YouTube Thumbnail Maker: Free AI Tool at 1280x720 Size
Last updated
1280x720 YouTube thumbnails in 30 seconds — bold backgrounds, popping colors, your face front and center.
Upload photo to create youtube thumbnails
"replace background with bold gradient from hot pink to electric blue, keep the subject sharp and pop the colors for a 1280x720 YouTube thumbnail"
Release to upload

Built for YouTubers and Video Creators
The thumbnail is the viewer's first impression — and on YouTube, the click decides whether you have an audience. Most thumbnail tools are template builders that drop your face into a stock layout. EditThisPic does the opposite: start with your real photo, describe the look you want in plain English, and the AI swaps the background, boosts the colors, and gives you a 1280x720-ready image with no watermark. Use it from your phone right after recording.
Tools for YouTube Thumbnails
Replace Background
Swap the cluttered bedroom for a bold gradient or solid color backdrop
Enhance Colors
Boost saturation and contrast so the thumbnail pops in YouTube's recommended feed
Remove Background
Cut out cleanly so you can drop yourself onto any thumbnail design
Enhance Face
Sharpen your face so it reads at thumbnail size
How to Make a YouTube Thumbnail
-
Upload your thumbnail photo
Drop in a sharp photo of your face or subject — phone photos work great as long as the focus is clean. Aim for at least 1280x720 source resolution. JPG, PNG, or WebP up to 7MB. Pull a still from your video if you don't have a separate shot.
Background swap or color boost: 15-20 seconds. Background swap plus face enhancement: 25-35 seconds. -
Describe the thumbnail look you want
Type the look in plain English: 'replace background with bold gradient from hot pink to electric blue' or 'enhance colors to be dramatically vibrant for a 1280x720 thumbnail.' Be specific about colors and mood — 'gaming RGB,' 'clean white tutorial,' 'dark cinematic.' No selection or masking needed.
High-contrast colors get clicked. Red, yellow, electric blue, and hot pink reliably outperform muted earth tones in YouTube's feed. -
Generate, then check at thumbnail size
Tap generate. When the result loads, check it at the actual size YouTube shows in search results — about 246x138 on desktop, even smaller on the mobile sidebar. Your face should still read clearly. If colors disappear at small size, regenerate with more saturation.
-
Refine with markers if needed
If the AI missed part of the background or smoothed your hair edges, tap markers on those spots and regenerate. Most thumbnail edits work on the first try — markers are for cleanup.
Markers are for precision refinement, not a required step. Try without them first.
Copy-Paste Prompts for YouTube Thumbnails
replace background with bold gradient from hot pink to electric blue, keep the subject sharp and pop the colors for a 1280x720 YouTube thumbnail
Pink-to-blue gradients are scroll-stoppers. Naming '1280x720' tells the AI what shape you need.
replace background with dark cinematic RGB lighting, neon purple and blue glow, keep the subject sharp and dramatically lit for a gaming YouTube thumbnail
Dark cinematic backgrounds with RGB accents match gaming and tech audiences.
replace background with clean pure white studio backdrop with soft shadow, sharpen the subject, professional tutorial look
White backdrops scream 'helpful tutorial' and convert well for how-to content.
replace background with solid bright yellow, enhance the subject colors to be more vivid, MrBeast-style high-contrast thumbnail
Bright yellow is the most reliable click-bait color in YouTube history. Use it when CTR matters.
Show 2 more prompts
enhance colors to be dramatically more vibrant and saturated, boost contrast to make the subject pop against the existing background
Use this when you like the original location but it looks flat against YouTube's dark interface.
replace background with deep dark cinematic gradient from black to deep blue, add subtle rim lighting on the subject, movie poster look
Dark cinematic thumbnails make your face the focal point and feel premium.
| Edit Type | Prompt | Time | |
|---|---|---|---|
| Bold gradient | replace background with bold pink-to-blue gradient |
20s | Try This → |
| Color boost | enhance colors dramatically, boost contrast for thumbnail impact |
15s | Try This → |
| Clean studio | replace background with pure white studio backdrop |
20s | Try This → |
| Cinematic dark | dark cinematic gradient with rim lighting on subject |
25s | Try This → |
Real YouTube Thumbnail Transformations
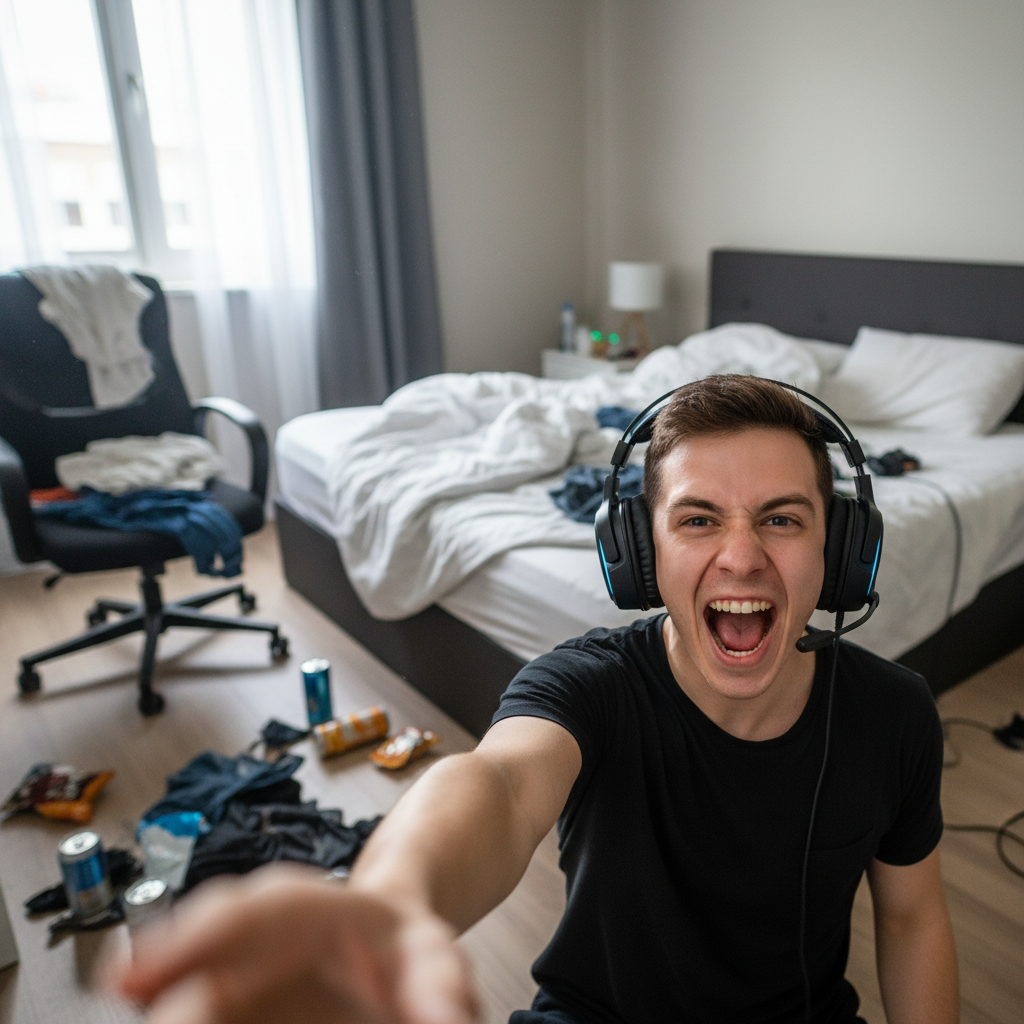

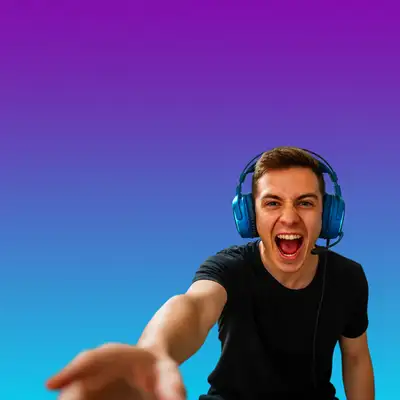
Gaming selfie to gradient thumbnail
A messy bedroom selfie became a vibrant pink-to-blue gradient thumbnail in one prompt. The cluttered background disappeared and the creator's face reads clearly at thumbnail size.
replace background with bold gradient from hot pink to electric blue, keep me sharp and pop the colors for a 1280x720 gaming YouTube thumbnail
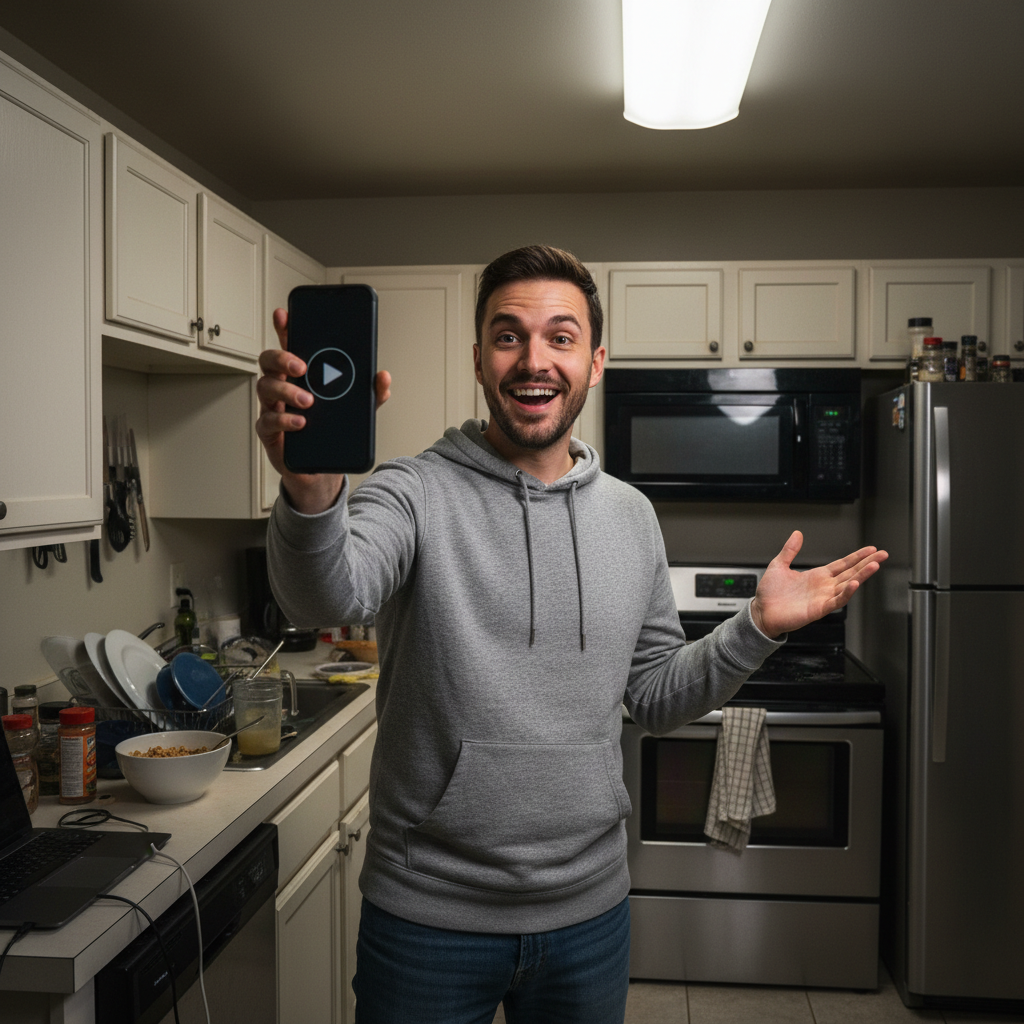

Tutorial creator on clean white
A kitchen-background phone photo became a clean tutorial thumbnail with a pure white studio backdrop. Now it reads as 'helpful how-to' instead of 'random kitchen video.'
replace background with clean pure white studio backdrop, soft shadow under the subject, sharpen the face for a tutorial YouTube thumbnail
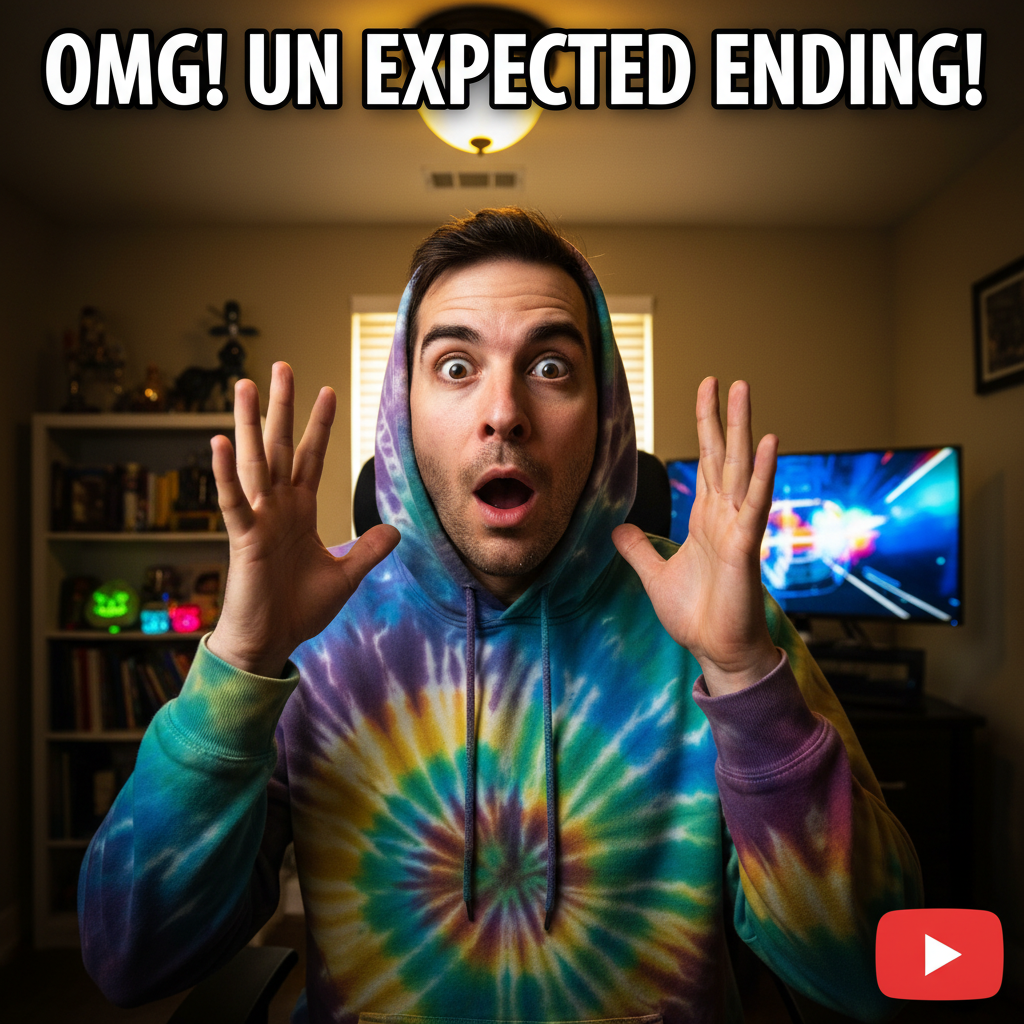
Reaction video with high-contrast color boost
A washed-out home-office shot became a high-contrast reaction thumbnail. Colors were boosted dramatically to read in YouTube's feed against other thumbnails.
enhance all colors to be dramatically more vibrant and saturated, boost contrast hard, make the subject pop against the existing background for a reaction YouTube thumbnail
When Things Go Wrong
Background replacement left edges of the old background
Why: Complex hair, headphones, or accessories confuse the AI about where the subject ends and the background begins.
clean up the remaining old background around my hair and headphones, sharpen the cutout edges
Add 'keep hair edges clean' or 'sharpen the cutout around my headphones' to your original prompt next time.
Colors look oversaturated or unnatural
Why: The AI pushed saturation too far based on 'vibrant' or 'pop' in your prompt.
redo the color boost more subtly, keep skin tones natural while keeping the background vivid
Use 'naturally vibrant' or 'punchy but natural' instead of 'extremely saturated' for a more controlled look.
Thumbnail looks blurry at small size
Why: The source photo was too low resolution or compressed before upload.
Re-upload a higher-resolution source photo at 1280x720 or larger, ideally straight from the camera roll
Pull a still frame from your video file rather than a screenshot of a screenshot. Direct exports are sharper.
AI changed the wrong area
Why: From description alone the AI couldn't determine which area you meant.
Tap a marker on the specific area you want to change, then regenerate with the same prompt
Markers tell the AI 'I mean THIS one specifically.' Use them when description alone is ambiguous.
Gradient colors don't match what I imagined
Why: Generic color words like 'blue' or 'pink' get interpreted differently each generation.
replace background with gradient from #FF1493 hot pink to #00BFFF electric blue, exact hex colors
Use specific named colors ('hot pink,' 'electric blue,' 'royal purple') or hex codes for repeatable results.
Face is too dark for the new background
Why: The AI replaced the background but didn't relight the subject to match.
brighten my face and add rim lighting that matches the new background colors, keep my features the same
When swapping to a dark background, ask for rim lighting in matching colors to make the face pop.
Frequently Asked Questions
What's the YouTube thumbnail size?
YouTube recommends thumbnails at 1280x720 pixels with a 16:9 aspect ratio. The minimum width is 640 pixels, the maximum file size is 2MB, and YouTube accepts JPG, GIF, BMP, and PNG formats. Always upload at 1280x720 or higher — anything smaller gets stretched and looks soft on TVs and large displays.
What makes a high-CTR YouTube thumbnail?
High click-through thumbnails share four traits: a clear, expressive face that fills a third of the frame; bold high-contrast colors (red, yellow, electric blue, hot pink) that survive at sidebar size; a simple background that doesn't compete with the subject; and a concept that pairs with the title rather than repeating it. Test your thumbnail at 246x138 — if it doesn't read at that size, it won't get clicked.
How do I make a free YouTube thumbnail without Photoshop?
Upload any photo to EditThisPic and type 'replace background with bold gradient from hot pink to electric blue, pop the colors for a 1280x720 YouTube thumbnail.' The AI does the background swap, color boost, and resize in 15-30 seconds. Download with no watermark, no signup, and upload it directly to YouTube Studio. Works on phone and laptop browsers.
What file format does YouTube accept for thumbnails?
YouTube accepts JPG, PNG, GIF, and BMP for custom thumbnails, with a maximum file size of 2MB. JPG is the most common because it gives the smallest file at high quality. EditThisPic exports JPG by default — your downloaded thumbnail is already YouTube-ready, no conversion needed.
Can I add text to my YouTube thumbnail?
EditThisPic focuses on the photo: background swap, color enhancement, face polish, and resizing to 1280x720. For adding text overlays, export your enhanced photo, then drop it into Canva or Photopea for the title text. Text-on-thumbnails is design — photo editing happens first.
Is there a free YouTube thumbnail maker without signup?
Yes. EditThisPic gives you one free Fast edit per week with no email and no signup, and the download has no watermark — important because YouTube monetization rules don't allow third-party watermarks on thumbnails. If you're a regular uploader and need 5+ thumbnails a week, the Lite plan is $4.99/month for 15 credits.
Can I make a YouTube thumbnail on my phone?
Yes. EditThisPic runs entirely in any modern mobile browser — Safari on iPhone, Chrome on Android, and tablets. Open the site, upload from your camera roll, edit, download, and upload directly to YouTube Studio's mobile app. There's also a native iOS app on the App Store if you'd rather have a home-screen shortcut.
Do thumbnails really change my view count?
Yes, dramatically. The thumbnail is the viewer's first impression and YouTube's algorithm boosts videos with high click-through rates. Two videos with identical titles can see 5x different view counts based on thumbnail alone. Bold backgrounds, expressive faces, and high contrast consistently outperform stock-photo thumbnails — which is exactly what creators like MrBeast have spent millions A/B testing.
Popular use cases
Ready to make a thumbnail that gets clicks?
Free to try. No signup. No watermark. Right size, every time.
Make Your ThumbnailTrusted by 15,000+ users