How to Remove Blemishes from a Photo
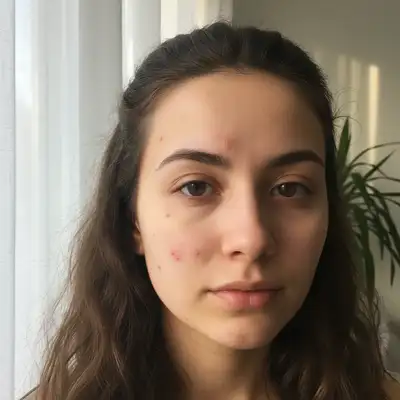
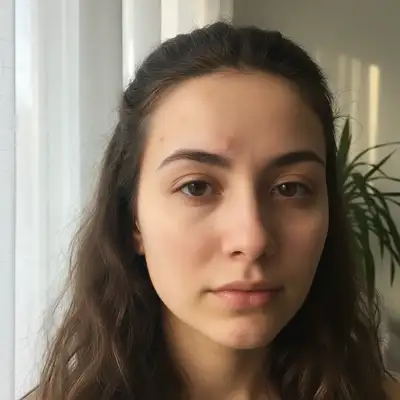
To remove blemishes from a photo, upload your image to EditThisPic and type 'remove the blemishes' or 'clear up the skin.' The AI identifies pimples, spots, and imperfections and erases them while preserving your natural skin texture. No clone stamping or manual selection needed. Free, no signup required.
Why Blemishes Look Worse in Photos
Cameras are brutally honest about skin. High-resolution sensors capture every pore, and harsh lighting — especially direct flash or overhead fluorescents — creates shadows around raised blemishes that make them more visible. A pimple that's barely noticeable in the mirror can look prominent in a photo because the camera compresses three-dimensional texture into a flat image with exaggerated contrast. This is why professional photographers always retouch skin in post-production.
How AI Blemish Removal Works
The AI scans your photo for skin irregularities — pimples, dark spots, scars, redness, and other blemishes — and replaces them with clean skin that matches the surrounding area. It preserves pores, fine lines, and natural skin texture so the result looks like real skin, not a plastic filter. Unlike manual tools that require you to select each blemish individually, AI processes the entire face at once and handles dozens of imperfections in a single pass.
Types of Blemishes AI Can Remove
- Active acne and pimples — both whiteheads and inflamed spots
- Post-acne dark spots and hyperpigmentation marks
- Minor scars from past breakouts or injuries
- Redness and irritation around the nose, cheeks, and chin
- Moles and beauty marks (if you specifically ask)
- Age spots, sun spots, and uneven skin tone patches
- Razor bumps and ingrown hair marks
Keeping Skin Texture Natural
The biggest mistake in blemish removal is over-smoothing. Skin without pores or texture looks obviously filtered — the 'porcelain doll' effect that everyone recognizes as fake. EditThisPic removes blemishes without blurring the surrounding skin. Pores stay visible, fine lines stay intact, and the skin retains its natural variation. The result looks like a good skin day, not a beauty filter.
Combining Blemish Removal with Other Retouches
Blemish removal pairs well with other subtle skin edits. 'Remove blemishes and even out the skin tone' handles both spots and color inconsistency. 'Clear up blemishes and reduce under-eye circles' covers the most common portrait retouches in one prompt. 'Remove blemishes and brighten the face' gives an overall polished look. Keep each additional request subtle to avoid the over-edited appearance.
Step-by-Step Guide
Upload Your Photo
Drop a selfie, portrait, or headshot into EditThisPic. Close-up shots give the best results because the AI has more detail to work with, but full-body and group photos work too.
Check the Skin
Zoom in on the edited areas. The skin should look clear but still have natural texture — visible pores and slight color variation are signs of a good edit. Compare before and after to make sure nothing else changed.
Frequently Asked Questions
Clear Up Your Skin in Seconds
Upload your photo and let AI remove blemishes naturally. Free, no signup needed.
Drop your photo to start editing
"remove the blemishes on my face and keep natural skin texture"
Release to upload