Enhance Old Photo
Revive faded family photos. Just describe what you want restored.
Type 'enhance and restore this old photo' and the AI sharpens details, corrects fading, and repairs minor damage in 20-45 seconds. No need to mark scratches or faded areas. Just describe what you want: clarity, contrast, or full restoration. Works on scanned prints, decades-old snapshots, and heritage photos. Free, no signup needed.

How it works
Upload your old photo
Drop your scanned or photographed old image into EditThisPic. JPG, PNG, and WebP up to 7MB work well. Higher resolution scans give the AI more detail to work with when restoring faded areas and repairing damage.
Describe the restoration you want
Type exactly what you need: 'enhance and restore this old photo with improved clarity and contrast' or 'fix the fading and sharpen the faces in this vintage photo.' No marking required. The AI understands what needs fixing from your description alone.
Copy one of these to get started:
enhance and restore this old photo with improved clarity, better contrast, and natural sharpening
restore the fading in this vintage photo, bring back the original contrast and make the colors or tones richer
enhance this old photo and sharpen the faces so features are clearly visible while keeping the vintage aesthetic
restore this old photo by repairing all scratches and damage marks while preserving the original image details
3 more prompts
fix the yellowing and discoloration in this old photo, restore natural tones while keeping it looking authentically vintage
enhance this old family photo for printing at high quality, maximize clarity and detail while removing dust spots and minor damage
completely restore this vintage photo with special attention to making faces clear and recognizable, repair damage, fix fading, and improve overall image quality
Generate and review
Tap generate and examine the result at full zoom. Check that faces are clear, important details are visible, and any damage has been repaired naturally. Compare against your original to ensure nothing important was altered.
Refine specific areas if needed
If certain scratches remain or a face needs more clarity, tap markers on those spots and regenerate with a focused prompt like 'repair the scratch here' or 'make this face clearer.' Most restorations work without markers.
"Found my grandmother's wedding photo from 1952. It was so faded you could barely see faces. One prompt and now it looks like it was taken yesterday." @FamilyHistoryMike
See it in action
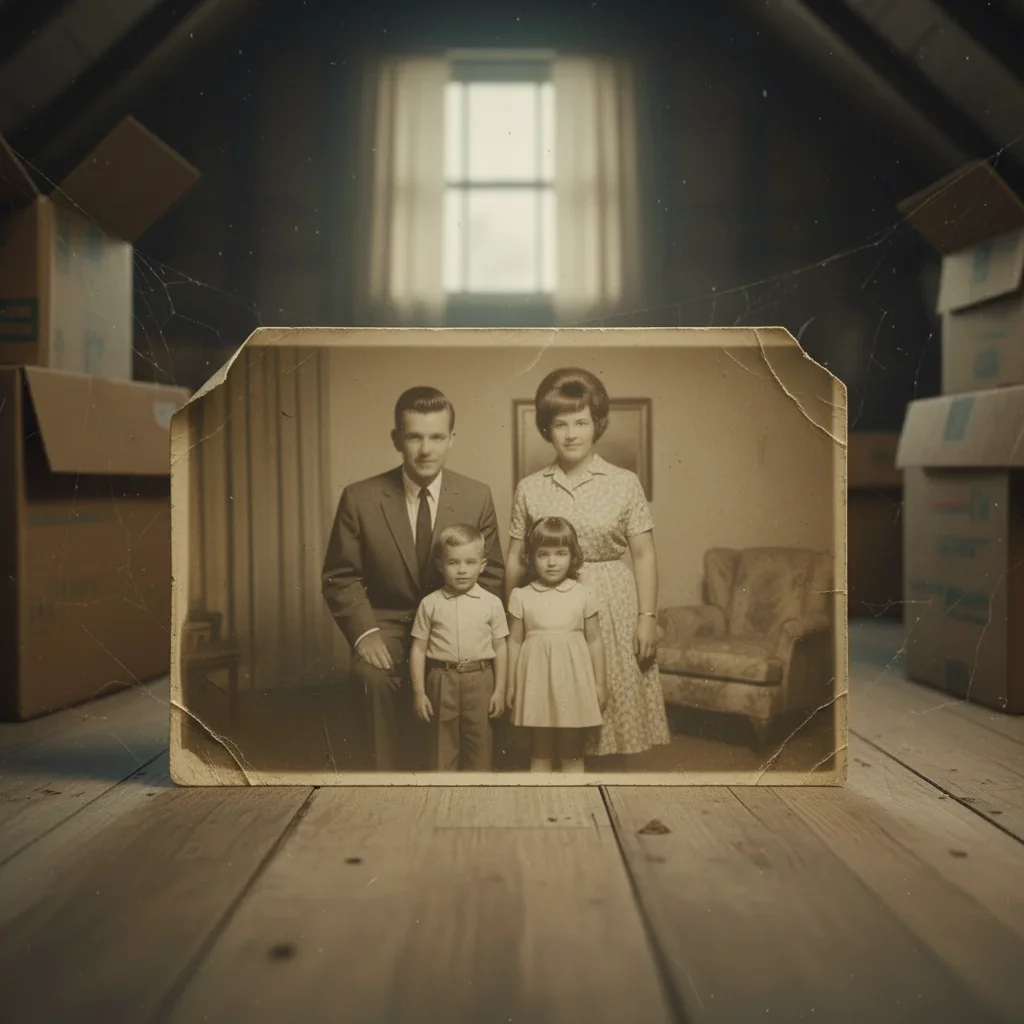
Faded family portrait restored
1960s family photo found in attic storage. Severe fading made faces almost invisible. One prompt brought back all the original detail.
enhance and restore this old photo with improved clarity, better contrast, and natural sharpening to make faces clearly visible
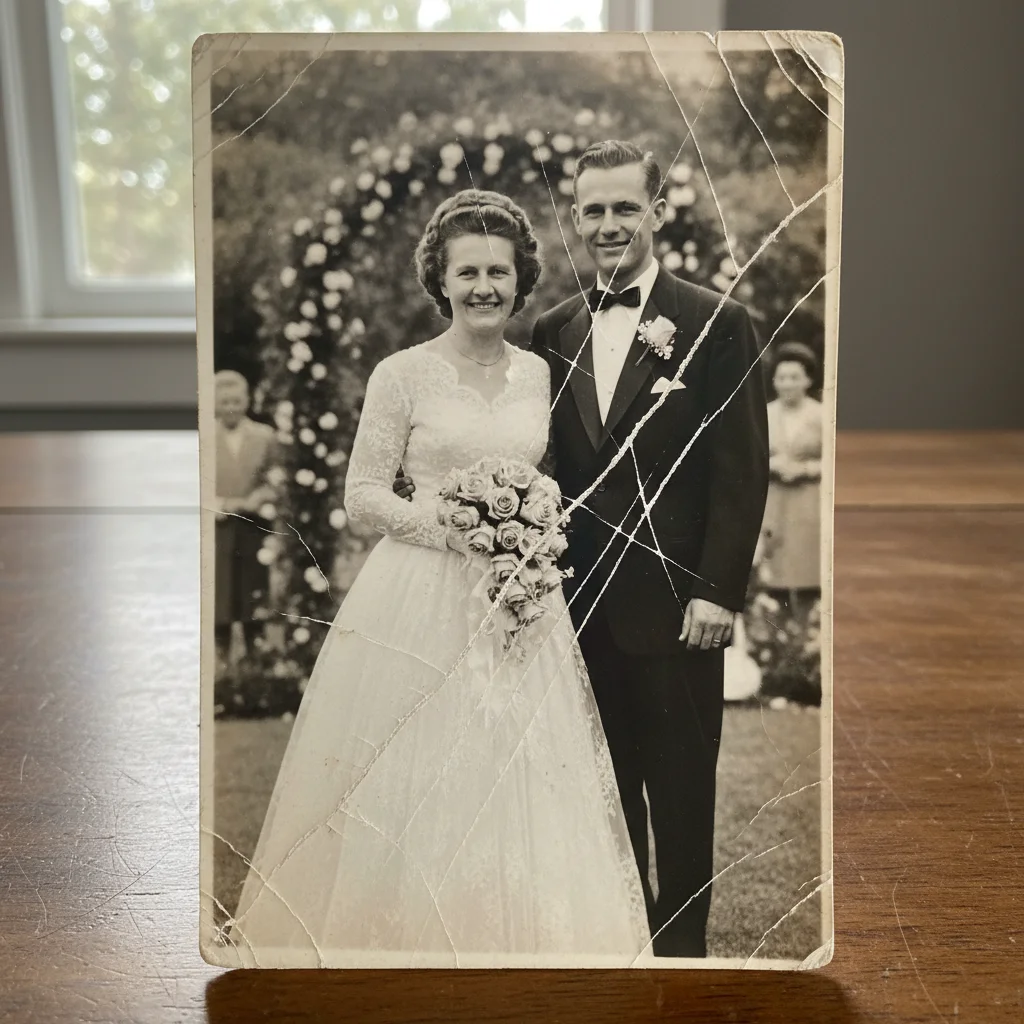
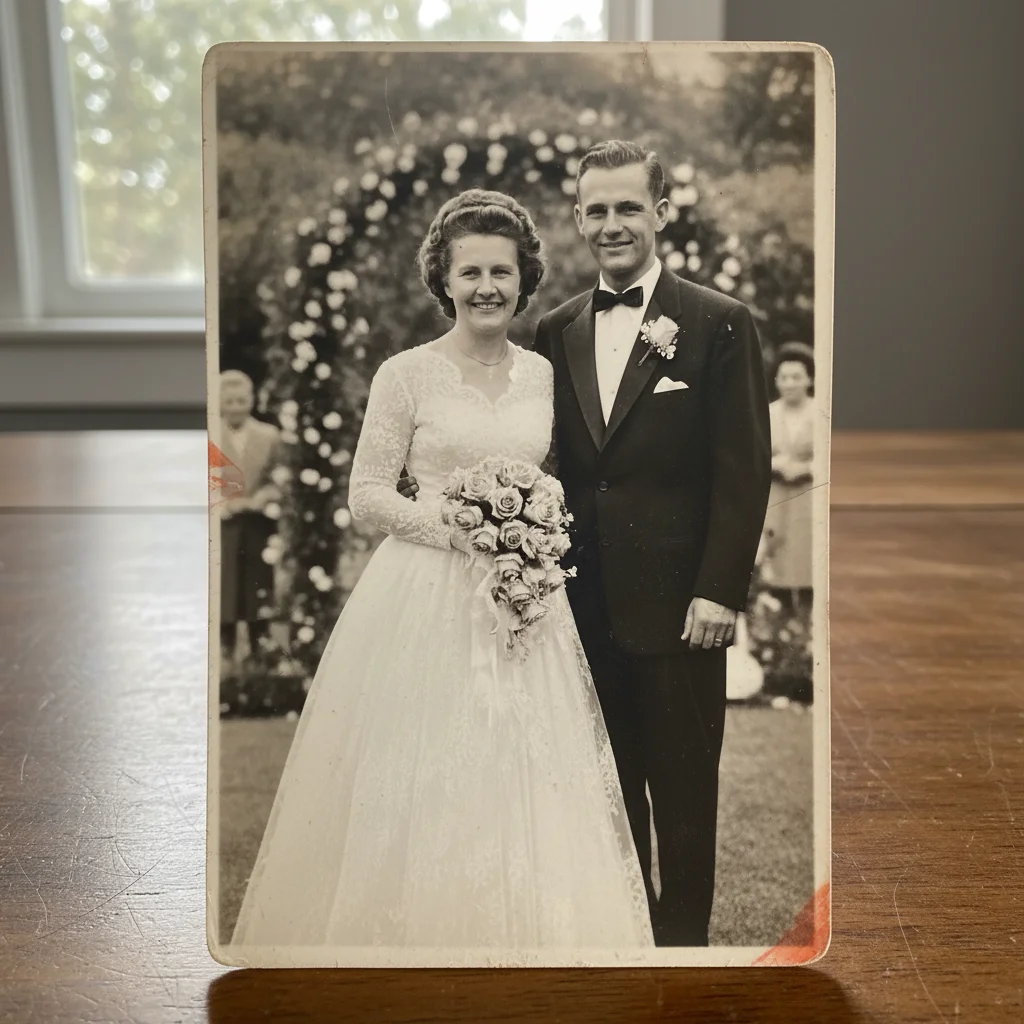
Scratched wedding photo repaired
Grandmother's wedding photo from the 1950s with deep scratches across the couple. AI repaired the damage while preserving the authentic vintage look.
restore this old wedding photo by repairing all scratches and damage while preserving faces and the vintage wedding dress details

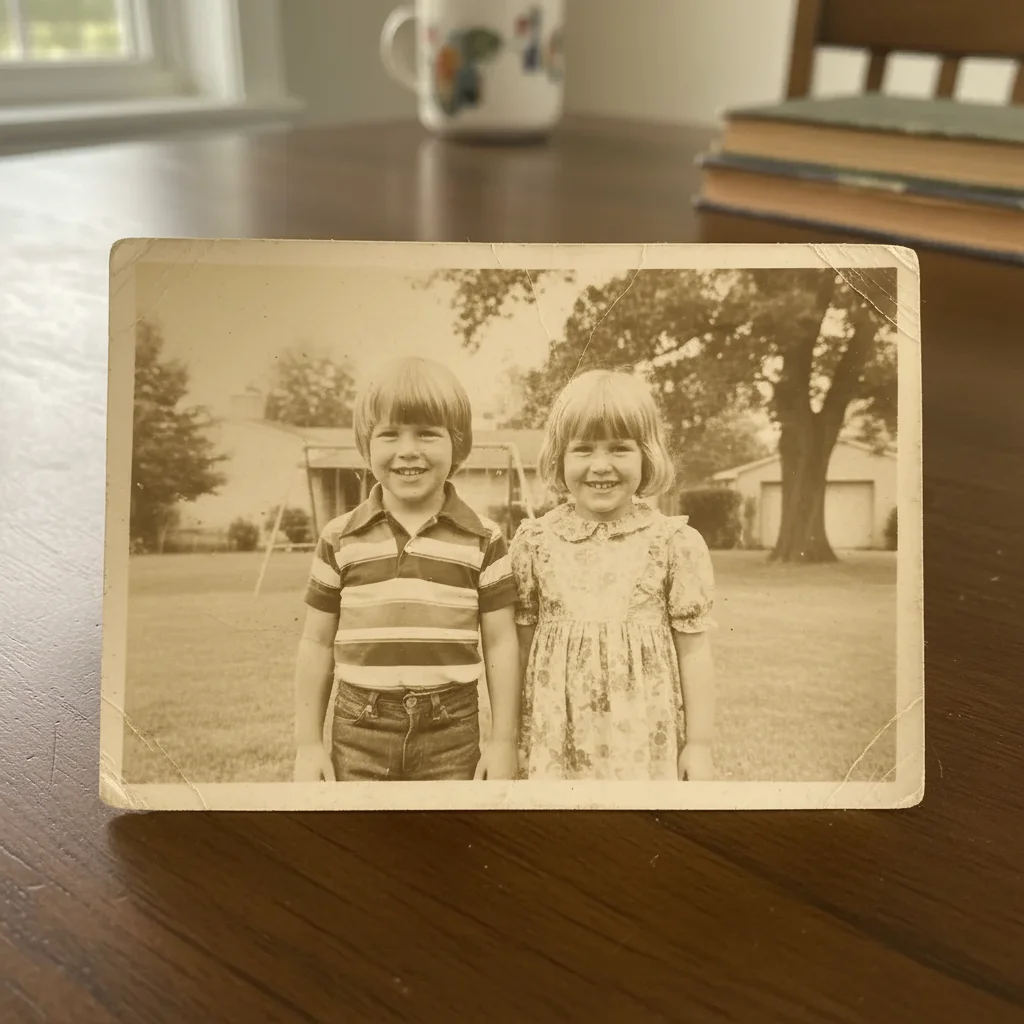
Yellowed childhood photo corrected
1970s childhood photo had severe yellowing from decades of improper storage. Restored natural tones while keeping the era-appropriate feel.
fix the heavy yellowing in this old photo, restore natural skin tones and background colors while keeping it looking like a genuine 1970s photograph
If something looks off
AI changed the wrong area or altered parts I wanted to keep
Why: The AI interpreted your restoration request too broadly or couldn't distinguish between intentional vintage effects and damage.
Tap markers on the areas you want to preserve unchanged, then regenerate with 'restore the photo but keep these marked areas exactly as they are'
💡 Markers tell the AI 'don't touch these spots.' Use them when the AI is being too aggressive with corrections.
Faces look artificial or over-processed
Why: The AI applied too much enhancement, making faces look unnaturally smooth or sharp. This happens when the original was very degraded.
enhance this photo with subtle, natural-looking face restoration that preserves skin texture and authentic character
💡 Adding 'natural-looking' and 'preserves texture' prevents the plastic look that over-processing creates.
Some scratches or damage spots remain after restoration
Why: Deep damage or scratches that blend with important details are harder for AI to detect automatically from a general prompt.
Tap markers directly on each remaining scratch, then use 'repair these specific damaged spots while blending naturally with surroundings'
💡 For stubborn damage, process in two passes: first the general restoration, then mark and fix remaining issues.
Photo lost its vintage character and looks too modern
Why: The AI corrected the vintage color palette or film grain thinking they were defects rather than period-appropriate characteristics.
restore this old photo for clarity and damage repair only, keeping the original vintage color tones and film grain texture
💡 Explicitly mentioning 'keep vintage tones' and 'film grain' protects the authentic historical look.
Colors look unnatural after restoration
Why: When correcting severe yellowing or fading, the AI sometimes overshoots into colors that look wrong for the era or film type.
fix the color cast in this photo with subtle, era-appropriate color correction that looks natural for a photo from this time period
💡 If colors still look off, try 'correct colors to look like a well-preserved photo from the same era' for better period accuracy.
Fine details like text or patterns are still blurry
Why: General enhancement prioritizes faces and main subjects. Small details like writing, fabric patterns, or background text need specific attention.
Tap markers on the specific text or patterns, then use 'sharpen and clarify these marked details while maintaining overall photo consistency'
💡 For text in old photos, try 'make the text readable' as a separate focused prompt after general restoration.
Quick answers
Do I need to mark damaged areas before describing?
No! Just describe what you want: 'enhance and restore this old photo' or 'repair the scratches and fix the fading.' The AI identifies damage, fading, and quality issues automatically. Only use markers if you need precision on a specific stubborn scratch or want to protect certain areas from being changed.
Will this work on very old photos from the 1800s or early 1900s?
Yes. The AI works well on photos from any era, including daguerreotypes and tintypes when scanned properly. Very old photos may need multiple refinement passes for best results. Use prompts like 'restore this antique photograph while preserving its historical character' to get appropriate treatment for the era.
Can I enhance a photo of an old photo instead of a scan?
Yes, but a good scan gives better results. If you photograph an old print, use even lighting without glare, hold the camera parallel to the photo, and capture at the highest resolution your phone allows. Mention 'ignore reflections and glare from photographing' in your prompt if those are visible.
Will enhancement change people's faces or features?
The AI preserves facial identity while improving clarity. It sharpens existing features rather than inventing new ones. If you're concerned, use 'enhance clarity while keeping all facial features exactly as they appear in the original' or compare carefully before saving.
How is this different from colorizing an old photo?
Enhancement restores and improves what's already there: fixing fading, sharpening blur, repairing damage, and improving contrast. Colorization adds color to black-and-white photos. You can do both, but they're separate processes. Start with enhancement first, then colorize if desired.
Ready to restore your old photo?
Free to try. No signup required.