Free • No signup Open Editor

Upscale Photo

Just type what you want. 'Upscale this photo' usually just works.

Type 'upscale this photo to 4x resolution' and EditThisPic's AI enlarges your image while adding realistic detail in 20-45 seconds. No sliders, no technical settings. Just describe the size you need. Works on portraits, landscapes, old photos, and screenshots. Free to try, no signup needed.

Small grainy family photo from the 1990s
Before
Same family photo upscaled with clear details and natural sharpness
After

How it works

1

Upload your photo

Drop your image into EditThisPic. JPG, PNG, and WebP up to 7MB work. The AI works best when it can see enough detail to extrapolate from, so extremely tiny images may have limited results.

⏱ Standard upscaling: 20-30 seconds. Large upscales (4x or higher): 30-45 seconds.
2

Describe what you want

Type your instruction: 'upscale this photo to 4x resolution' or 'enlarge this image to 2000 pixels wide while keeping it sharp.' That's it. The AI understands—no marking, no selecting. Most upscales work perfectly on the first try.

💡 Specify the exact multiplier (2x, 4x) or target dimensions if you have specific requirements. Otherwise 'upscale this photo' defaults to a sensible increase.

Copy one of these to get started:

General upscaling for any photo upscale this photo to 4x resolution while keeping all details sharp and natural
Enlarging for print use upscale this photo to 3000 pixels on the longest side, optimized for high quality print output
Old or vintage photo restoration upscale this old photo to 2x resolution while preserving the vintage feel and reducing noise
Portrait or headshot enlargement upscale this portrait to 4x resolution with natural skin texture and sharp eye detail
3 more prompts
Screenshot or digital art upscale this screenshot to 4x resolution while keeping text crisp and edges clean
Landscape or nature photo upscale this landscape photo to 2x resolution with enhanced texture detail in foliage and terrain
Product photo for e-commerce upscale this product photo to 2000x2000 pixels with sharp edges and accurate colors preserved
3

Generate and review

Tap generate and examine the result at full zoom. Check fine details like text, facial features, and texture areas. These are where upscaling quality shows most clearly.

💡 Always zoom to 100% and compare specific areas against the original. Good upscaling adds plausible detail without introducing artifacts.
4

Refine with markers if needed

If certain areas look soft or over-processed, tap markers on those spots and ask for more detail there. This precision step is optional—most upscales work without markers.

💡 Markers are for precision refinement, not a required step. Try without them first—the AI usually handles the entire image well.
Try it free
"I had a 400x300 screenshot from an old video. One prompt later it was 1600x1200 and actually usable for print." @DesignDaveM

See it in action

Small grainy family photo from the 1990s
Before
Same family photo upscaled with clear details and natural sharpness
After

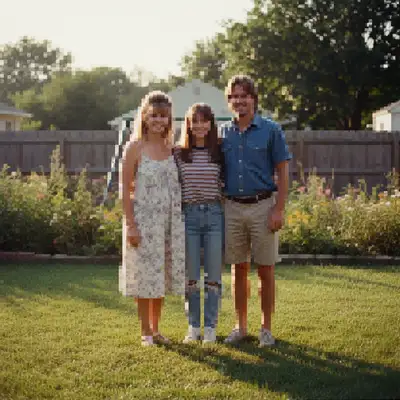
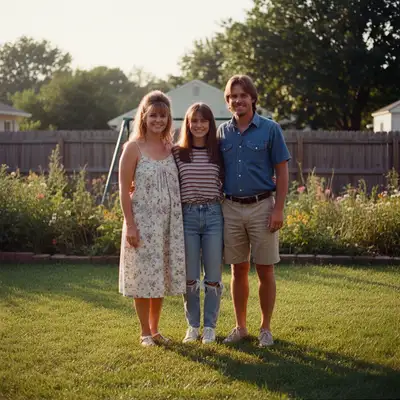
Old family photo enlarged

Scanned photo from the 1990s was too small to print. AI upscaling added realistic detail while preserving the original character.

Prompt: upscale this photo to 4x resolution while keeping all details sharp and natural looking
Web-sized professional headshot
Before
Same headshot upscaled to print resolution with natural detail
After

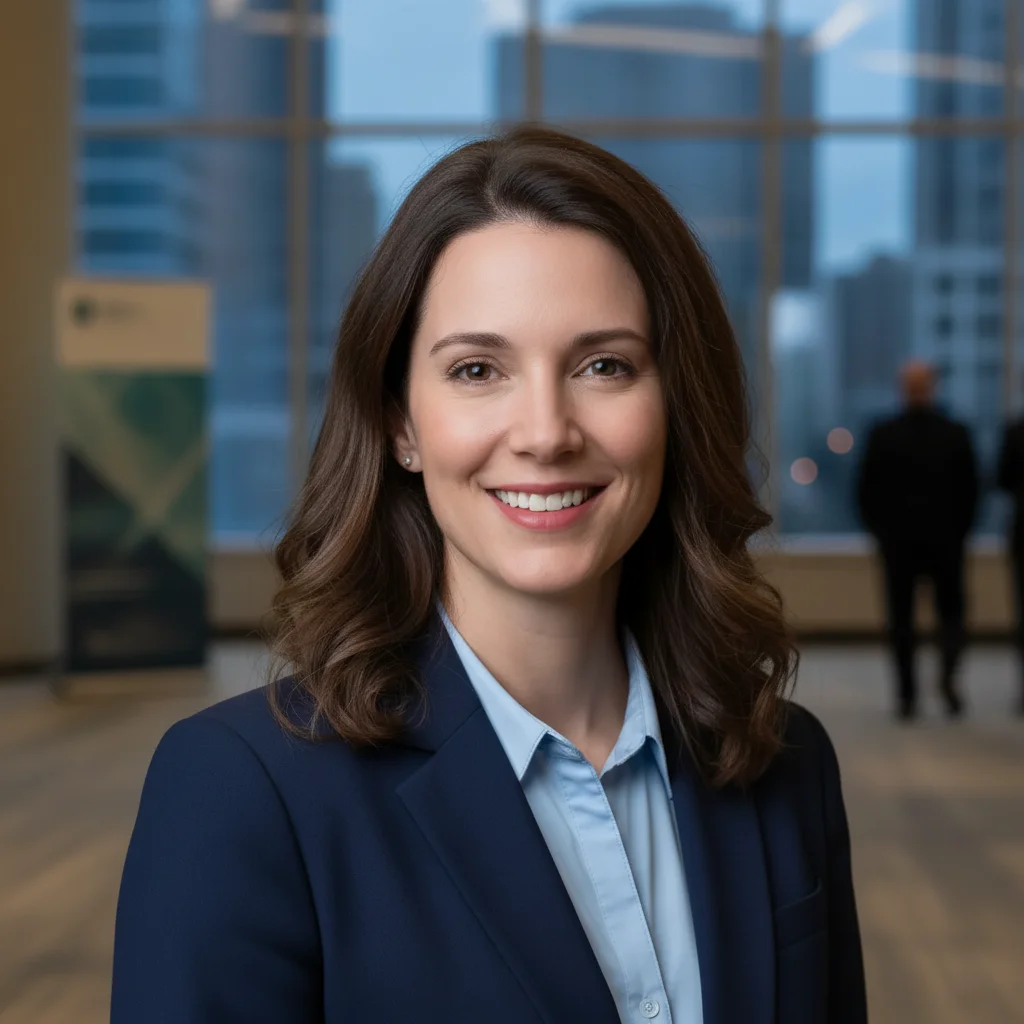
Portrait upscaled for large print

Professional headshot needed for a conference banner. One prompt enlarged it from web size to print resolution.

Prompt: upscale this portrait to 3000 pixels wide with natural skin texture and sharp eye detail, optimized for print
Pixelated low-resolution screenshot
Before
Same screenshot upscaled with crisp text and clean edges
After

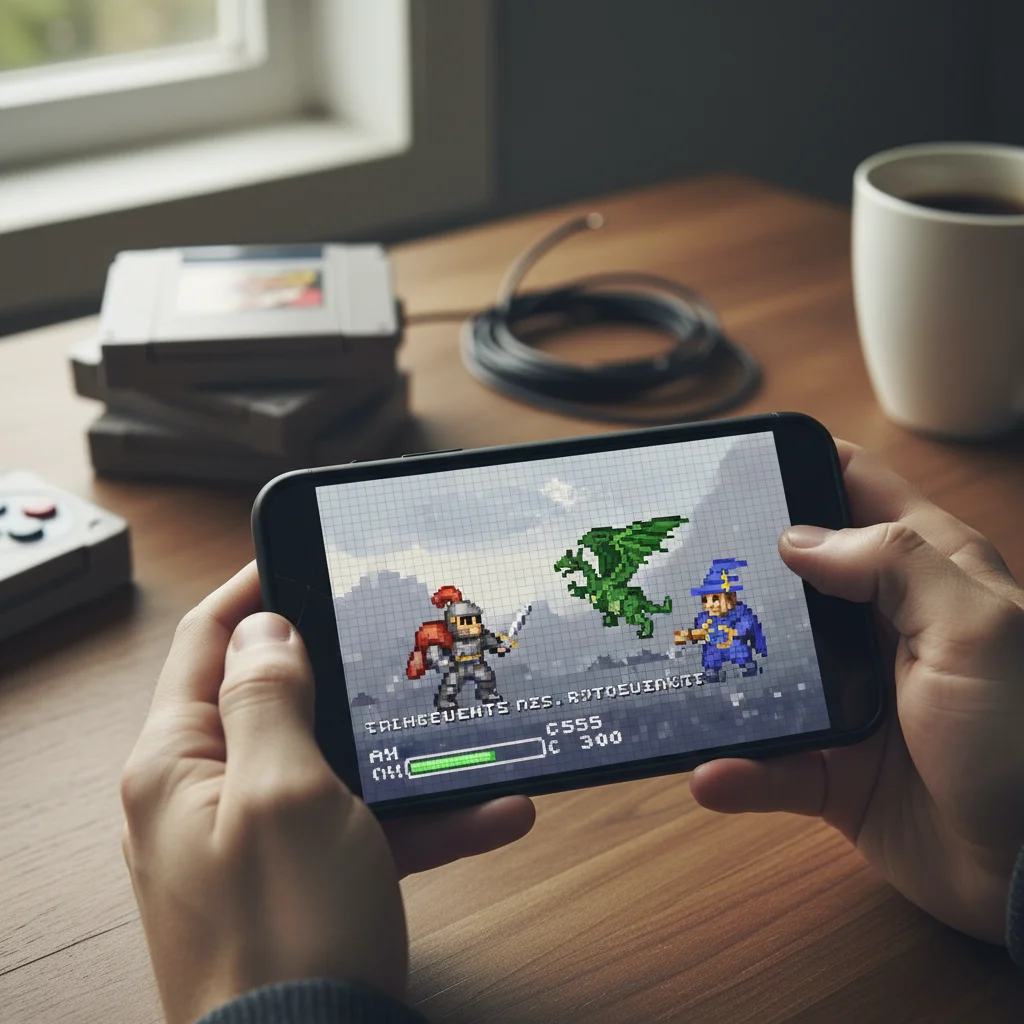
Screenshot made usable

Low-res screenshot from an old video needed for a presentation. AI upscaling made the text readable and image professional.

Prompt: upscale this screenshot to 4x resolution while keeping text crisp and edges clean, no blur

If something looks off

AI changed the wrong area or something I didn't want changed

Why: The AI interpreted your request differently than expected, possibly enhancing or modifying areas you wanted left alone.

Try: Tap a marker on the specific area you want to preserve as-is, then regenerate with the same prompt

💡 Markers tell the AI 'I mean THIS area specifically.' Use them when description alone is ambiguous.

Upscaled image looks too smooth or plastic

Why: The AI over-processed fine textures trying to remove noise. This is common with portraits and detailed textures.

Try: upscale this photo to [size] while preserving natural texture and film grain, avoid over-smoothing

💡 Adding 'preserve texture' or 'keep natural grain' prevents the AI from making everything too clean.

Text or fine lines appear blurry after upscaling

Why: The AI treated text as image content rather than sharp edges. Text requires different handling than photographs.

Try: upscale this image to [size] with crisp sharp text and clean hard edges on all lettering

💡 For images with text, always specify 'crisp text' or 'sharp lettering' in your prompt.

Faces look distorted or unnatural at larger size

Why: The AI added detail that doesn't match the original face structure. This can happen with extreme upscaling ratios.

Try: upscale this portrait to [size] with natural facial features, preserving the original likeness exactly

💡 For faces, try 2x upscaling first. If you need more, upscale the result again rather than doing 4x at once.

Colors shifted or look different after upscaling

Why: Some upscaling processes can introduce subtle color changes. This happens more with heavily compressed source images.

Try: upscale this photo to [size] while preserving exact original colors with no color shift

💡 If color accuracy is critical, mention 'preserve exact colors' or 'no color correction' in your prompt.

Quick answers

Do I need to mark anything first?

No—just type what you want and try it. 'Upscale this photo to 4x' usually just works. The AI understands the entire image needs enlarging. Markers are only there if you want to refine specific areas afterward, but most upscales don't need them at all.

How large can I upscale a photo?

You can upscale up to 4x in a single pass, which means a 500x500 image becomes 2000x2000. For larger increases, upscale once, download, then upscale the result again. The AI adds realistic detail at each stage. Extreme upscaling (beyond 8x total) may introduce artifacts since the AI has less original information to work with.

Will upscaling fix a blurry photo?

Upscaling makes images larger while adding plausible detail, but it works best on sharp source images. If your original is blurry from camera shake or focus issues, upscaling alone won't fix that. Try combining upscaling with 'sharpen details' or use a separate deblur tool first for best results.

What's the best multiplier for printing?

For print, you typically need 300 DPI. A web image at 72 DPI needs roughly 4x upscaling to reach print quality. Type 'upscale to 3000 pixels on longest side for print' to get specific dimensions. For canvas or poster prints viewed from distance, 2x may be sufficient since viewing distance is greater.

Can I upscale old scanned photos?

Yes—old scanned photos are one of the best use cases. Type 'upscale this old photo to 4x while preserving the vintage character and reducing noise.' The AI adds detail while respecting the original aesthetic. For best results, scan at the highest resolution your scanner allows before uploading.

Ready to upscale your photo?

Free to try. No signup required.

Try it free