Free • No signup Open Editor

AI Photo Restoration

Fix scratches, tears, fading, and water damage. Colorize black and white images. Remove noise and grain. Bring irreplaceable family memories back to life — describe the damage and our AI repairs it in under a minute.

FreeNo signupNo watermark

Drop your photo here

"restore this old photo — fix all scratches, remove the grain, restore the faded colors, and sharpen the details"

Release to upload

Free • No signup

Before photo
Before
After AI edit
After

Unlike generic photo editors that require you to clone pixels manually or use healing brushes, EditThisPic describes damage in plain English and our AI repairs it automatically — no Photoshop skills, no layer masks, no hours of retouching work.

How AI Photo Restoration Works

AI photo restoration goes far beyond what traditional editing tools offer. Instead of cloning nearby pixels to fill in damage, our AI understands what the image should look like based on context — the scene, the faces, the objects, the era. When you upload a scratched photo, the AI identifies the damage (scratches, tears, missing areas) separately from the actual image content. It then reconstructs damaged areas by predicting what belongs there, drawing on the surrounding textures, face structure, and scene context. For colorization, the AI analyzes grayscale values and scene content to assign historically plausible colors. Skin tones, sky, foliage, and common objects get natural, era-appropriate colors. You can guide the result: 'colorize with a blue dress and warm skin tones.' For faded photos, the AI doesn't just boost contrast — it reconstructs original color relationships and tonal range, recovering depth and vibrancy while keeping the image looking authentically of its era. For physical damage like tears, missing corners, and insect damage, the AI uses surrounding detail to reconstruct what was there. Photos that seemed beyond saving — heavy scratching, large tears, severe fading — can come back to life in a single pass. Work in stages for the best results on severely damaged photos. One pass per type of damage (tears first, then fading, then colorization) gives you control at each step.

What Types of Damage Can Be Restored

Scratches and Tears — Physical damage from storage and handling. Remove scratches by describing the damage or asking to 'fix all scratches and creases.' Deep tears where parts of the image are missing can be reconstructed based on surrounding context. Fading and Discoloration — Sun exposure, age, and chemical degradation cause colors to shift and bleach. Restore faded photos to bring back original vibrancy: 'restore the faded colors and bring back contrast while keeping the vintage character.' Noise and Grain — Film grain from old cameras, digital noise from scans, and scanner artifacts. Remove grain and noise while preserving underlying detail: 'clean up the grain while keeping the photo sharp.' Blur and Softness — Camera shake, slow film, out-of-focus subjects, or low-resolution scans. Sharpen blurry photos to recover hidden detail: 'sharpen the faces and details in this old photo.' Missing Areas — Torn corners, holes, sections eaten by insects or mold. The AI reconstructs missing areas from surrounding context: 'fill in the torn corner with natural sky and background.' Works even when 20-30% of the image is gone. Water Damage — Stains, tide marks, bleeding, and color distortion from water or humidity. The AI separates stain from content and reconstructs affected areas: 'remove the water stains and restore the image underneath.' Mold, Foxing, and Biological Damage — Brown spots, mold colonies, insect damage, and adhesive stains. Fix foxing spots or mold damage — describe the spots and the AI removes them cleanly. Black and White Photos — Add realistic, plausible color to grayscale photos from any era. Colorize B&W photos and guide specific colors in your prompt: 'colorize with accurate 1940s-era colors, warm skin tones, pale blue dress.'

Step-by-Step Restoration Workflow

For severely damaged photos, work in stages rather than trying to fix everything at once. Each pass focuses on one type of damage for cleaner results. Step 1: Scan at high resolution. Scan at 300-600 DPI minimum. Phone photos work too — good natural light, camera directly overhead, no flash on glossy prints. More resolution = better restoration. Step 2: Repair physical damage first. Fix tears, scratches, and missing areas before anything else. This is your structural foundation. 'Repair the tear across the center and fix all the scratches.' Step 3: Restore colors and contrast. Once the image is structurally intact, address fading. 'Restore the faded colors and bring back proper contrast while keeping it looking vintage.' Step 4: Enhance faces carefully. Faces need special attention. 'Restore the facial details while preserving the exact likeness — keep natural appearance.' The 'preserve the exact likeness' instruction prevents the AI from altering facial features. Step 5: Remove noise and grain. Clean up film grain and scan artifacts last. 'Remove the grain and noise while keeping details sharp.' Step 6: Colorize (if desired). For black and white photos, add color after all other restoration is complete. 'Colorize this photo with realistic, natural colors appropriate to the era.' Guide specific colors in your prompt for more accurate results. For most photos with mild to moderate damage, a single comprehensive prompt handles everything: 'restore this old photo — fix scratches, restore faded colors, remove noise, and sharpen the details.'

Tips for Scanning Old Photos Before Restoration

Resolution matters most. Scan at 300 DPI minimum, 600 DPI for small prints or photos with fine detail. Higher resolution gives the AI more to work with and produces sharper restorations. Clean the scanner glass before placing photos. Dust or smudges on the glass appear as damage on the scan and give the AI extra work to undo. Don't pre-correct in scanning software. Scan the photo as-is without auto-sharpening, noise reduction, or color correction. Let the AI work with the raw scan — pre-processing can hide information the AI needs. Phone photos work too. If you don't have a scanner, photograph the print in good natural light, flat surface, camera directly overhead, no flash (flash creates glare on glossy prints). A flatbed scanner produces better results but phone shots work fine for most restorations. Fragile photos: handle minimally. Never flatten a curled print by force — scan it curled or weight it gently. Don't write on the back of originals. Store in acid-free sleeves after scanning. Preserve the original always. The digital file is your working copy. Keep the original print regardless of damage — it may be restorable again as AI technology improves.

Damage Repair

Enhancement

Colorization

Photo Restoration Specialists

Specific Damage Types

Use case guides

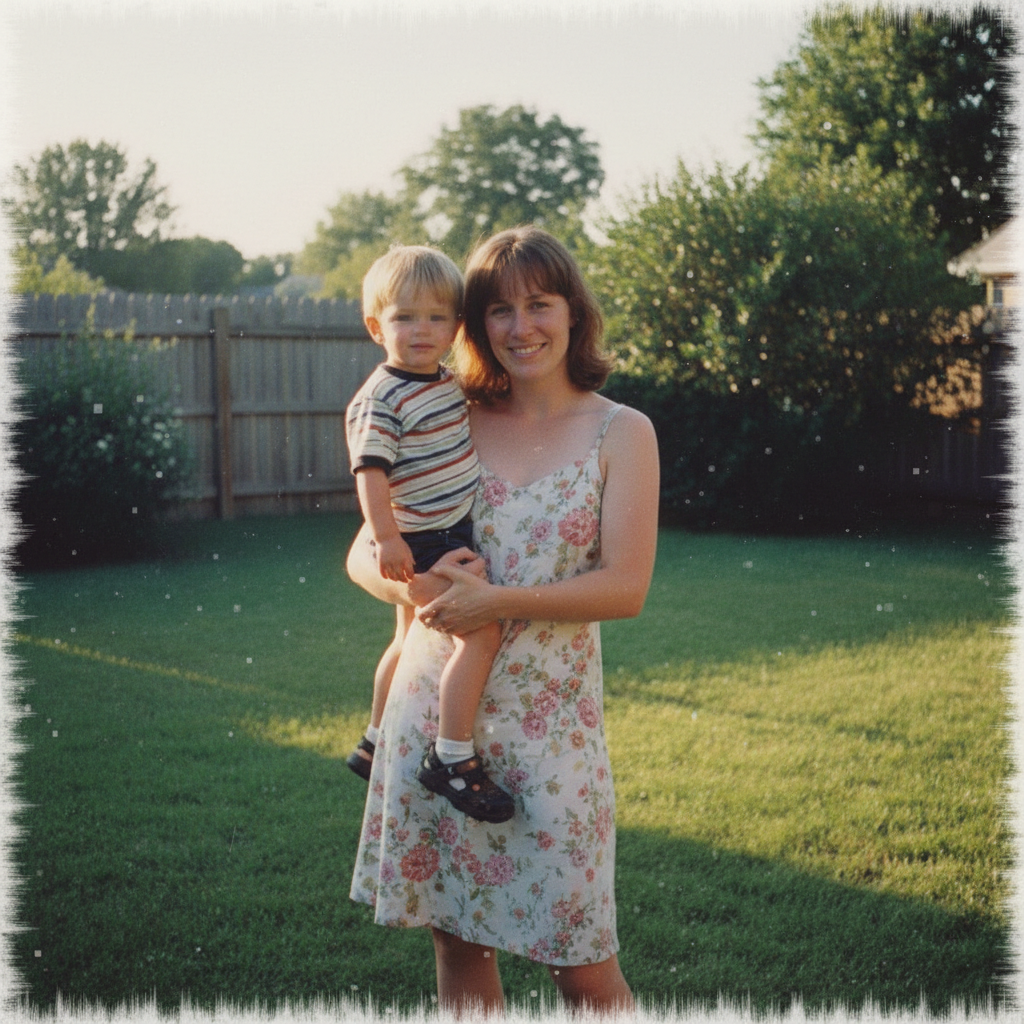
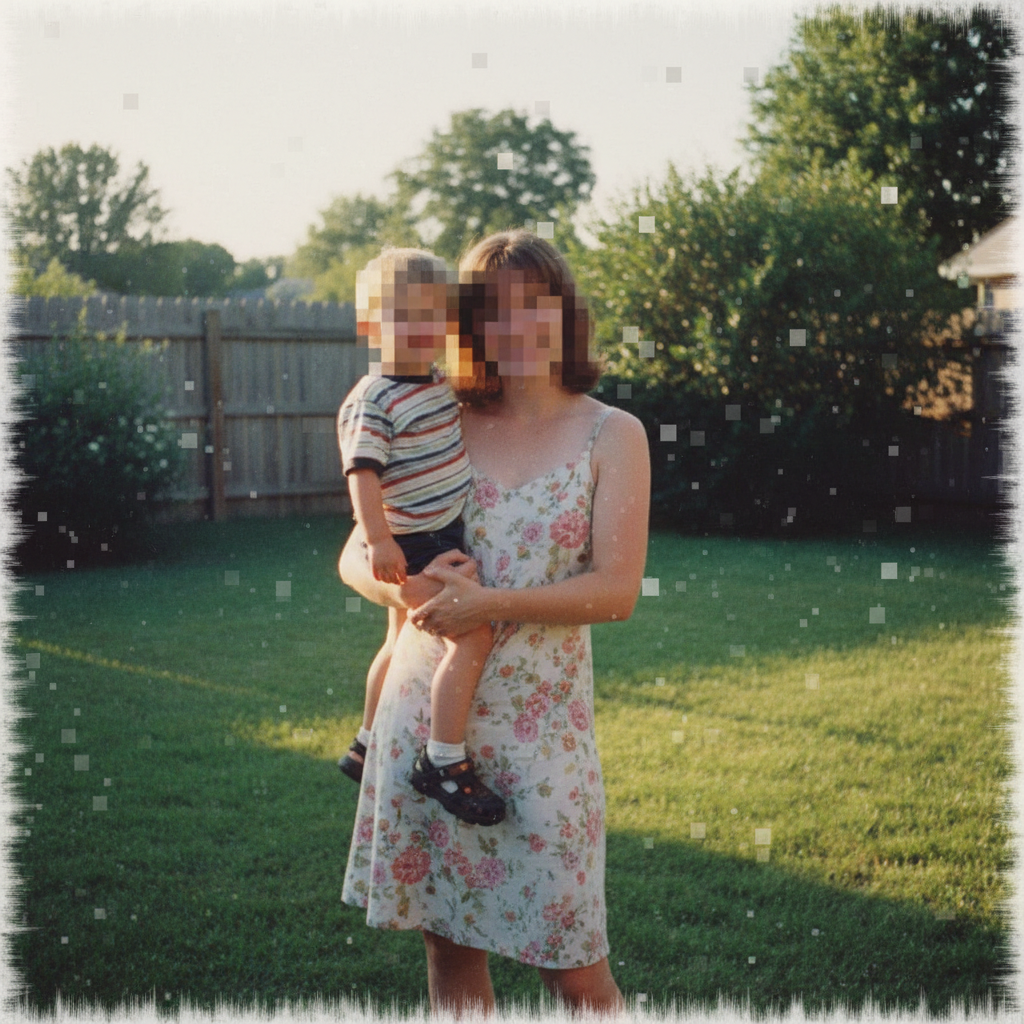
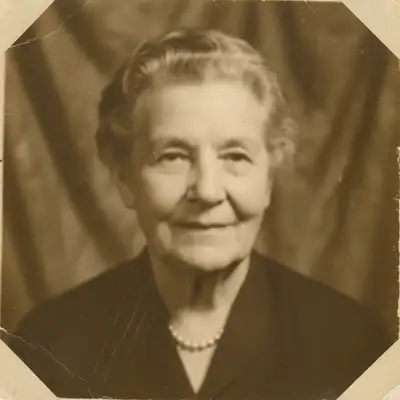
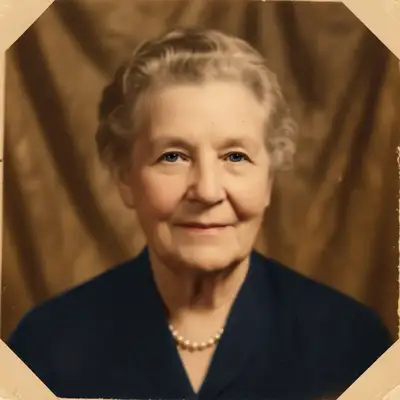
Restoring Old Family Photos

Bring irreplaceable family memories back to life — repair scratches, tears, fading, and water damage on prints from grandparents, parents, and childhood that can't be retaken.

Common scenarios

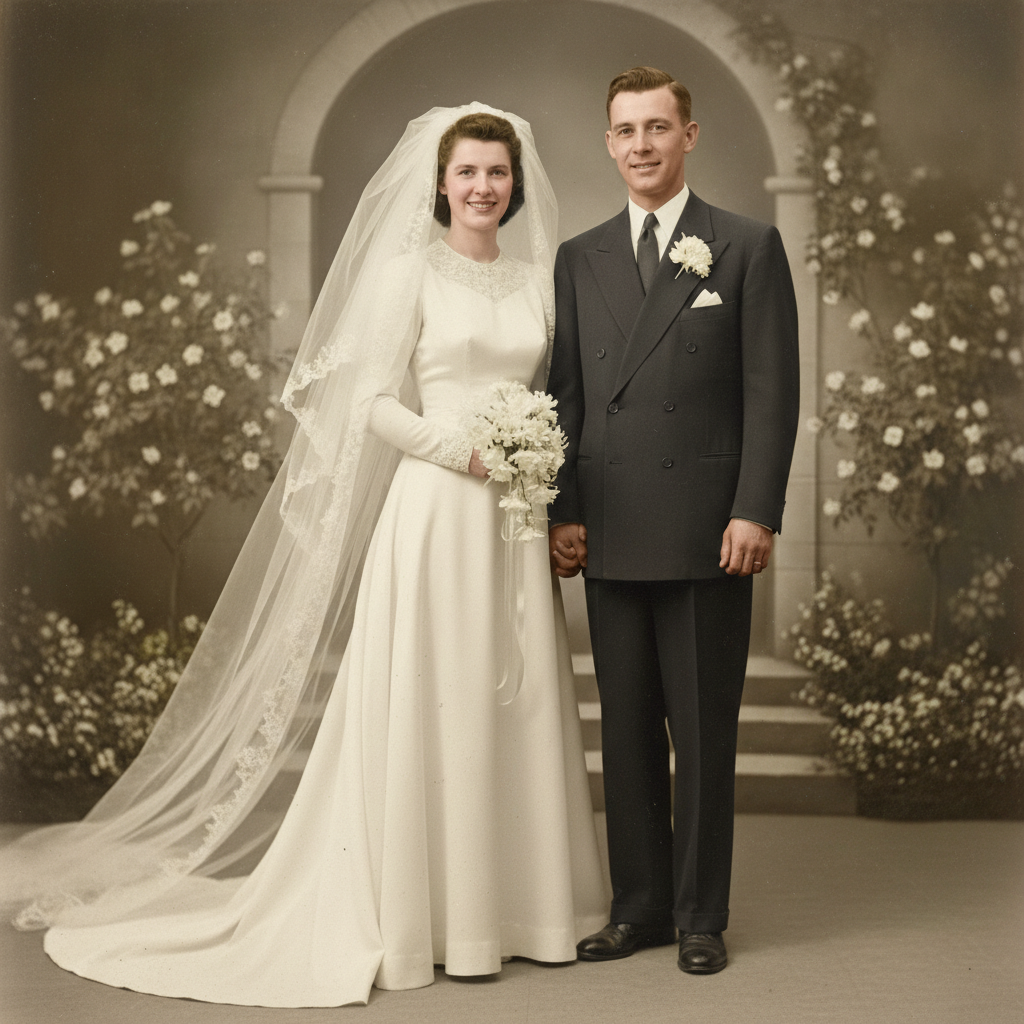
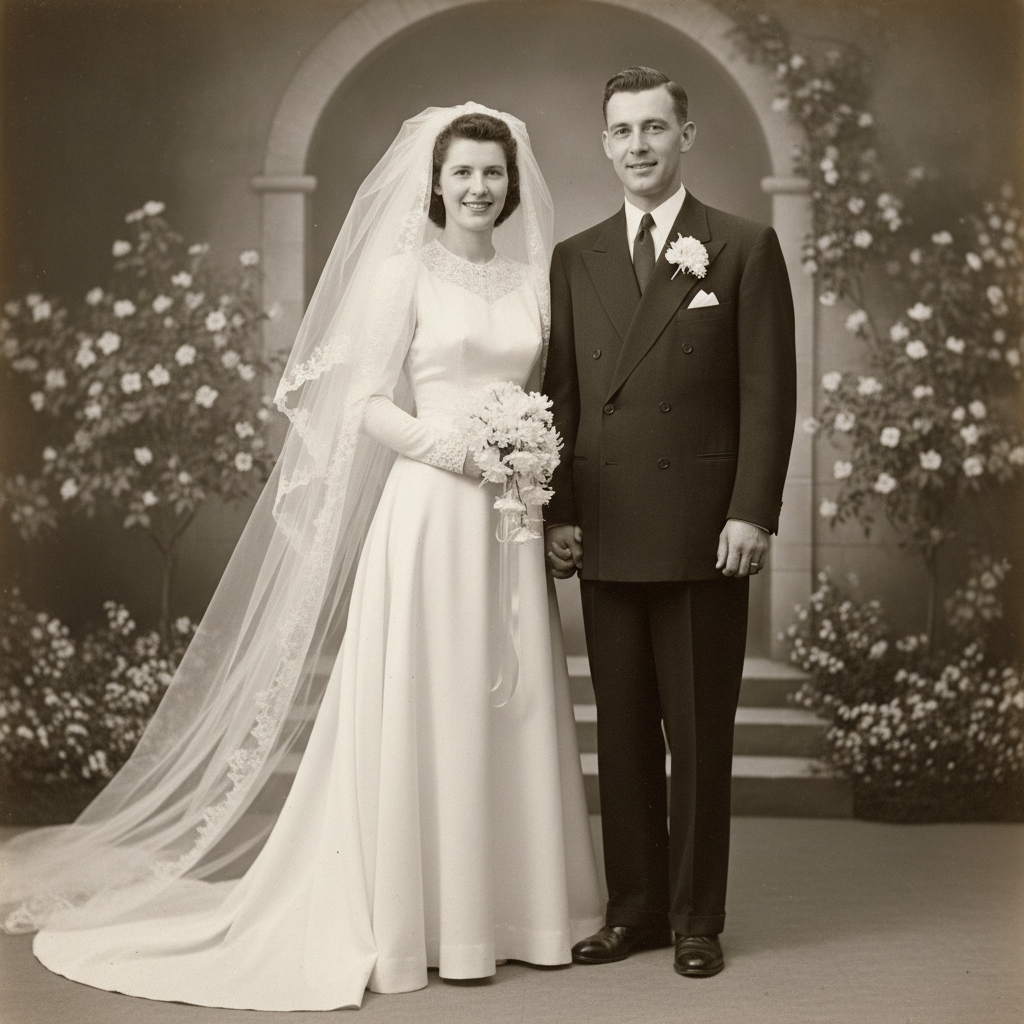
  • A grandparent's wedding portrait from the 1950s with scratches and significant fading across the entire print
  • A childhood photo album where prints have yellowed, stuck together, or suffered water damage from a flood
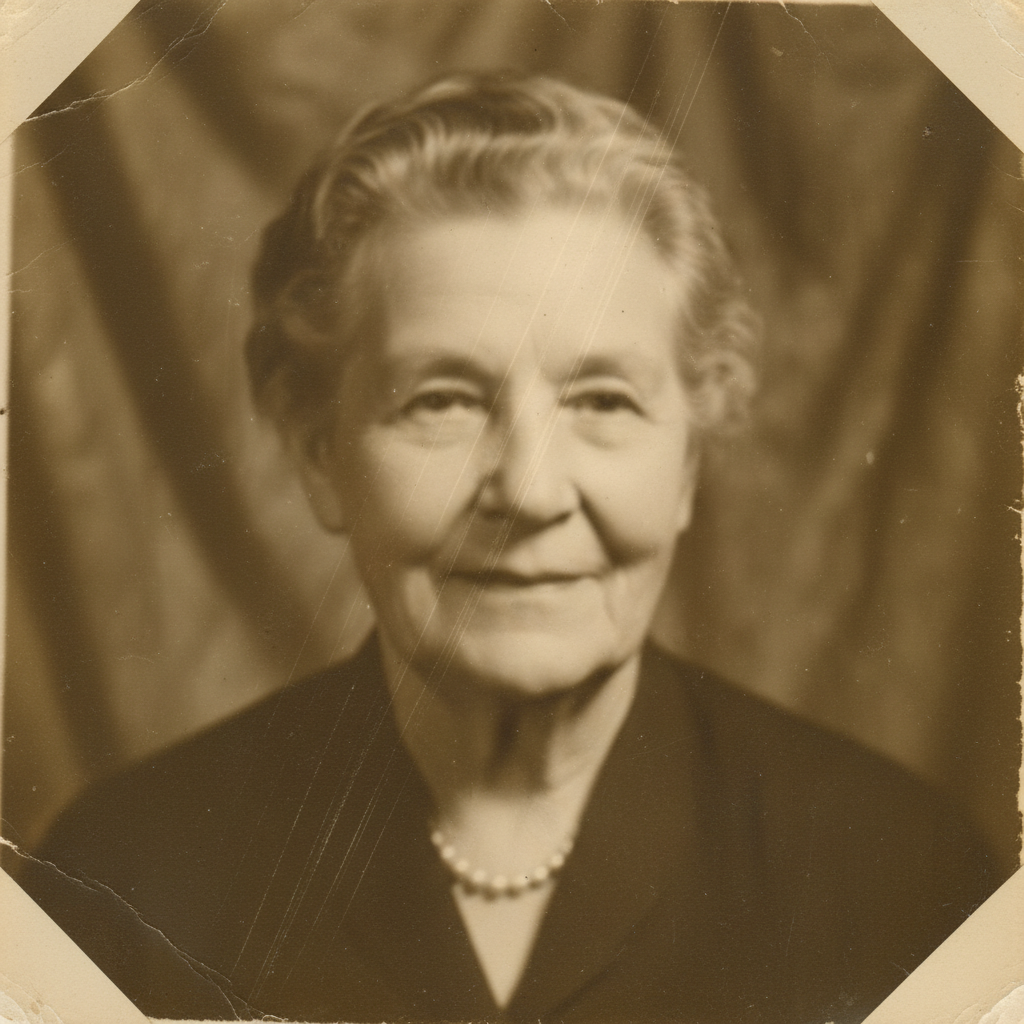
  • A single damaged photo that's the only surviving image of a deceased family member

Best practices

  • Scan at the highest DPI your scanner supports — 600 DPI for small prints — before uploading for best restoration results
  • Describe the specific damage rather than asking generically: 'fix the diagonal scratch across the faces and remove the yellowing' produces sharper results than 'restore this photo'
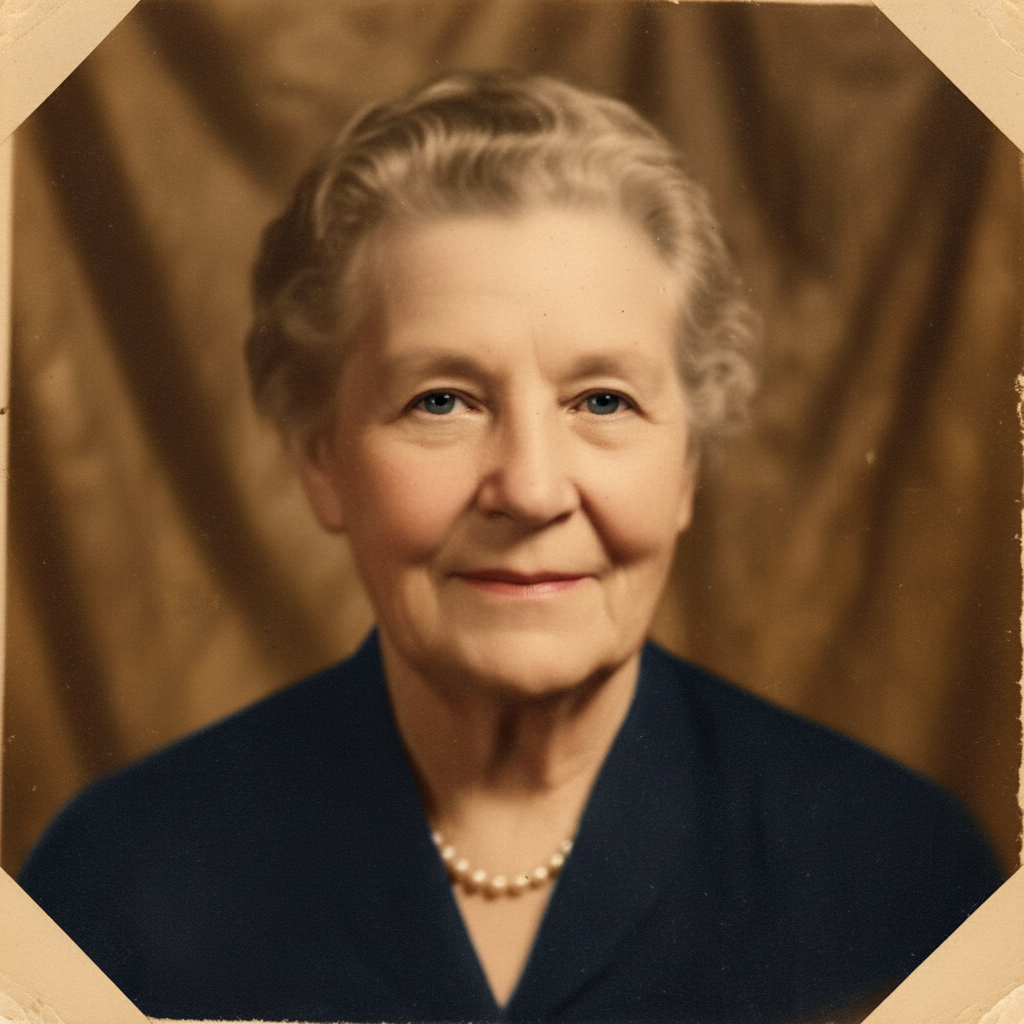
  • For faces, always add 'preserve the exact likeness' to your prompt to prevent the AI from altering anyone's appearance while repairing damage
  • Work in stages for severely damaged photos — fix structural damage (tears, scratches) first, then address fading and colorization in follow-up passes

Sample prompts

Restore this old family photo — fix the scratches, remove yellowing, and sharpen the faces while preserving everyone's exact appearanceRepair the water damage in the lower section, reconstruct the missing detail underneath, and restore natural colors throughout

Scanned Prints and Physical Damage Recovery

Turn deteriorated scanned prints into clean digital archives — remove crease lines, foxing spots, insect damage, tape residue, mold marks, and other physical artifacts that accumulated over decades of storage.

Common scenarios

  • A photo stored in a damp basement that has developed brown foxing spots, mold patches, and discoloration across the surface
  • A print that was repaired with tape decades ago — the adhesive has yellowed and bled into the image
  • An old newspaper clipping with a portrait that has heavy grain, low contrast, and halftone dot pattern from the printing process

Best practices

  • Describe the specific damage type by name if you know it: 'remove the brown foxing spots' or 'fix the tape stain residue along the top edge' is more accurate than 'fix the damage'
  • For insect or mold damage, describe what's in the missing area if visible in undamaged portions: 'the missing section appears to be a blue sky background — reconstruct it naturally'
  • Scan fragile prints without flattening them by force — scan curled or use a book scanner; the AI can correct perspective and flatten digitally
  • Run a second refinement pass on stubborn spots: tap a marker directly on remaining damage and re-prompt with the same instruction for targeted repair

Sample prompts

Remove all the brown foxing spots and mold marks from this old photo and restore the clear image underneath — keep the vintage characterFix the tape damage along the edges, remove the adhesive staining, and restore the original photo detail beneath the damaged areas

Color Restoration and Black & White Colorization

Bring color back to faded photographs or add it for the first time to black and white images — whether restoring lost vibrancy to a 1970s color print or colorizing a 1940s portrait for the first time.

Common scenarios

  • A collection of 1960s-1980s color prints that have shifted toward orange or magenta as the color dyes degraded over decades
  • Black and white family portraits from the 1930s-1950s that family members want to see in realistic color for the first time
  • A Polaroid from the 1970s or 1980s where the characteristic color shift has bleached highlights and skewed skin tones heavily toward yellow

Best practices

  • For color restoration on faded prints, specify the era so the AI targets historically accurate color relationships: 'restore faded colors from a 1975 color print, correct the magenta color shift'
  • For black and white colorization, guide specific items you know the color of: 'colorize with a red plaid shirt, dark brown hair, pale blue painted walls' reduces guesswork on important details
  • Add 'keep it looking natural and era-appropriate' to prevent the AI from applying modern color grading that would make a 1940s portrait look like a modern photo
  • Colorize after all damage repair is complete — structural restoration first, colorization last gives the cleanest results

Sample prompts

Colorize this black and white 1940s family portrait with realistic, natural colors — warm skin tones, era-appropriate clothing and background colorsRestore the faded colors in this 1970s photo — correct the heavy orange color cast, bring back true skin tones, and restore the original vibrancy while keeping it period-authentic

Example prompts to get started

restore this old photo — fix all scratches, remove the grain, restore the faded colors, and sharpen the details
colorize this black and white photo with realistic, natural colors appropriate to the era
repair the torn section and fill in the missing area naturally using the surrounding image as a guide
restore this photo but preserve the faces exactly as they appear — repair damage around and over the faces without altering anyone's appearance
remove the water stains and restore the image detail underneath — recover any faded or discolored areas from water damage
restore this very old photograph — clean up damage and enhance clarity while keeping the original character and era-appropriate tones

Frequently Asked Questions About Photo Restoration

Can AI restore heavily damaged photos?

Yes. Our AI restores most damage including scratches, tears, fading, water stains, missing sections, and biological damage like mold or foxing spots. Very large missing areas — more than 30% of the image — may produce approximate reconstructions. For severe damage, work in stages: repair the biggest issue first, then refine in follow-up passes.

How do I restore an old photo for free?

Upload your photo to EditThisPic, describe the damage in plain English — 'fix the scratches and fading' or 'repair the torn corner' — and the AI repairs it in under 60 seconds. Free to try with no account needed. One free edit per week with no signup, no watermarks on the result.

How accurate is AI colorization?

Our AI produces realistic, plausible colors for skin tones, sky, foliage, and common objects based on scene context. It cannot know the exact color of a specific dress or car unless you tell it. Guide specific colors in your prompt: 'blue dress, brown wooden table, pale green walls.' Think of it as historically plausible rather than photographically exact.

Should I scan old photos before restoring?

Yes, scanning at 300-600 DPI gives the best results — more detail in the scan means better restoration. Phone photos of prints work too but may introduce glare or perspective distortion. Scan without auto-correction or sharpening; let the AI work with the raw image for maximum detail recovery.

Can AI restore photos from the 1800s?

Yes. Very old photos — daguerreotypes, tintypes, albumen prints, and early glass-plate photographs — respond well to AI restoration. The AI can repair physical damage, enhance contrast and clarity, and even add realistic colorization. Use prompts like 'restore this Victorian-era portrait, keep the era-appropriate tones and character.'

Can restoration change someone's appearance or facial features?

Restoration should preserve likeness — it repairs damage, not the person. Add 'preserve the original faces exactly' to your prompt to make this explicit. If the result alters features, use a more targeted approach: tap a marker on the face and prompt 'repair damage around this face without changing the person's appearance.'

Can I restore a photo with large missing sections?

Yes. The AI reconstructs missing areas by predicting what belongs there based on surrounding context. Torn corners, holes, and sections destroyed by water or insects can be filled in convincingly. Missing sections larger than 30% of the image may need multiple passes. Describe what should be in the missing area if you know: 'fill the torn corner with more of the garden background.'

What types of old photos respond best to AI restoration?

Most printed photos from any era respond well: prints from the 1920s-1990s, Polaroids, newspaper clippings, school portraits, and wedding photographs. Even 1800s daguerreotypes and tintypes can be enhanced. Photos with faces typically show the most dramatic improvements because the AI has strong understanding of facial structure and natural skin tones.

How long does AI photo restoration take?

Most restorations complete in 30-60 seconds. Simple fixes like scratch removal or grain reduction take 15-30 seconds. Complex work like reconstructing large missing areas or full colorization may take 45-90 seconds and benefit from a refinement pass.

Do I need Photoshop skills to restore old photos?

No. Just describe the damage in plain English and the AI does the repair. No layers, no clone stamp, no healing brush. 'Fix the scratches and fading' is a complete instruction — no technical knowledge required.

Can I restore photos on my phone?

Yes. EditThisPic works in any mobile browser — iPhone, Android, or tablet. No app download needed. Take a photo of your print in good natural light, upload it, and restore it directly on your phone.

Will the restored photo have a watermark?

No. EditThisPic never adds watermarks to your photos, even on free edits. The downloaded image is clean and ready to print, share, or archive.

Ready to start editing?

Open Editor