Free • No signup Open Editor

Fix Damaged Photo

Repair water damage, mold stains, and physical deterioration in seconds.

Type 'repair the damaged areas, restore the photo to its original condition' and EditThisPic's AI reconstructs missing sections in 20-40 seconds. Works on water stains, mold spots, cracked emulsion, and torn edges. For general restoration, no marking needed. Tap specific damage spots only when the AI needs guidance on complex repairs. Free to try, no account needed.

Family portrait with brown water stains across lower portion
Before
Same portrait fully restored with stains removed
After

How it works

1

Upload your damaged photo

Drop your image into EditThisPic. JPG, PNG, WebP up to 7MB. Scan or photograph the damaged print at the highest resolution possible—more detail gives the AI more to work with during reconstruction.

⏱ Minor damage: 20-30 seconds. Severe water damage or missing sections: may need 2-4 refinements.
2

Describe the repair you need

Type your instruction: 'repair all the water damage and stains, restore the photo to its original condition' or 'fix the mold spots and bring back the original colors.' Be specific about the type of damage—water stains, mold, cracks, or missing pieces. No marking needed for overall restoration.

💡 Describe the damage type: 'water stains' vs 'mold spots' vs 'cracked emulsion' helps the AI choose the right repair approach.

Copy one of these to get started:

Water damage with stains repair all the water damage and stains, restore the photo to its original condition with natural colors
Mold or mildew spots remove all the mold spots and mildew damage, reconstruct the affected areas to match the rest of the photo
Cracked or peeling emulsion repair the cracked emulsion and peeling areas, smooth out the surface damage while preserving all details
Torn or missing corners reconstruct the torn corner, extend the background naturally and restore any missing elements
3 more prompts
Multiple damage types fully restore this damaged photo, repair water stains, fix discoloration, and remove all deterioration
Heat or fire damage repair the heat damage and discoloration, restore the natural colors and remove warping artifacts
Chemical stains remove the chemical stains and restore the original tones, repair any areas where the image has deteriorated
3

Review the restoration

Check faces and important details at full zoom. Look for natural skin tones, consistent textures, and proper blending where damage was repaired. Verify no artifacts remain from the original damage.

4

Target specific damage if needed

If some damage spots remain or the AI reconstructed an area incorrectly, tap markers on those specific spots and regenerate. This guides the AI to focus on stubborn damage. Most full-photo restorations work without markers.

💡 Use markers for stubborn stains or areas where the AI's first reconstruction needs refinement.
Try it free
"My grandmother's wedding photo was water damaged for decades. Now it looks like it was taken yesterday. Truly incredible." @VintageRestorer_Mike

See it in action

Family portrait with brown water stains across lower portion
Before
Same portrait fully restored with stains removed
After

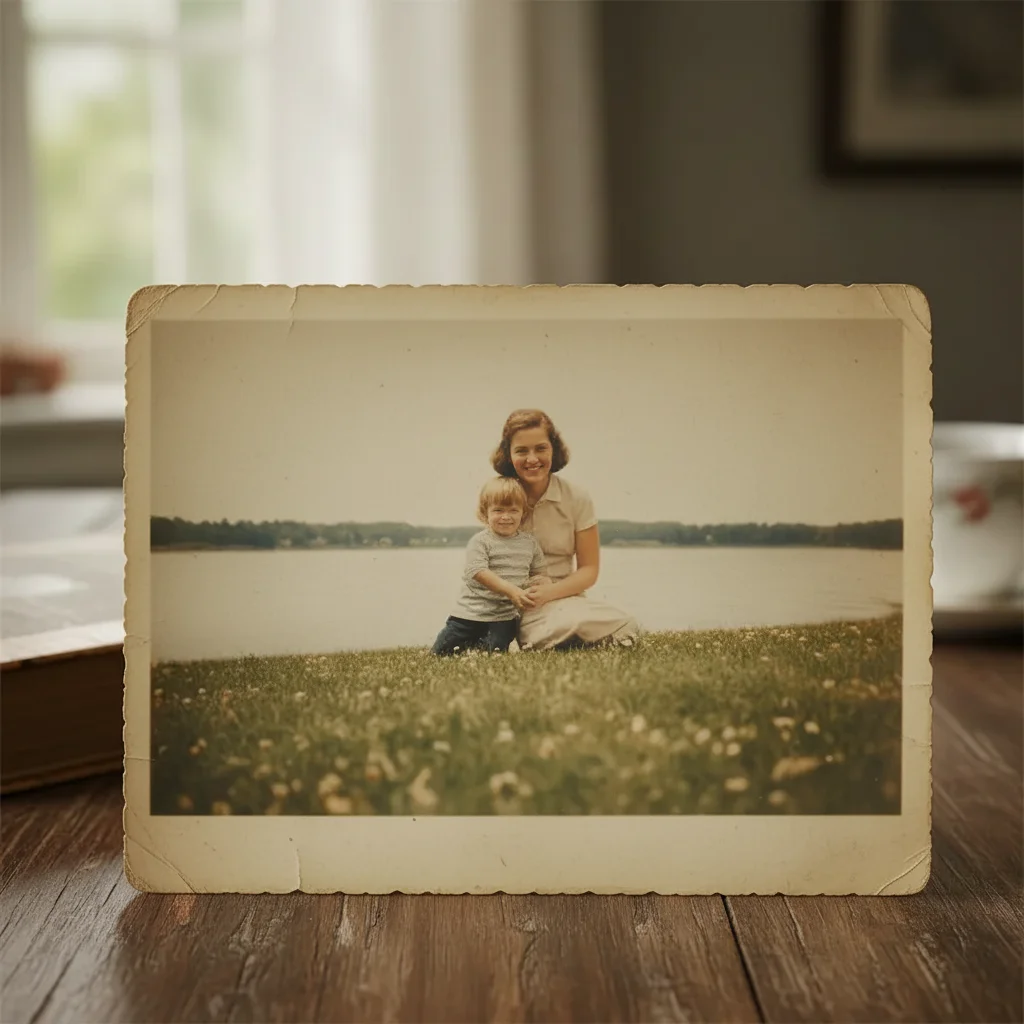
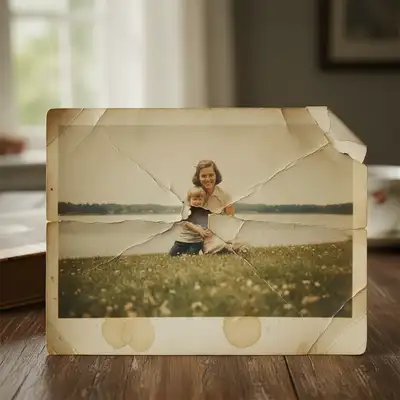
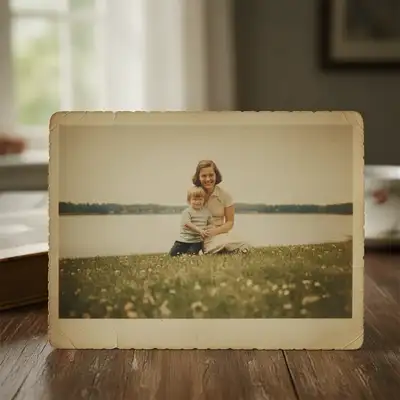
Water-damaged family portrait restored

Flood damage left brown water stains across this 1970s family portrait. One prompt removed all staining.

Prompt: repair all the water damage and stains, restore the photo to its original condition with natural colors
Wedding photo with mold spots on dress and background
Before
Clean wedding photo with mold damage fully repaired
After

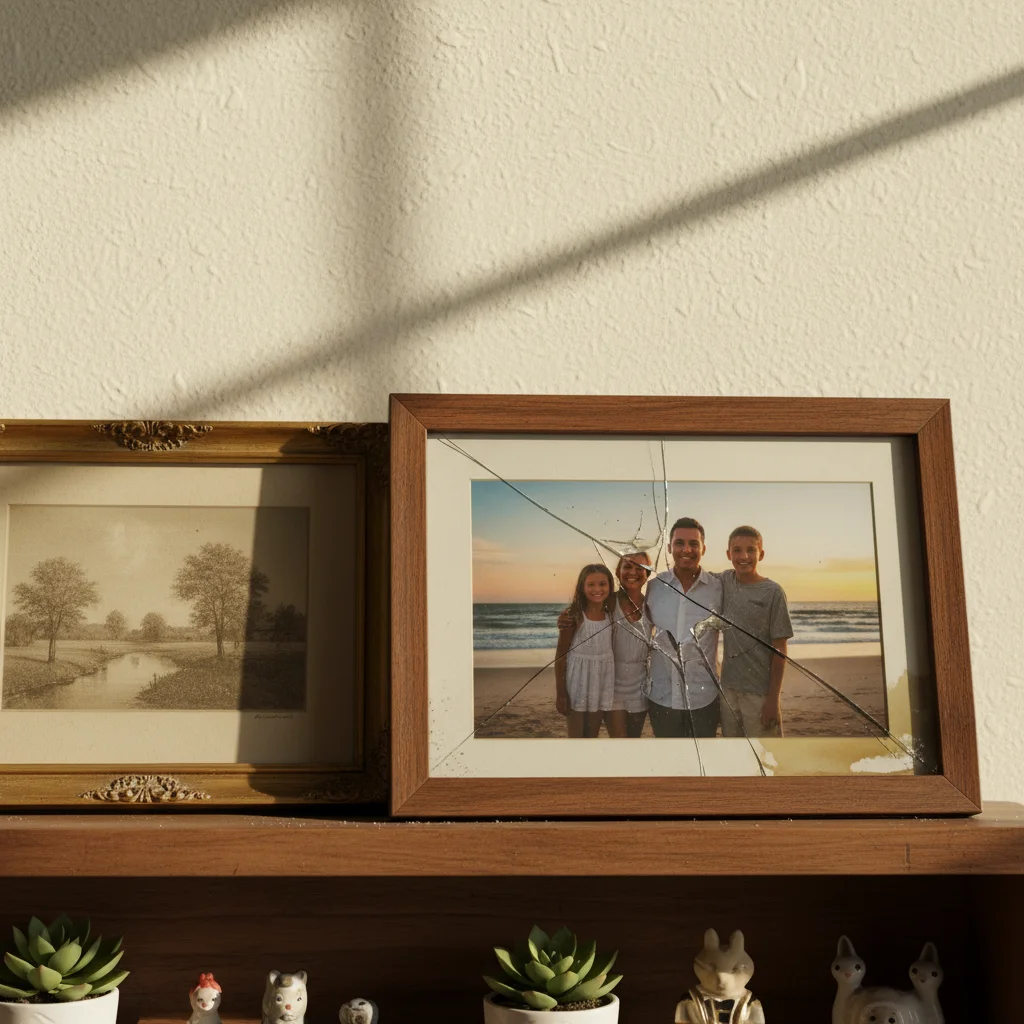
Mold damage on wedding photo repaired

Basement storage caused mold spots across a treasured wedding photo. The AI removed all spots and restored the original image.

Prompt: remove all the mold spots and mildew damage, reconstruct the affected areas to match the rest of the photo
Portrait with cracks across surface and missing corner
Before
Portrait restored with corner reconstructed and cracks removed
After

Cracked print with missing corner fixed

Physical damage had cracked this portrait and torn off a corner. The AI reconstructed everything seamlessly.

Prompt: repair the cracked surface and reconstruct the torn corner, restore the photo to pristine condition

If something looks off

Repaired areas look blurry or smeared

Why: The AI prioritized removing damage over preserving texture, especially in heavily damaged areas.

Try: repair the damage while preserving sharp detail and natural texture, maintain the grain of the original photo

💡 Adding 'preserve texture' or 'maintain grain' keeps repairs looking authentic.

Colors look wrong after restoration

Why: The AI may have overcorrected color shifts or applied inconsistent color restoration across the image.

Try: repair the damage and restore natural, consistent colors throughout, match the undamaged areas

💡 'Match the undamaged areas' tells the AI to use good sections as a color reference.

AI changed the wrong area or something I didn't want changed

Why: The AI couldn't determine exactly which area you meant from description alone. This happens with ambiguous requests.

Try: Tap a marker on the specific damage you want repaired, then regenerate with the same prompt

💡 Markers tell the AI 'I mean THIS one specifically.' Use them when description alone is ambiguous.

Faces look reconstructed incorrectly

Why: When damage covers facial features, the AI must infer what was there. Complex damage on faces is challenging.

Try: carefully repair the face, preserve the person's likeness and natural features, only fix visible damage

💡 For faces, try smaller incremental repairs rather than one large restoration.

Some damage spots remain after restoration

Why: Subtle damage or stains matching the photo's tones can be missed by the initial pass.

Try: Tap markers on the remaining damage spots and use: remove these specific stains and blend naturally

💡 Markers help the AI identify damage it missed in the first attempt.

Reconstructed background doesn't match

Why: When damage destroyed large background sections, the AI infers what should be there, sometimes inconsistently.

Try: reconstruct the missing background to seamlessly match the existing pattern and colors

💡 For patterned backgrounds, mention the pattern type: 'match the wallpaper pattern' or 'continue the gradient.'

Quick answers

Do I need to mark the damaged areas before describing?

No! For most damage repair, just describe what you want: 'repair the water damage' or 'remove the mold spots.' The AI recognizes common damage patterns. Only use markers when the AI needs guidance on specific stubborn spots, or when damage is subtle and blends with the image.

How much damage can AI actually repair?

The AI handles water stains, mold spots, minor tears, cracks, and discoloration very well. For major missing sections, it can reconstruct plausible content based on context. Faces with severe damage are most challenging—expect good but not perfect results on heavily damaged facial features.

Should I scan or photograph my damaged print?

Scanning at 300-600 DPI gives the best results. If you must photograph, use even lighting without flash, shoot straight on (not at an angle), and ensure the photo is flat. The more detail in your scan, the better the AI can distinguish damage from image content.

Can the AI restore completely missing sections?

Yes, for backgrounds and simple elements. The AI infers what should be there based on surrounding context. Missing sections of faces or unique objects are reconstructed plausibly but may not match the original exactly—there's no way to know what was truly there.

Will the repair look obviously edited?

Well-done repairs blend seamlessly. The AI matches texture, grain, and color of surrounding areas. For best results, mention 'preserve the original grain' and 'blend naturally' in your prompt to ensure authentic-looking restoration.

Ready to repair your damaged photo?

Free to try. No signup required.

Try it free