Make Photo Clearer
Just type 'make this photo clearer' and watch haze, blur, and softness disappear.
Type 'make this photo clearer' and EditThisPic's AI analyzes your image and removes whatever is making it unclear--haze, fog, soft focus, or low contrast--in 15-30 seconds. No sharpening sliders to adjust. The AI identifies what's obscuring detail and corrects it automatically. Works on foggy landscapes, hazy indoor shots, and soft smartphone photos. Free, no signup needed.
How it works
Upload your photo
Drop your unclear image into EditThisPic. JPG, PNG, and WebP up to 7MB work. Hazy landscapes, foggy morning shots, soft indoor photos, and images that just look 'off' all benefit from clarity enhancement.
Describe what you want
Type 'make this photo clearer' and let the AI diagnose the problem. It detects haze, atmospheric blur, soft focus, and low contrast automatically. For specific issues, add details: 'make this photo clearer, remove the haze' or 'make this photo clearer with sharper edges.'
Copy one of these to get started:
make this photo clearer, improve sharpness and remove any haze or blur
make this photo clearer by removing the haze and fog, restore natural contrast and color depth
make this photo clearer with improved sharpness and definition, enhance the fine details
make this phone photo clearer, sharpen the details and improve overall crispness
3 more prompts
make this photo clearer, remove the hazy film from shooting through glass, restore crisp details
make this old photo clearer, restore sharpness lost over time while keeping it natural
make this photo clearer, reduce the motion blur and sharpen the subject
Generate and review
Tap generate and zoom to 100% to compare details. Check that edges are sharp without halos, colors remain natural, and the image doesn't look over-processed. True clarity improvement reveals hidden detail rather than adding artificial sharpness.
Refine with markers if needed
If some areas got too sharp or not sharp enough, place markers on those spots and describe what they need. For example, tap the foreground and say 'make this area clearer' if the AI focused on the background instead.
"Had a foggy morning beach photo that looked like it was shot through a dirty window. One prompt and suddenly I could see everything crystal clear." @TravelWithSarah
See it in action
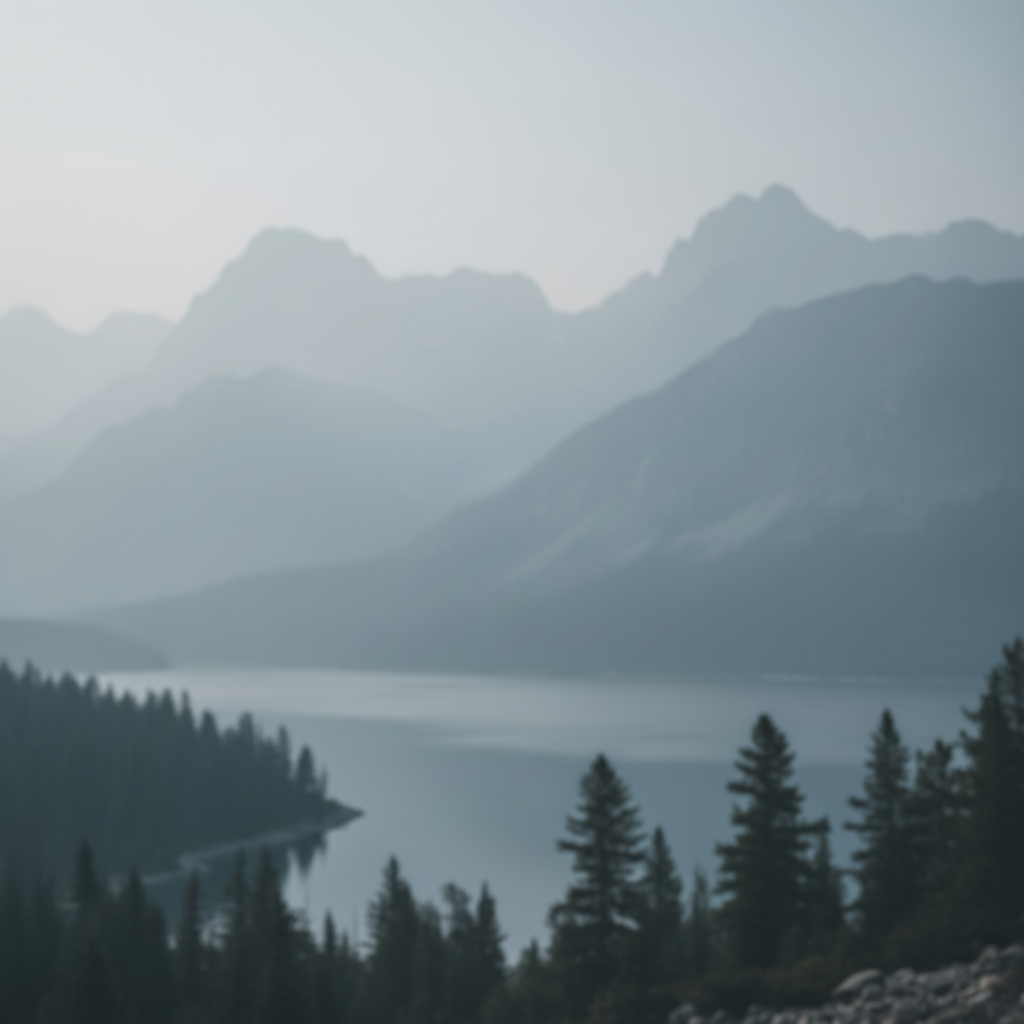
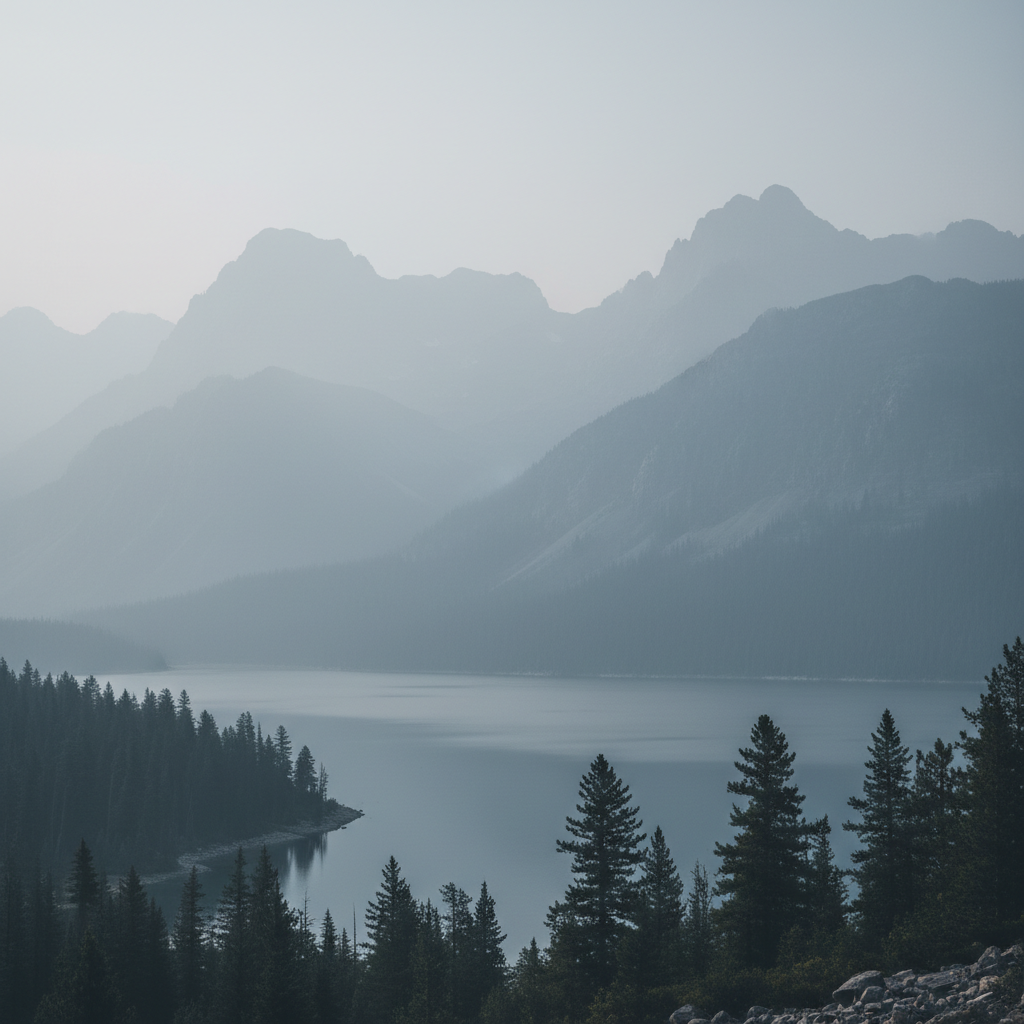
Morning fog lifted from landscape
Early morning mountain photo was obscured by atmospheric haze. The AI revealed the full scene hiding behind the fog.
make this photo clearer by removing the haze and fog, restore natural contrast and color depth

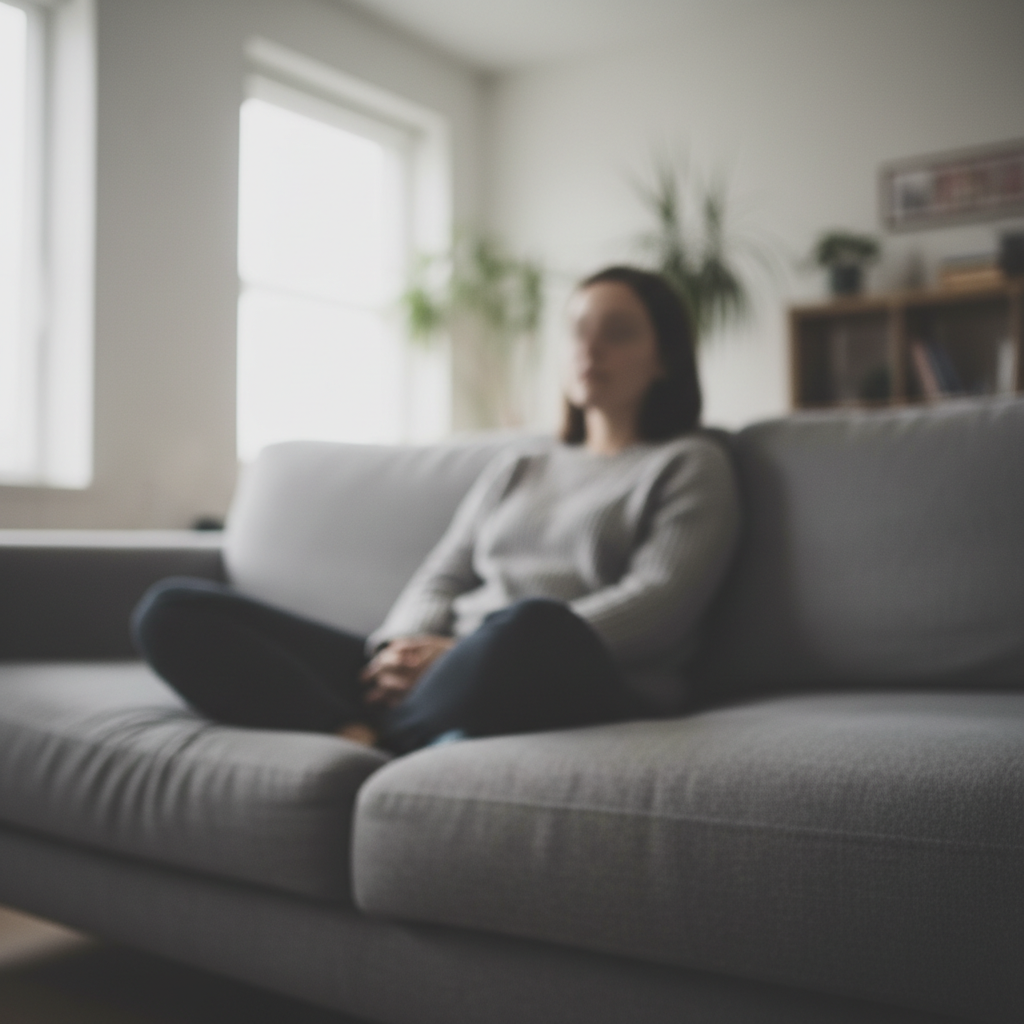
Indoor portrait sharpened
Living room photo looked soft and lacked definition. Clarity enhancement brought out facial features and texture details.
make this photo clearer with improved sharpness and definition, enhance the fine details
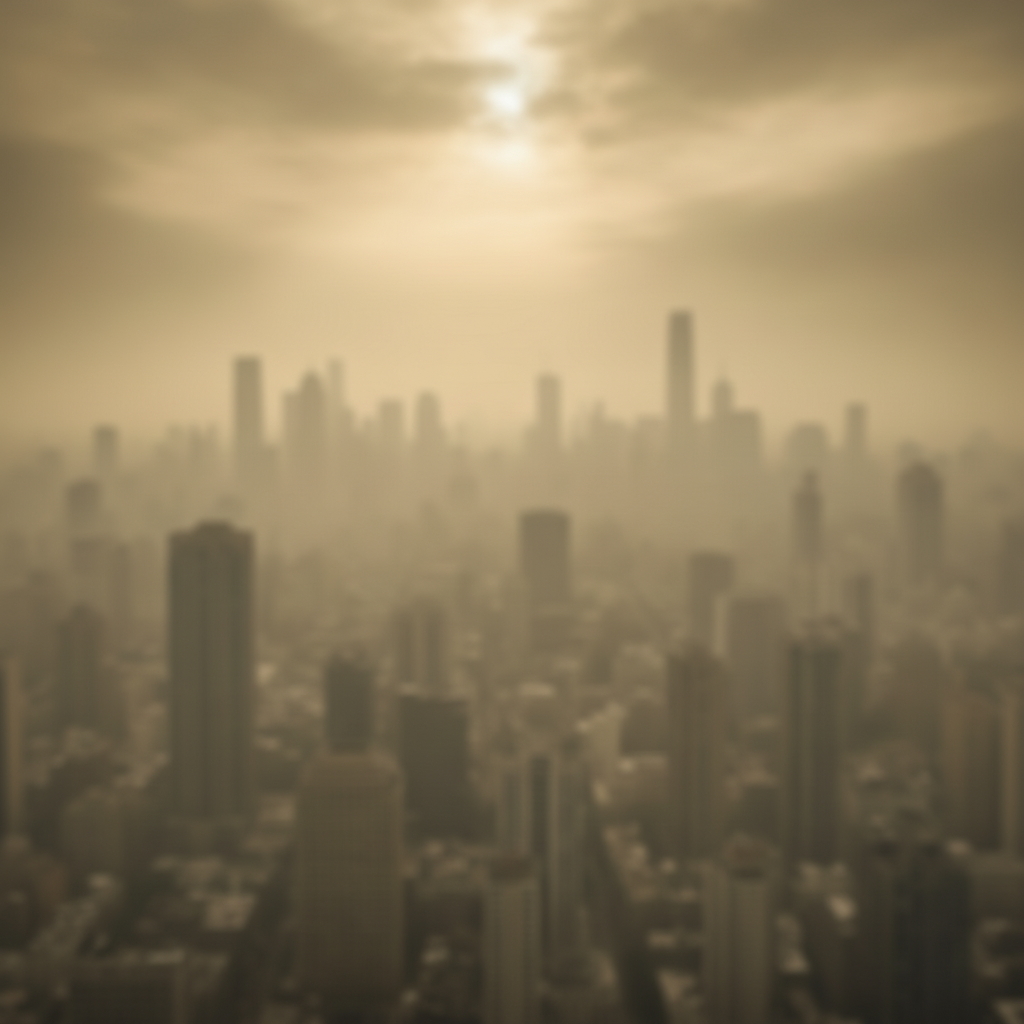
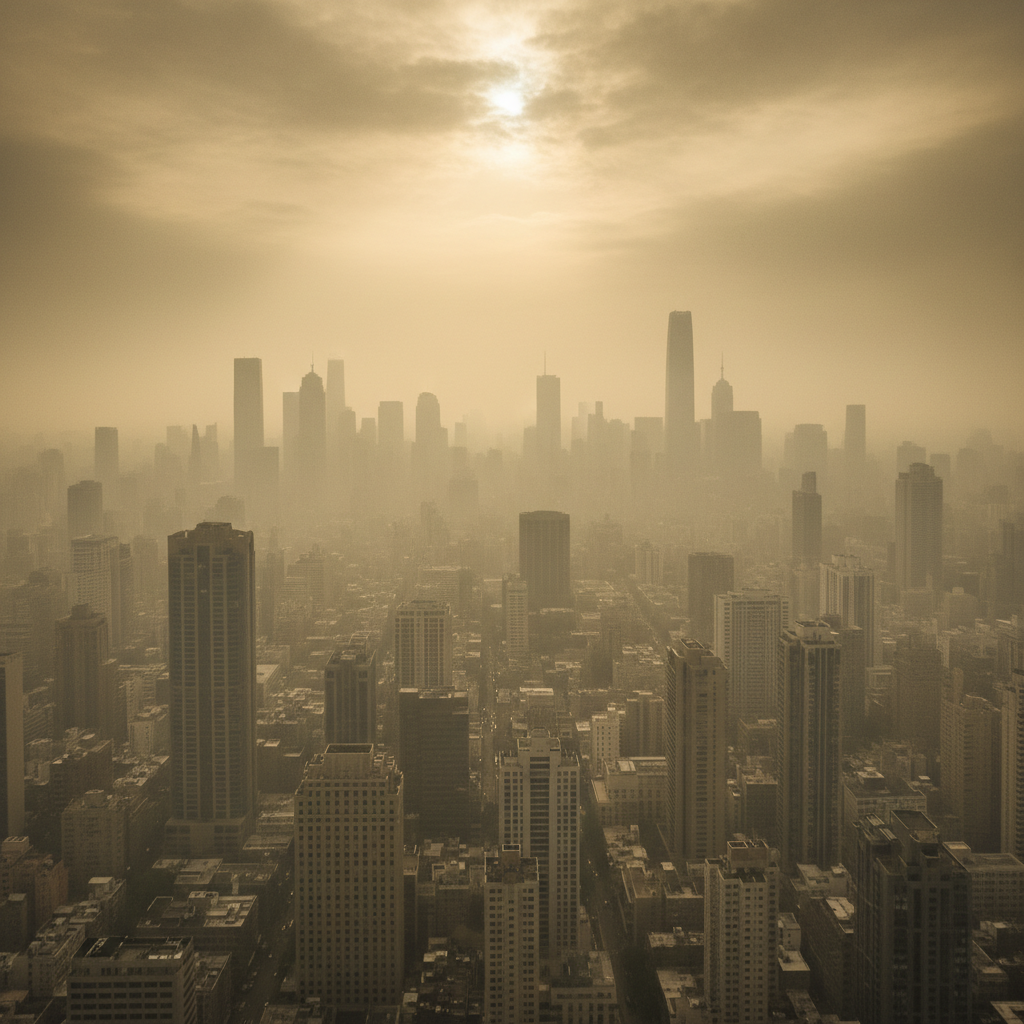
City skyline through pollution cleared
Urban skyline photo was veiled by smog and atmospheric pollution. The AI cut through the haze to reveal the buildings clearly.
make this photo clearer, remove the smog and haze, restore building details and contrast
If something looks off
Photo looks over-sharpened with visible halos around edges
Why: The AI applied too much sharpening, creating light or dark outlines at high-contrast edges. This happens when sharpness is boosted beyond natural levels.
make this photo clearer with natural sharpening, avoid halos and over-processing, keep edges realistic
💡 If you see white or dark lines around objects, dial back with 'gentle' or 'subtle' sharpening.
Colors shifted or look unnatural after clarity boost
Why: Haze removal can affect color balance because atmospheric haze often has a color tint. Removing it may reveal unexpected colors.
make this photo clearer while preserving natural color tones, remove haze but keep colors accurate
💡 Adding 'preserve colors' or 'natural tones' prevents the AI from altering the color balance too much.
Noise and grain became more visible after sharpening
Why: Sharpening enhances all detail including noise. Low-light or high-ISO photos often reveal grain when clarity is increased.
make this photo clearer while reducing noise, improve sharpness but smooth out the grain
💡 For noisy photos, ask for both 'clearer' and 'reduce noise' in the same prompt.
AI changed the wrong area or something I didn't want changed
Why: The AI couldn't determine exactly which area you meant from description alone. This happens when some areas should stay unchanged.
Tap a marker on the specific area you want to make clearer, then regenerate with 'make this marked area clearer'
💡 Markers tell the AI 'I mean THIS area specifically.' Use them when you want selective clarity.
Photo still looks soft--clarity didn't improve enough
Why: The AI may have been too conservative, or the original blur is severe. Some photos need more aggressive treatment.
make this photo much clearer with maximum sharpness, dramatically improve definition and crispness
💡 Words like 'maximum', 'dramatic', and 'much clearer' signal the AI to push further.
Quick answers
Do I need to mark anything before making a photo clearer?
No--just type 'make this photo clearer' and it works on the entire image automatically. Markers are only useful when you want to improve clarity in specific areas while leaving others unchanged. Most clarity enhancement works perfectly without any marking.
What's the difference between 'clearer' and 'sharper'?
Clarity includes more than just sharpness. When you ask to make a photo clearer, the AI addresses multiple issues: removing haze and atmospheric blur, improving contrast and definition, enhancing edge sharpness, and restoring color depth. Sharpening only affects edges. Clarity is a more complete improvement.
Can this fix motion blur from camera shake?
It can improve mild motion blur but cannot fully restore severely shaken images. The AI works best on atmospheric blur, soft focus, and low contrast. For moderate motion blur, try 'make this photo clearer, reduce motion blur' and see how much recovery is possible.
Will this work on old photos or scanned images?
Yes--old photos often benefit significantly from clarity enhancement. Scanned images lose sharpness over time and through the scanning process. Try 'make this old photo clearer while keeping its authentic character' to improve definition without making it look artificially modern.
Does making a photo clearer increase the resolution?
Making a photo clearer improves perceived sharpness and detail visibility but doesn't add new pixels. It reveals detail that was obscured by haze, blur, or low contrast. For actual resolution increase, use the upscale tool after making the photo clearer.
Ready to make your photo clearer?
Free to try. No signup required.