Restaurant Food Photo Guide
Lighting for Food Photography
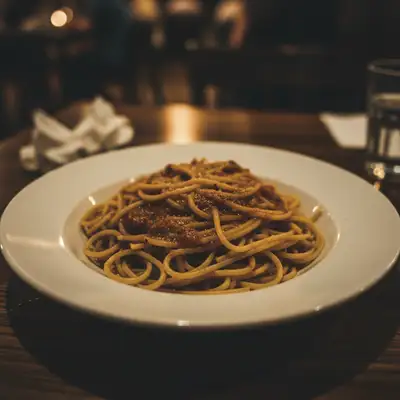
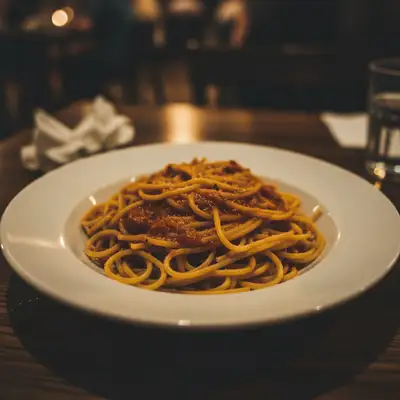
Lighting makes or breaks food photography. The wrong light makes food look gray, greasy, or unappetizing. The right light makes it glow. Natural window light is the gold standard for food photography. Position the dish near a large window with indirect sunlight. The light should come from the side or behind the food (backlighting creates beautiful translucency in drinks, sauces, and thin foods). Avoid direct flash. Camera flash flattens food, creates harsh reflections on sauces and glazes, and washes out color. If you must shoot in a dark restaurant, use a continuous LED panel bounced off a white surface. For consistent results across your entire menu, set up a dedicated photo spot in your restaurant near the best window. Shoot during the same time of day for consistent light. Use a white foam board as a reflector on the shadow side of the dish to fill in dark areas. If natural light isn't available (basement kitchens, evening shoots), use two softbox lights or ring lights at 45-degree angles. The goal is soft, even light that shows food texture without harsh shadows.
Find your best window
Large window with indirect light. Side or back lighting. Avoid direct sun that creates harsh shadows.
Use a reflector
White foam board or paper on the shadow side bounces fill light under the dish.
Never use flash
Direct flash kills food appeal. Continuous soft light or natural light only.
Angles and Composition for Food
Two angles work for most dishes. The 45-degree angle (camera at dining height, tilted down slightly) mimics how a diner sees the plate. This works for tall dishes: burgers, stacked pancakes, drinks, salads with height. The overhead/flat-lay angle (camera directly above) works for flat or spread-out dishes: pizza, sushi platters, bowls, charcuterie boards, and table spreads. It also works great for social media where the overhead look is popular. Some dishes benefit from a low, eye-level angle: layered cakes (shows the layers), burgers (shows the filling), and drinks (shows the glass and garnish). Composition rules: the dish should fill most of the frame. Leave some breathing room but don't include half the table. Use the rule of thirds, placing the main dish slightly off-center. Props add context: utensils, napkins, a hand reaching in, scattered ingredients, a drink beside the plate. But don't overdo it. The food is the star; props are supporting actors.
45 degrees for tall food
Burgers, drinks, stacked dishes. Camera at eye level, tilted down slightly.
Overhead for flat food
Pizza, platters, bowls, table spreads. Camera directly above looking down.
Fill the frame
The dish should dominate the image. Include just enough context (table, utensil) without distracting.
Food Styling Basics for Restaurants
Professional food stylists exist for a reason: how food is arranged on the plate matters enormously in photos. But you don't need a professional. A few basic techniques make a big difference. Freshness matters. Photograph food immediately after plating. Lettuce wilts, sauces congeal, ice cream melts, steam disappears. Have your camera ready before the dish comes out. Garnish intentionally. A sprinkle of fresh herbs, a drizzle of sauce, a few crumbs on the plate, a lemon wedge. These small touches add color, texture, and visual interest. But don't over-garnish. It should look like something you'd actually serve. Clean the plate edges. Wipe any drips or smears from the rim before shooting. A messy plate rim looks careless. Use a paper towel or clean cloth. Use complementary colors. Green herbs on red sauce, yellow lemon on blue plate, dark chocolate on white plate. Color contrast draws the eye. Portions look better slightly smaller than normal. Full-to-the-brim plates look messy in photos. Plate slightly less than you'd serve to allow the presentation to breathe. Shiny surfaces sell: brush a light coat of oil on grilled items to enhance the grill marks. Spray water on salads for freshness. A little oil on wood surfaces adds warmth.
Shoot immediately
Food looks best in the first 30 seconds after plating. Have your setup ready.
Garnish with purpose
Fresh herbs, sauce drizzle, citrus wedge. Color contrast and texture.
Clean plate edges
Wipe drips from the rim. A clean plate frame makes the food look more appetizing.
Editing Food Photos
Even well-shot food photos benefit from editing. The goal is to make the food look as appetizing as it does in person, compensating for what the camera fails to capture. White balance is critical. Restaurant lighting is often warm (incandescent, candles) which makes food look orange/yellow. Correct white balance so white plates look white and food colors are accurate. In AI tools: 'fix the white balance and make the plate white.' Contrast and vibrance: slightly increase contrast to make food textures pop. A small vibrance boost enhances color without making food look artificial. Avoid oversaturation, which makes food look synthetic. Remove distracting elements: stray crumbs on the table (unless intentional), fingerprints on glasses, a stained napkin, the neighboring table's mess in the background. AI handles this quickly: 'remove the crumbs from the table' or 'clean up the background.' Sharpen appropriately: food texture should be crisp and detailed. Steam, sauce drizzle, and grill marks should all be visible. Apply light sharpening focused on the food, not the background. Don't change the food's actual appearance. You can correct color, enhance lighting, and clean the environment, but don't add ingredients that aren't there, change portion sizes, or dramatically alter what the dish looks like. Customers should recognize their order from the photo.
Correct white balance
Food should show its true colors. White plates should be white, not yellow or blue.
Enhance texture
Slight contrast and sharpness boost. Grill marks, sauce glossiness, and herb detail should pop.
Clean the scene
Remove distractions from the table and background. Keep focus on the food.
Photos for Google Business, Social Media, and Delivery Apps
Each digital platform has different requirements and audiences. Google Business Profile: your most important digital presence after your website. Upload at least 10 food photos plus interior and exterior shots. Google displays these prominently in local search and Maps. Optimal size: 720x720 to 2048x2048 pixels. Update seasonally as your menu changes. Instagram: 1080x1080 pixels (square) or 1080x1350 (portrait, gets more screen space). Instagram's algorithm favors engaging content. Close-up detail shots, behind-the-scenes kitchen footage, and plating videos perform well. Use hashtags and location tags. DoorDash, Uber Eats, Grubhub: these platforms auto-crop your images. Upload square photos (1200x1200 minimum) centered on the food. The thumbnail is tiny, so the dish needs to be recognizable even at small sizes. Bright, high-contrast photos stand out in crowded delivery app feeds. Facebook: 1200x630 for link previews, 1080x1080 for posts. Less visual-focused than Instagram but important for events, specials, and community engagement. For all platforms: consistent branding across channels. If your Instagram looks warm and rustic, your Google Business photos should match. Consistency builds recognition.
Google Business: 10+ quality photos
Food, interior, exterior. 720px minimum. Update seasonally.
Instagram: 1080px square or portrait
Close-ups, detail shots, and behind-the-scenes content. Visually rich.
Delivery apps: bright and centered
Square format, 1200px+. Food must be recognizable at tiny thumbnail size.
Frequently Asked Questions
Make your food photos look delicious
Fix lighting, clean backgrounds, enhance colors. Upload a food photo, describe the edit. Free, no signup.
Edit Food Photos
Release to upload