Grátis • Sem cadastro Fix Overexposed photo · Grátis

Fix Overexposed Photo

Last updated

Restore blown out highlights and recover detail from washed out photos in seconds.

Beach portrait with severely overexposed face, blown highlights on forehead and cheeks
Before
Same portrait with facial details restored and natural skin tones recovered
After

Fix Overexposed Photo

Upload photo to fix overexposed photo

Free • Results in 30 seconds • No signup

Release to upload

GratisSem cadastroSem marca d'agua

1 free edit·then from $1.99

Popular use cases:
  • photographers
  • wedding photos
  • outdoor portraits
  • real estate interiors
  • product photography
  • vacation photos
  • event photography
  • window light photos

Cost
Free No signup required
Time
Instant results in 15-30 seconds
Works on
Any device - browser, phone, tablet, desktop
Powered by
AI-powered photo editing
Scenario Prompt Time
Mild overexposure fix the overexposure and restore detail in the bright areas 15s
Blown out portrait recover the facial details lost to overexposure and restore natural skin tones 20s
White-out window fix the overexposed window and restore the outdoor view 25s

How it works

  1. Upload your overexposed photo

    Drop your washed out image into EditThisPic. JPG, PNG, WebP up to 7MB. The AI can recover detail from photos that look completely blown out, though extreme overexposure (pure white areas) may have limited recovery.

    Expect: Simple exposure fixes: 15-30 seconds. Severely overexposed photos with multiple problem areas: may need 2-3 refinements.
  2. Descreva o que voce quer

    Type your instruction: 'fix the overexposure and restore detail in the bright areas' or 'correct the blown out highlights and bring back natural colors.' Be specific about what's washed out: 'recover the facial details lost to the bright light' or 'restore the sky that's blown out to white.' Sem marcacao necessaria - a IA entende exposure problems.

    Tip: Mention what the recovered areas should look like: 'restore natural skin tones in the overexposed face' or 'bring back the blue sky from the blown highlights.'

    Copy one of these to get started:

    General overexposure fix fix the overexposure and restore detail in the bright areas
    Portrait with blown out face recover the facial details lost to overexposure and restore natural skin tones
    Landscape with white sky fix the blown out sky and restore natural blue with cloud detail
    Harsh flash photography correct the harsh flash overexposure and even out the lighting on the subject
    3 more prompts
    Window light blowing out interior fix the overexposed window and restore the outdoor view while keeping the interior properly lit
    Washed out product photo recover the product details lost to overexposure and restore true colors
    Backlit subject with bright background fix the overexposed background while keeping the subject properly exposed
  3. Gere e revise

    Check that highlights now show detail instead of pure white. Zoom to 100% to verify skin tones look natural, not gray or muddy. The recovered areas should blend seamlessly with properly exposed regions.

  4. Refine with markers if needed

    If specific bright spots still need work while others look good, tap markers on those areas and regenerate with a focused prompt like 'fix just this bright spot on the forehead.' This is optional - most overexposure fixes work without markers.

    Tip: Markers help when you have mixed exposure: properly lit areas you want to keep and blown areas you want to fix.
Try it free

Fix Overexposed Photo

Upload photo to fix overexposed photo

Free • Results in 30 seconds • No signup

Release to upload

Grátis • Sem cadastro

See it in action

Beach portrait with severely overexposed face, blown highlights on forehead and cheeks
Before
->
Same portrait with facial details restored and natural skin tones recovered
After

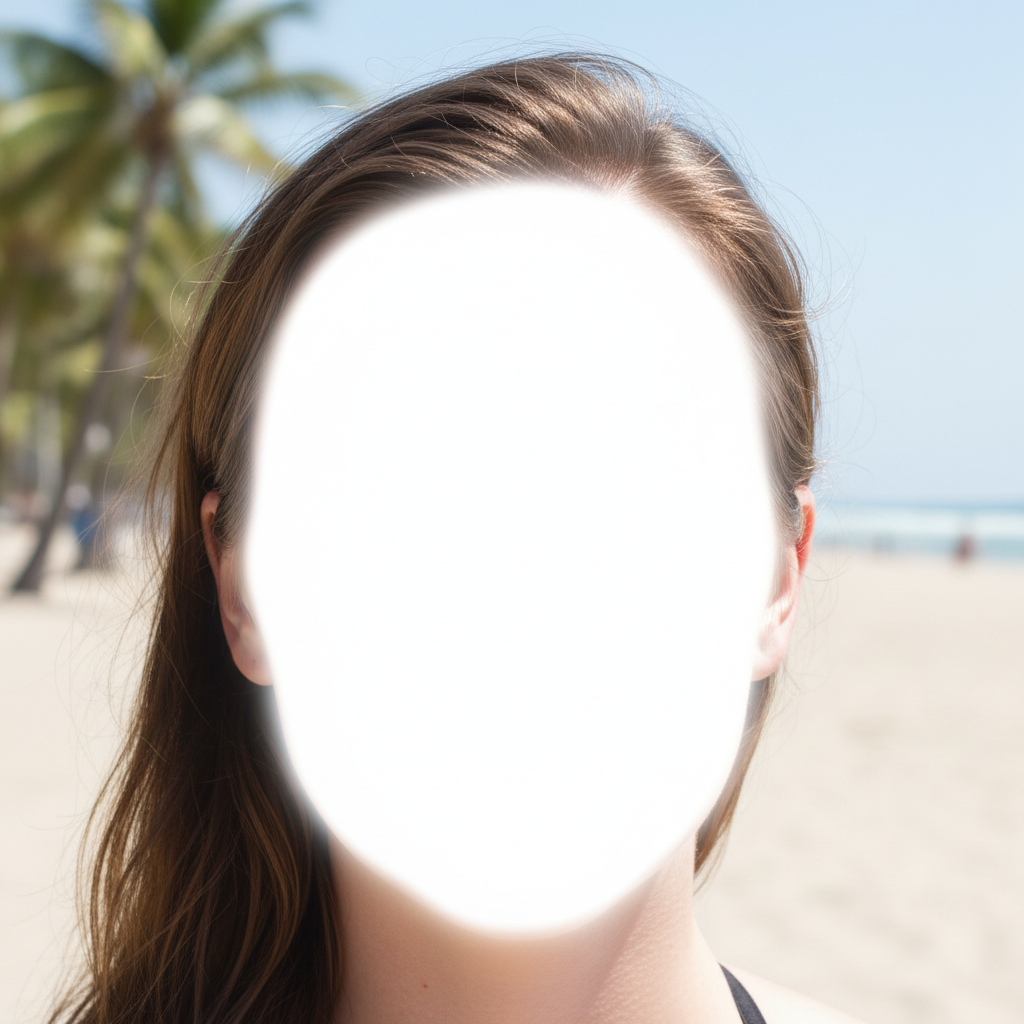
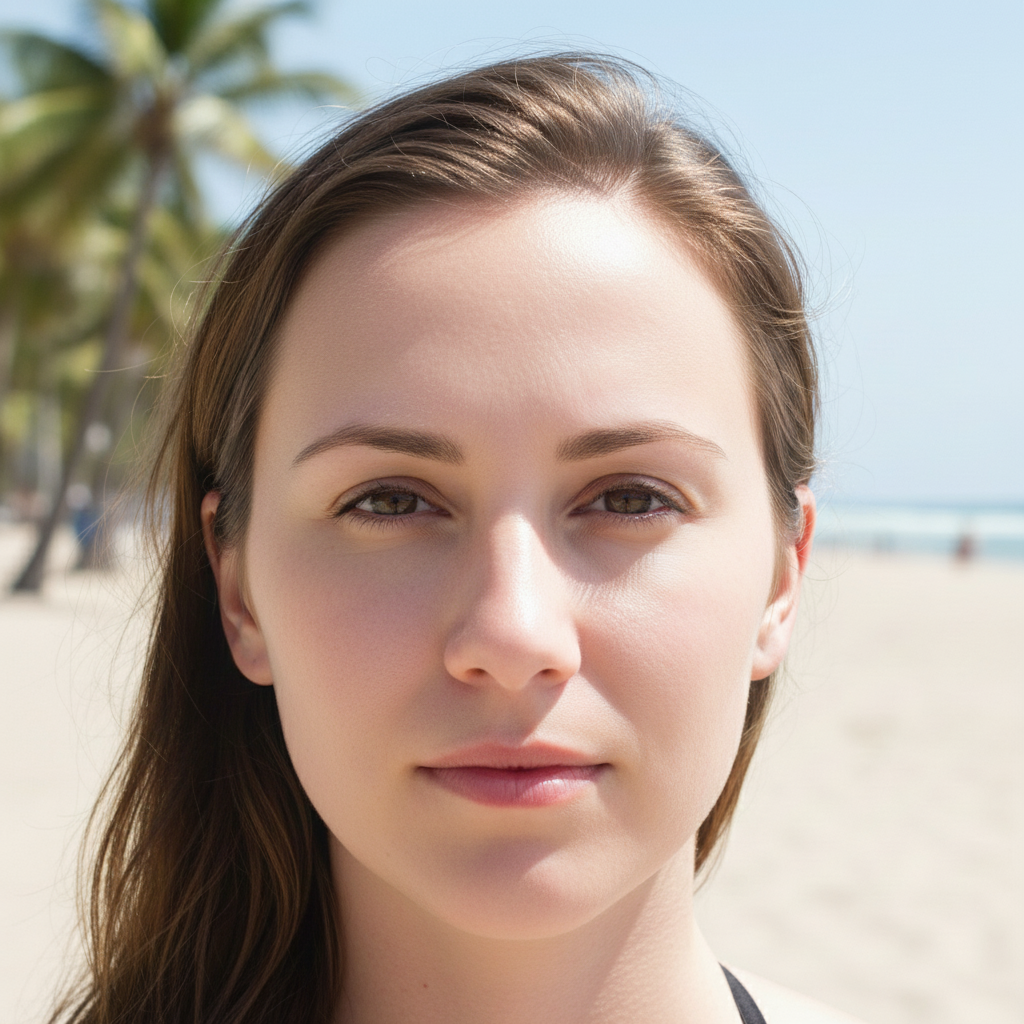
Beach portrait with blown highlights

Bright sunlight washed out the subject's face and hair. One prompt restored all the facial detail.

Prompt: fix the overexposure and restore detail in the bright areas of the face and hair
Living room interior with window blown out to pure white, no outdoor detail visible
Before
->
Same room with window showing trees and blue sky, balanced exposure throughout
After

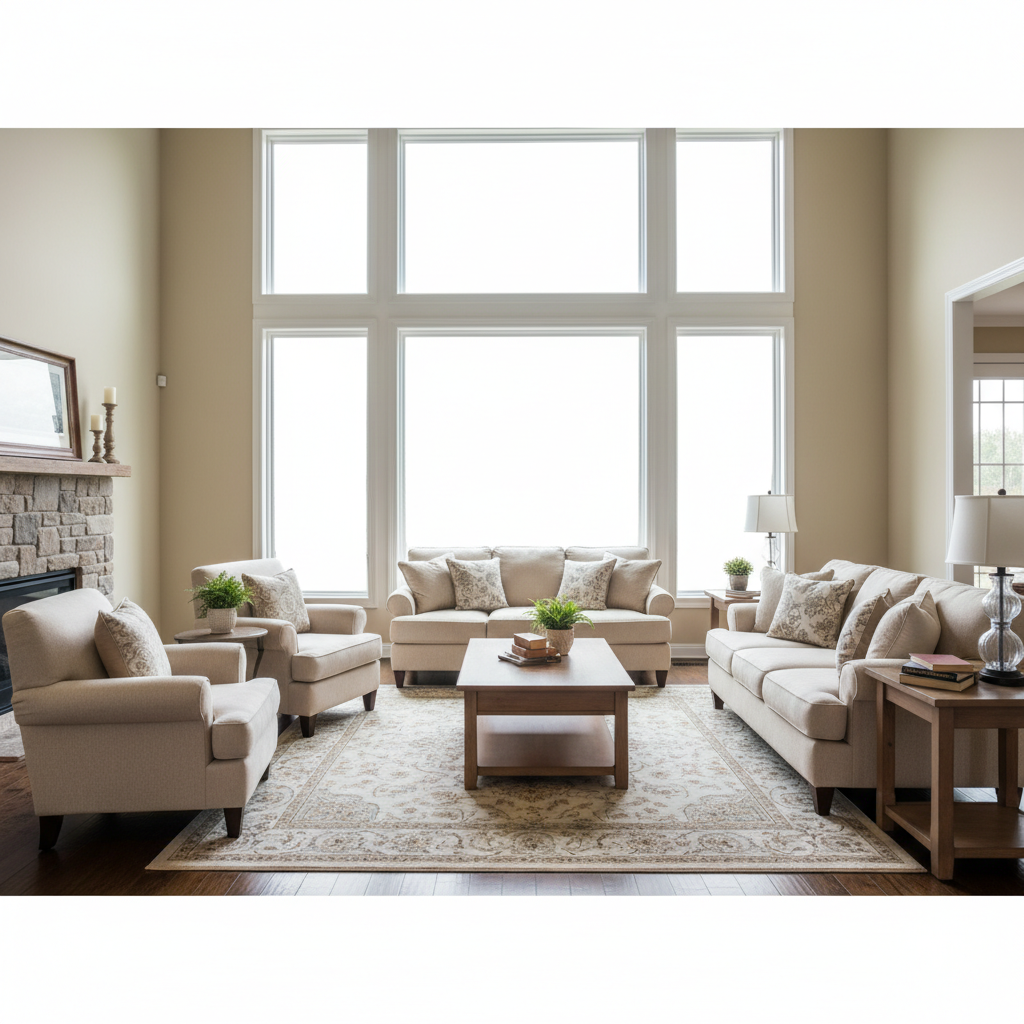
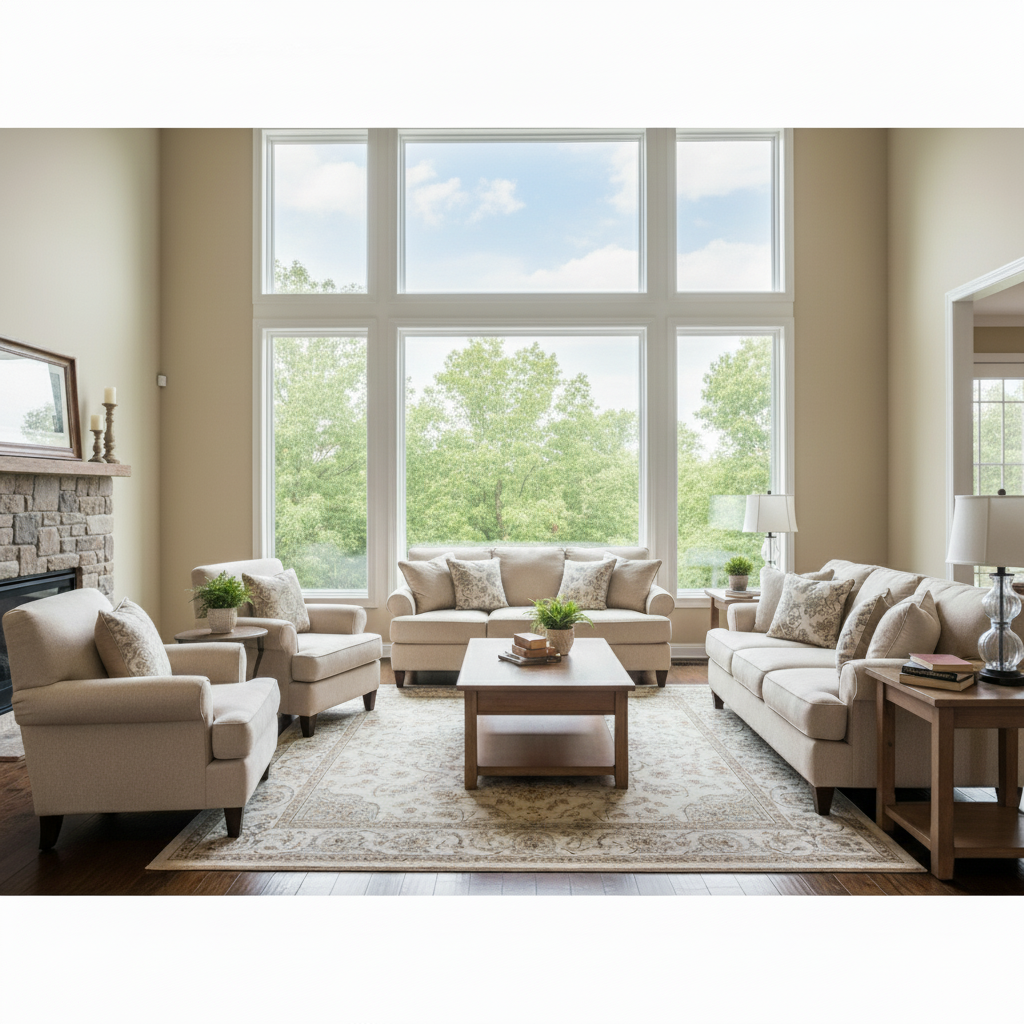
Interior shot with white-out window

The bright window turned completely white, hiding the outdoor view. AI recovered the scenery.

Prompt: fix the overexposed window and restore the outdoor view with trees and sky
White ceramic vase with overexposed highlights bleeding into white background
Before
->
Same vase with clear edges, visible texture, and properly defined shape
After

Product photo with washed out details

Studio lighting was too harsh, losing product texture. Fixed with natural detail restoration.

Prompt: recover the product details lost to overexposure and restore the true texture and colors

If something looks off

Recovered highlights look gray or muddy instead of natural

Why: The AI reduced brightness but didn't restore proper color. Overexposure destroys color information, so the AI needs guidance.

Try: fix the overexposure and restore natural, vibrant colors in the recovered areas

Tip: Specify the color you want: 'restore natural skin tones' or 'bring back the blue sky' gives better results than just 'fix overexposure.'

The whole image got darker, not just the blown areas

Why: The AI interpreted 'fix overexposure' as a global adjustment rather than targeting specific blown highlights.

Try: recover detail only in the pure white overexposed areas while keeping the rest of the image at its current brightness

Tip: Being specific about 'only the blown areas' or 'just the white spots' prevents unwanted global changes.

Some bright areas still look blown out after the fix

Why: Extremely overexposed areas (pure white) have no recoverable detail. The AI can estimate what should be there, but severely blown areas need multiple passes.

Try: continue recovering detail in the remaining bright spots, especially on the [specific area]

Tip: For severely overexposed photos, two passes often work better than one: first pass gets 80%, second pass refines the rest.

AI changed the wrong area or something I didn't want changed

Why: The AI couldn't determine exactly which area you meant from description alone. This happens with ambiguous requests or photos with multiple bright areas.

Try: Tap a marker on the specific bright area you want to fix, then regenerate with the same prompt

Tip: Markers tell the AI 'I mean THIS bright spot specifically.' Use them when you have both intentional highlights (like catchlights in eyes) and unwanted overexposure.

Fixed areas don't blend well with the rest of the photo

Why: The recovered highlights have different color temperature or contrast than surrounding areas, creating visible edges.

Try: fix the overexposure and blend the recovered areas seamlessly with the surrounding tones

Tip: Adding 'seamlessly blend' or 'match the surrounding lighting' helps the AI create natural transitions.

Quick answers

Do I need to mark the bright areas before describing?

No! Basta descrever what you want: 'fix the overexposure and restore detail in the bright areas.' The AI automatically identifies blown highlights. Only use markers when you need precision - like fixing one bright spot while keeping another intentionally bright (such as catchlights in eyes).

Can AI recover detail from completely white areas?

Partially. When a photo area is pure white (255,255,255), the original detail is gone - the camera didn't record it. However, the AI can intelligently estimate what should be there based on surrounding context. Skin texture, sky gradients, and fabric patterns can often be convincingly reconstructed, though the result is an estimation, not recovery of original data.

Why does my fixed photo look flat or low contrast?

Exposure correction can reduce overall contrast. After fixing overexposure, you may want a second edit: 'enhance the contrast and make the colors more vibrant' to restore punch to the image. The two-step approach often gives better results than trying to do both at once.

Is fixing overexposure the same as HDR?

Similar goal, different approach. HDR combines multiple exposures to capture full dynamic range. AI exposure correction works from a single photo by estimating lost highlight detail. The AI approach is more convenient (works on any photo) but HDR from multiple exposures captures actual data rather than estimates.

Will this work on RAW files?

EditThisPic works with JPG, PNG, and WebP. RAW files need to be converted first. However, if you have the RAW, consider recovering highlights in your RAW processor first - RAW files contain more highlight data than JPGs. Use EditThisPic for JPGs where traditional recovery has failed.

How much does EditThisPic cost?

You get 1 free edit per week — no account needed. After that, credit packs start at $1.99 for 3 edits. Monthly plans start at $4.99/mo for 15 edits with unused credits rolling over. All edits are full resolution with no watermark.

How EditThisPic compares

Tool Free tier Per-edit cost AI-powered Signup required
EditThisPic 1 free edit/week From 27¢ Yes (Gemini) No
Adobe Photoshop 7-day trial ~$22.99/mo subscription Yes (Firefly) Yes
Remove.bg Low-res preview only ~20¢/HD edit Background only Yes (for HD)
Canva Basic tools only $15/mo Pro for AI Partial (Pro tier) Yes

Ready to fix your overexposed photo?

Gratis to try. Sem cadastro required.

1 free edit included·Credit packs from $1.99