How to Fix a Scratched Old Photo
To fix a scratched photo, scan it and upload to EditThisPic. Describe the damage: 'remove the scratches' or 'fix the scratches on this old photo.' The AI identifies scratch marks and reconstructs the image underneath, filling in the missing detail seamlessly. Free, no signup required.
Rescuing Scratched Photos Without Photoshop
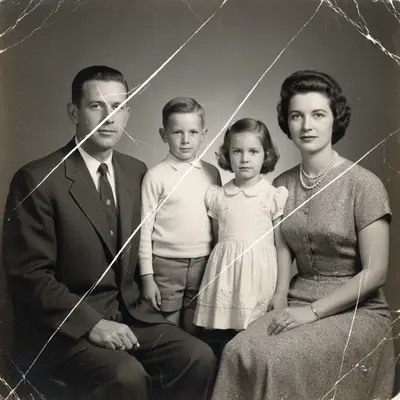
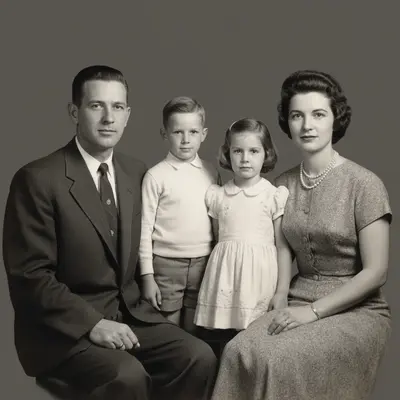
Scratched photos are one of the most heartbreaking forms of image damage — a single line across a face can ruin an irreplaceable memory. Traditionally, fixing scratches required hours of careful clone-stamping in Photoshop, painstakingly painting over each mark pixel by pixel. AI changes that completely. It recognizes scratch patterns — their linear shape, their inconsistency with the surrounding image — and fills them in with reconstructed detail that matches the original.
Types of Photo Scratches AI Can Fix
Surface scratches appear as thin white or light-colored lines running across the image — these are the easiest to fix because the underlying emulsion is mostly intact. Deep scratches that gouge through to the base layer show up as bright white lines with rough edges. Scuff marks create hazy, semi-transparent patches. Fingernail scratches leave short, curved marks. AI handles all of these by analyzing the intact image around the damage and predicting what belongs in the scratched area.
Common Photo Damage AI Can Repair
- Fine scratches from sliding prints across surfaces
- Deep scratches from handling or storage in stacks
- Creases and fold lines from bent photos
- Scuff marks from rubbing against other prints
- Light scratches from old photo albums with adhesive pages
- Scanning artifacts where dust settled in scratches
How to Scan Scratched Photos for Best Results
The quality of your scan matters. Use a flatbed scanner at 300-600 DPI — higher resolution gives the AI more data to work with around the scratches. Clean the scanner glass and the photo surface with a microfiber cloth first. Dust in scratches creates dark lines on the scan that are harder for AI to fix than the white scratch marks themselves. If you're using a phone camera instead of a scanner, shoot in bright, even lighting and get as close as possible without distortion.
Tips for the Best Scratch Removal
For light scratches, 'remove the scratches' is enough. For heavy damage, be specific: 'remove the deep scratches across the face and restore the skin detail.' If the photo has both scratches and fading, fix scratches first — color correction after scratch removal produces cleaner results. For photos with many small scratches, 'clean up all the surface scratches and restore the photo' works better than addressing each one individually.
Step-by-Step Guide
Scan Your Scratched Photo
Use a flatbed scanner at 300+ DPI or take a well-lit phone photo of the print. Clean the surface first to avoid adding dust artifacts to the scan.
Upload to EditThisPic
Drop your scanned image into EditThisPic. Any format works — JPEG, PNG, TIFF, WebP. Higher resolution scans give the AI more to work with.
Describe the Damage
Type what needs fixing: 'remove the scratches,' 'fix the scratched face,' or 'clean up all the surface damage on this old photo.' Mention specific areas if the damage is concentrated.
Review and Refine
Use the before/after slider to check each scratched area. If some scratches remain, ask for 'remove the remaining scratch on the left side' or 'clean up the marks I can still see.' Multiple passes can clear stubborn damage.
Frequently Asked Questions
Fix Your Scratched Photo Now
Upload your damaged scan and let AI remove the scratches. Free, instant results.
Drop your photo to start editing
"Remove the scratches"
Release to upload