AI Photo Editor for Dermatology Before & After Photos
Last updated
Consistent, professional treatment documentation without a photo studio.
Drop your photo here
"correct the lighting to be even and consistent, natural skin tones, clinical documentation quality"
Release to upload

Built for Dermatology Professionals
Dermatology depends on visual proof. But inconsistent lighting between before and after shots undermines your treatment documentation. Professional clinical photography setups cost thousands. EditThisPic lets you standardize lighting, correct color casts, and present treatment results accurately with the photos you already take.
How to AI Photo Editor for Dermatology Before & After Photos
-
Upload your photo
Drop your dermatology photo into EditThisPic. JPG, PNG, WebP up to 7MB.
-
Describe your edit
Type what you want — the AI understands dermatology photography needs.
-
Review the result
Check that the edit looks natural and accurately represents your space or subject.
Copy-Paste Prompts for Dermatology
correct the lighting to be even and consistent, natural skin tones, clinical documentation quality
Consistent lighting is the most important factor in before/after credibility
remove the yellow color tint and show accurate natural skin tones under neutral lighting
Accurate skin tones are essential for documenting treatment progress
soften the harsh flash, reduce overexposure while keeping skin detail visible
Harsh flash hides the subtle improvements you want to showcase
make the background a clean neutral color, keep the skin area exactly as is
Neutral backgrounds keep focus on the treatment area
Show 2 more prompts
enhance visibility of skin texture and detail without changing color or tone
Subtle treatment improvements become visible with better detail
brighten this clinical photo while maintaining accurate skin tones and treatment documentation
Dark photos hide treatment results — brighten without color shifting
Real Dermatology Photo Transformations
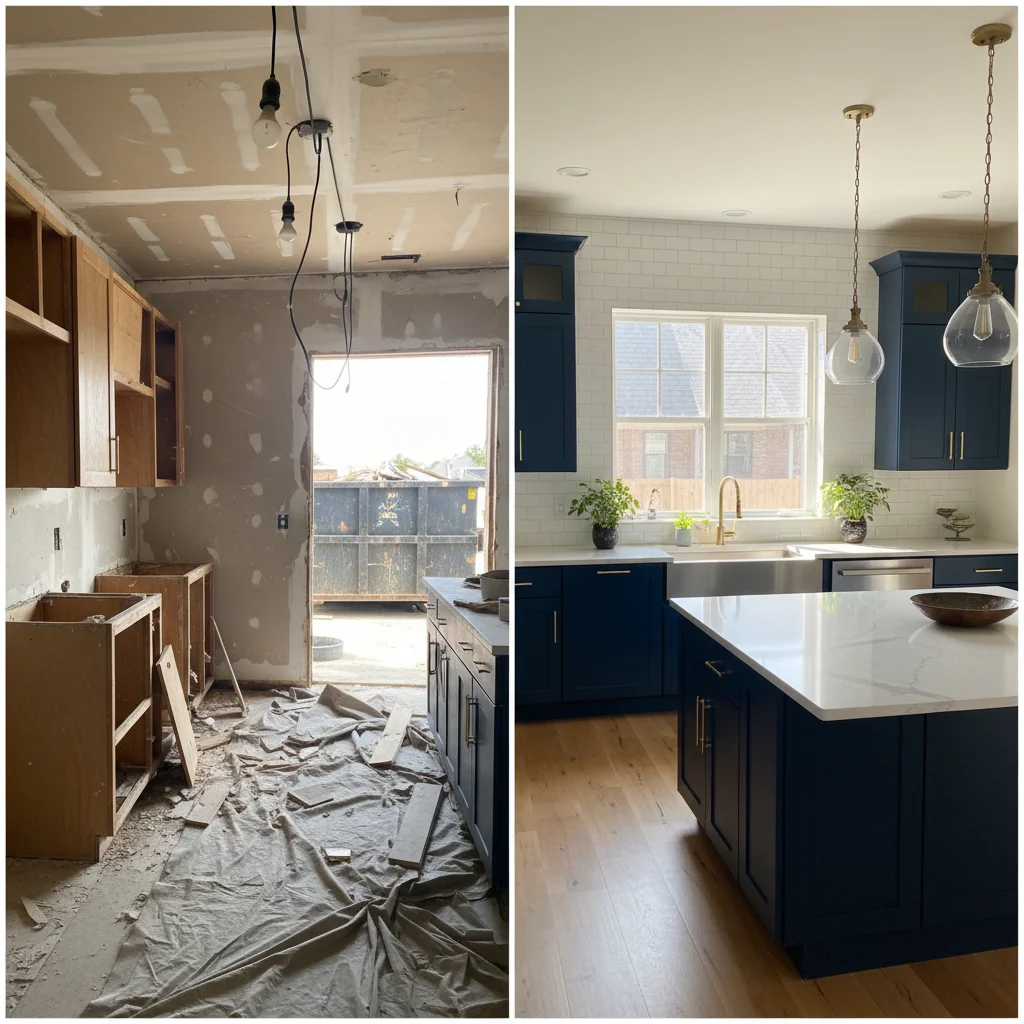
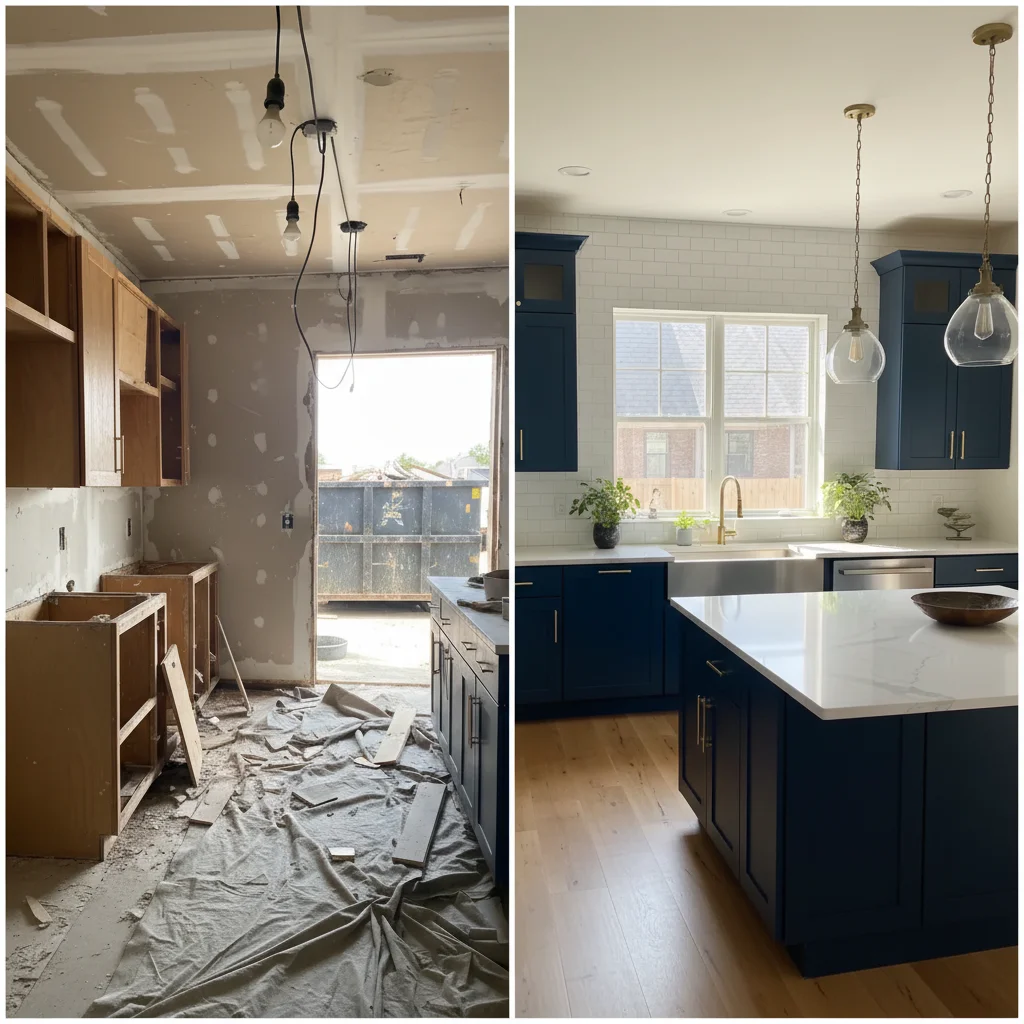
Before/after lighting standardized
Two dermatology photos taken in different lighting conditions corrected for consistent clinical presentation.
correct the lighting to be even and consistent, natural skin tones, clinical documentation quality

Color-corrected skin documentation
Clinical skin photo with strong yellow cast corrected to show accurate natural skin tones.
remove the yellow color tint and show accurate natural skin tones under neutral lighting
Common Issues
Clinical lighting makes everything look harsh
Why: Fluorescent office lights create unflattering cold tones and shadows
Warm, professional lighting builds patient trust and comfort
Before/after comparison isn't clear enough
Why: Different lighting or angles between shots make comparison difficult
Consistent lighting is more important than perfection for before/after pairs
Background clutter or equipment visible
Why: Clinical settings have monitors, wires, and equipment that distract
Focus attention on the subject by keeping only relevant context in frame
Colors look inaccurate under exam lights
Why: Medical exam lights and mixed light sources distort true colors
Color accuracy matters for medical documentation — be specific about what's off
Frequently Asked Questions
Is it ethical to edit dermatology before/after photos?
Standardizing lighting and color balance is standard clinical practice. The goal is accurate representation, not enhancement. Never edit the actual treatment area — only fix environmental inconsistencies like lighting, color casts, and backgrounds.
Can AI match lighting between two different photos?
Yes. Upload each photo separately and use the same prompt to standardize. 'Correct lighting to even clinical standard with natural skin tones' applied to both creates visual consistency.
Will this change the actual skin condition shown?
The prompts are designed to fix lighting and color, not alter skin features. Always verify the edited photo still accurately represents the treatment area before using in documentation.
What about HIPAA compliance?
EditThisPic processes images on-device and via API without storing them permanently. However, always follow your practice's HIPAA protocols for any patient images. Consider de-identifying photos before uploading.
Can I use these for my website gallery?
Yes, once lighting is standardized and you have proper patient consent. Consistent clinical photos build credibility in your treatment gallery.
Is this really free?
Yes — you get 1 free edit per week, no account needed. For processing multiple documentation photos, plans start at $4.99/month.
Popular use cases
Professional clinical documentation in seconds
Consistent before/after photos. Free to try.
Upload Your PhotoTrusted by 15,000+ users