Free • No signup Open Editor

Enhance Lighting from Photo

Just describe the lighting you want. No sliders, no curves—the AI figures it out.

Type 'improve the lighting and brighten the shadows' or 'balance the exposure so faces are visible.' EditThisPic's AI analyzes your photo and fixes lighting problems in 15-30 seconds. No manual adjustments, no selecting dark areas. Works on backlit portraits, dim indoor shots, and harsh shadow situations. Free, no signup needed.

Person silhouetted against bright window, face in complete shadow
Before
Same scene with balanced exposure, face visible and window not blown out
After

How it works

1

Upload your photo

Drop your underexposed or poorly-lit image into EditThisPic. JPG, PNG, and WebP up to 7MB work best. The AI can recover detail from surprisingly dark images, so don't delete those failed shots just yet.

⏱ Simple lighting fixes: 15-30 seconds. Complex backlighting or mixed lighting: may need 2-3 refinements over 1-2 minutes.
2

Describe the lighting you want

Type what you need: 'brighten the shadows and balance the exposure' or 'make the faces visible without blowing out the background.' Be specific about what's wrong. No need to select dark areas—the AI understands lighting problems.

💡 Mention specific areas if they matter: 'brighten the faces while keeping the window view intact' helps the AI prioritize correctly.

Copy one of these to get started:

General underexposed photo improve the lighting and brighten the shadows while keeping highlights natural
Backlit portrait (face in shadow) brighten the face and balance the exposure so the subject is clearly visible without losing the background
Dim indoor shot without flash enhance the indoor lighting to look naturally well-lit, reduce noise, and bring out detail in the shadows
Harsh midday shadows on face soften the harsh shadows on the face and balance the contrast so features are evenly lit
3 more prompts
Mixed lighting (window + indoor) balance the mixed lighting so both the window area and indoor areas have proper exposure and natural color
Event photo in dark venue brighten this dark venue photo, make faces visible, reduce noise, and maintain the ambient mood of the lighting
Sunset/golden hour with dark subject brighten the subject in the foreground while preserving the warm sunset colors and golden hour atmosphere
3

Generate and review

Tap generate and examine the result. Check that shadow detail is recovered without looking artificial. Verify skin tones look natural and highlights aren't blown out. Compare before and after at full zoom.

💡 Look at skin tones first—if faces look natural, the rest usually follows. Unnatural skin is the quickest way to spot over-processing.
4

Refine with markers if needed

If certain areas need more attention—like a face that's still too dark while the rest looks good—tap markers on those spots and regenerate with a more specific prompt. This precision step is optional for most lighting fixes.

💡 Markers help when you need different treatment for different areas. 'Brighten just the marked areas' gives you surgical precision.
Try it free
"My indoor family photos were always too dark. Now I just type 'brighten the faces and balance the exposure' and they look like a pro took them." @MomPhotographer_Lisa

See it in action

Person silhouetted against bright window, face in complete shadow
Before
Same scene with balanced exposure, face visible and window not blown out
After

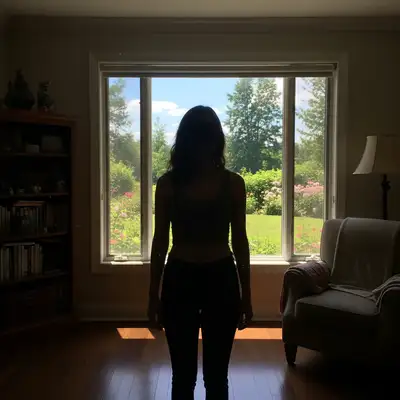
Backlit portrait rescue

Subject standing in front of a bright window, face completely in shadow. One prompt revealed the face while keeping the window view.

Prompt: brighten the face and balance the exposure so the subject is clearly visible without losing the bright window behind them
Dark living room photo with faces barely visible
Before
Same family photo with natural-looking bright lighting and visible faces
After

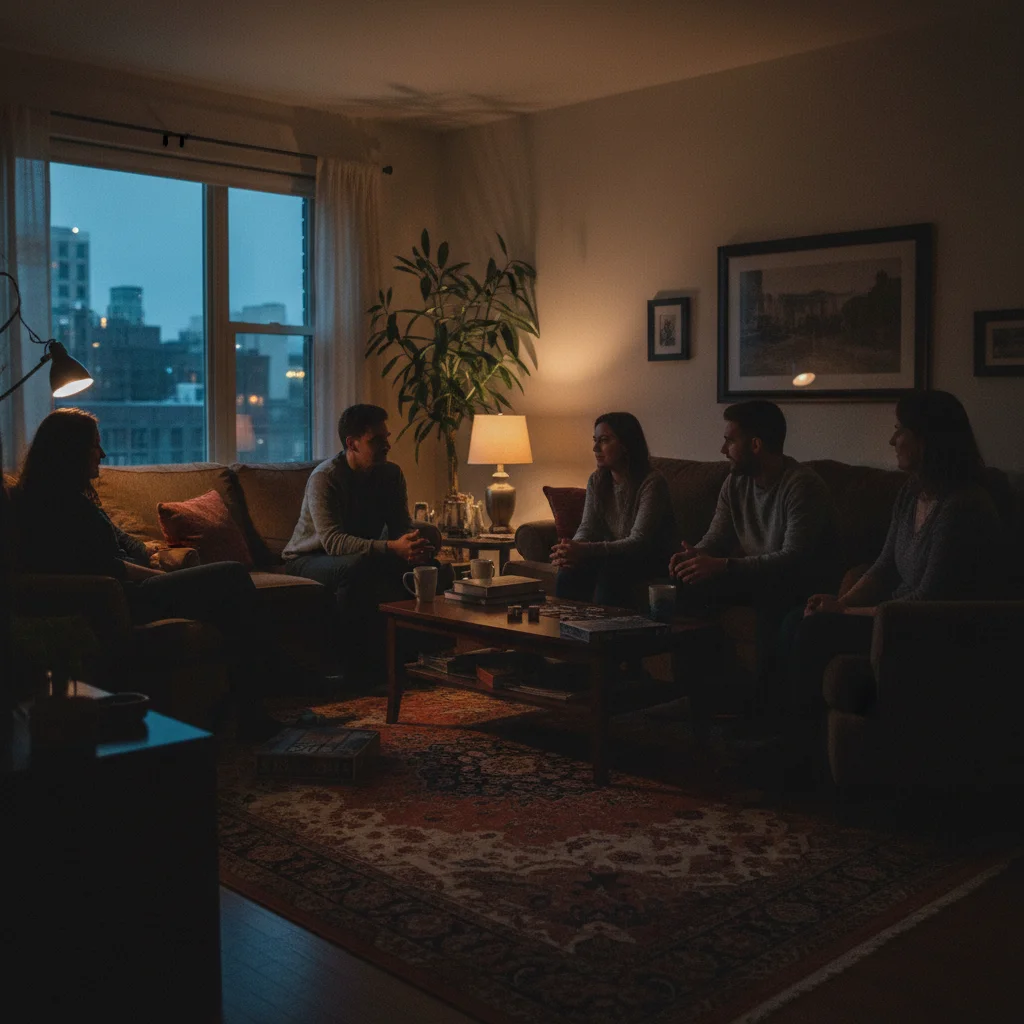
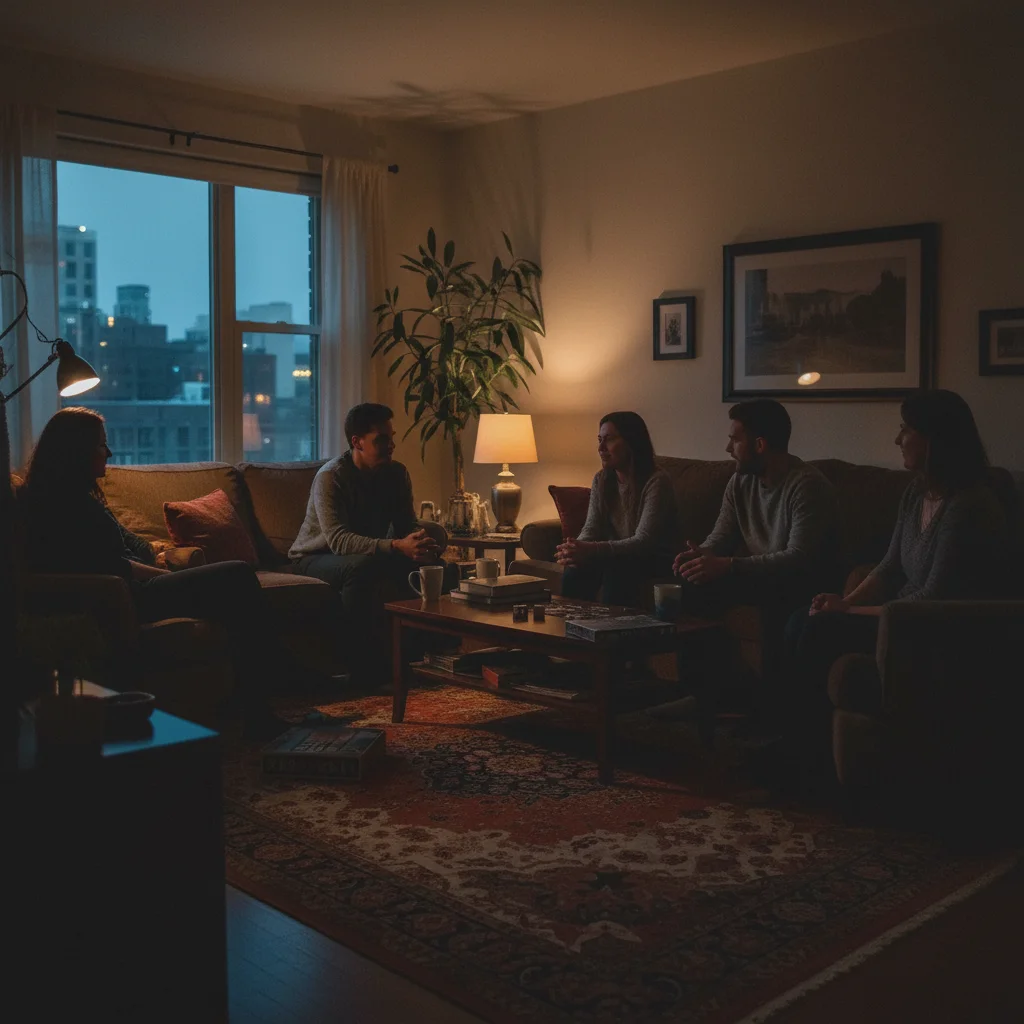
Dark indoor family photo

Living room gathering shot without flash. Dim lighting made everyone's faces muddy and hard to see. AI brightened naturally.

Prompt: enhance the indoor lighting to look naturally well-lit, brighten faces, and reduce the noise in shadow areas
Portrait with harsh shadows creating dark areas under eyes and nose
Before
Same portrait with softened, balanced facial lighting
After

Harsh shadow correction

Outdoor portrait at noon with unflattering dark shadows across the face. AI softened shadows while keeping natural dimension.

Prompt: soften the harsh shadows on the face and balance the contrast so facial features are evenly lit while maintaining natural depth

If something looks off

AI changed the wrong area or affected areas I wanted to keep

Why: The AI interpreted your lighting request too broadly, applying changes everywhere instead of where you needed them.

Try: Tap a marker on the specific area you want brightened, then regenerate with 'brighten just the marked areas'

💡 Markers tell the AI 'I mean THIS area specifically.' Use them when you need selective lighting adjustment.

Photo looks over-processed or HDR-fake

Why: The AI pushed the enhancement too far, revealing too much detail in shadows while compressing highlights unnaturally.

Try: improve the lighting naturally without over-processing, maintain realistic contrast and shadow depth

💡 Adding 'naturally' and 'realistic' signals the AI to use a lighter touch.

Skin tones look unnatural after brightening

Why: Brightening shadows can shift color balance, especially in mixed lighting situations where color casts get amplified.

Try: improve the lighting while preserving natural skin tones and accurate colors

💡 If skin still looks off, add 'correct any color cast on the faces' to your prompt.

Highlights are blown out (pure white areas)

Why: The AI prioritized shadow recovery over highlight protection. Some bright areas lost detail.

Try: brighten the shadows while protecting the highlights from clipping, keep detail in bright areas

💡 Mentioning 'protect highlights' tells the AI to be careful with already-bright regions.

Noise and grain increased in shadow areas

Why: Brightening dark areas amplifies the noise that was hidden in the shadows. This is especially common with phone photos in low light.

Try: brighten the shadows and apply noise reduction to keep the image clean and smooth

💡 For very noisy photos, try 'significant noise reduction in shadow areas' for stronger cleanup.

Lost the mood or atmosphere of the original

Why: The AI made the photo technically correct but removed the intentional dim/moody quality you wanted to keep.

Try: brighten just enough to see faces clearly while maintaining the moody atmospheric lighting

💡 Be explicit about mood: 'keep the romantic dim atmosphere' or 'preserve the cozy evening feel.'

Quick answers

Do I need to mark dark areas before describing?

No! Just describe what you want: 'brighten the shadows' or 'improve the lighting.' The AI analyzes your entire photo and identifies what needs fixing. Only use markers when you need selective adjustment—like brightening just one person's face while leaving the rest unchanged.

Can the AI recover detail from very dark photos?

Yes, the AI can reveal surprising detail from underexposed images. However, extremely dark photos (near-black) may have noise issues when brightened. For best results, type 'brighten and reduce noise' together. Photos shot in RAW before converting have more recoverable data than heavily compressed JPEGs.

How do I fix backlit photos where the face is in shadow?

Type 'brighten the face and balance the exposure without losing the background.' The AI understands backlighting and will lift the shadows on faces while keeping the bright background from blowing out. This is one of the most common lighting fixes and usually works on the first try.

Will enhancing lighting make my photo look fake or over-edited?

Not if you describe what you want naturally. Use prompts like 'improve the lighting naturally' or 'brighten while keeping realistic shadows.' Avoid asking for extreme changes. If results look over-processed, regenerate with 'more subtle enhancement' or 'maintain natural contrast.'

Can I enhance lighting for just part of the photo?

Yes. Either describe the specific area in your prompt—'brighten just the faces' or 'improve lighting on the subject only'—or tap markers on the areas you want adjusted and use 'brighten only the marked areas.' Markers give you precise control when description alone doesn't isolate the right region.

Ready to enhance your lighting?

Free to try. No signup required.

Try it free