Free • No signup Create Double exposure · Free

Double Exposure Photo Effect

Upload a portrait and a landscape — the AI blends them into a cinematic double exposure in seconds.

Clean front-facing portrait on white background, no double exposure applied yet
Photo 1
+
Dense green forest with tall trees and filtered sunlight used as second layer
Photo 2
Double exposure portrait with dense green forest blended through the face and hair
Result

Create Double Exposure Effect from Two Photos

Drop your photo here

or click to browse

Release to upload

Free • No signup

Popular use cases:
  • double exposure portrait
  • blend two photos
  • photo overlay effect
  • silhouette blend
  • combine portrait with landscape
  • multiple exposure effect
  • album cover double exposure
  • creative photo blend
  • face merged with landscape
  • double exposure social media
  • double exposure online free

1Your photo
+
2Reference
=
Result
Primary portrait photo for double exposure Your portrait
Landscape or texture reference image Reference image
Final double exposure blending portrait with landscape Result

"Create a double exposure blending this portrait with the landscape, soft cinematic blend"

Cost
Free No signup required
Time
Instant results in 15-30 seconds
Works on
Any device - browser, phone, tablet, desktop
Powered by
AI-powered photo editing
Scenario Prompt Time
create a double exposure blending this portrait with the forest reference, cool blue-green tones, dreamlike 20-30s
blend this silhouette with the sunset reference, warm amber tones, bold and graphic 20-30s
create double exposure album cover, desaturated, cinematic, fade to dark at bottom 30-45s
soft double exposure for Instagram, keep face visible at center, pastel warm tones 20-30s

How it works

  1. Upload your primary photo

    Drop your main image into EditThisPic — this is usually a portrait, silhouette, or close-up face. Clean, high-contrast subjects with a simple background work best for double exposure. JPG, PNG, WebP up to 7MB.

    Expect: Simple portrait blends: 20-30 seconds. Complex textures or detailed landscapes: may need 2-3 refinements to balance the blend correctly.
  2. Add your reference image

    Click '+ Add reference image' below the prompt to upload your second photo — the landscape, forest, cityscape, or texture you want blended in. This is the key step that enables the two-image double exposure workflow. Without it, the AI will generate the second layer from your description alone.

    Tip: High-contrast reference images — dramatic skies, dense forests, bold cityscapes — produce the most striking double exposure results.

    Copy one of these to get started:

    Double Exposure Photo Effect + Add reference image — make it look natural and professional
    Silhouette filled with a galaxy or starfield create a double exposure merging this silhouette with the starfield reference photo, keep the outline sharp and let the galaxy fill the figure, dark moody background, minimal grain
    Album cover with a cityscape create a double exposure album cover blending this portrait with the cityscape reference image, neon warm tones, the city lights filling the face and upper body, gritty and bold
    Soft dreamy portrait for social media create a soft double exposure for Instagram blending this portrait with the floral reference image, pastel warm tones, dreamy and ethereal, keep the face clearly visible at center
    3 more prompts
    Dramatic cinematic blend create a dramatic double exposure merging this portrait with the mountain reference image, desaturated with a cold blue grade, high contrast, cinematic wide feel
    Black and white fine art double exposure create a black and white double exposure blending this portrait with the forest reference image, convert to monochrome, high contrast with deep blacks, fine art photography style
    Seasonal autumn portrait create a double exposure blending this portrait with the autumn foliage reference image, warm orange amber and red tones, leaves filling the hair and shoulders, cozy seasonal mood
  3. Describe the blend

    Type how you want the two images merged: 'create a double exposure blending this portrait with the landscape, soft and cinematic' or 'merge the forest into the silhouette with a dreamlike, ethereal quality.' Specify opacity, color toning, or mood to guide the effect.

    Tip: Add color direction for more control: 'warm golden tones' or 'cool blue teal grade' to set the mood of the final blend.

    Copy one of these to get started:

    Double Exposure Photo Effect + Add reference image — make it look natural and professional
    Silhouette filled with a galaxy or starfield create a double exposure merging this silhouette with the starfield reference photo, keep the outline sharp and let the galaxy fill the figure, dark moody background, minimal grain
    Album cover with a cityscape create a double exposure album cover blending this portrait with the cityscape reference image, neon warm tones, the city lights filling the face and upper body, gritty and bold
    Soft dreamy portrait for social media create a soft double exposure for Instagram blending this portrait with the floral reference image, pastel warm tones, dreamy and ethereal, keep the face clearly visible at center
    3 more prompts
    Dramatic cinematic blend create a dramatic double exposure merging this portrait with the mountain reference image, desaturated with a cold blue grade, high contrast, cinematic wide feel
    Black and white fine art double exposure create a black and white double exposure blending this portrait with the forest reference image, convert to monochrome, high contrast with deep blacks, fine art photography style
    Seasonal autumn portrait create a double exposure blending this portrait with the autumn foliage reference image, warm orange amber and red tones, leaves filling the hair and shoulders, cozy seasonal mood
  4. Generate and review

    Check that the subject silhouette is clearly readable within the blended scene, and that the reference image fills the portrait naturally. Verify the tonal balance — neither image should completely overpower the other.

Try it free

Create Double Exposure Effect from Two Photos

Drop your photo here

or click to browse

Release to upload

Free • No signup

"I blended my portrait with a forest photo and got a stunning double exposure for my album cover. Took 20 seconds, no Photoshop needed." @PortraitsByMira

See it in action

Clean front-facing portrait on white background, no double exposure applied yet
Main Photo
Dense green forest with tall trees and filtered sunlight used as second layer
Reference
Double exposure portrait with dense green forest blended through the face and hair
Result

Portrait merged with dense forest

A clean close-up portrait blended with a forest photo. The trees and foliage fill the face and hair to create a nature-identity double exposure.

Prompt: create a double exposure blending this portrait with the forest reference image, the trees filling the face softly, cool blue-green tones, dreamlike and cinematic
High-contrast black profile silhouette on white background ready for double exposure
Main Photo
Dramatic mountain range at sunset with warm orange and amber sky used as reference layer
Reference
Double exposure silhouette filled with dramatic mountain sunset in warm amber and orange tones
Result

Silhouette blended with a mountain sunset

A sharp profile silhouette merged with a dramatic mountain sunset. The sky and mountain peaks fill the figure with warm amber and orange light.

Prompt: create a double exposure blending this silhouette with the mountain sunset reference image, warm amber and orange tones filling the figure, the horizon line running through the shoulder, bold and graphic

Detailed Guides by Scenario

📷

Portrait Art & Fine Photography

Double exposure is a classic fine-art technique. Blend a face or figure with a natural scene to create a photograph that feels painterly and conceptual.

Common Scenarios

  • Portrait merged with a dense forest for a nature-identity concept
  • Face blended with ocean waves for a water-reflection effect
  • Silhouette overlaid with a starfield or galaxy texture
  • Black-and-white portrait fused with a color landscape

Best Practices

  • Use a high-contrast portrait where the subject is clearly separated from the background
  • Landscapes with bright areas in the sky fill face shadows naturally
  • Ask for 'soft blend' for dreamy results or 'hard blend' for graphic impact
  • Specify if you want color or black-and-white output
Portrait merged with dense forest create a double exposure blending this portrait with the forest reference image, the trees filling the face with a soft, dreamlike quality, cool blue-green tones
Silhouette filled with galaxy texture create a double exposure merging the silhouette with the starfield reference photo, keep the outline sharp and let the galaxy fill the figure, dark cinematic mood
📷

Album Covers & Music Artwork

Double exposure is one of the most popular techniques for album artwork. Merge an artist portrait with a thematic landscape to create mood and identity.

Common Scenarios

  • Artist silhouette merged with a misty mountain range for an indie folk album
  • Band photo blended with a burning cityscape for a rock aesthetic
  • Face overlaid with ocean horizon for an ambient electronic release
  • Portrait merged with abstract smoke or light painting textures

Best Practices

  • Front-facing or profile portraits produce the most graphic, readable album art
  • Match the landscape mood to the genre — forests for folk, cities for hip-hop, oceans for ambient
  • Request a specific color grade to set the palette: 'warm amber', 'cold steel blue', 'desaturated film look'
  • For text readability, ask for a gradient fade at the bottom: 'fade the blend to dark at the bottom for title text'
Indie folk album cover with mountains create an album cover double exposure: blend this portrait with the misty mountain reference image, cinematic wide ratio, desaturated with a cold blue teal grade, dramatic and moody
Urban hip-hop or pop album aesthetic merge this artist photo with the cityscape reference image using double exposure, neon-lit warm orange tones, gritty urban feel, the city lights filling the face and shoulders
📷

Social Media & Creative Content

Double exposure photos stand out in social feeds. Use the technique for profile pictures, editorial posts, creative self-portraits, and content that catches the eye instantly.

Common Scenarios

  • Profile picture blended with a favorite travel destination
  • Self-portrait merged with a seasonal landscape (autumn leaves, snow)
  • Creative editorial for Instagram using a bold color-contrast blend
  • Promotional visual for an event: speaker portrait merged with venue exterior

Best Practices

  • Square or vertical crops work best for Instagram — mention 'square crop' or 'portrait ratio' in the prompt
  • High-saturation reference images produce more eye-catching social content
  • For profile pictures, keep the face clear and centered: 'preserve face visibility at the center'
  • Seasonal effects: 'blend with autumn foliage reference, warm orange and red tones'
Seasonal autumn self-portrait for social create a double exposure for an Instagram post blending this portrait with the autumn forest reference image, warm orange and amber tones, the leaves filling the hair and shoulders naturally
Travel-themed profile picture create a soft double exposure profile photo blending this face with the ocean reference image, cool blue tones, dreamy and ethereal, keep the face clearly readable at center

If something looks off

Subject silhouette is not readable in the final blend

Why: The reference image is too bright or too detailed and is overwhelming the primary subject, making the portrait disappear into the background layer.

Try: create a double exposure keeping the subject outline clearly visible and defined, reduce the reference image opacity to 60%, preserve the face structure

Tip: High-contrast primary portraits — especially dark hair against light backgrounds — hold up much better in blends. Try a profile or silhouette if a full portrait disappears.

The two images look pasted together rather than blended

Why: The AI treated the reference image as a separate layer rather than blending them with multiply or screen blend modes, creating a hard composite instead of a double exposure.

Try: create a true double exposure effect blending both images together with a screen blend, the scenes naturally interweaving rather than layered on top of each other

Tip: Adding 'screen blend' or 'multiply blend mode' to your prompt signals the exact photographic technique you want.

Colors look muddy or clashing between the two images

Why: When two images with very different color temperatures are blended, they compete instead of harmonizing, producing murky or mixed tones.

Try: create a double exposure and convert both layers to a unified cool blue-green tone before blending, desaturate slightly for a cinematic result

Tip: Specifying a single color grade — 'cool blue', 'warm amber', or 'black and white' — forces the AI to harmonize both images under one palette.

AI changed the wrong area or something I didn't want changed

Why: The AI couldn't determine exactly which area you meant from description alone. This happens with ambiguous requests.

Try: Tap a marker on the specific area you want to change, then regenerate with the same prompt

Tip: Markers tell the AI 'I mean THIS area specifically.' Use them when description alone doesn't give enough precision for the blend region.

Reference landscape is barely visible in the result

Why: The primary portrait is too dominant and the blend ratio is skewed entirely toward the main image, leaving the reference layer nearly invisible.

Try: create a double exposure with the reference landscape visible at 50-60% opacity blended through the portrait, both images equally contributing to the final result

Tip: Explicitly stating an opacity ratio gives the AI a clear target for how much each layer should show.

Background outside the subject is also blending when I only want the figure to blend

Why: The AI applied the blend across the entire frame instead of isolating the subject silhouette, so the background behind the person is also receiving the landscape texture.

Try: create a double exposure applying the landscape blend only within the subject silhouette, keep the background outside the figure clean and dark

Tip: Use a marker on the background area and add 'keep background outside subject clean and unblended' to constrain where the effect applies.

Quick answers

Do I need to mark anything before creating a double exposure?

No. Just upload your primary photo, click '+ Add reference image' to add the second photo, and describe the blend: 'create a double exposure blending this portrait with the landscape, soft cinematic quality.' The AI handles the entire blend. Use markers only if you need to constrain which region of the image the blend applies to — for example, to keep the background outside the subject clean.

How do I create a double exposure from two photos online for free?

Upload your primary photo (usually a portrait or silhouette) to EditThisPic, then click '+ Add reference image' to upload your second photo — a landscape, forest, cityscape, or texture. Type what blend you want: 'create a double exposure merging both images with warm amber tones.' The result downloads in seconds, completely free with no watermark and no account needed.

What types of photos work best for double exposure?

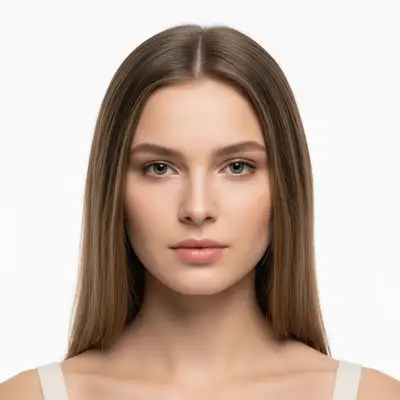
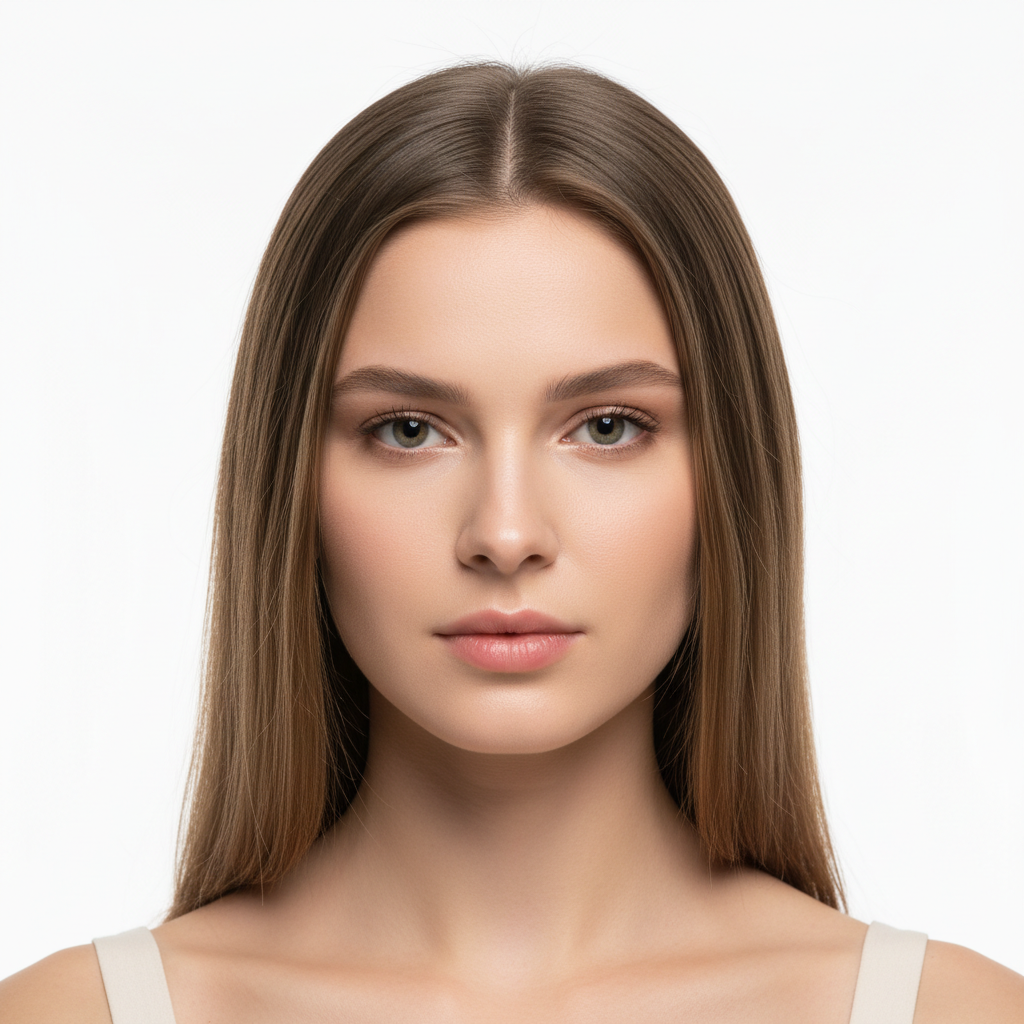
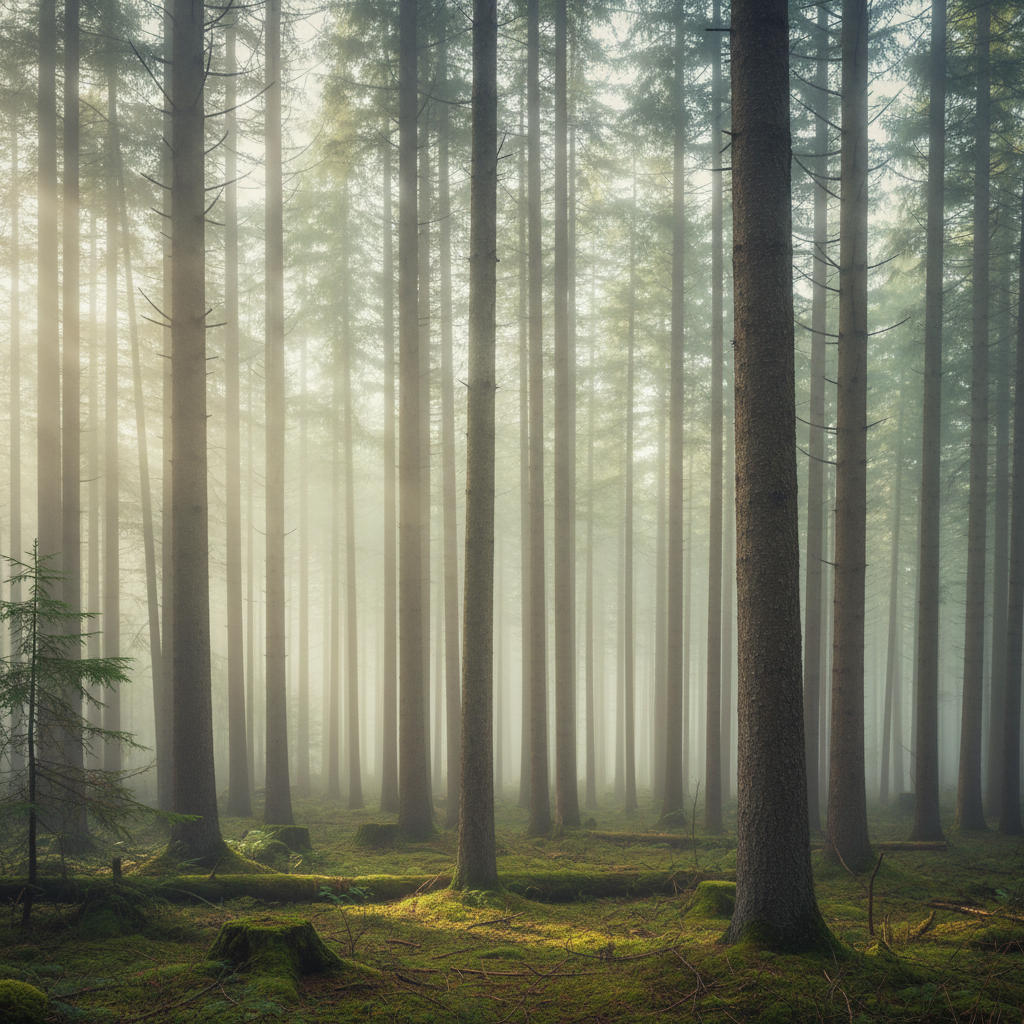
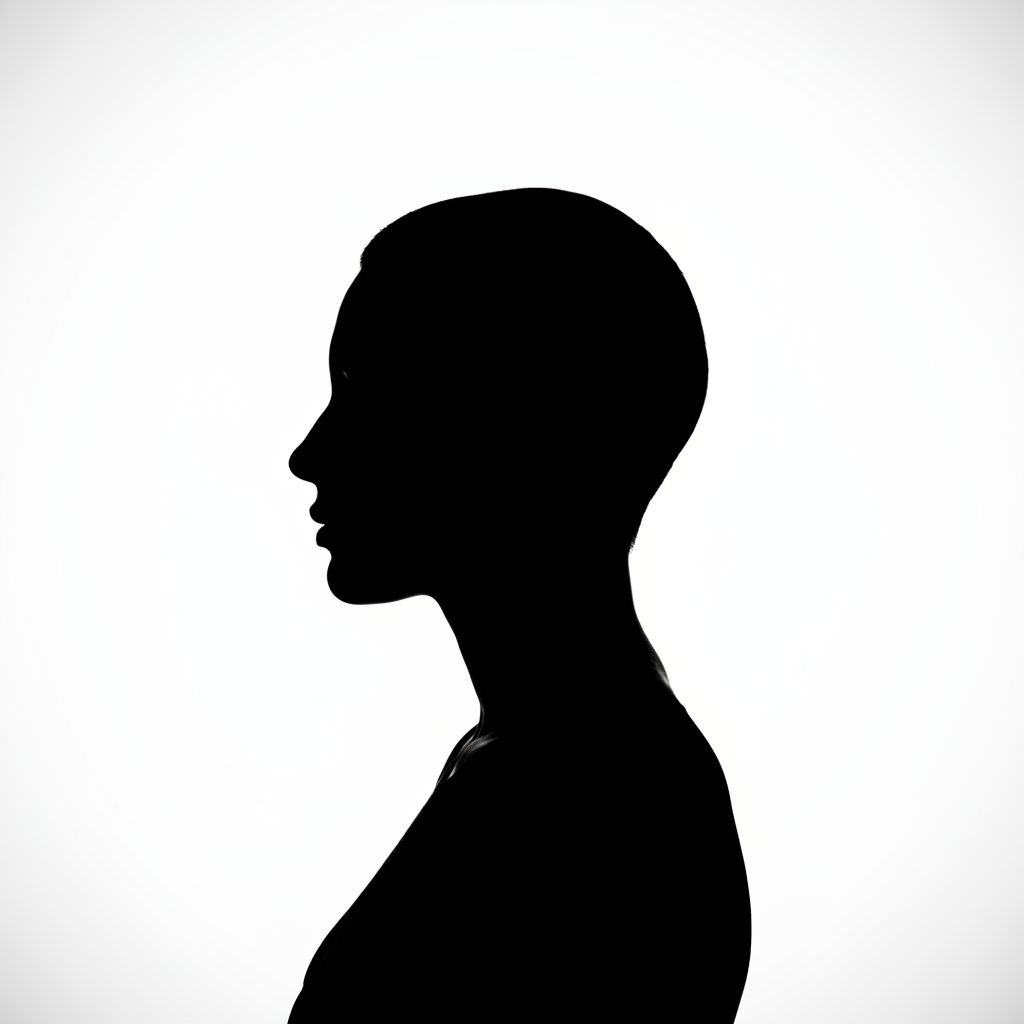
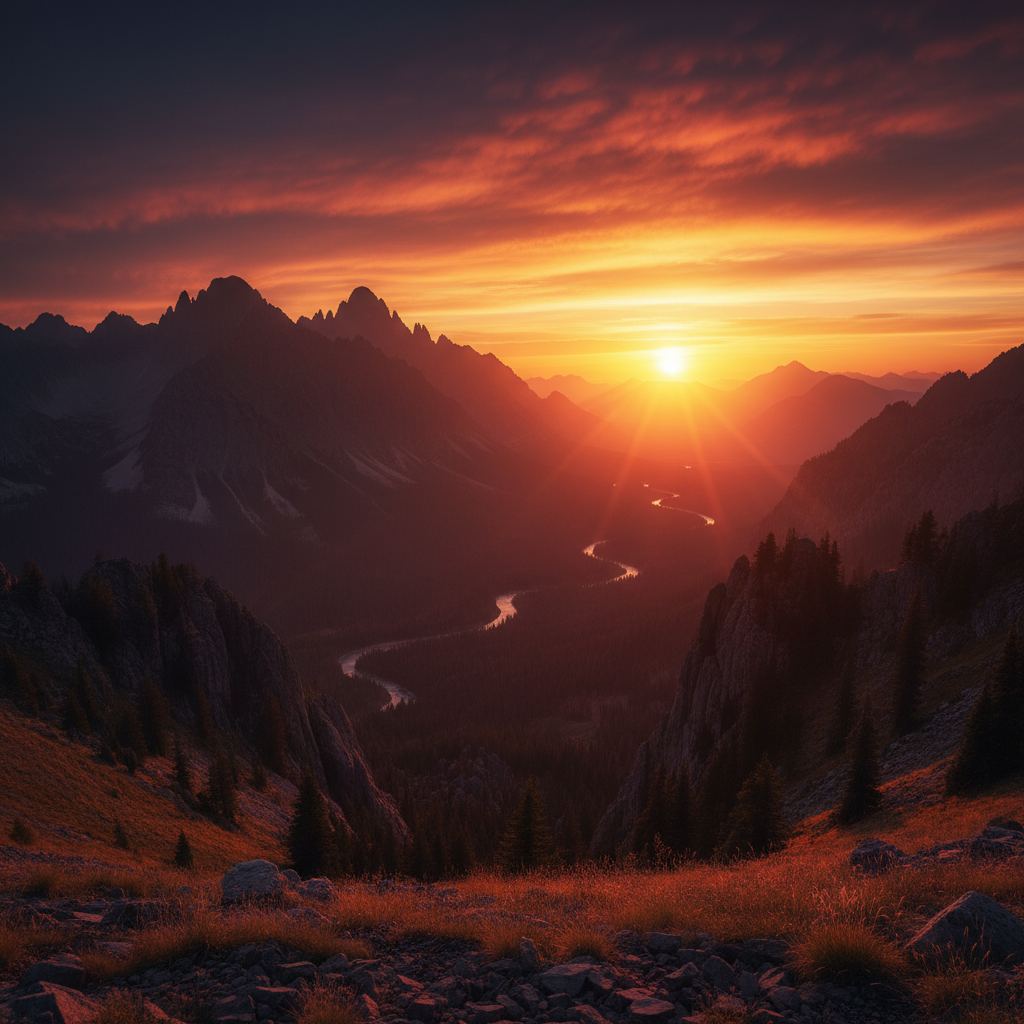
For the primary image: high-contrast portraits, sharp silhouettes, or close-up faces with simple backgrounds work best because the subject shape needs to be clearly readable through the blend. For the reference image: landscapes with strong tonal contrast — dense forests, dramatic skies, ocean horizons, cityscapes — produce the most striking results. Avoid reference images that are mostly one flat color, as they produce dull blends.

Is there a free double exposure tool that doesn't require login or Photoshop?

Yes. EditThisPic creates double exposure effects from two photos entirely in your browser — no Photoshop, no account, and no signup required. In Photoshop this technique involves layer masks, blend modes, and manual adjustment layers. Here you describe the blend and the AI does it in 30 seconds. One free edit per week with no watermark on the result.

What is the best way to blend a portrait with a landscape for double exposure?

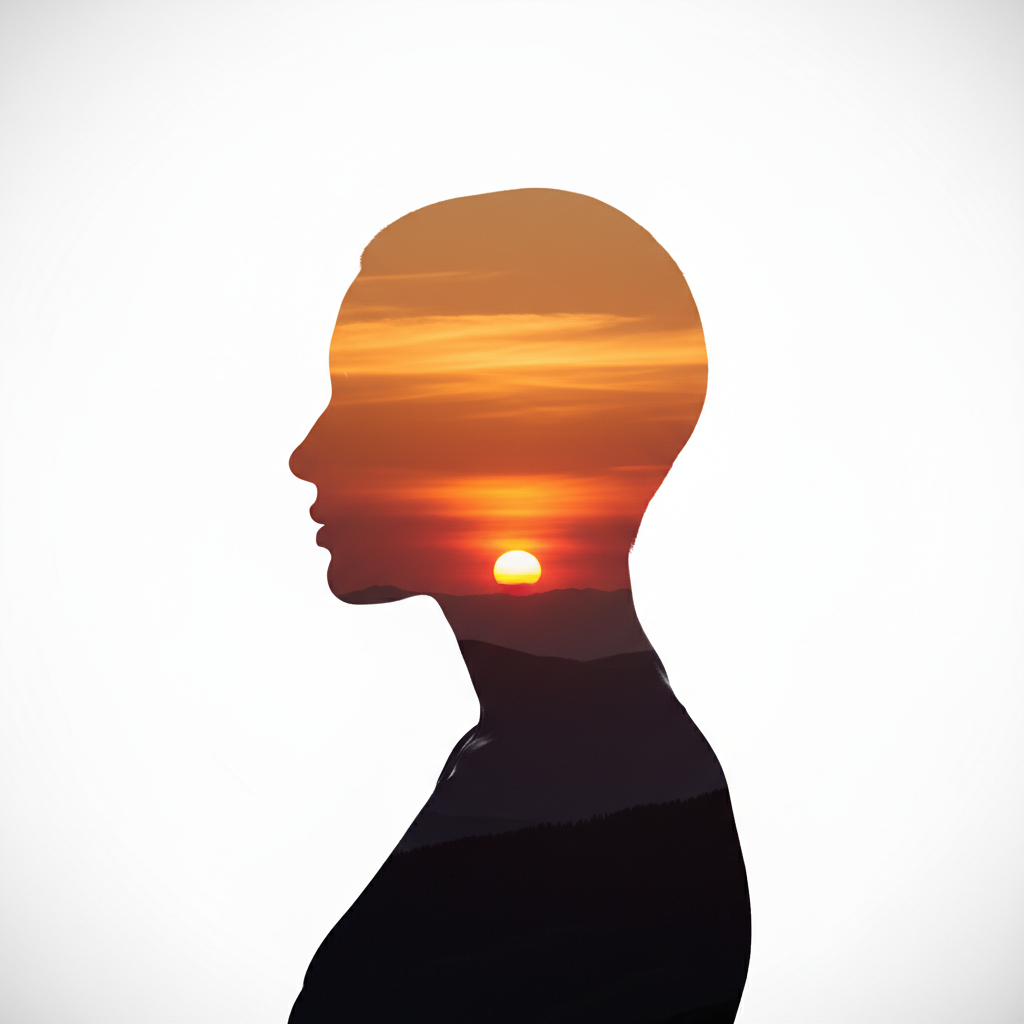
Use a front-facing or profile portrait with a plain or dark background as your primary photo. Upload a high-contrast landscape — mountains, forest, ocean, or cityscape — as the reference image. Describe the tonal mood you want: 'cool blue cinematic blend' or 'warm amber dreamlike quality.' The AI matches the luminosity of both images and merges them using a photographic screen blend. Specifying a single color grade prevents the two images from clashing.

How do I make a double exposure effect for an album cover?

Upload your artist portrait or silhouette as the primary photo. Click '+ Add reference image' and upload a landscape that matches the album mood — misty mountains for folk, neon cityscape for urban, ocean for ambient. In your prompt, describe the aesthetic: 'create a double exposure album cover, desaturated cool blue grade, bold and graphic.' Add 'fade to dark at the bottom' if you need space for album title text. The whole process takes under a minute.

How do I combine two photos into a double exposure without blending looking muddy?

The most common cause of muddy blends is competing color temperatures between the two images. Fix this by specifying a unified color grade in your prompt: 'convert both layers to a cool blue-green tone before blending' or 'desaturate slightly for a cinematic look.' Alternatively, use a black-and-white blend ('convert to monochrome') which eliminates color conflict entirely and often produces the sharpest double exposure results.

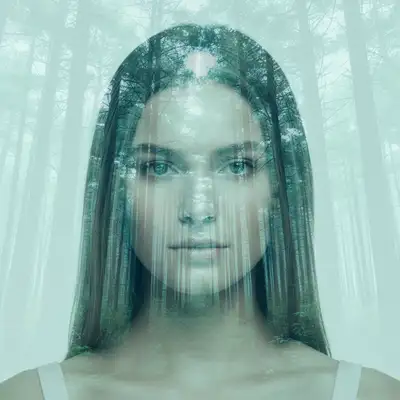
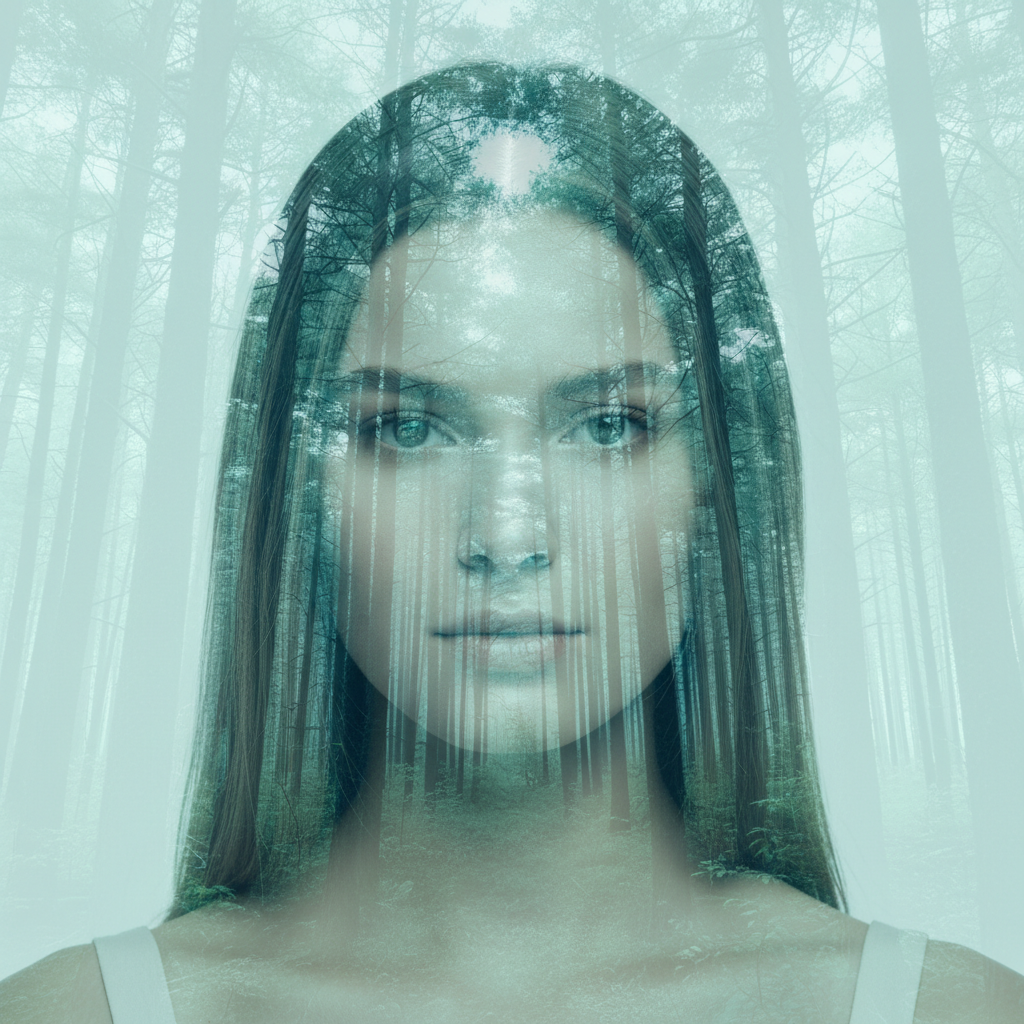
What is a double exposure photo effect?

Double exposure is a photography technique where two images are combined into one frame, traditionally by exposing the same piece of film twice. The result is a blended, often surreal image — a portrait overlaid with a forest, a silhouette filled with a starfield, or a face merged with an ocean. With AI, you replicate this effect digitally by uploading two photos and describing how you want them blended.

Can I create a double exposure from a selfie and a landscape photo?

Yes. Selfies work well as the primary photo as long as your face fills most of the frame. Avoid selfies where the face is small and the background is busy — those make it harder for the AI to isolate the subject for blending. Upload the selfie as your main photo and add a landscape via '+ Add reference image.' Describe the blend: 'create a double exposure blending my portrait with the forest reference, dreamlike and soft.'

How long does it take to create a double exposure?

Most double exposure blends generate in 20-30 seconds. More complex blends involving very detailed reference images or precise color grading may take up to 45 seconds. If the first result isn't quite right, regenerating with a refined prompt takes another 20-30 seconds. The total time from upload to finished result is typically under two minutes.

Does EditThisPic add a watermark to double exposure photos?

No. Every result you download from EditThisPic — including double exposure blends — is completely watermark-free. The free weekly edit produces a clean, full-resolution download with no branding added to the image.

Ready to create your double exposure?

Upload two photos and blend them into one. Free, no signup required.

Try it free