Free • No signup Create Home renovation before-after photos · Free

Create Professional Home Renovation Before-After Photos

Last updated

Renovation photos with different lighting kill your portfolio credibility. Make them match professionally.

Kitchen renovation photos with construction lighting vs finished natural light Matched lighting showing professional kitchen transformation

Upload photo to create home renovation before-after photos

"match the bright finished lighting to the construction phase photo, normalize both to consistent appearance"

Release to upload

50,000+photos edited
<30stypical edit
1 freeedit weekly

1 free edit·then from $4.99

How it works

  1. Upload before and after photos

    Drop your pre-renovation and post-renovation photos into EditThisPic. JPG, PNG, WebP up to 7MB. Works with kitchen remodels, bathroom renovations, room makeovers, exterior work—any home improvement project needing professional documentation.

    Expect: Simple lighting matching: 25-30 seconds. Complex multi-room projects or significant angle differences: may need refinement.
  2. Describe the portfolio format

    Type 'create before-after with matched lighting for renovation portfolio' or 'combine with consistent appearance, show transformation clearly.' The AI normalizes lighting differences caused by different times of day, work in progress, or photo quality variations—critical for professional portfolio presentation.

    Tip: Specify 'before on left, after on right' for standard portfolio format that clients immediately understand.

    Copy one of these to get started:

    Creating standard renovation portfolio before-after create professional before-after comparison with matched lighting, before on left and after on right, show renovation clearly
    Before photo taken during demolition, after in finished lighting match the bright finished lighting to the construction phase photo, normalize both to consistent appearance
    Different times of day creating lighting mismatch adjust both photos to look like they were taken at the same time of day with consistent natural light
    Old before photo vs new high-quality after enhance before photo to match the quality of after photo, create professional portfolio-ready comparison
    3 more prompts
    Multiple rooms need consistent portfolio style create side-by-side with matched lighting and consistent layout, use for all room renovations
    Adding project details for marketing create before-after with matched lighting, add project name, budget, and timeline labels for portfolio
    Real estate listing showing renovations combine before-after showing home improvements, matched lighting, clean professional presentation for listing
  3. Verify transformation visibility

    Check that renovations are clearly visible—new cabinets, updated fixtures, fresh paint, improved layout. Verify lighting consistency doesn't hide the improvements you made. The before-after should make the transformation obvious at a glance.

  4. Add project details if needed

    If creating portfolio or marketing materials, include project details: 'add label showing kitchen renovation, $25K, 3 weeks' or 'include before-after with project scope description.' Context helps potential clients understand scope and timeline.

    Tip: For marketing, add subtle branding—company logo in corner shows professionalism without being intrusive.

See it in action

Kitchen renovation photos with construction lighting vs finished natural light
Before
->
Matched lighting showing professional kitchen transformation
After

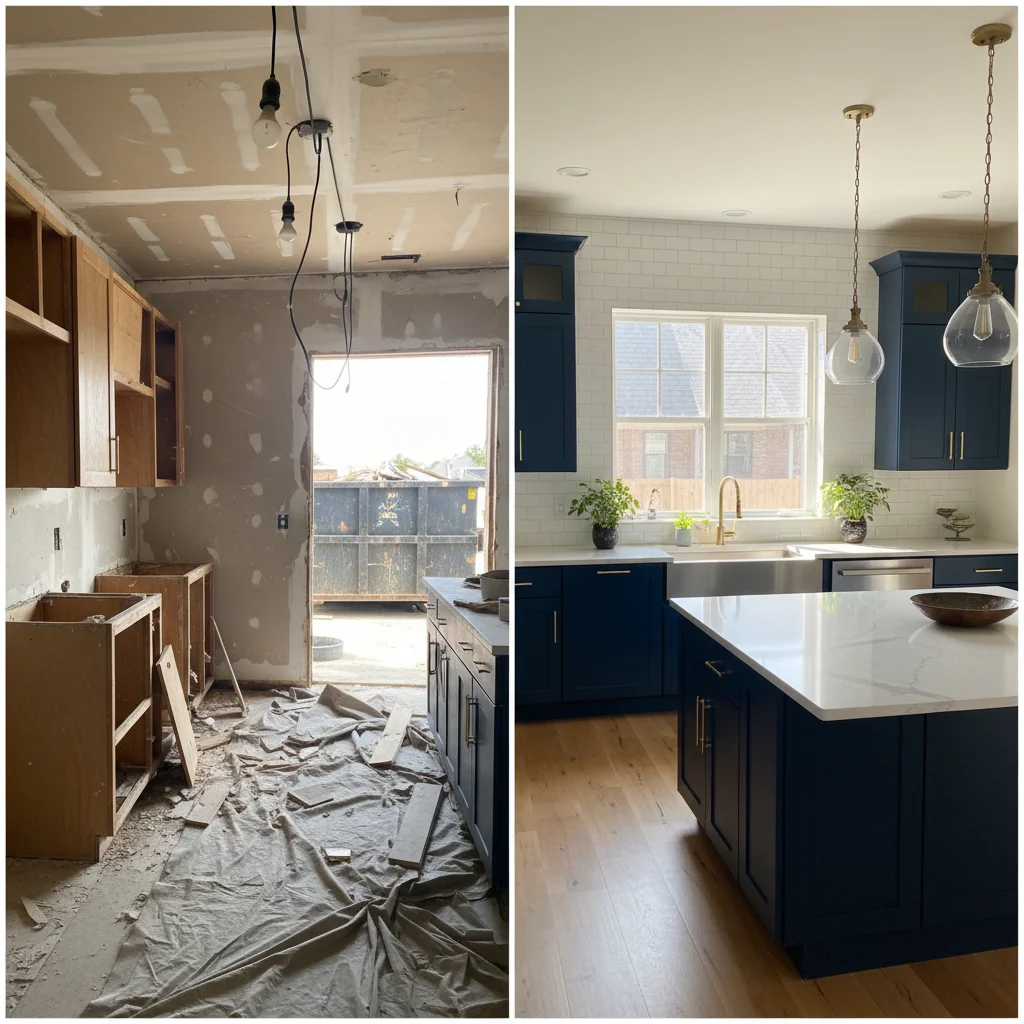
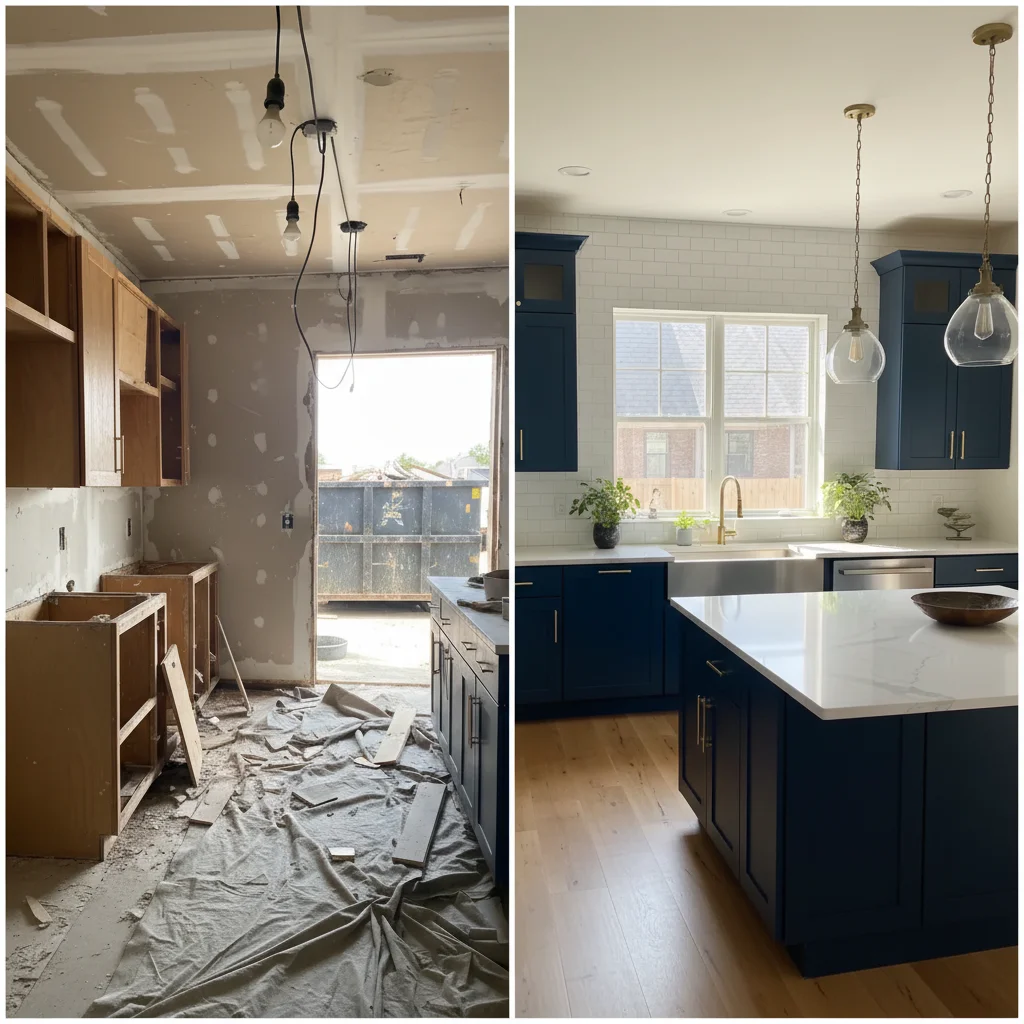
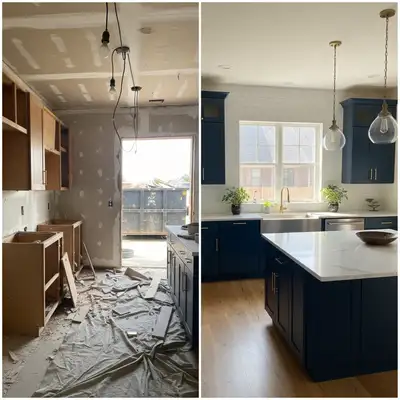
Kitchen renovation with lighting consistency fixed

Before photo during demolition with work lights, after photo in finished kitchen with natural window light. Matched to show actual transformation without lighting distraction.

Prompt: create professional before-after comparison with matched lighting, before on left and after on right, show renovation clearly
Bathroom remodel with morning vs evening lighting mismatch
Before
->
Consistent lighting showing professional bathroom transformation
After

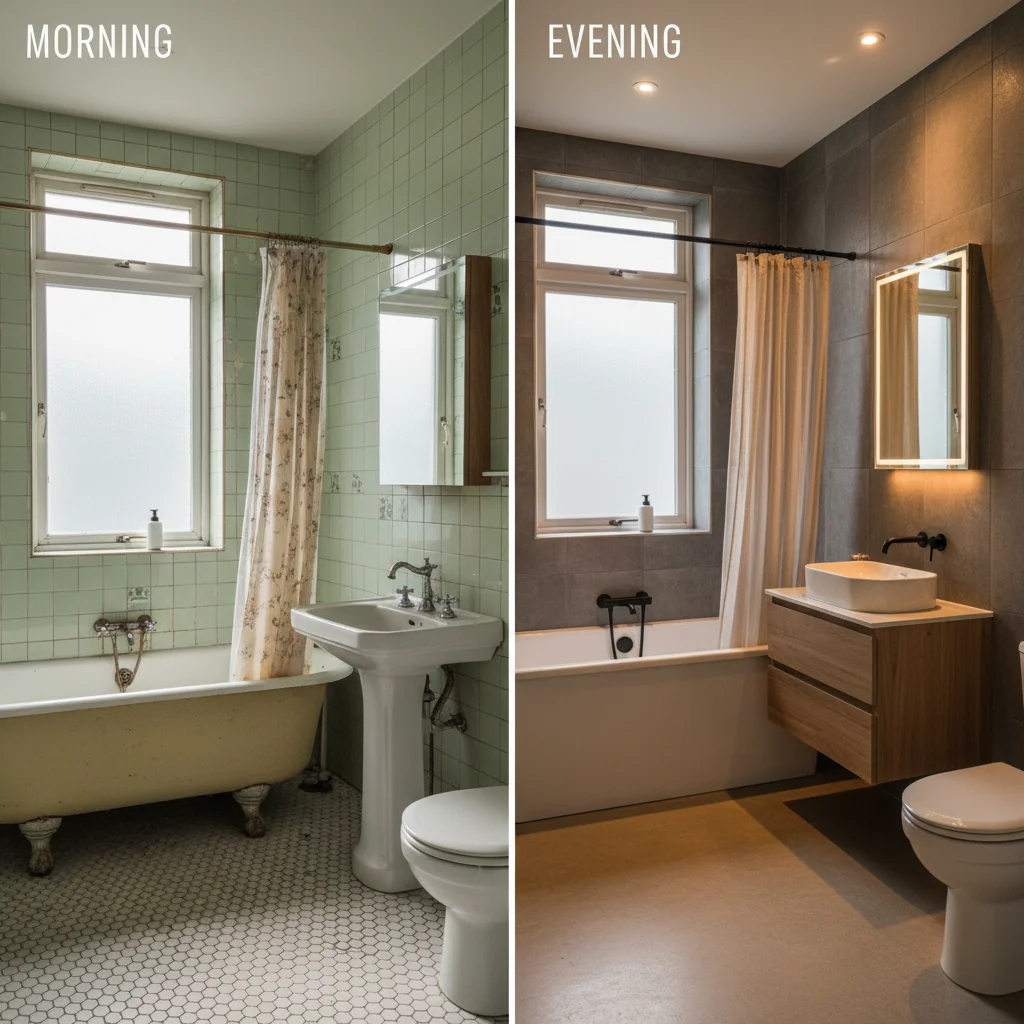
Bathroom remodel with time-of-day lighting normalized

Before photo taken in morning natural light, after photo in evening artificial light. Different times created huge lighting variation—normalization made both look consistent for portfolio.

Prompt: adjust both photos to look like they were taken at the same time of day with consistent natural light
Living room makeover with old phone photo vs new high-quality photo
Before
->
Matched quality professional interior design portfolio photo
After

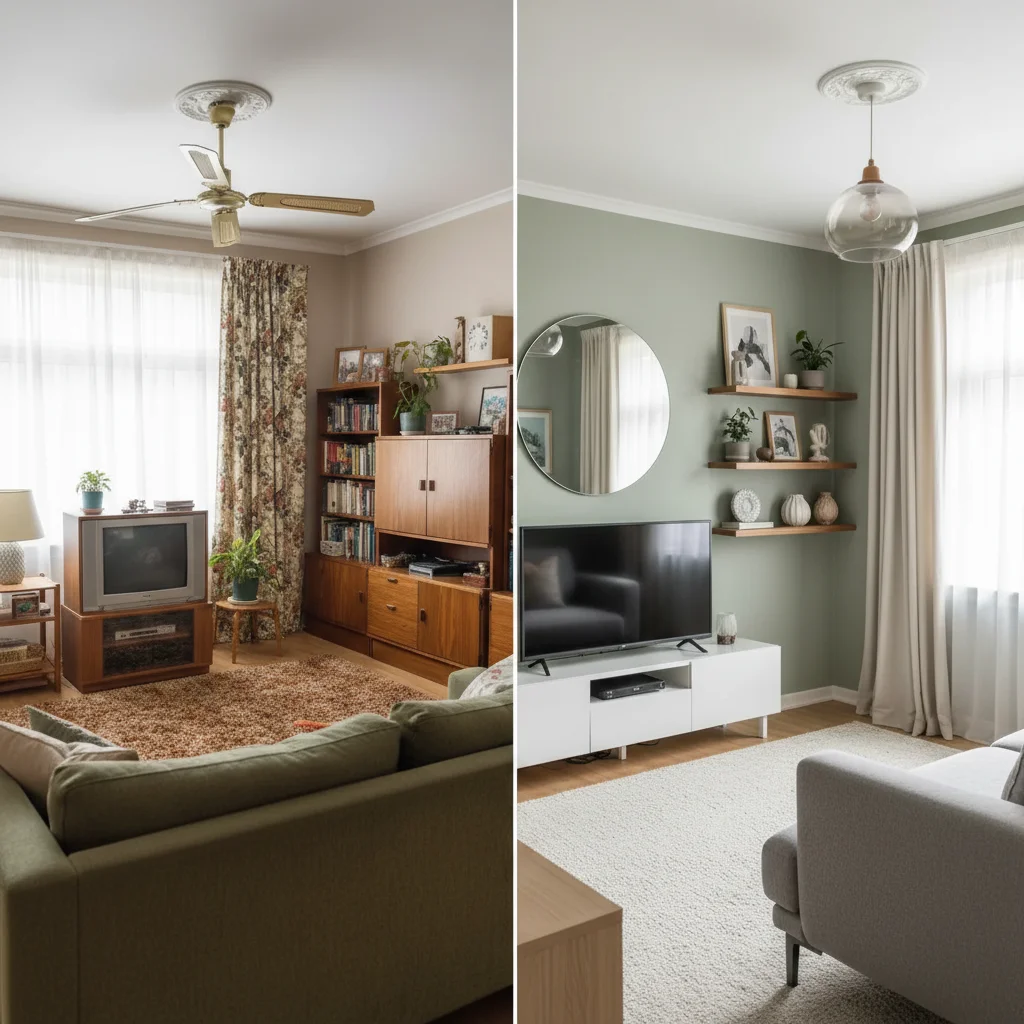
Living room makeover with quality enhancement

Interior designer's before photo from 3 years ago on old phone camera, new after on latest iPhone. Enhanced before photo to match current quality for professional portfolio presentation.

Prompt: enhance before photo to match the quality of after photo, create professional portfolio-ready comparison

Quick answers

Do I need to mark anything to create renovation before-after photos?

No! Just describe what you want: 'create before-after with matched lighting' or 'combine with consistent appearance for portfolio.' The AI handles lighting normalization, alignment, and side-by-side layout automatically.

Why do renovation photos need consistent lighting?

Inconsistent lighting makes it unclear how much is real improvement vs. just better photography. Before photos often have poor lighting (construction phase, old photos), while after photos show finished spaces in best light. Matching them proves your work made the difference, not just better lighting. Professional portfolio documentation with consistent lighting wins more contracts because it shows credible transformations.

Can this fix before photos taken during construction?

Yes. Construction-phase photos often have work lights, debris, and poor conditions. The AI can normalize lighting to match finished photos while preserving the 'before' state that shows what you improved. It removes lighting and quality differences but keeps the dated fixtures, old finishes, and original conditions visible—showing exactly what you transformed.

How do I create consistent before-afters for my entire portfolio?

Use the exact same prompt for all renovation projects: 'create before-after with matched lighting, before left and after right, professional portfolio format.' This gives every project the same layout and quality—making your portfolio look intentional and professional. Consistency across projects signals attention to detail and professional standards.

Should I add project details to portfolio before-afters?

Yes. Include room type, approximate budget, and timeline. 'Master Bath Remodel - $18K - 3 weeks' helps potential clients immediately know if you work in their budget range and timeline expectations. This pre-qualifies leads and sets realistic expectations. Add details by including them in your prompt: 'add project details as labels.'

Is EditThisPic's AI home renovation before-after photos creator really free?

Yes — you get 1 free edit per week, no account needed. Plans start at $4.99/month for 15 edits.

Can I create home renovation before-after photos on my phone?

Yes. EditThisPic works in any mobile browser — iPhone, Android, tablet. No app download needed.

What photo formats does the AI home renovation before-after photos creator support?

JPG, PNG, WebP, and HEIC. Upload any common photo format and EditThisPic handles the rest.

How much does EditThisPic cost?

You get 1 free edit per week — no account needed. After that, credit packs start at $1.99 for 3 edits. Monthly plans start at $4.99/mo for 20 edits with unused credits rolling over. All edits are full resolution with no watermark.

Ready to create professional renovation before-afters?

Free to try. No signup required.

1 free edit included·Credit packs from $4.99