Free • No signup Add Jewelry · Free

AI Jewelry Virtual Try-On

← Browse all add & replace tools

Last updated

See how any piece of jewelry looks on you before buying — upload your photo and a reference photo of the jewelry, and AI places it on you with matched lighting and fit.

01Photo 1
Portrait with visible neckline and collarbone, no jewelry
02Photo 2
Gold pendant necklace product listing photo used as reference
03Result
Same portrait with gold pendant necklace naturally placed and draped

Upload photo to add jewelry

"add these earrings in both earlobes, hanging naturally downward, with the light from the right catching the metal and stones as shown in the reference"

Release to upload

1 free edit·then from $4.99

Popular use cases:
  • virtual jewelry try-on
  • try on necklace virtually
  • see how jewelry looks on me
  • virtual earring try-on
  • jewelry lifestyle photo
  • AI jewelry fitting free

1Your photo
+
2Reference
=
Result
Portrait photo showing neck and collarbone area with no jewelry Your photo
Product photo of the necklace to try on Jewelry reference
Portrait with necklace naturally placed around the neck Result

"Add this necklace around the neck, matching the lighting"

Cost
Free No signup required
Time
Instant results in 15-30 seconds
Works on
Any device - browser, phone, tablet, desktop
Powered by
AI-powered photo editing

How it works

  1. Upload your two photos

    Drop your main photo (your portrait or the photo where you want to see the jewelry) into EditThisPic. Then click '+ Add reference photo' to upload the jewelry piece's photo — a product listing image, brand website photo, or your own clear photo of the piece. JPG, PNG, WebP up to 7MB each.

    Expect: Necklaces and earrings: 25-35 seconds. Rings and bracelets on hands may need 2 attempts for accurate fit.
  2. Provide the jewelry piece as reference

    The jewelry reference tells the AI exactly which piece to place — its design, material, stones, metalwork, and overall style. Any clear photo of the jewelry works: a product listing image on white background, a lifestyle shot of the piece, or a screenshot from a jewelry website. The more clearly the piece is visible in the reference, the more accurate the try-on.

    Tip: Product listing photos of jewelry on white backgrounds are ideal references — the piece is isolated and all details are visible.

    Copy one of these to get started:

    Necklace try-on add this necklace around the neck with the pendant centered at the upper chest, chain draping naturally, matching the portrait's lighting and the necklace's metallic finish
    Earrings try-on add these earrings in both earlobes, hanging naturally downward, with the light from the right catching the metal and stones as shown in the reference
    Bracelet or bangle on wrist add this bracelet on the left wrist, sitting naturally around the wrist bone, with the metal reflecting the warm ambient lighting from the scene
    Ring on finger add this ring on the ring finger of the right hand, fitting naturally around the finger, with the stone and metal reflecting the light source from the reference
    2 more prompts
    Choker necklace add this choker around the neck, sitting close to the throat, following the neck's natural curve, with consistent lighting matching the portrait
    Layered necklace stack add these necklaces in a layered stack: the choker closest to the neck, the second chain at the upper chest, and the pendant chain at mid-chest, matching the warm studio lighting
  3. Describe placement on the body

    Tell the AI where the jewelry should be placed: 'add this necklace around the neck with the pendant centered at the collarbone' or 'add these earrings in the ear lobes, matching the light from the right.' Include placement details specific to the type of jewelry — necklace length, earring position, bracelet wrist.

    Tip: For necklaces, mention the chain length cue: 'pendant sitting at the upper chest' for choker length or 'pendant at mid-chest' for longer chains.

    Copy one of these to get started:

    Necklace try-on add this necklace around the neck with the pendant centered at the upper chest, chain draping naturally, matching the portrait's lighting and the necklace's metallic finish
    Earrings try-on add these earrings in both earlobes, hanging naturally downward, with the light from the right catching the metal and stones as shown in the reference
    Bracelet or bangle on wrist add this bracelet on the left wrist, sitting naturally around the wrist bone, with the metal reflecting the warm ambient lighting from the scene
    Ring on finger add this ring on the ring finger of the right hand, fitting naturally around the finger, with the stone and metal reflecting the light source from the reference
    2 more prompts
    Choker necklace add this choker around the neck, sitting close to the throat, following the neck's natural curve, with consistent lighting matching the portrait
    Layered necklace stack add these necklaces in a layered stack: the choker closest to the neck, the second chain at the upper chest, and the pendant chain at mid-chest, matching the warm studio lighting
  4. Review the try-on result

    Check that the jewelry piece looks naturally placed — correct scale, the metal finish reflects the scene's light direction, and stones or gems sparkle realistically. Verify that delicate details like chain links, stone facets, or filigree patterns are preserved from the reference.

See it in action

Portrait with visible neckline and collarbone, no jewelry
Main Photo
Gold pendant necklace product listing photo used as reference
Reference
Same portrait with gold pendant necklace naturally placed and draped
Result

Pendant necklace tried on from product listing

A product listing photo of a gold pendant necklace used as reference — AI placed it naturally on a portrait with matched chain drape and lighting.

Prompt: Add the pendant necklace from the reference photo around my neck, letting it drape naturally.
Portrait with visible ears and no earrings
Main Photo
Reference image for AI Jewelry Virtual Try-On
Reference
Same portrait with drop earrings naturally placed in both earlobes
Result

Statement earrings tried on

A pair of drop earrings from an Etsy listing placed on a portrait photo — AI matched the earring details and lighting direction.

Prompt: Add the bracelet from the reference photo to my wrist, sitting naturally and matching the lighting of the portrait.
Model portrait with visible neckline and collarbone, no jewelry
Main Photo
Reference image for AI Jewelry Virtual Try-On
Reference
Same model portrait with a necklace naturally placed as a lifestyle product shot
Result

Jewelry seller: necklace on model lifestyle shot

A jewelry seller's white-background necklace photo composited onto a model portrait for an Etsy listing lifestyle shot.

Prompt: Add the necklace from the reference photo to the model's neck. Position the pendant at her collarbone and make the chain drape naturally, matching the photo's lighting.

Detailed Guides by Scenario

📷

Try Before You Buy

See how a specific piece of jewelry looks on your own photo before committing to a purchase.

Common Scenarios

  • Seeing how a necklace sits on your neckline before ordering online
  • Checking if statement earrings suit your face shape
  • Previewing a ring style on your hand
  • Comparing multiple jewelry options on the same photo

Best Practices

  • Use a photo where the jewelry placement area is clearly visible — open neckline for necklaces, ears visible for earrings
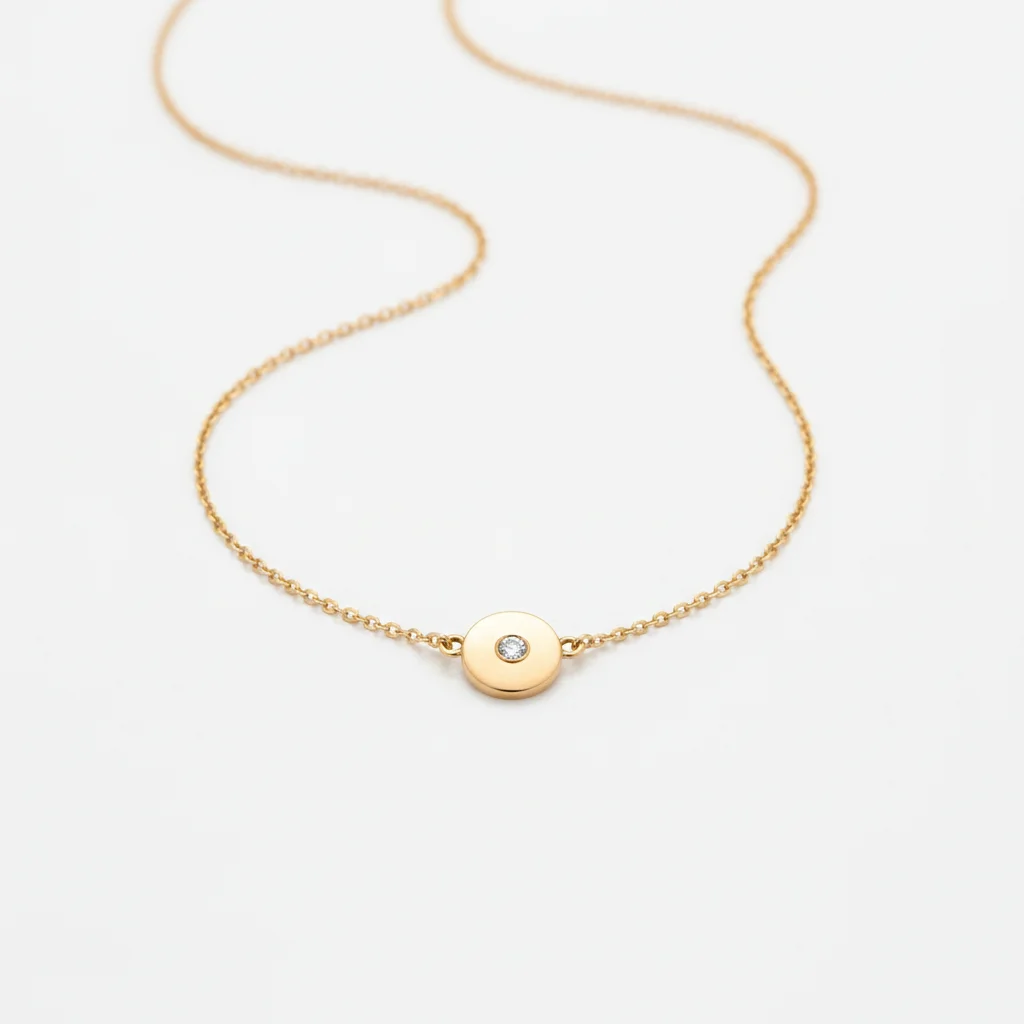
  • Use the product's listing photo as your reference for the most accurate representation
  • Try the same piece in different reference shots to see it from multiple angles
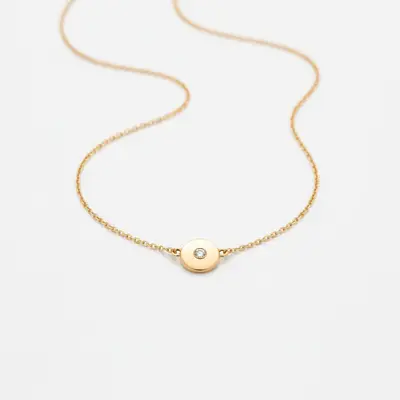
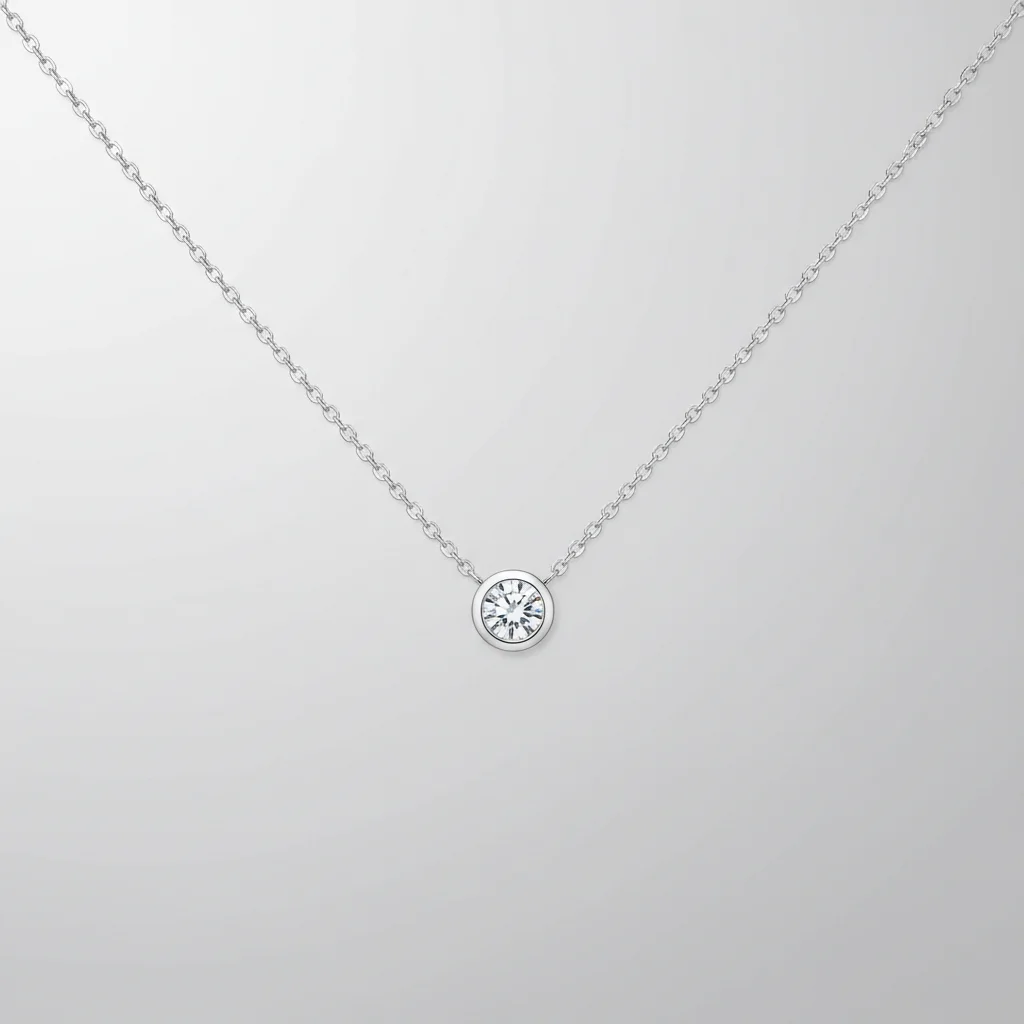
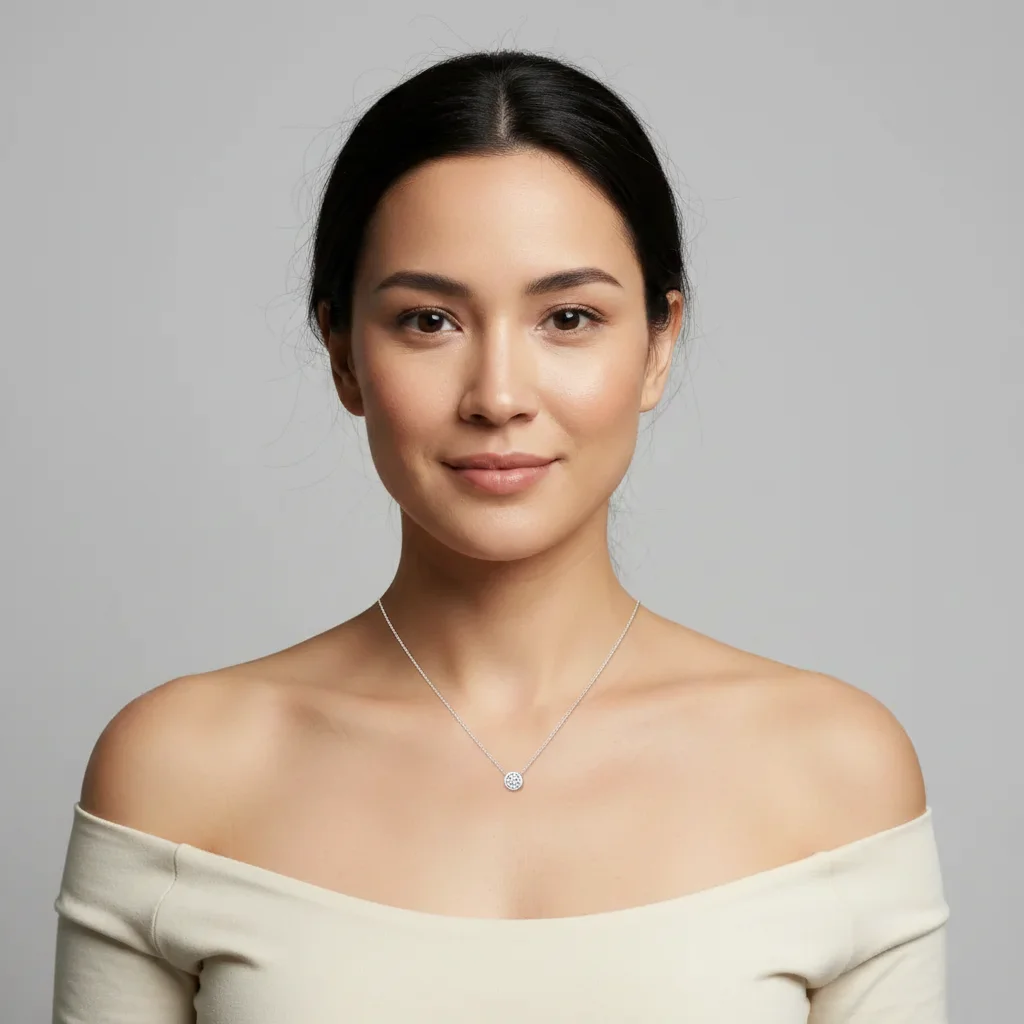
Trying on a pendant necklace before buying add this necklace around the neck with the pendant centered at the upper chest, following the neckline naturally, matching the warm indoor portrait lighting
Previewing statement earrings on a portrait add these earrings in both earlobes, hanging naturally with light from the right, the earring details matching the reference photo
📷

Jewelry Sellers: Lifestyle Shots Without a Model

Create lifestyle product shots of your jewelry on a person without booking a model or photographer.

Common Scenarios

  • Creating lifestyle listing photos for Etsy or a jewelry website
  • Showing how a custom piece looks worn for a client presentation
  • Building a collection lookbook from individual product shots
  • Creating social media content showing pieces in context

Best Practices

  • Use a model photo with consistent lighting that matches your brand aesthetic
  • Shoot the jewelry on white background first — this gives the best reference for compositing
  • Create multiple lifestyle variations from the same product photo for a complete gallery
Creating jewelry listing lifestyle photo add this necklace on the model's neck, pendant resting naturally at the collarbone, matching the soft studio lighting with a subtle metallic reflection

If something looks off

Necklace chain looks flat or stiff

Why: The AI rendered the chain as a flat graphic instead of following the body's natural curve.

Try: add this necklace with the chain draping naturally around the neck following the body's natural curve, not flat

Tip: Say 'draping naturally' or 'following the collarbone curve' — this tells the AI to respect gravity and body contour

Jewelry is the wrong size for the photo

Why: Without scale context, the AI may render the piece too large or too small.

Try: add this necklace/ring/earring at its realistic size — it should appear [choker-length/finger-sized/matching the ear] proportional to the subject

Tip: Describe the piece's relationship to the body part: 'fitting snugly around the wrist' or 'pendant resting at mid-chest'

Metal finish doesn't look right

Why: The AI didn't replicate the jewelry's specific metal finish from the reference.

Try: add this jewelry preserving its exact [yellow gold/rose gold/silver/matte/brushed] metal finish as shown in the reference

Tip: Name the metal explicitly: 'yellow gold with a high polish,' 'oxidized silver,' 'rose gold satin finish'

AI changed wrong area of the photo

Why: Ambiguous placement description caused changes in an unintended area.

Try: Tap a marker on the exact spot where the jewelry should be placed, then regenerate

Tip: For earrings, tap directly on the earlobe. For rings, tap the specific finger. Markers eliminate all placement ambiguity.

Stone or gem details are missing or simplified

Why: The AI approximated the stones rather than reproducing the reference details.

Try: add this jewelry preserving the exact stone details from the reference — the facets, color, and sparkle of the [emerald/diamond/sapphire/etc] gem

Tip: Naming the stone type and cut helps: 'round diamond solitaire,' 'pear-cut emerald,' 'marquise amethyst'

Quick answers

Do I need TWO photos for this?

Yes. You need your main photo (the portrait or photo where you want to see the jewelry) and a reference photo of the specific jewelry piece. EditThisPic extracts the jewelry design from the reference and places it naturally on your photo — matching lighting, scale, and the piece's material details.

How do I virtually try on jewelry for free?

Upload your main photo to EditThisPic, click '+ Add reference photo' to upload the jewelry piece's photo (a product listing image works perfectly), then describe the placement: 'add this necklace around the neck, pendant at the upper chest, matching the warm lighting.' The AI places it naturally in about 30 seconds. Free, no account needed.

Can I use a jewelry store's product photo as my reference?

Yes. Jewelry listing photos — from Etsy, Amazon, brand websites, or any retailer — work as reference images. Screenshot the piece directly and upload it. The AI extracts the jewelry from the reference background and places it on your photo.

Does this work for all types of jewelry?

Yes. Necklaces and earrings give the most consistent results. Bracelets and rings work well when the hand or wrist is clearly visible in the main photo. Rings on hands can be trickier — use a photo with your hand clearly visible and well-lit. Headpieces and hair jewelry also work with clear reference photos.

Can jewelry sellers use this to create listing photos?

Yes. Upload a model portrait as your main photo and your product's white-background listing photo as the reference. The AI creates a lifestyle 'worn' photo of the piece without booking a model or photographer. This works well for Etsy and jewelry brand websites that want to show pieces in context.

How much does EditThisPic cost?

You get 1 free edit per week — no account needed. After that, credit packs start at $1.99 for 3 edits. Monthly plans start at $4.99/mo for 15 edits with unused credits rolling over. All edits are full resolution with no watermark.

Try on jewelry before you buy.

Upload your photo and the jewelry piece. Free, no account required.

1 free edit included·Credit packs from $4.99