Free β€’ No signup Optimize Headshot Β· Free

AI Headshot Optimizer - Enhance Photo Quality

Fix lighting, sharpen details, and enhance colors in existing headshots

Underexposed dark headshot with poor visibility
Before
β†’
Properly exposed headshot with optimized lighting and natural colors
After

Optimize Headshot Photo Quality

Drop your photo here

or click to browse

Release to upload

Free β€’ No signup

Popular use cases:
  • headshot optimization
  • photo quality improvement
  • professional photo enhancement
  • lighting fix
  • sharpness enhancement

Cost
Free No signup required
Time
Instant results in 15-30 seconds
Works on
Any device - browser, phone, tablet, desktop
Powered by
AI-powered photo editing
Scenario Prompt Time
Lighting Fix optimize lighting and brightness 10s
Sharpness Boost increase sharpness and clarity 12s
Color Enhancement enhance colors and vibrancy 15s
Full Optimization optimize lighting, sharpness, and colors 20s

How it works

  1. Upload your headshot

    Use any existing professional headshot or portrait photo. Works best with photos that are already reasonably well-composed but need technical improvements like better lighting, sharpness, or color enhancement.

    Expect: Simple optimization (lighting, sharpness): 10-15 seconds. Complex fixes (multiple issues, major color correction): 25-30 seconds and may need refinement.
  2. Describe what to optimize

    THIS IS THE KEY STEP. Simply type what technical improvements you need - 'optimize lighting and sharpness', 'enhance colors and brightness', or 'fix underexposure and add clarity'. The AI understands photo optimization terminology. Be specific about lighting issues, sharpness needs, or color problems.

    Tip: Combine multiple optimizations in one prompt: 'optimize lighting, increase sharpness, enhance colors, and reduce noise'

    Copy one of these to get started:

    General headshot optimization Optimize this headshot by improving lighting, increasing sharpness, and enhancing colors naturally
    Fix underexposed headshot Brighten this underexposed headshot, optimize lighting on face, and enhance overall visibility while maintaining natural skin tones
    Enhance sharpness and clarity Increase sharpness and clarity throughout the headshot, especially on eyes and facial features, without over-sharpening
    Color and vibrancy boost Enhance colors and vibrancy in this headshot, make skin tones warmer and more natural, increase overall color richness
    2 more prompts
    Fix harsh lighting shadows Soften harsh shadows on face, balance lighting across the headshot, reduce contrast while maintaining depth
    Reduce noise and grain Reduce noise and grain in this headshot, smooth out artifacts, while preserving natural skin texture and sharpness
  3. Review the optimized result

    Check that lighting is even and natural, details are sharp without over-sharpening artifacts, colors are vibrant but realistic. Zoom in to verify skin texture looks natural, eyes are clear and sharp, and no new artifacts were introduced.

  4. Refine with markers if needed

    OPTIONAL. If specific areas need different optimization levels - like brightening just the face or sharpening only the eyes - tap markers on those areas and regenerate. Most headshot optimizations work perfectly without markers.

    Tip: Markers are for precision refinement, not a required step. Use when different areas need different optimization levels.
Try it free ↓

Optimize Headshot Photo Quality

Drop your photo here

or click to browse

Release to upload

Free β€’ No signup

"Had old headshots that looked dull and dated. Optimized them with 'enhance brightness and colors' - now they look current and professional again." @MikeConsultant

See it in action

Underexposed dark headshot with poor visibility
Before
->
Properly exposed headshot with optimized lighting and natural colors
After

Underexposed LinkedIn headshot fixed

Professional had a good headshot composition but it was too dark from poor office lighting. Optimized exposure and color.

Prompt: Brighten this underexposed headshot, optimize lighting on face, and enhance overall visibility while maintaining natural skin tones
Soft-focus blurry headshot lacking sharpness
Before
->
Sharp professional headshot with crisp details
After

Soft-focus headshot sharpened

Executive headshot was slightly out of focus. Optimized sharpness and clarity to make it professionally crisp.

Prompt: Increase sharpness and clarity throughout the headshot, especially on eyes and facial features, without over-sharpening

If something looks off

AI changed the wrong area or something I didn't want changed

Why: The AI couldn't determine exactly which area you meant from description alone.

Try: Tap a marker on the specific area you want to optimize, then regenerate with the same prompt

Tip: Markers tell the AI 'I mean THIS one specifically.' Use them when description alone is ambiguous.

Optimized headshot looks over-processed or artificial

Why: Optimization settings were too aggressive, creating unnatural appearance.

Try: Try: 'Subtly optimize this headshot with natural enhancements, avoid over-processing'

Tip: Add 'natural' or 'subtle' to your prompt to prevent over-optimization. Professional headshots should look enhanced, not filtered.

Sharpening created harsh edges or artifacts

Why: Too much sharpening was applied, creating halos around features or unnatural edges.

Try: Request: 'Increase sharpness moderately, especially on eyes, without creating artifacts or halos'

Tip: Specify 'moderate' or 'subtle' sharpening. Focus sharpening on eyes and key features rather than the entire image.

Color enhancement made skin tones look wrong

Why: Color adjustments shifted skin tone hues unnaturally.

Try: Try: 'Enhance overall colors while preserving accurate natural skin tones'

Tip: Always specify 'natural skin tones' or 'accurate skin color' when requesting color enhancements.

Brightening washed out the image or lost detail

Why: Too much exposure increase caused highlights to blow out and lose detail.

Try: Request: 'Brighten shadows and midtones while protecting highlights and maintaining detail'

Tip: Target specific tonal ranges - brighten shadows/midtones rather than overall exposure to preserve highlight detail.

Quick answers

Do I need to mark areas before describing optimization needs?

No! Simply describe what technical improvements you need - better lighting, increased sharpness, enhanced colors, reduced noise, etc. The AI understands photo optimization terminology from description alone. Only use markers if different areas need different optimization levels or if you want to target very specific zones.

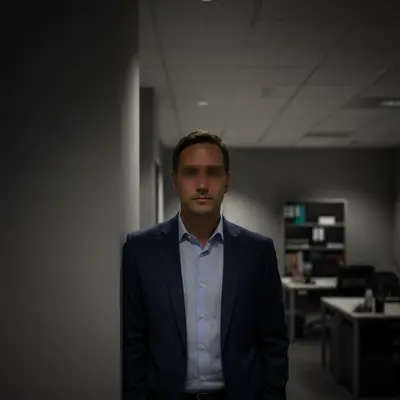
How do I optimize headshots for free?

Upload your existing headshot and describe the technical improvements needed - 'optimize lighting and sharpness', 'enhance colors and brightness', or 'fix underexposure and reduce noise'. EditThisPic's AI analyzes and optimizes photo quality instantly. Completely free, no account required, no watermarks.

What's the difference between optimizing and enhancing?

Optimization focuses on technical photo quality - lighting, sharpness, color accuracy, noise reduction. Enhancement can include creative changes like background replacement or compositional adjustments. This tool excels at technical optimization while maintaining your original headshot's professional style.

Can I fix old headshots that look dated?

Absolutely! Optimize old headshots by enhancing colors, improving sharpness, and adjusting lighting. This can make older professional photos look current again without needing a new photo session.

Will optimization work on low-quality phone photos?

Yes, optimization can significantly improve phone photos by fixing lighting, reducing noise, and increasing sharpness. While it can't add detail that isn't there, it maximizes the quality of your existing image.

How do I avoid over-processing?

Include 'natural' or 'subtle' in your prompts, like 'subtly optimize lighting' or 'enhance colors naturally'. This tells the AI to improve quality while maintaining realistic appearance. Professional headshots should look polished, not heavily filtered.

Ready to optimize your headshot?

Free to try. No signup required.

Try it free β†’