Free • No signup Open Editor

Make Background Transparent

Just type 'make background transparent' and download your PNG. That's it.

Type 'make the background transparent with clean crisp edges' and EditThisPic creates a perfect cutout in 15-30 seconds. No lasso tools, no selection brushes, no marking. The AI automatically detects your subject and removes the background. Download as PNG with alpha transparency preserved. Free, no signup needed.

Blue ceramic mug on wooden kitchen counter with cluttered background
Before
Same blue mug with transparent background on checkered pattern
After

How it works

1

Upload your photo

Drop your image into EditThisPic. JPG, PNG, and WebP up to 7MB all work. Higher resolution photos give cleaner edges, especially for complex subjects like hair or intricate product details.

⏱ Simple subjects with solid backgrounds: 15-20 seconds. Complex edges like hair or fur: may need 2-3 refinements over 1-2 minutes.
2

Describe what you want

Type exactly what you need: 'make the background transparent' or 'remove background and make it transparent with sharp edges.' That's it. No selection tools, no marking around the subject. The AI automatically identifies what to keep and what to remove.

💡 For product photos, add 'preserve shadows' if you want the natural shadow to remain. For logos, add 'crisp vector-like edges' for cleaner results.

Copy one of these to get started:

Product photo for e-commerce make the background completely transparent with clean sharp edges around the product
Logo or graphic for design work make background transparent with crisp vector-like edges, no anti-aliasing blur
Portrait for composite work make background transparent, preserving all hair detail and individual strands with soft natural edges
Product with natural shadow make background transparent but keep the natural product shadow as semi-transparent
3 more prompts
Object with fine details like lace or mesh make background transparent, preserving all fine details and holes in the fabric with clean separation
Glass or transparent product make background transparent while preserving the glass transparency and reflections of the product
Quick cutout for social media make background transparent with smooth edges
3

Generate and review

Tap generate and examine the result. The preview shows a checkered pattern behind transparent areas. Zoom to 100% to check edges carefully—especially around hair, thin elements, or semi-transparent areas like glasses.

💡 The checkered pattern is standard for showing transparency. Your PNG will have true alpha transparency when downloaded.
4

Refine with markers if needed

If some edges look rough or the AI included unwanted elements, tap markers on those specific areas and regenerate. This is optional—most transparent backgrounds work perfectly on the first try.

💡 Markers are for precision refinement only. Try without them first. If the AI missed a spot, one or two markers usually fix it.
Try it free
"Saved me hours of Photoshop work. I just describe what I want and get perfect transparent PNGs for my Etsy listings." @CraftyDesignStudio

See it in action

Blue ceramic mug on wooden kitchen counter with cluttered background
Before
Same blue mug with transparent background on checkered pattern
After

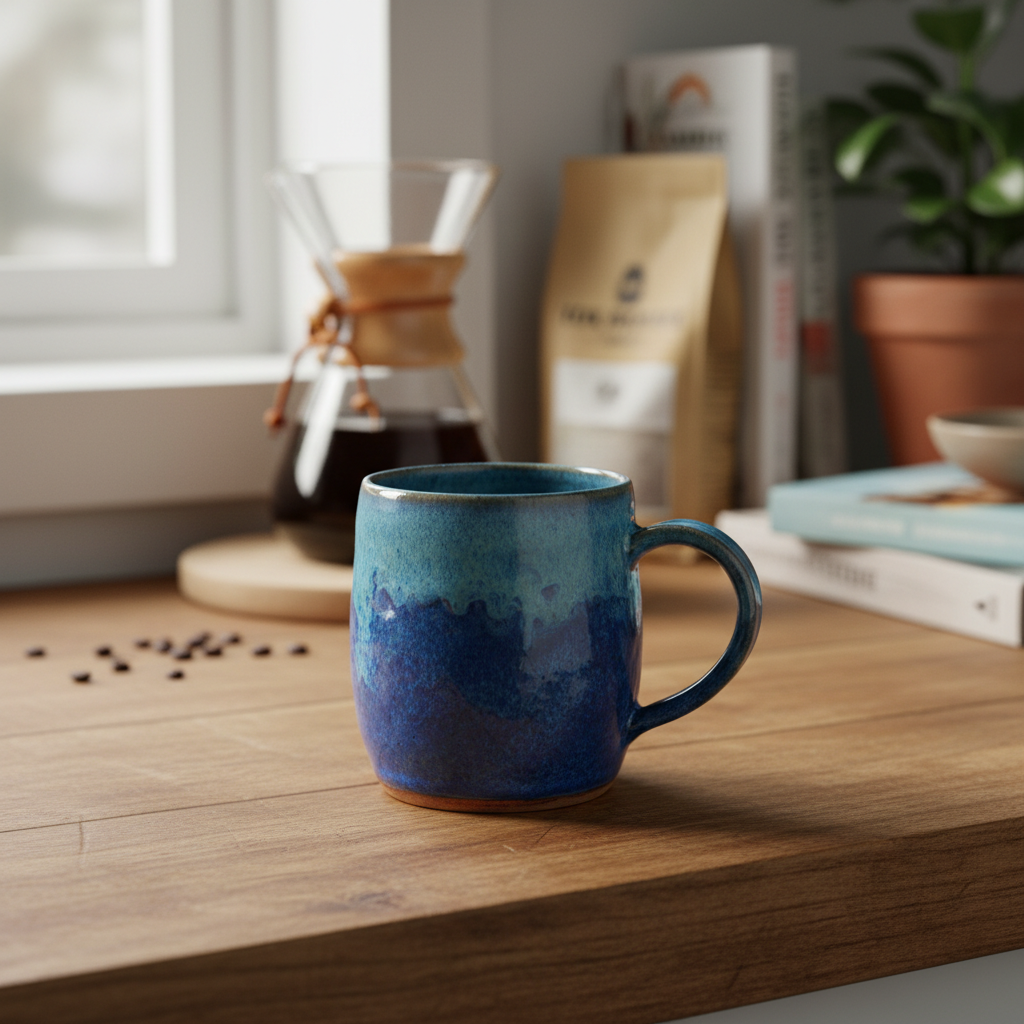
Product photo for Amazon listing

Handmade ceramic mug photographed on kitchen counter. One prompt created a perfect transparent cutout ready for any marketplace background.

Prompt: make the background completely transparent with clean sharp edges around the product
Red and black logo printed on white paper
Before
Same logo with transparent background and crisp edges
After

Company logo for website

Logo photographed from printed materials needed clean digital version. Transparent background created with crisp edges for web use.

Prompt: make background transparent with crisp vector-like edges, no anti-aliasing blur
Professional headshot with curly hair against gray studio background
Before
Same portrait with transparent background, all hair detail preserved
After

Portrait for design composite

Professional headshot needed transparent background for marketing materials. Preserved every strand of curly hair for natural-looking cutout.

Prompt: make background transparent, preserving all hair detail and individual strands with soft natural edges, no color fringing

If something looks off

AI changed the wrong area or removed part of my subject

Why: The AI may have interpreted part of your subject as background, especially with similar colors or complex shapes.

Try: Tap markers on the areas that should remain solid (not transparent), then regenerate with the same prompt

💡 Markers tell the AI 'keep this area solid.' Use them when description alone causes confusion.

Edges look choppy or have a hard cutout appearance

Why: The AI created too-sharp edges that look unnatural. This often happens with hair or soft edges.

Try: make background transparent, preserving soft natural edges and all fine details without harsh cutoff lines

💡 Adding 'soft natural edges' creates more realistic cutouts that blend well when composited.

Color halo or white fringing around the subject

Why: The original background color bled into edge pixels. Common when the background was bright white or very different from the subject.

Try: make background transparent with no color contamination or fringing at edges, pure clean separation

💡 If fringing persists, tap markers along the affected edges and regenerate.

Holes or gaps in subject aren't transparent

Why: The AI treated enclosed areas (like the hole in a mug handle) as part of the subject instead of background.

Try: make background transparent including all gaps, holes, and enclosed spaces within the subject

💡 For objects with holes, tap a marker inside each hole that should be transparent.

PNG downloaded without transparency

Why: Some browsers or download methods convert PNG to JPG. The transparency might also not be visible against white backgrounds.

Try: Open the downloaded file in an image editor to verify transparency. The checkered pattern in preview confirms transparency was created.

💡 Always download as PNG—JPG format cannot store transparency.

Shadow was removed but I wanted to keep it

Why: By default, the AI treats shadows as part of the background since they're typically what users want removed.

Try: make background transparent but preserve the natural shadow beneath the subject as semi-transparent

💡 Semi-transparent shadows add realism. Mention 'keep shadow' if you want it preserved.

Quick answers

Do I need to select or trace around my subject first?

No—just type what you want. 'Make background transparent' is all you need. The AI automatically detects your subject and removes the background. No lasso tools, no magic wand, no tracing. Markers are only there if you need to refine something afterward, but most cutouts work perfectly on the first try.

Will the transparent PNG work in Canva, Photoshop, and other design software?

Yes. The PNG includes true alpha channel transparency that's compatible with all major design software including Canva, Photoshop, Illustrator, Figma, and Google Slides. The transparent areas will remain transparent when you import the file.

How do I handle subjects with complex hair or fur?

Add detail to your prompt: 'make background transparent, preserving all hair strands and fine details with soft edges.' The AI is trained to handle complex edges. If some strands look cut off, tap markers on those areas and regenerate. Most hair works well on the first try.

Can I keep the shadow when making the background transparent?

Yes. Add 'preserve the shadow' or 'keep shadow as semi-transparent' to your prompt. The AI will create transparency behind the shadow while keeping the shadow itself visible. This creates more realistic composites when placing products on new backgrounds.

Why does my transparent PNG show a white background when I view it?

Your image viewer may display transparency as white by default. Open the file in an image editor or design software like Canva to verify the transparency. The checkered pattern shown in EditThisPic's preview confirms transparency was created—your PNG has it even if the viewer shows white.

Ready to make your background transparent?

Free to try. No signup required.

Try it free