Free • No signup Preview Tattoo · Free

Tattoo Preview from Photo

Upload your body photo + a tattoo design. AI places it on your skin realistically in seconds.

Bare inner forearm with no tattoos on a plain background
Photo 1
+
Black and grey rose tattoo design on white background
Photo 2
Same forearm with a black and grey rose tattoo design placed realistically on the skin
Result

Preview Tattoo on Photo from Design

Drop your photo here

or click to browse

Release to upload

Free • No signup

Popular use cases:
  • preview tattoo on my body from photo
  • see tattoo before getting it
  • virtual tattoo try on
  • tattoo placement preview AI
  • AI tattoo simulator free
  • how will tattoo look on me from design
  • tattoo design on skin preview
  • cover up tattoo preview
  • tattoo consultation tool
  • tattoo from reference image

1Your photo
+
2Reference
=
Result
Clear photo of a bare forearm or shoulder Your body photo
Tattoo design or photo of a tattoo on someone else Tattoo reference
The tattoo design placed realistically on the user's skin Result

"place the tattoo design from the reference image onto my forearm, realistic ink style"

Cost
Free No signup required
Time
Instant results in 15-30 seconds
Works on
Any device - browser, phone, tablet, desktop
Powered by
AI-powered photo editing
Scenario Prompt Time
place the tattoo design from the reference image on the inner forearm, realistic ink on skin 30-45s
apply the reference design to the outer shoulder cap, sized to fill naturally 40-50s
apply the cover-up design completely over the existing tattoo, bold dark ink 45-60s
place the small design from the reference image on the inside of the wrist, about 2 inches 30s

How it works

  1. Upload your body photo

    Drop in a clear photo of the area you want to preview — arm, shoulder, back, leg, or wrist. Good lighting and a clear view of the skin surface give the AI enough detail to blend the tattoo realistically. JPG, PNG, WebP up to 7MB.

    Expect: Simple arm or wrist tattoo: 30-45 seconds. Large back or sleeve placement: 45-60 seconds and may benefit from one refinement pass.
  2. Add your tattoo design as a reference image

    Click '+ Add reference image' below the prompt box and upload a photo of the tattoo design — a sketch, flash art, stencil, or a photo of the tattoo on someone else's skin. This is what the AI will place onto your body photo. Without a reference image, the AI generates a tattoo from description only.

    Tip: Any image works as a reference: Pinterest saves, artist flash sheets, a photo of a tattoo you admire on a stranger, or a hand-drawn sketch. The AI extracts the design and adapts it to your skin.

    Copy one of these to get started:

    Tattoo Preview from Photo + Add reference image — make it look natural and professional
    Shoulder placement from a reference photo apply the tattoo design from the reference image to the outer shoulder cap, black ink, sized to fill the shoulder naturally, realistic skin texture
    Back tattoo preview from a design place the reference tattoo design centered on the upper back between the shoulder blades, black and grey ink, realistic and detailed
    Cover-up tattoo preview apply the cover-up design from the reference image over the existing tattoo on the forearm, bold dark ink, completely covering the old tattoo
    3 more prompts
    Wrist or ankle placement from a design place the small design from the reference image on the inside of the wrist, fine-line black ink, sized about 2 inches, delicate placement
    Test the same design across multiple placements apply the tattoo from the reference image to the upper arm, matching the muscle contour, black ink style similar to the reference
    Leg or calf placement place the design from the reference image on the outer calf, wrapping slightly around the muscle, black and grey shading, realistic ink texture
  3. Describe the placement

    Tell the AI where to put it: 'place the tattoo design from the reference image on the inner forearm, realistic ink style following body contours.' Mention placement, orientation, and size. No marking required — the AI knows where 'inner forearm' and 'shoulder blade' are.

    Tip: Add 'sized to fill the [area] naturally' or 'about 3 inches wide' to control how large the tattoo appears relative to the body part.

    Copy one of these to get started:

    Tattoo Preview from Photo + Add reference image — make it look natural and professional
    Shoulder placement from a reference photo apply the tattoo design from the reference image to the outer shoulder cap, black ink, sized to fill the shoulder naturally, realistic skin texture
    Back tattoo preview from a design place the reference tattoo design centered on the upper back between the shoulder blades, black and grey ink, realistic and detailed
    Cover-up tattoo preview apply the cover-up design from the reference image over the existing tattoo on the forearm, bold dark ink, completely covering the old tattoo
    3 more prompts
    Wrist or ankle placement from a design place the small design from the reference image on the inside of the wrist, fine-line black ink, sized about 2 inches, delicate placement
    Test the same design across multiple placements apply the tattoo from the reference image to the upper arm, matching the muscle contour, black ink style similar to the reference
    Leg or calf placement place the design from the reference image on the outer calf, wrapping slightly around the muscle, black and grey shading, realistic ink texture
  4. Review the result and refine if needed

    Check that the design follows body contours, the ink texture looks realistic, and the size feels right for the area. If the AI placed it in the wrong spot or the orientation is off, tap a marker on the exact target area and regenerate with a more specific prompt.

    Tip: Markers are optional — try without them first. Add one only if the tattoo keeps appearing in the wrong location.
Try it free

Preview Tattoo on Photo from Design

Drop your photo here

or click to browse

Release to upload

Free • No signup

"I uploaded a photo of my forearm and a picture of a tattoo I'd saved on Pinterest. Within a minute I could see exactly how it would look. Showed my artist and she matched it perfectly." @InkDecision_Mae

See it in action

Bare inner forearm with no tattoos on a plain background
Main Photo
Black and grey rose tattoo design on white background
Reference
Same forearm with a black and grey rose tattoo design placed realistically on the skin
Result

Rose design previewed on forearm from reference

User uploaded a photo of a rose tattoo design and their bare forearm. The AI placed the design realistically on the skin to preview before booking.

Prompt: place the tattoo design from the reference image on the inner forearm, realistic ink on skin, following body contours naturally
Bare shoulder with no tattoos viewed from the side
Main Photo
Bold geometric black tattoo design on white paper
Reference
Same shoulder with the geometric tattoo design placed and sized naturally on the shoulder cap
Result

Geometric shoulder piece from an artist's flash

The artist had provided a geometric stencil. The user previewed it on their shoulder before the appointment to confirm size and placement.

Prompt: apply the tattoo design from the reference image to the outer shoulder cap, black ink, sized to fill the shoulder naturally, realistic skin texture

Detailed Guides by Scenario

📷

Before Getting Inked

The most common use: you have a design you love and want to see it on your actual body before committing to the needle.

Common Scenarios

  • You saved a design on Pinterest and want to see it on your own arm
  • Your artist drew a custom flash and you want to check placement before the appointment
  • You're deciding between two designs and want to compare them side by side
  • You're nervous about size — want to confirm it's not too big or too small

Best Practices

  • Photograph the body area in the same pose and angle you'd naturally see the tattoo
  • Use the original design file or a clean high-contrast photo of the design as reference
  • Generate 2-3 size variations to confirm the right fit before your appointment
  • Screenshot the result and send it to your artist — they can use it as a placement guide
Checking a saved design on your own arm place the tattoo design from the reference image on the inner forearm, realistic ink on skin, sized to fill the forearm naturally
Confirming size and placement before the appointment apply the design from the reference photo to the upper arm, black ink, wrapping naturally around the muscle
📷

Tattoo Placement Decisions

You have the design locked in but aren't sure where on your body it belongs. Use the same reference image on multiple body photos to find the best placement.

Common Scenarios

  • Testing the same design on your forearm vs. upper arm vs. shoulder
  • Deciding whether a piece belongs on the ribs, back, or chest
  • Checking if a smaller piece works better on the wrist than behind the ear
  • Confirming a design doesn't overlap with existing tattoos

Best Practices

  • Photograph multiple body areas in the same session so lighting is consistent across comparisons
  • Keep the same reference image and swap only the body photo between edits
  • Consider visibility — describe 'inner forearm facing outward' vs. 'outer forearm' for hidden vs. visible placement
  • Include existing tattoos in the photo so the AI can check for spacing and flow
Testing shoulder vs. upper arm placement place the design from the reference image on the outer shoulder, sized to fit the shoulder cap naturally, realistic ink
Previewing a back piece placement apply the reference tattoo design to the upper back between the shoulder blades, centered, black ink, realistic skin texture
📷

Cover-Up Tattoo Preview

Have an existing tattoo you want to cover up? Upload a photo of your current tattoo and a reference of the cover-up design to see whether it will work before booking the session.

Common Scenarios

  • Checking if a new design is large enough to cover an old tattoo
  • Testing a cover-up design your artist proposed before you commit
  • Previewing a blackout or geometric cover-up over an old faded piece
  • Showing your artist where an old tattoo sits so they can plan the new design

Best Practices

  • Photograph the existing tattoo clearly under good lighting — the AI needs to see its shape and boundaries
  • Cover-up designs typically need to be 30-50% larger than the original — factor that into your size prompt
  • Dark bold designs cover better than fine-line — mention 'bold, solid black' if coverage is the goal
  • Upload a reference of the proposed cover-up design and describe 'place it over the existing tattoo completely'
Testing whether a cover-up design is large enough place the cover-up tattoo design from the reference image over the existing faded tattoo on the forearm, bold dark ink, completely covering the old design
Previewing a blackout cover-up apply the blackwork design from the reference photo over the old tattoo on the upper arm, solid black fill, fully covering the existing artwork

If something looks off

AI changed the wrong area or placed the tattoo in the wrong spot

Why: The AI couldn't determine the exact placement from the text description alone. This happens when the body area is ambiguous or the photo shows multiple possible locations.

Try: Tap a marker on the exact location where the tattoo should go, then regenerate with the same prompt

Tip: Markers tell the AI 'put the tattoo HERE specifically.' Use them whenever the placement keeps landing in the wrong spot.

The tattoo from the reference image doesn't match what ended up on my skin

Why: The AI interpreted the reference design loosely rather than copying it precisely — common if the reference photo is low-contrast or cluttered.

Try: apply the exact design from the reference image as closely as possible onto the forearm, preserving all design details, realistic ink style

Tip: Use a clean, high-contrast reference photo of the design on a plain white background. Photographed stencils and line drawings work better than photos of existing tattoos on dark skin.

Tattoo looks flat — like a sticker pasted on rather than ink on skin

Why: The AI placed the design as a flat overlay without accounting for the three-dimensional shape of the body part.

Try: make the tattoo wrap naturally around the body contour, following the muscle shape, with realistic ink-on-skin texture and slight skin texture visible through the design

Tip: 'Skin texture visible through' is the key phrase — real tattoos show the underlying skin texture, not a smooth opaque overlay.

Tattoo is the wrong size for the body area

Why: Without a size reference, the AI estimates and may make the tattoo significantly larger or smaller than intended.

Try: resize the tattoo to about [2-3] inches wide, fitting naturally within the [inner forearm / shoulder / wrist] without extending past the edges

Tip: Give a physical measurement or describe the coverage: 'filling the inner forearm' vs. 'small, about the size of a palm.'

Design elements look distorted or stretched on a curved area

Why: Curved surfaces like biceps, calves, and shoulders require the design to be adapted to the body's three-dimensional shape, which the AI sometimes misses.

Try: place the design so it wraps naturally around the curve of the [arm/calf/shoulder], adjusting perspective so it looks correct when viewed straight-on

Tip: Mention 'cylindrical surface' for arms and legs, or 'curved surface of the shoulder cap' — these cues help the AI apply correct perspective warping.

Cover-up design doesn't fully hide the old tattoo

Why: The AI may have positioned the new design next to the old tattoo rather than overlapping it, or sized it too small to provide coverage.

Try: apply the cover-up design directly over and completely covering the existing tattoo, with solid bold ink, the old tattoo should not be visible

Tip: Cover-up designs typically need to be 30-50% larger than the original. If coverage fails, explicitly add 'larger than the old tattoo, ensuring full coverage.'

Quick answers

Do I need to mark the skin area before uploading my tattoo design?

No. Just describe the placement: 'place the design on the inner forearm' or 'apply to the shoulder cap.' The AI understands body anatomy and places the tattoo automatically. Use markers only if the AI keeps putting the tattoo in the wrong location despite clear description.

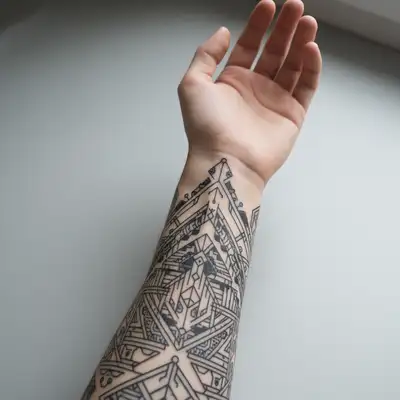
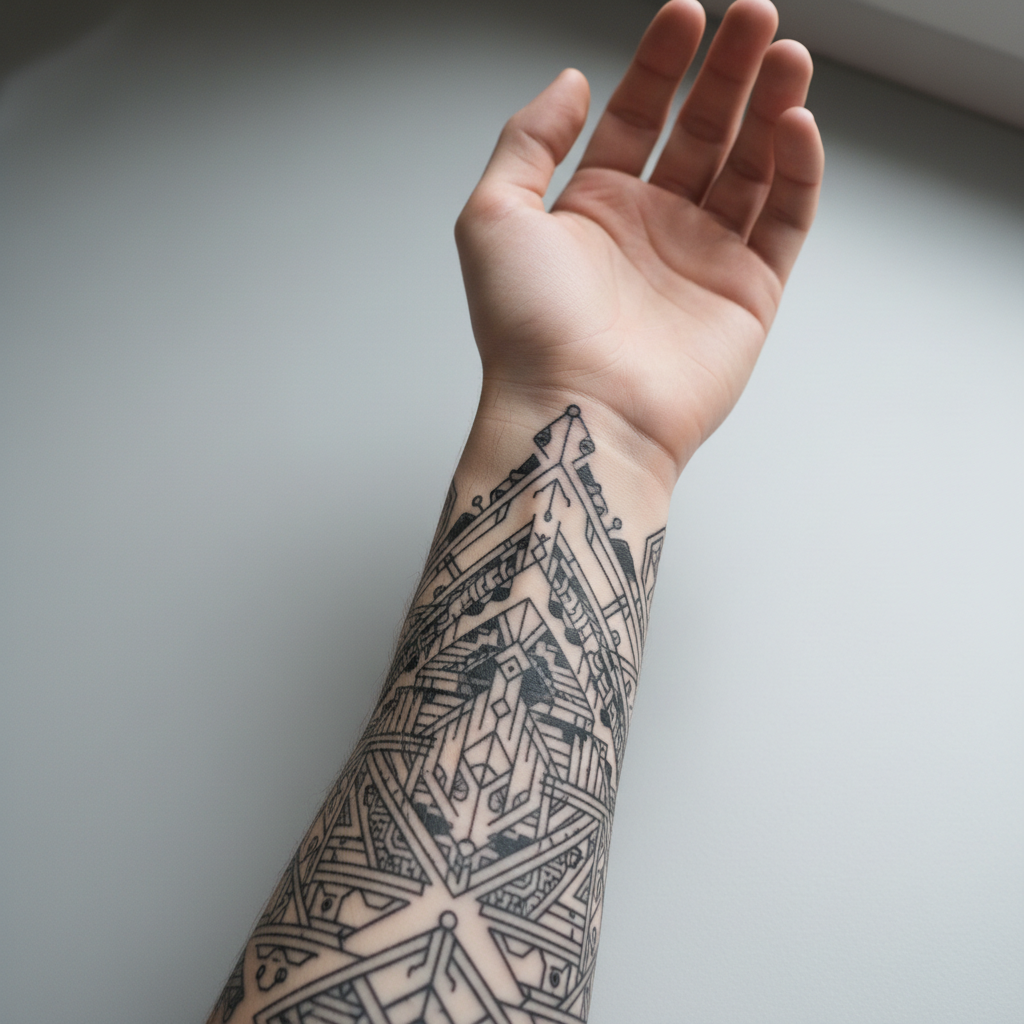
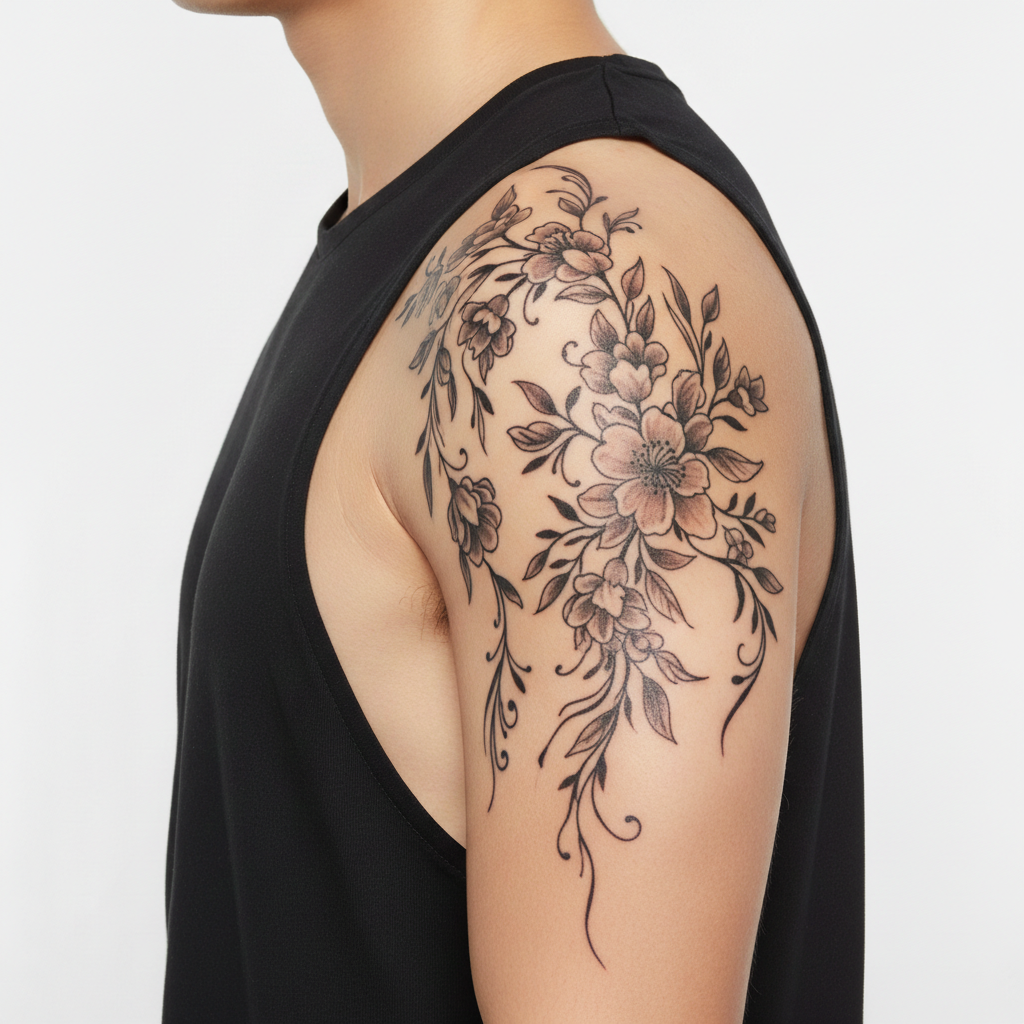
How do I preview a tattoo on my body from a design photo for free?

Upload your body photo to EditThisPic, click '+ Add reference image' to attach your tattoo design, then describe the placement. The AI renders the design realistically on your skin in 30-45 seconds. Free to use, no account required, no watermarks on the result.

Is there a free tattoo placement preview AI that doesn't require login?

Yes. EditThisPic previews any tattoo design on your body photo for free with no account needed. Upload both images, describe where you want it, and download the result. No watermarks. Works for any body area — arm, shoulder, back, leg, or wrist.

Can I upload my own tattoo design and see it on my skin?

Yes. This is the core workflow. Upload your body photo first, then click '+ Add reference image' to attach your design — a sketch, stencil, artist flash, or a photo of a tattoo you admire. Describe where to place it and the AI renders it on your skin. Works with PNG, JPG, and WebP design files.

What is the best way to see how a tattoo will look on me before getting it?

EditThisPic gives the most realistic preview because it uses your actual photo — not a generic arm model. Upload a clear photo of the body area, attach the tattoo design as a reference image, and describe placement. The AI adapts the design to your skin tone, body contours, and lighting, giving you a preview that's specific to you.

Can I use a photo of someone else's tattoo as the reference image?

Yes. Upload any photo of a tattoo you like as the reference — a stranger's Instagram post, a photo of a friend's tattoo, or stock photography. The AI extracts the design and places it on your body photo. Results look most accurate when the reference is a clean, well-lit photo showing the tattoo clearly.

Can I preview a cover-up tattoo before my appointment?

Yes. Upload a photo of your existing tattoo as the main image, then attach the proposed cover-up design as a reference. Describe: 'apply the cover-up design completely over the existing tattoo, bold dark ink.' This lets you and your artist verify the new design is large enough to provide full coverage before you commit.

How do I test the same tattoo design on different body areas?

Keep the same reference image and swap your body photo between edits. Upload a photo of your arm, generate the preview, then upload a photo of your shoulder and generate again with the same prompt. This is the fastest way to compare placements side by side.

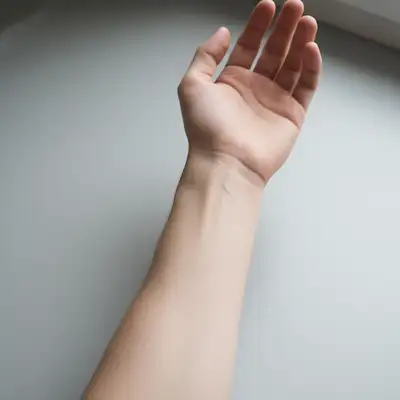
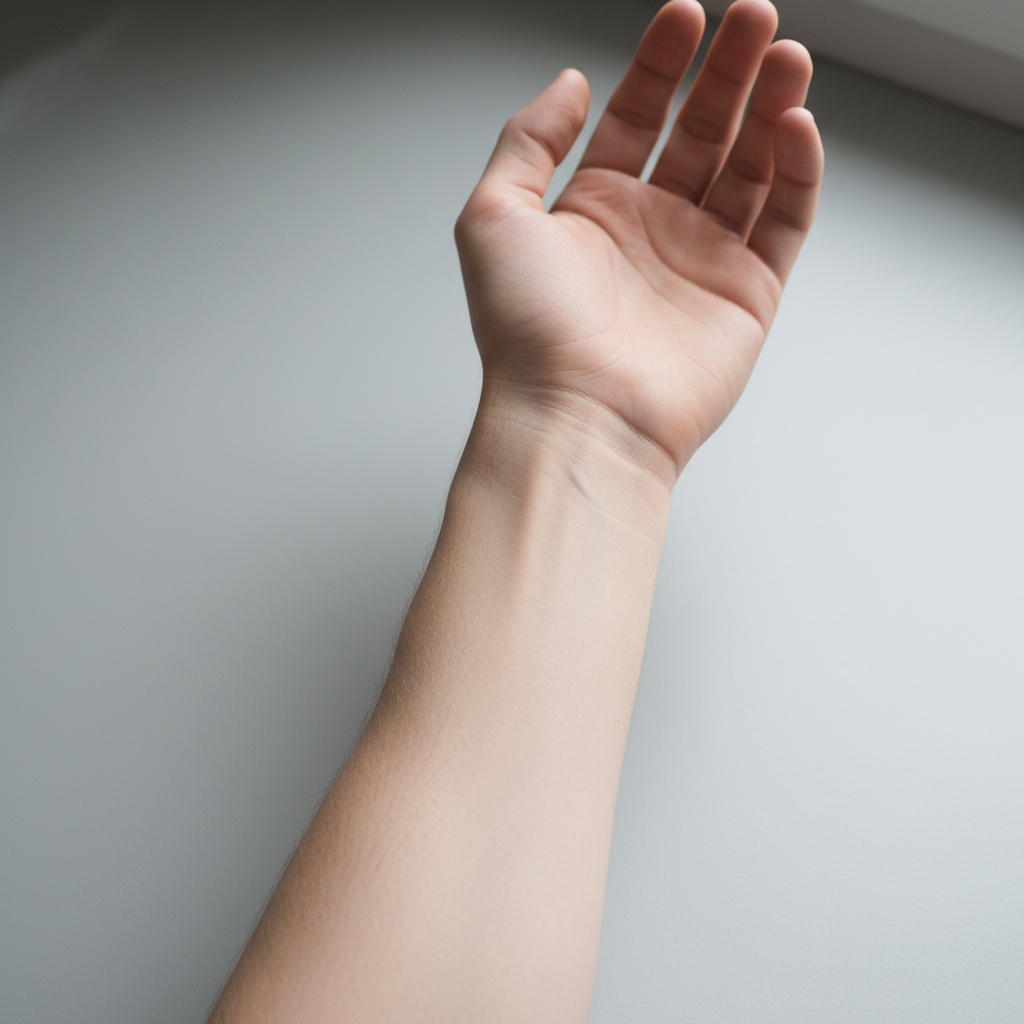
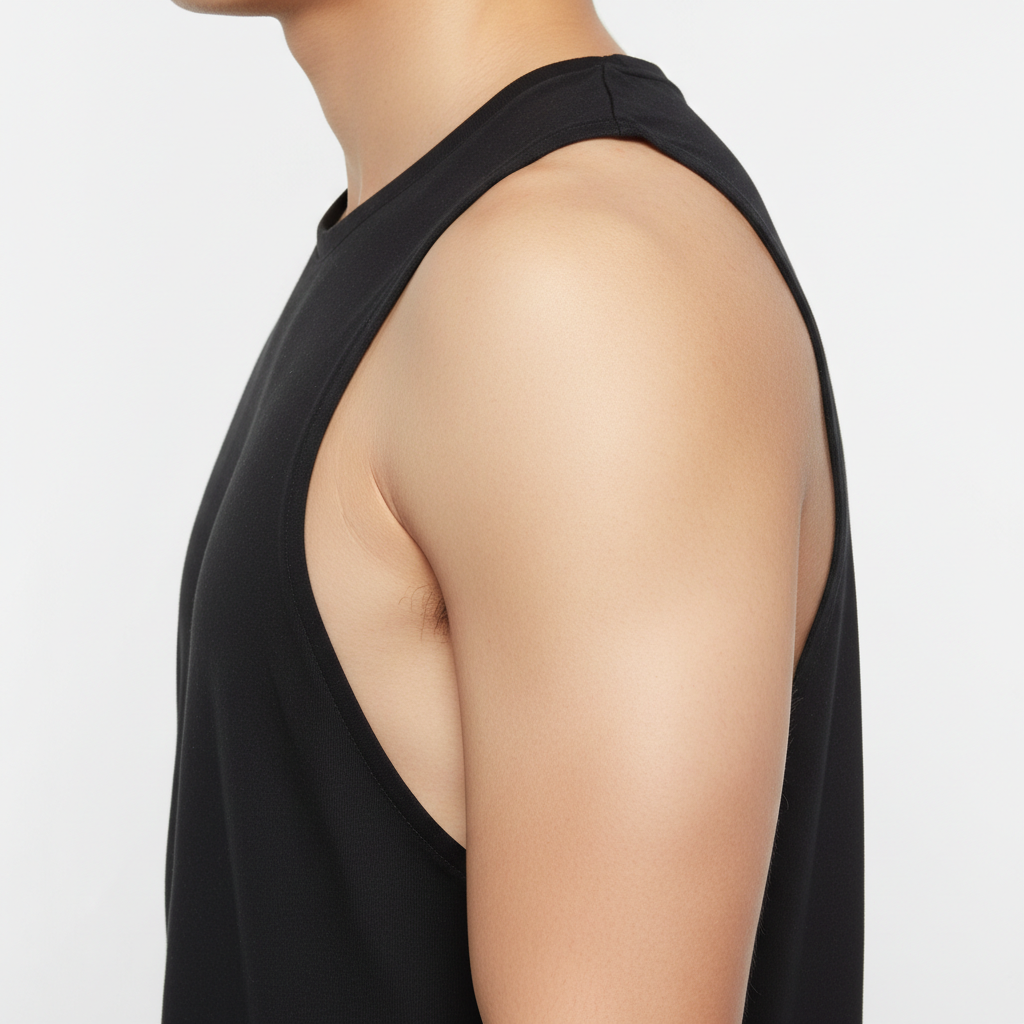
What makes a good body photo for tattoo placement preview?

Good lighting with no harsh shadows, the area positioned straight-on or at the angle you'd naturally view the tattoo, and clear skin visibility. Avoid blurry photos or shots where the body area is at an extreme angle. A plain or simple background helps the AI focus on your skin rather than the surroundings.

What makes a good tattoo design reference photo?

High contrast works best — a black design on white paper, a clean stencil photo, or a well-lit photograph of an existing tattoo. Avoid cluttered or low-contrast reference images. The clearer and more defined the design edges, the more accurately the AI replicates the design on your skin.

Will the tattoo preview look realistic enough to share with my tattoo artist?

Yes, and many users do exactly this. The AI renders tattoos with realistic ink-on-skin texture, proper body contouring, and consistent lighting. You can screenshot the result and share it with your artist as a placement reference. Set expectations that it's an AI preview, not a guarantee of the final result — your artist will use it as a starting point.

Ready to preview your tattoo before getting inked?

Upload your body photo + design. Free, no signup required.

Try it free