Free • No signup Create Car restoration before-after photos · Free

Create Professional Car Restoration Before-After Photos

Auto restoration photos with different lighting kill portfolio credibility. Match them professionally.

Barn find classic car in dim dusty lighting
Before
Completed restoration with matched professional lighting showing transformation
After

Create Car Restoration Before-After Photos | EditThisPic

Drop your photo here

or click to browse

Release to upload

Free • No signup

Advertisement
Popular use cases:
  • Car restoration before after
  • Auto shop portfolio
  • Classic car restoration photos
  • Custom car build documentation
  • Auto detailing before after
  • Paint job documentation
  • Engine rebuild photos

Cost
Free No signup required
Time
Instant results in 15-30 seconds
Works on
Any device - browser, phone, tablet, desktop
Powered by
AI-powered photo editing
Scenario Prompt Time
Standard restoration create before-after with matched lighting, show transformation 20s
Extreme conditions normalize lighting from junkyard to showroom, professional comparison 25s
Quality enhancement enhance before photo to match professional after photo quality 25s

How it works

  1. Upload before and after photos

    Drop your pre-restoration and completed restoration photos into EditThisPic. JPG, PNG, WebP up to 7MB. Works with classic car builds, paint jobs, engine rebuilds, custom fabrication, detailing—any automotive work needing portfolio documentation.

    Expect: Simple lighting matching: 20-25 seconds. Different locations (junkyard to showroom) or major quality differences: may need refinement.
  2. Describe portfolio requirements

    Type 'create before-after with matched lighting for restoration portfolio' or 'combine photos showing transformation, normalize lighting from garage to showroom.' The AI adjusts for different locations, lighting conditions, and photo quality—critical when before photos are in dusty shops and after photos are pristine showroom shots.

    Tip: Specify angle if important: 'front three-quarter view' or 'driver side profile' ensures consistent perspective for portfolio cohesion.

    Copy one of these to get started:

    Standard restoration portfolio before-after create professional before-after comparison with matched lighting, show car restoration transformation clearly
    Junkyard find to showroom finish normalize lighting from outdoor junkyard photo to indoor showroom photo, create professional comparison
    Garage build to professional photo shoot match the professional finished photo lighting to the garage work-in-progress photo, consistent portfolio quality
    Old phone photo vs new camera enhance before photo to match the quality and lighting of professional after photo, create portfolio-ready documentation
    2 more prompts
    Paint job or bodywork documentation create before-after showing paint transformation, match lighting to reveal body quality and finish accurately
    Multiple angle portfolio consistency for front view, match lighting; for side view, match lighting; for rear view, match lighting
  3. Verify transformation clarity

    Check that restoration work is clearly visible—new paint, repaired bodywork, replaced parts, custom modifications. Verify lighting consistency doesn't hide the quality of your work. The transformation should be dramatic and obvious.

  4. Add build details if needed

    For portfolio or social media, include build information: 'add labels showing 1967 Mustang restoration, 2-year build, custom paint' or describe scope. Context helps potential customers understand complexity and timeline.

    Tip: For high-end builds, create multi-angle documentation—front, rear, interior, engine bay—all with same consistent lighting treatment.
Try it free

Create Car Restoration Before-After Photos | EditThisPic

Drop your photo here

or click to browse

Release to upload

Free • No signup

"Our restoration portfolio looked amateur with inconsistent before-afters. Now every build shows professional documentation and we book higher-end projects." @ClassicCarRestoration

See it in action

Barn find classic car in dim dusty lighting
Before
->
Completed restoration with matched professional lighting showing transformation
After

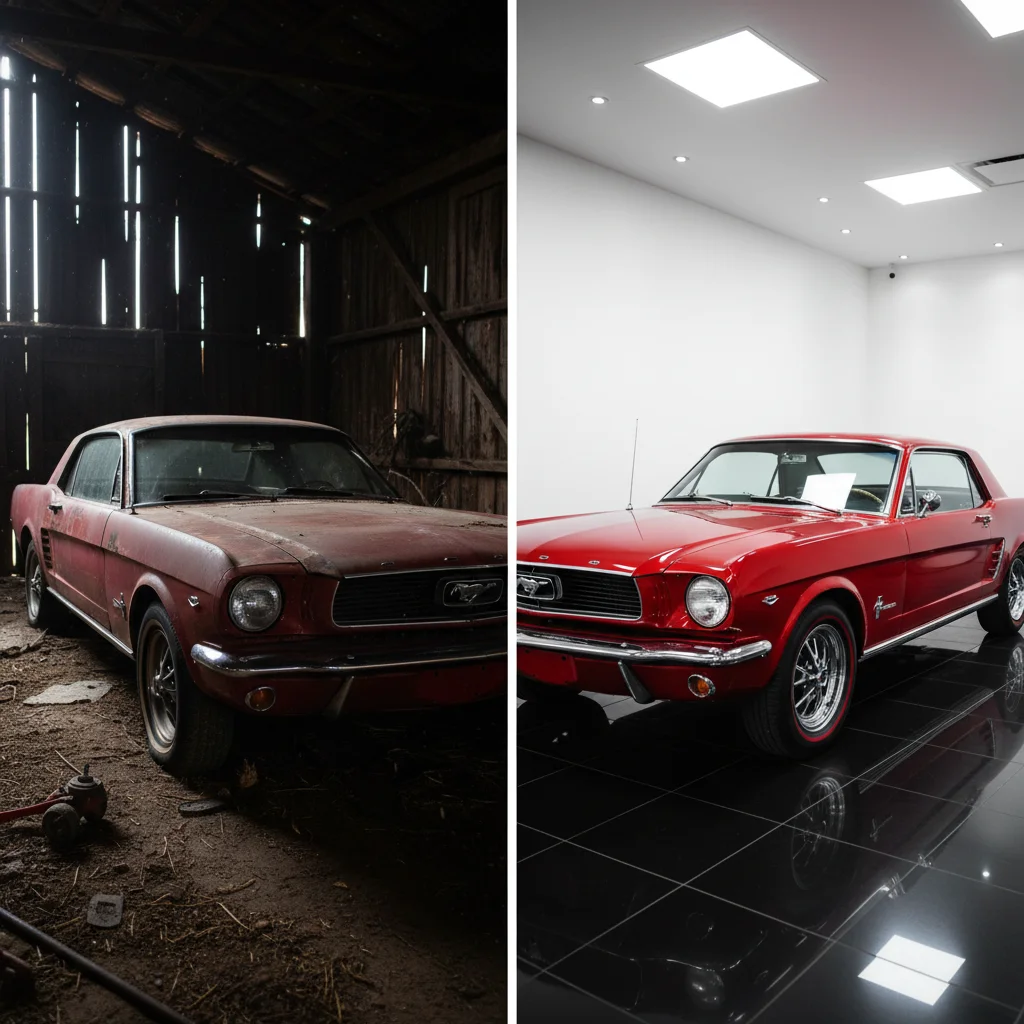
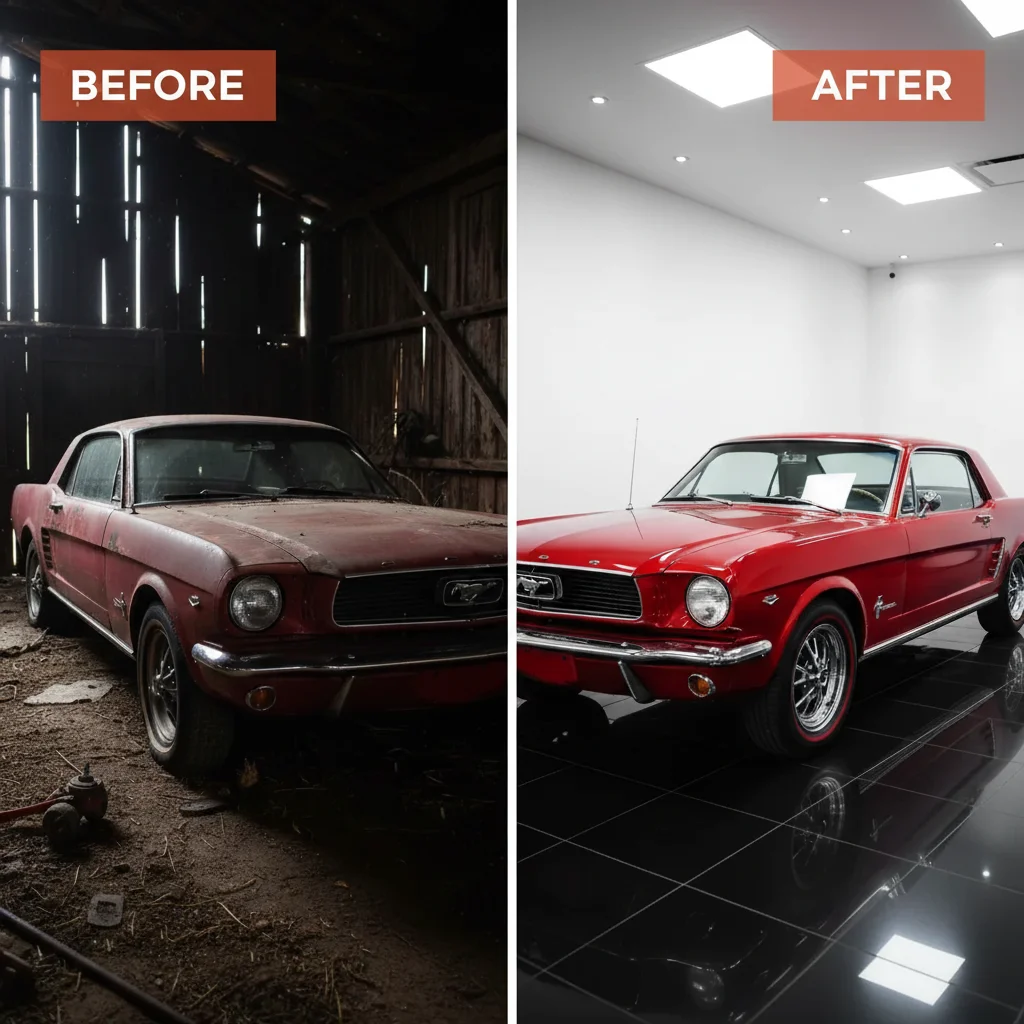
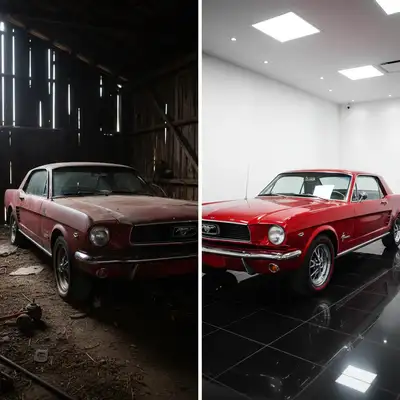
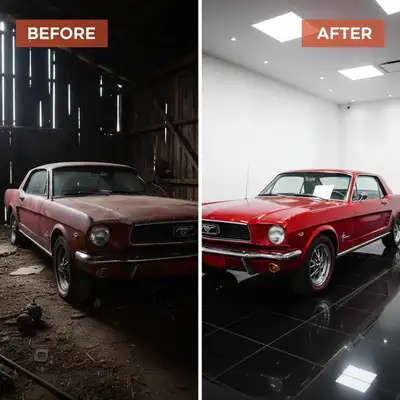
Classic Mustang restoration from barn find to show car

Before photo in dusty barn with dim natural light, after photo in showroom with professional lighting. Matched to show transformation without lighting bias.

Prompt: create professional before-after comparison with matched lighting, show car restoration transformation clearly
Paint job with shop fluorescent lighting vs outdoor natural light
Before
->
Matched lighting showing accurate custom paint transformation
After

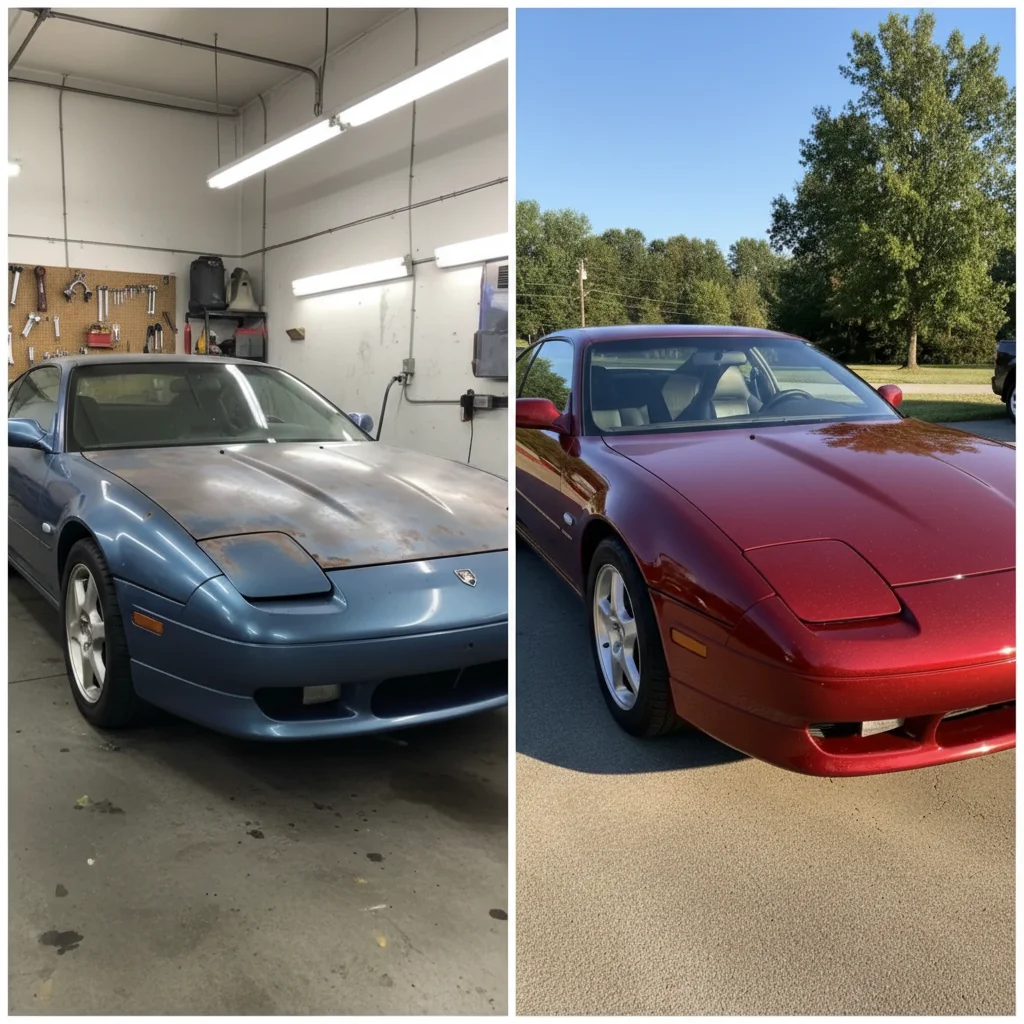
Custom paint job with lighting normalized

Before photo in garage with fluorescent shop lights, after photo outdoors in natural light. Different light sources made comparison unclear—normalization showed actual paint quality.

Prompt: create before-after showing paint transformation, match lighting to reveal body quality and finish accurately
Engine bay with old phone photo quality vs professional camera
Before
->
Matched quality showing professional engine rebuild documentation
After

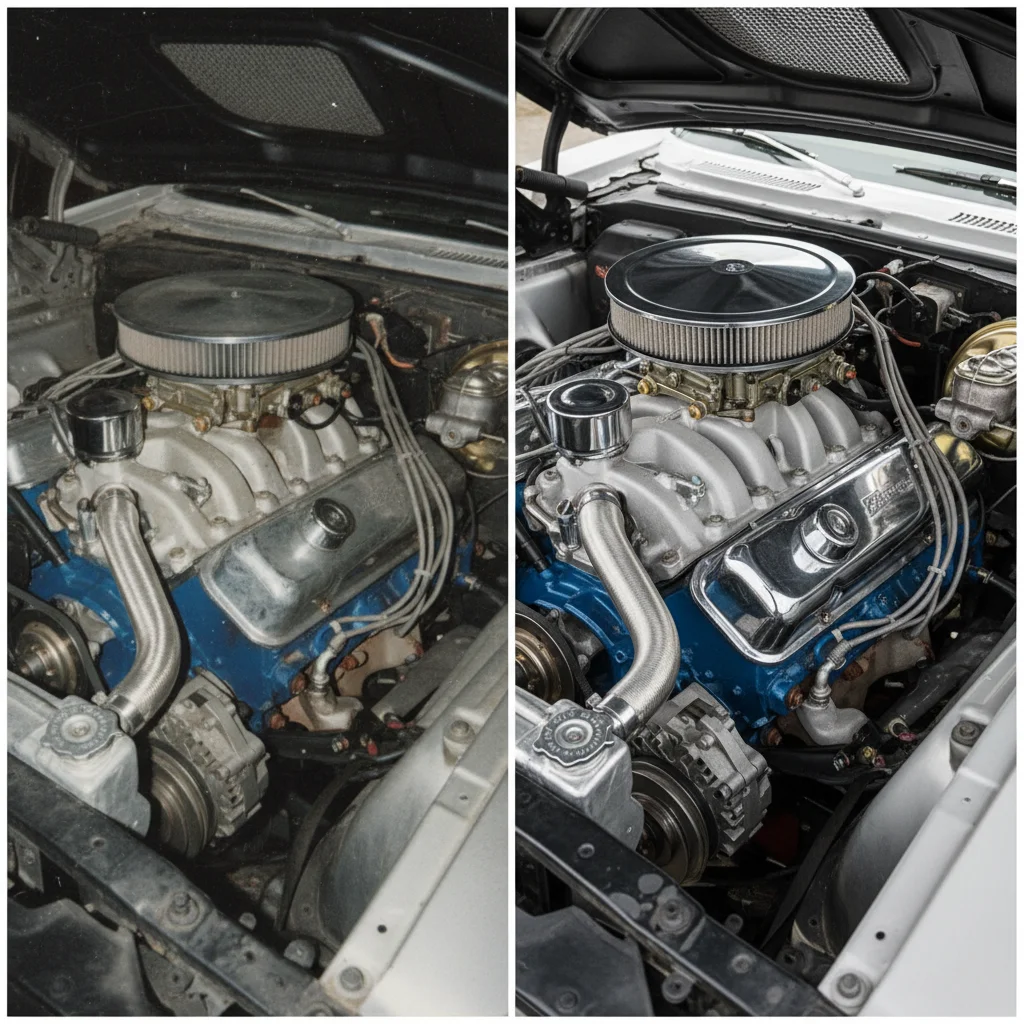
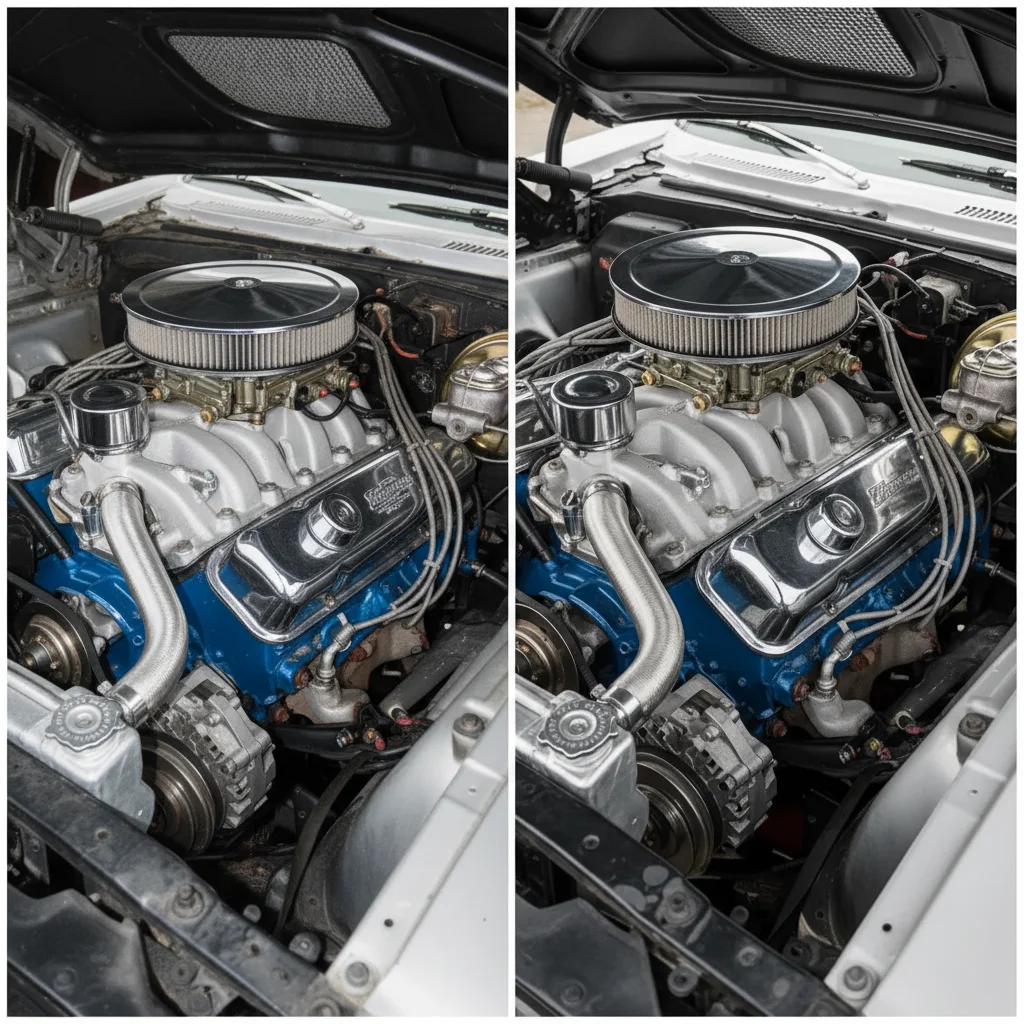
Engine bay rebuild with quality enhancement

Before photo from 2 years ago on old phone showing dirty engine, after photo on professional camera showing rebuilt engine. Enhanced before to match after quality for portfolio cohesion.

Prompt: enhance before photo to match the quality and lighting of professional after photo, create portfolio-ready documentation
Advertisement

If something looks off

Lighting match reduced visibility of restoration quality

Why: Over-normalization can minimize the dramatic difference between rusted/damaged and restored condition.

Try: match lighting for consistency but preserve the dramatic contrast showing restoration quality improvement

Tip: Restoration transformations should look dramatic—if normalization reduces impact, lighten the adjustment.

Paint color looks different after lighting normalization

Why: Paint is extremely lighting-sensitive—color temperature shifts can change how custom paint appears.

Try: match overall lighting but preserve accurate paint color and finish appearance

Tip: Paint color accuracy is critical—customers expect photos to match real-world appearance of finished work.

Angle differences make car look different proportions

Why: Different camera distances or heights change vehicle proportions in photos.

Try: adjust perspective minimally to match vehicle proportions without distortion

Tip: Small angle corrections work. Large differences (wide-angle vs telephoto) need retaking photos.

Chrome and reflective surfaces look inconsistent

Why: Chrome and polished parts reflect ambient lighting—different environments create different reflections.

Try: normalize lighting while preserving natural reflections on chrome and polished metal parts

Tip: Reflections show environment changes—they're expected and prove authenticity of different photo locations.

Background differences distract from car transformation

Why: Barn, garage, street, showroom—different backgrounds draw attention away from the car itself.

Try: blur or neutralize backgrounds while keeping car in sharp focus, minimize background distraction

Tip: For portfolio, car is the focus—subtly reducing background prominence keeps attention on your work.

Multi-angle documentation has inconsistent styles

Why: Using different prompts or treatments for each angle creates non-cohesive portfolio presentation.

Try: Use identical prompt for all angles: 'professional lighting, same treatment' for cohesive multi-angle documentation

Tip: Save your standardized prompt and apply it to every angle of every build for portfolio consistency.

Quick answers

Do I need to mark anything to create car restoration before-afters?

No! Just describe what you want: 'create before-after with matched lighting for restoration portfolio.' The AI handles lighting normalization and side-by-side layout automatically. Markers are only needed if you want to emphasize specific restoration areas—like highlighting custom bodywork or specific modifications.

Why do restoration photos need consistent lighting?

Automotive work is extremely lighting-sensitive—paint quality, body straightness, chrome condition all look dramatically different under various lighting. Barn finds in dim light vs showroom in bright light makes comparison meaningless. Consistent lighting proves your work created the improvement, not just better photography. Professional documentation with matched lighting wins higher-value projects.

Can this fix junkyard or barn find photos?

Yes. Extreme before conditions—dusty barns, outdoor junkyards, dimly lit garages—can all be normalized to match finished showroom-quality photos. The AI adjusts lighting while preserving the rusted, damaged, or original condition that shows what you transformed. Critical for dramatic restoration documentation.

How do I create consistent multi-angle portfolio documentation?

Use the same prompt for all angles: 'professional lighting, front three-quarter view' for front, then repeat for side, rear, interior, engine bay. Consistency across all angles creates comprehensive professional documentation. High-end builds need this multi-angle consistency to command premium prices.

Should I add build details to portfolio before-afters?

Yes. Include vehicle year/make/model, build duration, and key modifications: '1967 Camaro, 3-year restoration, numbers-matching 427.' This context helps potential customers understand scope, timeline, and authenticity. Add details in your prompt: 'include build information as labels.'

Ready to create professional restoration documentation?

Free to try. No signup required.

Try it free