Facebook Cover Photo Maker: Free AI Tool at the Right Size
Last updated
Hit the exact 820x312 Facebook cover size — no cropping, no headroom panic, no Photoshop.
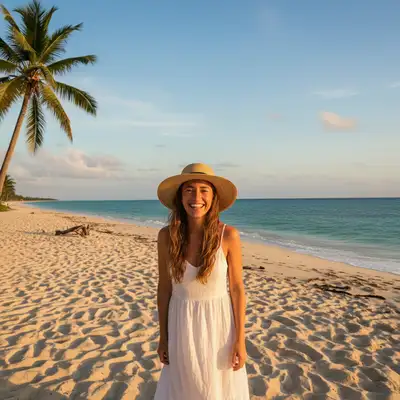
Upload photo to create facebook cover photos
"extend the background on both sides to fit Facebook cover dimensions of 820x312, match the existing colors and lighting seamlessly, keep the subject in the center safe zone"
Release to upload

Built for Facebook Profile and Page Owners
Most cover photo tools force you into a template grid: pick a layout, drop in a stock image, add corporate fonts. EditThisPic does the opposite — start with your real photo and let the AI extend the edges, remove distractions, and balance the composition until it fits the Facebook cover slot. You keep the actual photo. The AI just makes it the right shape.
Tools for Facebook Cover Photos
Extend Background
Extend a portrait or square photo horizontally to fill the cover slot
Remove Person
Remove a stranger or photobomber from the edge of your cover photo
Enhance Colors
Make a flat photo pop against Facebook's white interface
Replace Background
Swap a boring backdrop for a scene that matches your brand or vibe
How to Make a Facebook Cover Photo
-
Upload your source photo
Drop in the image you want to turn into a Facebook cover. Landscape works best, but portrait and square photos work too — the AI will extend the sides. JPG, PNG, WebP, or HEIC up to 7MB. Aim for 1640x624 source resolution or higher for the sharpest result.
Color enhancement: 15-20 seconds. Background extension to 820x312: 20-30 seconds, occasionally one refinement for the seam. -
Describe the cover you want
Type the change in plain English: 'extend the background on both sides to fit Facebook's 820x312 cover photo size, match the existing scene' or 'remove the person on the right and fill with the matching beach.' Mention the Facebook safe zone (640x312 mobile-visible center) if your subject needs to stay centered. No marking required.
Always say what to keep: 'keep the subject sharp and in the center safe zone' so important elements survive Facebook's mobile crop. -
Generate, then test at both desktop and mobile sizes
Tap generate. Check the result at 820x312 desktop AND 640x360 mobile — Facebook crops the sides on mobile, so anything outside the center 640x312 may disappear from a phone view. The seams between original and extended areas should be invisible.
-
Refine with markers if needed
If a seam shows where the extension meets the original, or the AI filled the wrong area, tap a marker on the spot and regenerate. Most cover edits work without markers — try without them first.
Markers are for precision refinement, not a required step.
Copy-Paste Prompts for Facebook Cover Photos
extend the background on both sides to fit Facebook cover dimensions of 820x312, match the existing colors and lighting seamlessly, keep the subject in the center safe zone
Naming the exact dimensions and the safe zone gives the AI everything it needs in one shot.
remove the person on the far right side and fill with the beach and ocean behind them, blend it naturally with the rest of the scene
Tell the AI what to rebuild ('beach and ocean'), not just what to remove.
enhance the colors to be more vibrant and contrasty so the photo pops against Facebook's white background, keep skin tones natural
Photos that look fine in a gallery get washed out by Facebook's white feed. A small color boost fixes it.
extend the top of the image with more sky to give my subject room above their head in a 820x312 frame
When your subject is too close to the top of the frame for Facebook's wide crop, extend the sky upward.
Show 2 more prompts
replace the sky with a dramatic sunset gradient in deep orange and pink tones, keep the foreground exactly the same
Saying 'keep the foreground exactly the same' prevents the AI from over-editing your subject.
remove the cluttered objects in the background and replace with clean, blurred matching scenery, keep the subject sharp
Vague terms like 'cluttered objects' work when the clutter is obviously not part of the subject.
| Edit Type | Prompt | Time | |
|---|---|---|---|
| Extend to cover size | extend the background to 820x312, keep subject in safe zone |
20s | Try This → |
| Remove photobomber | remove the person on the right, fill with matching scene |
25s | Try This → |
| Pop colors for feed | enhance colors against a white feed background |
15s | Try This → |
| Add headroom | extend the top with more sky for a wide cover frame |
20s | Try This → |
Real Facebook Cover Transformations
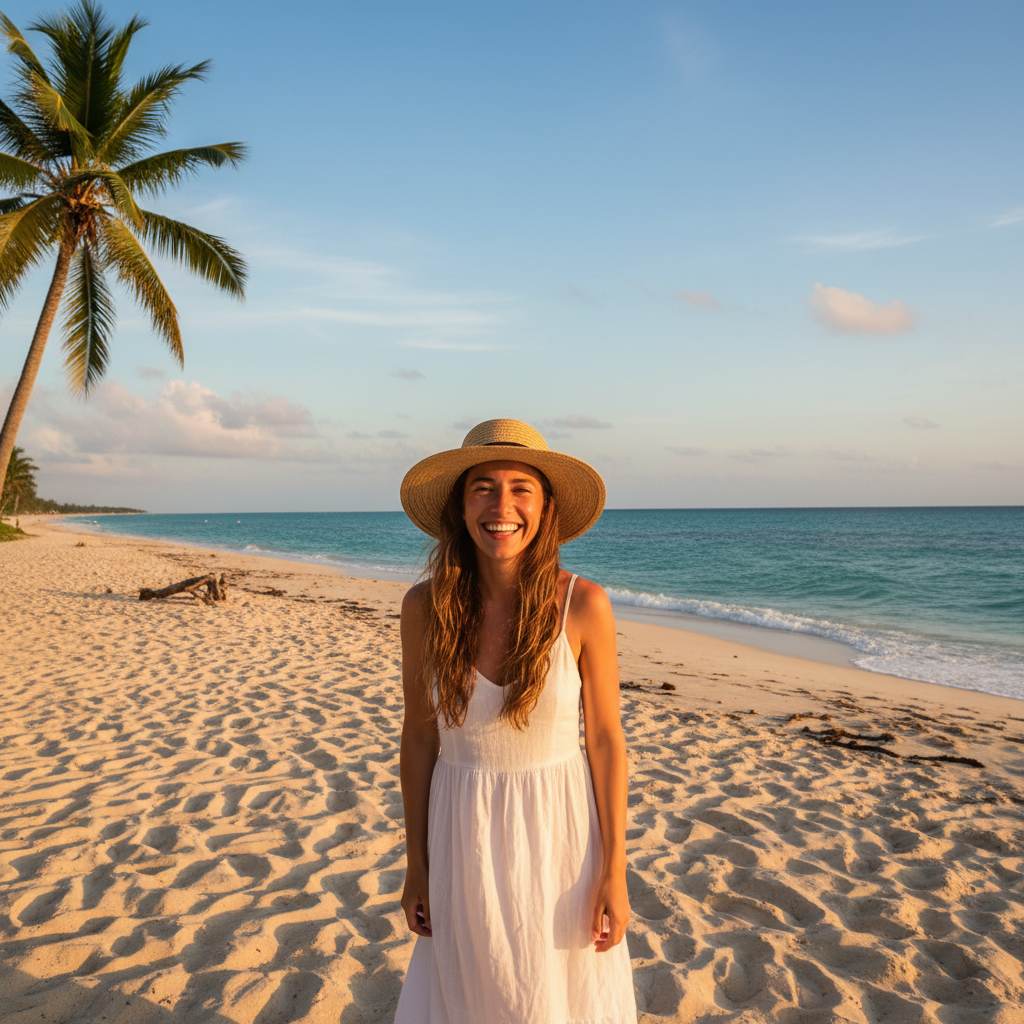
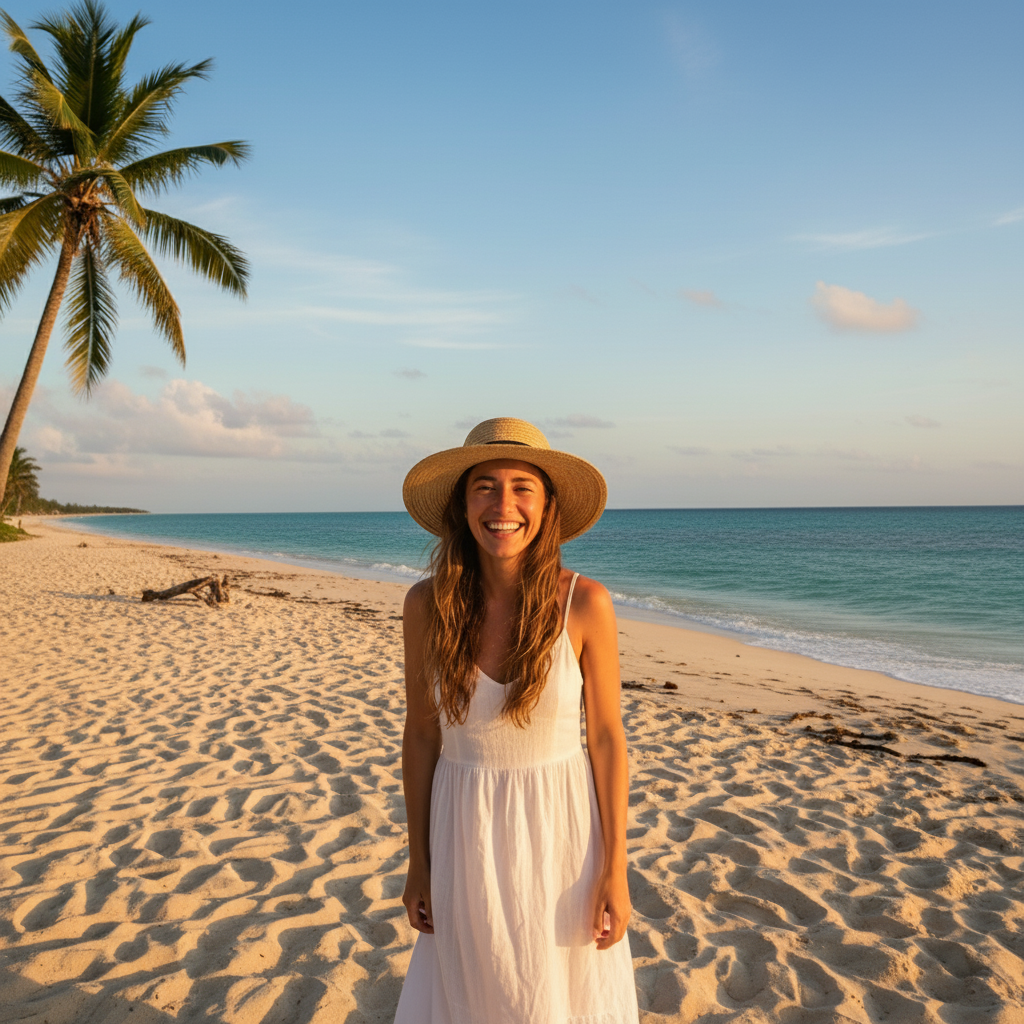
Vertical beach portrait extended to 820x312
A vertical vacation portrait turned into a wide Facebook cover. The AI extended the sand and ocean on both sides until the photo filled the cover slot, with the subject in the safe center.
extend the background on both sides to fit Facebook cover dimensions of 820x312, more beach and ocean, match the existing golden hour lighting, keep me in the center safe zone
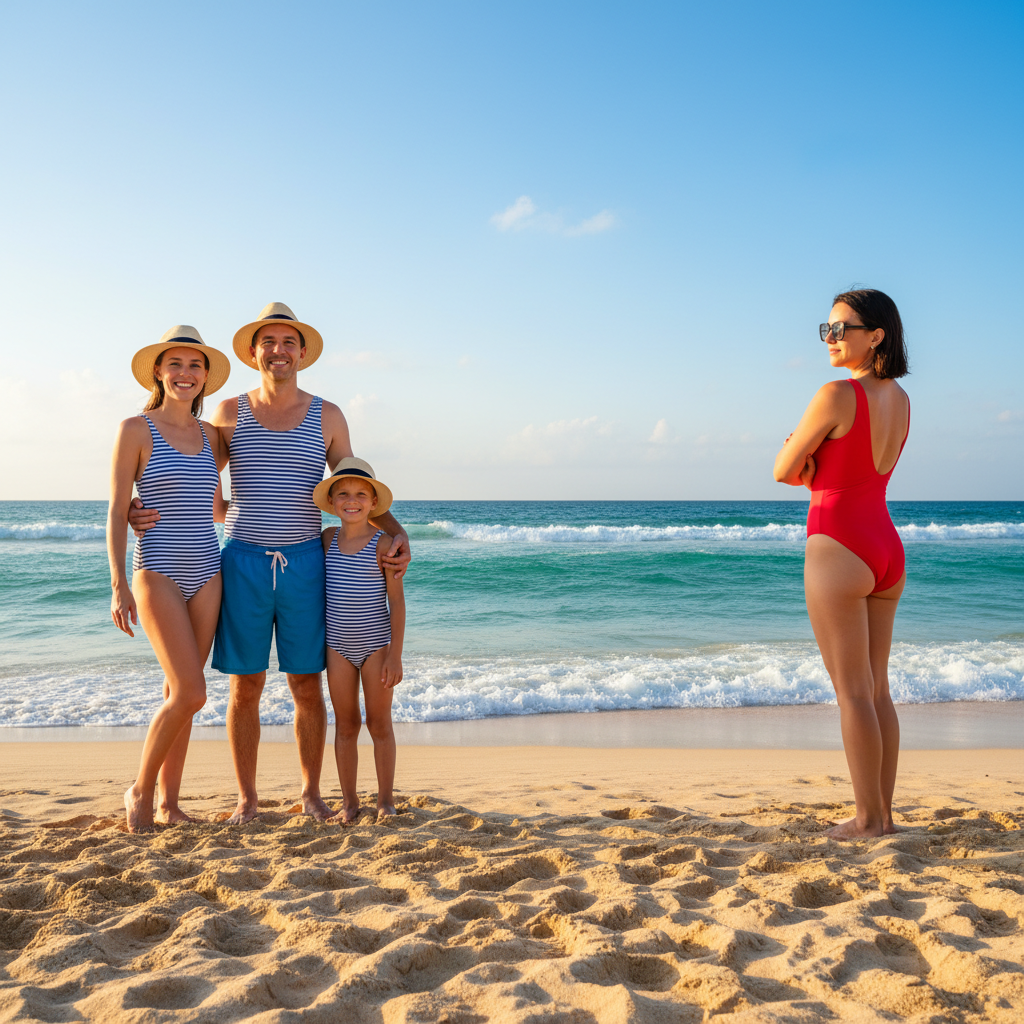
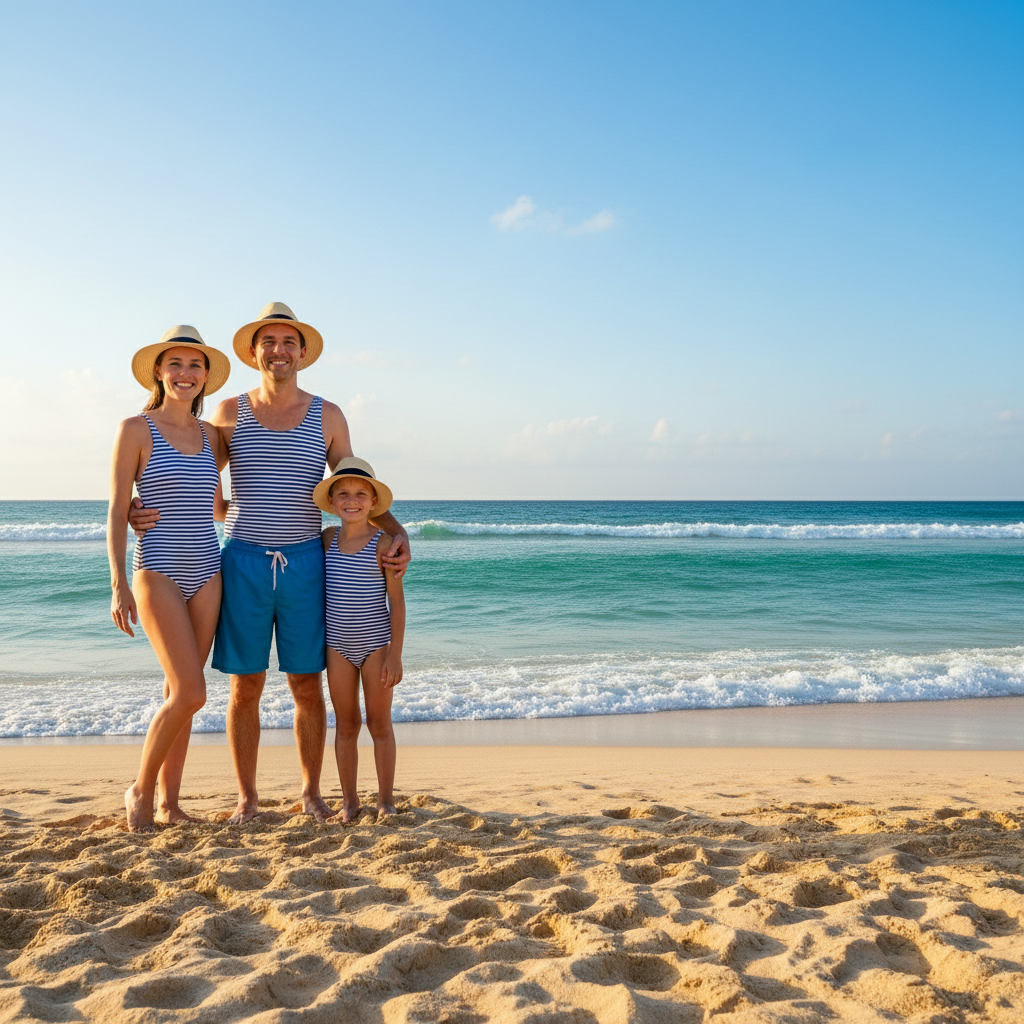
Family beach photo with stranger removed
A great family beach photo had a stranger in a bright red swimsuit at the right edge. One prompt removed them and rebuilt the sand and ocean behind.
remove the person on the far right and fill with the beach and ocean to match the rest of the scene, keep the family exactly the same
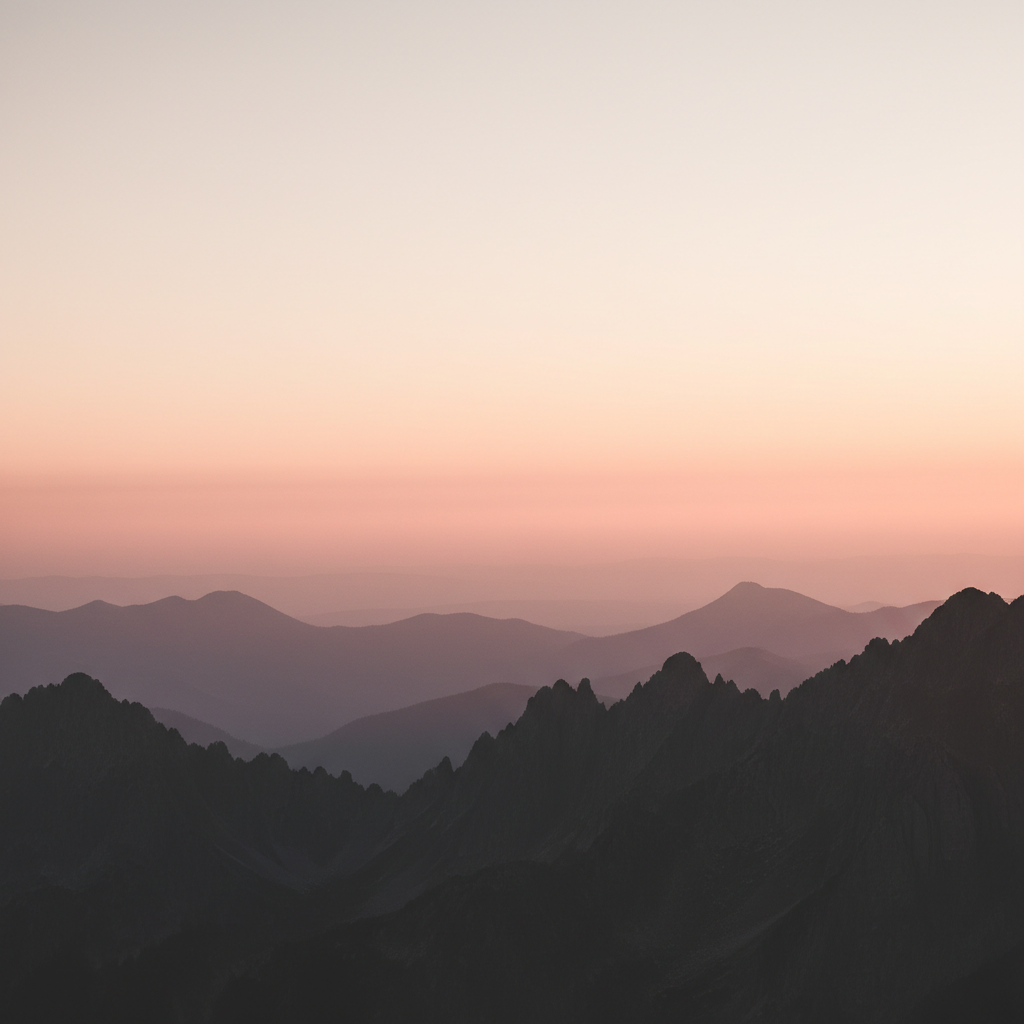
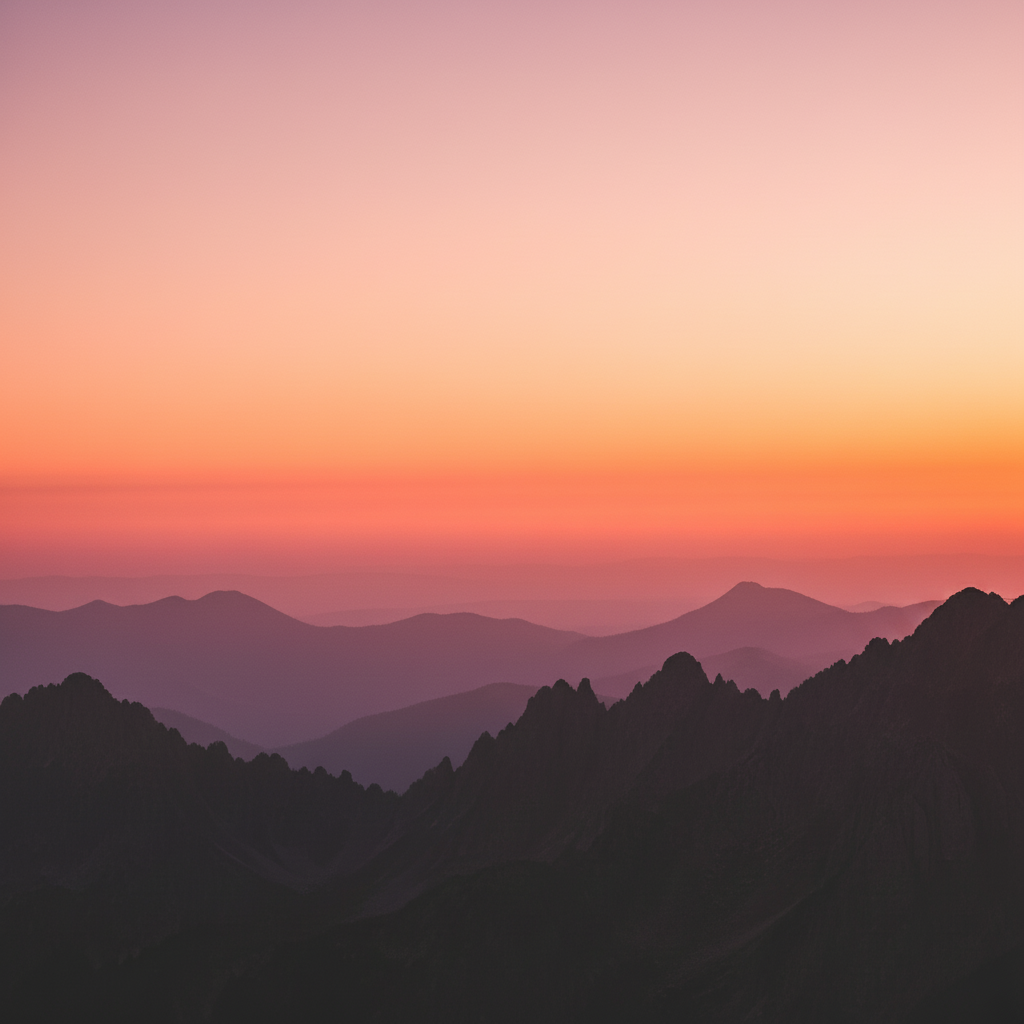
Washed-out mountain sunset enhanced
A mountain sunset cover photo looked dull against Facebook's white interface. Color enhancement made the oranges and pinks pop without overcooking the foreground.
enhance the colors to make the sunset more vibrant with deeper oranges and pinks, increase contrast for impact against a white feed background, keep the foreground silhouettes natural
When Things Go Wrong
Subject gets cut off on Facebook mobile
Why: Facebook crops to 640x360 on mobile and slices the left and right sides off your 820x312 desktop cover. Anything outside the center 640x312 disappears from phones.
regenerate with the subject moved slightly toward the center, keep the subject inside the center 640x312 mobile-safe zone
Always preview your cover at both 820x312 (desktop) and 640x360 (mobile) before uploading. Center the subject.
Visible seam where the extension meets the original
Why: The transition between original and AI-generated content is too abrupt — usually from a color or lighting mismatch.
blend the edges more smoothly where the extension meets the original, match the exact lighting and color tone, no visible seam
Tap a marker directly on the seam line and run a focused fix instead of regenerating the whole image.
Extended area looks different from original
Why: The AI generated content that doesn't match the original lighting, color temperature, or texture.
extend the background with the exact same color tone, lighting direction, and texture as the original photo
Mention specific colors and light sources: 'extend with the same warm golden-hour tones from the right.'
AI changed the wrong area
Why: From description alone the AI couldn't determine which area you meant — common when there are multiple similar regions.
Tap a marker on the specific area you want to change, then regenerate with the same prompt
Markers tell the AI 'I mean THIS one specifically.' Use them when description alone is ambiguous.
Subject looks distorted after extending
Why: The AI accidentally modified the main subject while editing the background.
redo the extension, keep the main subject completely unchanged, only modify the background and edges
Always say 'keep the main subject exactly the same' on extension prompts. The AI defaults to editing everything.
Frequently Asked Questions
What's the Facebook cover photo size in 2026?
The Facebook cover photo size is 820x312 pixels on desktop and 640x360 pixels on mobile. The center 640x312 area is the safe overlap visible on both — anything outside that center gets cropped on phones. Facebook recommends uploading at least 851x315 to avoid quality loss, and supports JPG and PNG up to 100KB for fastest load.
How do I make a Facebook cover photo for free?
Upload any photo to EditThisPic and type 'extend the background to fit Facebook's 820x312 cover dimensions, keep the subject in the center safe zone.' The AI extends the sides, matches colors, and gives you the cover-shaped result in 15-30 seconds. Download with no watermark, no signup, and upload it directly to Facebook from any phone or laptop browser.
What is the safe zone for Facebook cover photos?
The safe zone is the center 640x312 area that displays on both desktop (820x312) and mobile (640x360). Keep your face, logo, text, and any important detail inside this center band — anything outside gets cropped on phones. When generating with EditThisPic, ask for 'subject in the center safe zone' to lock the composition.
Can I extend a vertical photo into a Facebook cover?
Yes. Upload the vertical photo and type 'extend the background on both sides to 820x312 cover dimensions, match the existing scene.' The AI generates new background to the left and right of your subject until the photo fits the cover slot. Works best when the original background is something the AI can extrapolate — sky, beach, grass, plain walls.
How do I make sure my face doesn't get cut off on mobile?
Position your subject in the center horizontally. Facebook's mobile crop slices the left and right sides — keeping the subject in the center 640x312 zone protects them. EditThisPic accepts 'keep the subject in the center safe zone' as a prompt. Always preview at 640x360 mobile before uploading.
Is there a free Facebook cover photo maker without signup?
Yes. EditThisPic gives you one free Fast edit per week with no email and no signup, and the download has no watermark. If you're refreshing the cover photo for a Facebook page or business profile and need 5+ edits at once, the Lite plan is $4.99/month for 15 credits, or grab a one-time $1.99 three-edit pack with no subscription.
Can I make a Facebook cover photo on my phone?
Yes. EditThisPic runs entirely in any modern mobile browser — Safari on iPhone, Chrome on Android, and tablets. Open the site, upload from your camera roll, edit, download, and open Facebook in the same browser session. There's also a native iOS app on the App Store if you'd prefer a home-screen shortcut.
What's the best free Facebook banner maker for business pages?
If you want template-driven designs with stock images and corporate fonts, Canva is the standard. If you want to use a real photo of your team, your product, or your storefront and just need it shaped for Facebook's cover slot, EditThisPic is faster and free without a signup. Use Canva for layouts, EditThisPic for actual photos.
Popular use cases
Ready to make your Facebook cover photo?
Free to try. No signup. No watermark. Right size, every time.
Make Your Cover PhotoTrusted by 15,000+ users