Free • No signup Smooth Skin · Free

AI Skin Smoother

Describe the smoothing you want and AI perfects your skin instantly. No marking needed.

Close-up portrait with visible pores and rough skin
Before
Same portrait with smooth, refined skin texture
After

AI Skin Smoother

Drop your photo here

or click to browse

Release to upload

Free • No signup

Advertisement
Popular use cases:
  • portrait skin smoothing
  • selfie skin filter
  • pore reduction
  • skin texture refinement
  • beauty retouching
  • dating profile photo
  • social media photo editing
  • professional headshot polish

Cost
Free No signup required
Time
Instant results in 15-30 seconds
Works on
Any device - browser, phone, tablet, desktop
Powered by
AI-powered photo editing
Scenario Prompt Time
Light smoothing gently smooth the skin, keep it natural 30s
Pore reduction minimize pores on nose and cheeks 35s
Full skin perfection smooth all skin to even flawless texture 45s

How it works

  1. Upload your photo

    Drop your image into EditThisPic. JPG, PNG, WebP up to 7MB. Well-lit portraits where the face is clearly visible produce the best skin smoothing results. Both close-ups and upper body shots work.

    Expect: Basic skin smoothing: 30-40 seconds. Detailed smoothing with tone correction: 45-60 seconds and may need refinements.
  2. Describe the smoothing you want

    Type what you want: 'smooth the skin on the face naturally' or 'reduce visible pores and soften skin texture while keeping features sharp.' Be specific about how much smoothing you want. No marking needed—the AI knows what 'skin' means on a face.

    Tip: Use 'subtle' for light smoothing or 'porcelain' for maximum effect. The level of smoothing follows your description.

    Copy one of these to get started:

    Natural skin smoothing smooth the skin on the face naturally, reduce visible pores and blemishes while keeping skin texture realistic
    Heavy pore reduction minimize visible pores on the nose and cheeks, smooth the skin to a refined porcelain finish
    Forehead and T-zone smoothing smooth the forehead and T-zone area, reduce shine and visible texture while keeping the rest of the face natural
    Gentle selfie smoothing gently smooth the skin in this selfie, reduce minor imperfections and add a soft healthy glow
    3 more prompts
    Full face skin perfection smooth all visible skin on the face to an even, flawless texture while keeping eyes and lips perfectly sharp
    Reduce oily shine smooth the skin and remove oily shine from forehead, nose, and chin, create a matte natural finish
    Body skin smoothing smooth the visible skin on arms and shoulders, reduce texture and imperfections for a polished look
  3. Review the result

    Check that skin looks smooth but believable. Zoom in to verify that eyes, eyebrows, lips, and hair edges remain sharp. Look for consistent smoothing across forehead, cheeks, nose, and chin.

  4. Refine with markers if needed

    If certain patches look rougher than others or the smoothing missed a spot, tap markers on those areas and regenerate. Most skin smoothing works perfectly on the first try.

    Tip: Markers are for precision refinement only. Try without them first—you usually won't need them.
Try it free

AI Skin Smoother

Drop your photo here

or click to browse

Release to upload

Free • No signup

"I use this for all my dating profile photos. One prompt smooths out my skin without making me look like a different person. Quick, easy, and actually looks real." @DatingProfile_Mike
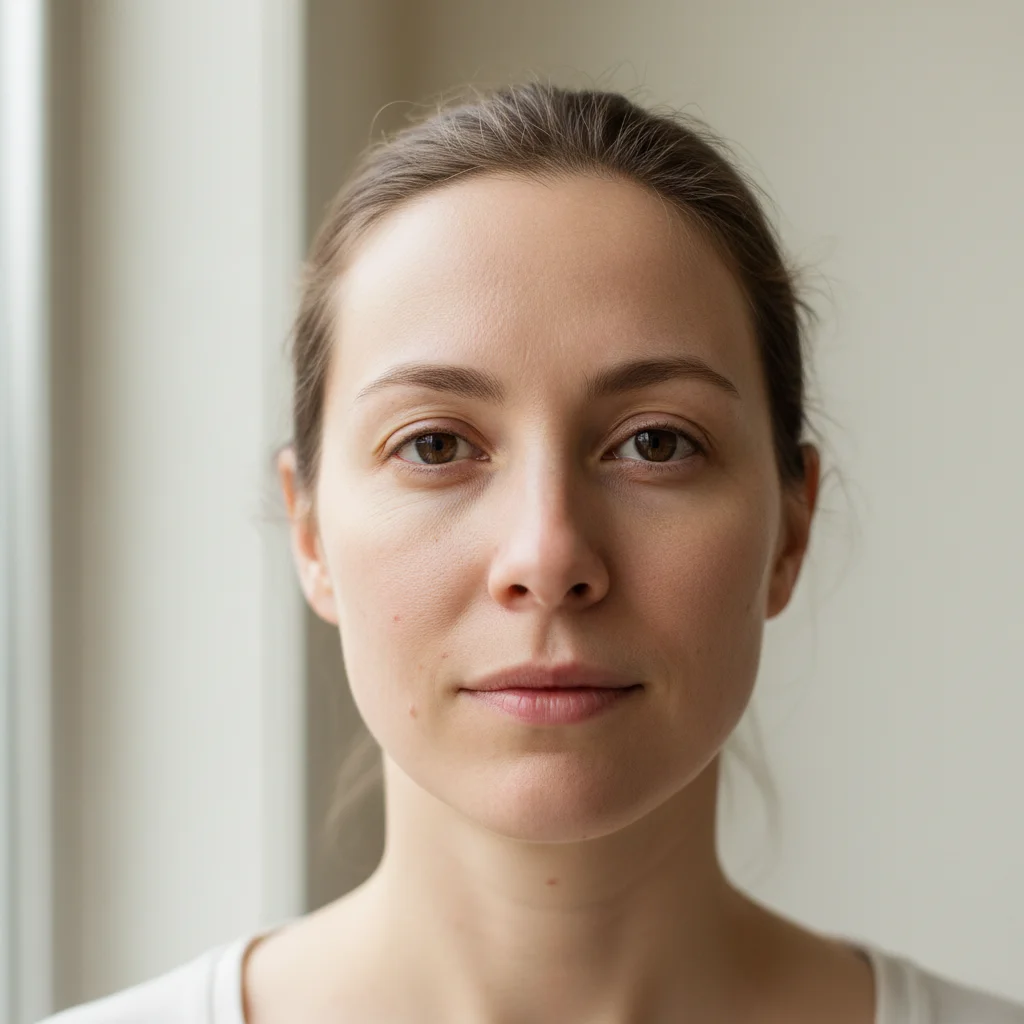
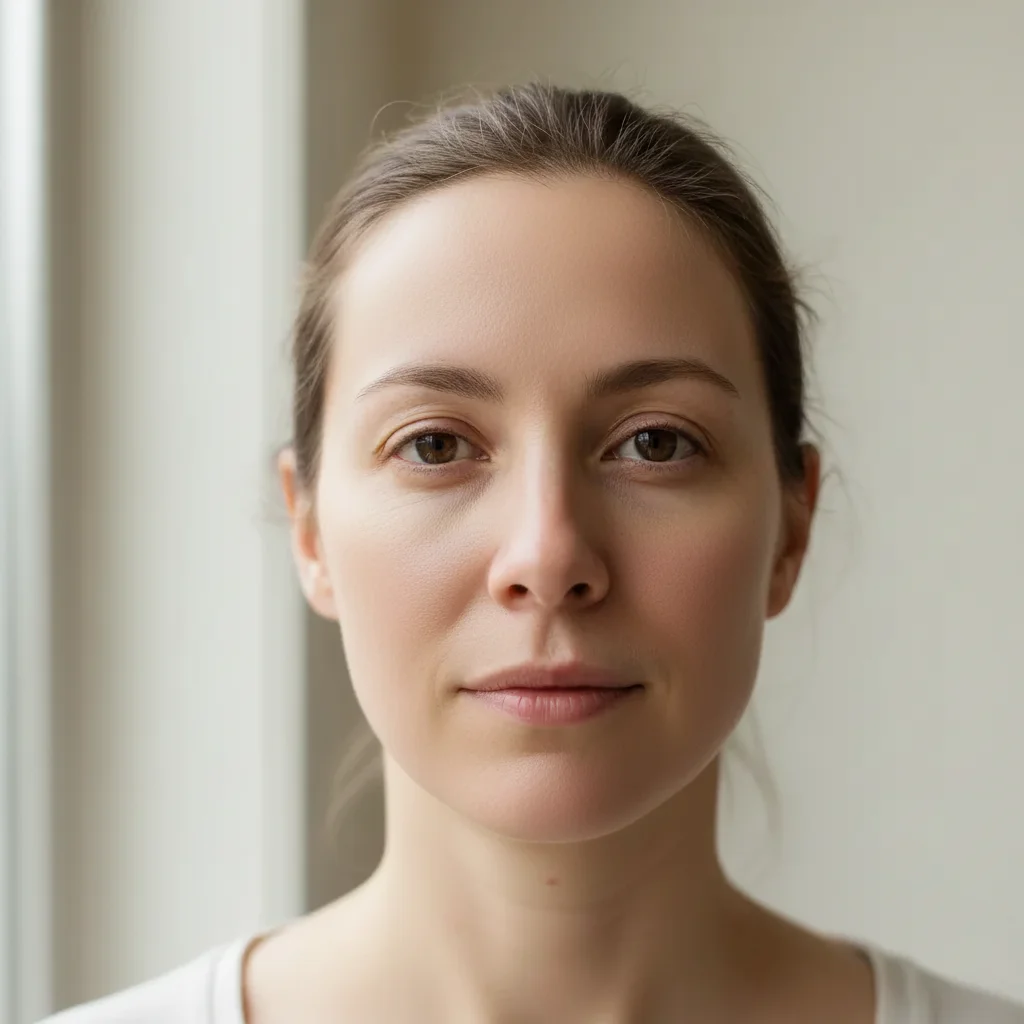
See it in action

Close-up portrait with visible pores and rough skin
Before
->
Same portrait with smooth, refined skin texture
After

Pore reduction on close-up portrait

A close-up portrait with visible enlarged pores smoothed to a refined, natural finish.

Prompt: smooth the skin on the face naturally, reduce visible pores and blemishes while keeping skin texture realistic
Man's portrait with oily shine on face
Before
->
Same portrait with matte, smooth skin
After

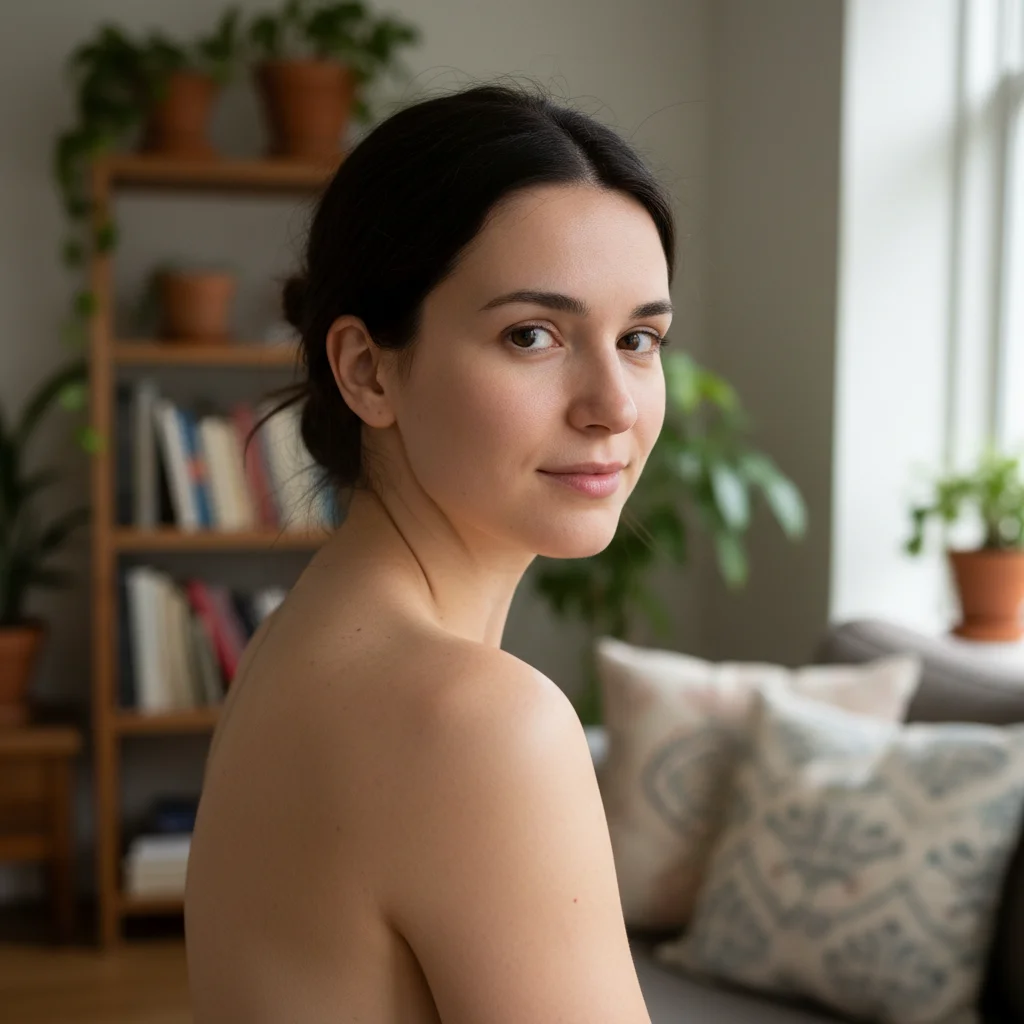
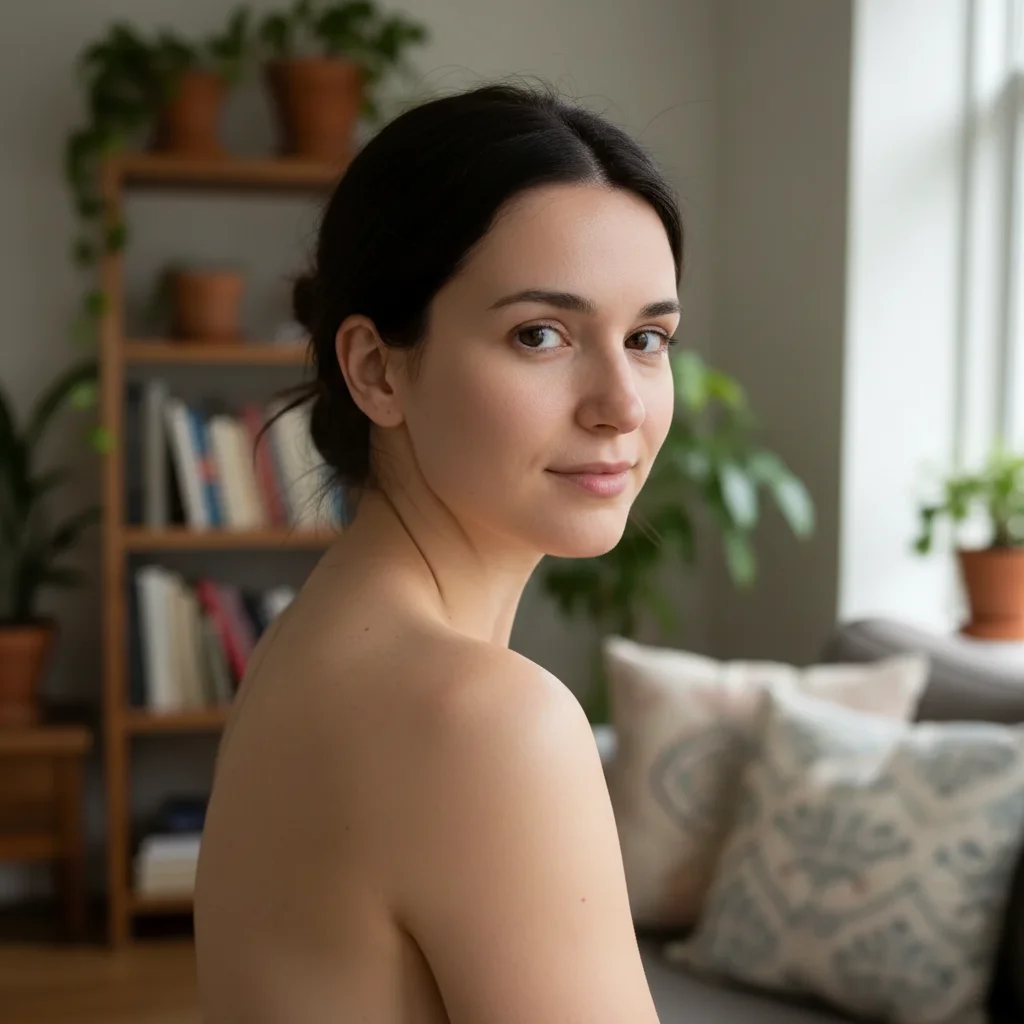
Oily skin mattified for professional shot

A portrait with visible oily shine transformed into a matte, polished professional photo.

Prompt: smooth the skin and remove oily shine from forehead, nose, and chin, create a matte natural finish
Advertisement

If something looks off

AI changed the wrong area or something I didn't want changed

Why: The AI couldn't determine exactly which skin area you meant from description alone. This happens when you only want specific zones smoothed.

Try: Tap a marker on the specific skin area you want smoothed, then regenerate with the same prompt

Tip: Markers tell the AI 'I mean THIS area specifically.' Use them when description alone is ambiguous.

Skin looks plastic or like a wax figure

Why: The AI removed too much natural texture including pores and micro-wrinkles that make skin look real.

Try: smooth the skin subtly, keep natural pores and micro-texture visible, only reduce major imperfections

Tip: Adding 'keep natural pores visible' is the key phrase to prevent the plastic look.

Eyes, lips, or hair got blurred by smoothing

Why: The smoothing effect bled into nearby sharp features, especially around the edges of the skin area.

Try: smooth only the skin areas - keep eyes, eyebrows, eyelashes, lips, and hair edges completely sharp

Tip: Explicitly listing features to keep sharp gives the AI clear boundaries for the smoothing effect.

Smoothing is uneven—some areas look different than others

Why: Varying lighting across the face caused the AI to apply different levels of smoothing in highlights versus shadows.

Try: apply consistent, even skin smoothing across the entire face including both highlighted and shadowed areas

Tip: Mentioning 'consistent' and 'even' specifically addresses the uneven smoothing pattern.

Skin color shifted or looks washed out after smoothing

Why: The smoothing algorithm altered color saturation while blending skin tones, washing out natural warmth.

Try: smooth the skin while preserving the original skin color, warmth, and natural undertones exactly

Tip: Adding 'preserve original skin color' ensures the smoothing only affects texture, not tone.

Quick answers

Do I need to mark skin areas before describing the smoothing I want?

No! Just describe what you want: 'smooth the skin on the face' or 'reduce visible pores.' The AI understands what skin is and where it is on a face. Only use markers when you want to smooth a very specific zone—like just the forehead or just around the nose.

How do I smooth skin in a photo without it looking fake?

Use words like 'natural,' 'subtle,' or 'keep texture visible' in your prompt. For example: 'smooth skin naturally while keeping pores visible.' The AI preserves enough micro-texture to keep the skin looking real while reducing imperfections. Avoid asking for 'flawless' or 'perfect' if you want a natural result.

Is there a free AI skin smoother that doesn't require an account?

Yes, EditThisPic is free to try with no account needed. Upload your photo, describe the skin smoothing you want, and download the result. No watermarks on outputs. Works for pore reduction, texture smoothing, and shine removal without any signup.

What's the best free tool for smoothing skin in photos?

EditThisPic offers free AI skin smoothing with no signup required. Unlike apps that need you to paint over skin with a brush tool, just describe the smoothing you want. It handles everything from subtle pore reduction to full skin refinement, producing natural results in seconds.

Ready to smooth skin in your photos?

Free to try. No signup required.

Try it free