Free • No signup Add Roof shingles · Free

AI Roof Shingle Visualizer

← Browse all exterior renovation tools

Last updated

Upload your house photo and a shingle reference to visualize a new roof before the installation crew arrives.

01Photo 1
Dated house with badly worn tan asphalt shingles needing replacement
02Photo 2
Charcoal architectural dimensional shingle product photo
03Result
Same house with new dimensional architectural shingles applied from contractor's reference photo

Upload photo to add roof shingles

"add the reference shingles to this house roof — photorealistic quality for a roofing bid presentation. Show the homeowner what the finished roof will look like before we start the job"

Release to upload

1 free edit·then from $4.99

Popular use cases:
  • roof shingle visualizer
  • add shingles to house photo
  • roofing contractor sales tool
  • shingle color comparison
  • roof replacement planning
  • new construction roofing
  • exterior renovation visualization

1Your photo
+
2Reference
=
Result
House exterior with existing worn asphalt shingles Your house photo
Charcoal architectural shingle product photo Shingle reference
House with new charcoal architectural shingles applied Result

"Add these architectural shingles to the full roof, matching the pitch"

Cost
Free No signup required
Time
Instant results in 15-30 seconds
Works on
Any device - browser, phone, tablet, desktop
Powered by
AI-powered photo editing
Scenario Prompt Time
Architectural shingles add architectural shingles from reference to full roof, all sections, horizontal courses 25s
Metal standing seam add metal roofing from reference showing vertical panel lines and metal finish 30s
Premium luxury shingles add luxury shingles with dimensional shadow lines and granule texture from reference 30s

How it works

  1. Upload your two photos

    Drop your house exterior photo into EditThisPic first — a front elevation or slight angle works well. Then click '+ Add reference photo' and upload the shingle product image or sample photo. Use a manufacturer's product photo, a photo you took at a roofing supply store, or a photo of an actual shingle sample. JPG, PNG, WebP up to 7MB each.

    Expect: The AI identifies the roof geometry from your house photo and maps the shingle style, color, and texture from your reference photo onto the roof surface.
  2. Describe the shingle style and coverage

    Tell the AI what type of shingles and where: 'add these architectural shingles to the entire roof, front gable and all visible sections' or 'replace the existing shingles with this three-tab shingle in the reference photo, maintaining the current roof pitch.' Mentioning the shingle type (architectural, three-tab, luxury, metal) helps the AI apply the correct texture.

    Tip: For complete coverage, say 'all visible roof sections including dormers.' The AI tends to stop at the main gable if not directed to include secondary roof planes.

    Copy one of these to get started:

    Standard architectural shingle replacement add the architectural shingles from the reference photo to the entire roof — cover all visible roof sections including any dormers, following the roof pitch angle, at realistic shingle scale
    Roofing bid visual for homeowner add the reference shingles to this house roof — photorealistic quality for a roofing bid presentation. Show the homeowner what the finished roof will look like before we start the job
    Luxury shingle upgrade visualization add the premium impact-resistant shingles from the reference photo to the roof, showing the dimensional shadow lines and texture that distinguish luxury shingles from standard three-tab
    Existing shingle versus new comparison replace the existing worn dark shingles with the new color from the reference photo — same roof geometry, same pitch, just the new shingle color and texture applied
    2 more prompts
    New construction roofing selection add shingles from the reference photo to this new construction house roof — the roof is currently bare plywood or underlayment. Show the finished look for the builder presentation
    Neighborhood color compatibility check add these shingles to my roof in this photo — keep the siding, trim, and shutters exactly as they are. I want to check that the shingle color works with my existing exterior color scheme
  3. Check shingle scale and alignment

    Verify that shingle courses appear at realistic scale relative to the house — typical architectural shingles are about 12 inches tall per exposed course. Check that horizontal shingle lines are parallel to the ridge and that the rake edge looks clean.

See it in action

Dated house with badly worn tan asphalt shingles needing replacement
Main Photo
Charcoal architectural dimensional shingle product photo
Reference
Same house with new dimensional architectural shingles applied from contractor's reference photo
Result

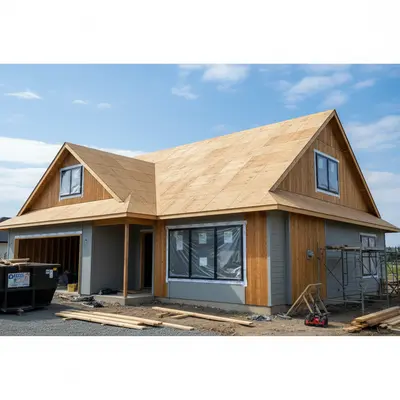
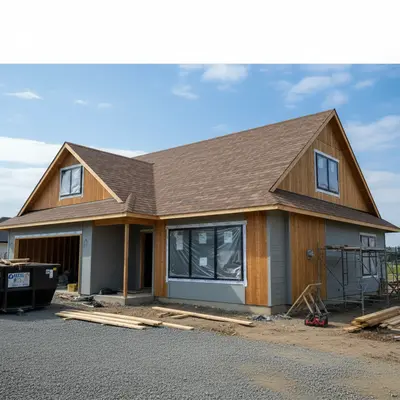
Roofing bid walkthrough visualization

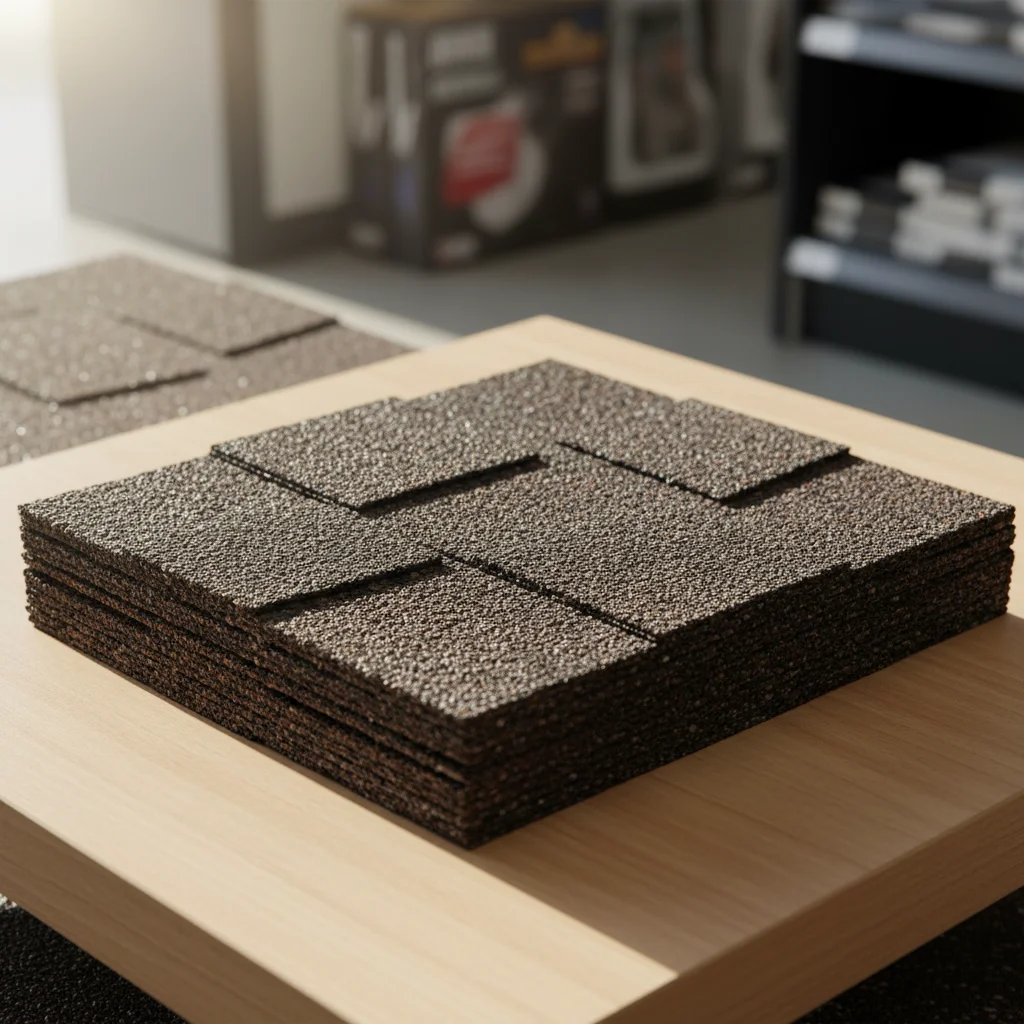
A roofing contractor showed a homeowner three shingle options during the estimate visit, using the homeowner's own house photo as the base.

Prompt: add the architectural shingles from the reference photo to the full roof — all visible sections, photorealistic quality for showing the homeowner before signing the contract
New construction home with completed siding but bare roof underlayment still exposed
Main Photo
Reference image for AI Roof Shingle Visualizer
Reference
Same new construction home with architectural shingles added from reference product photo
Result

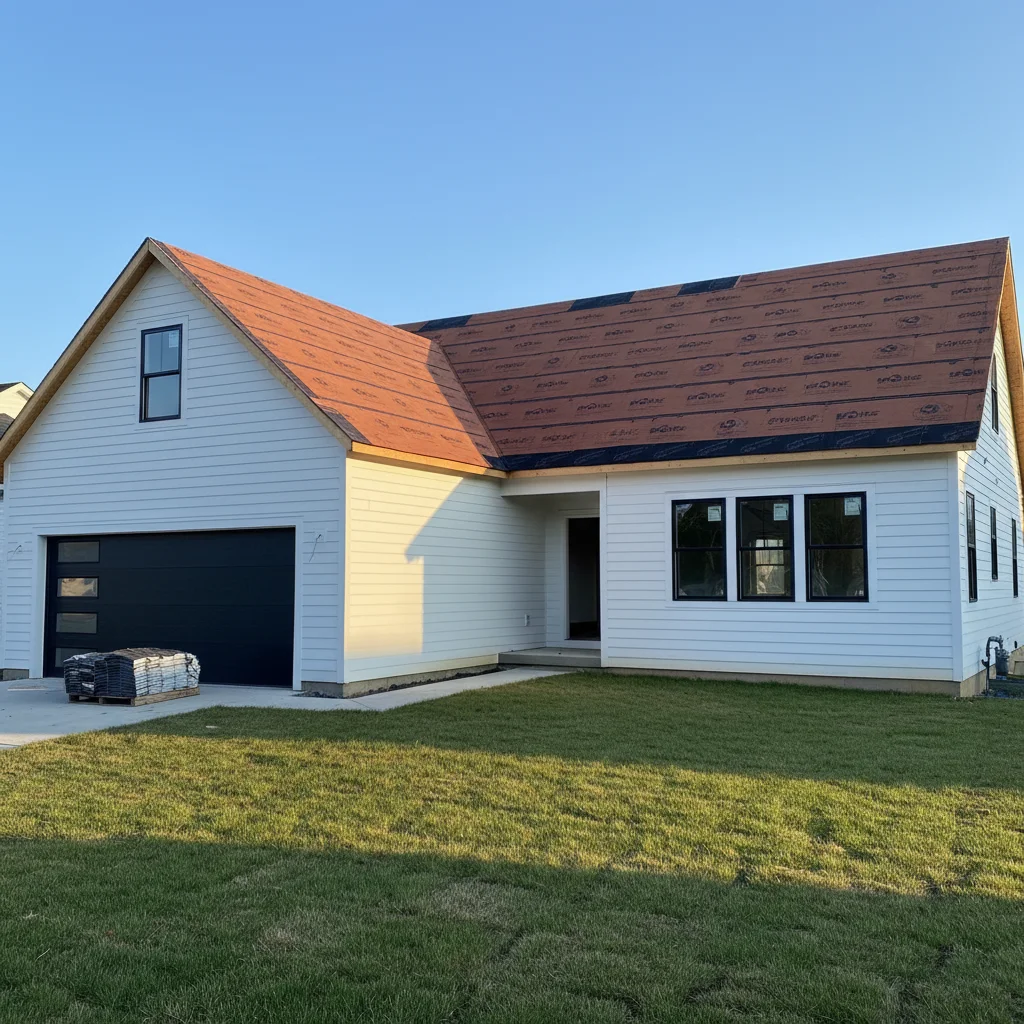
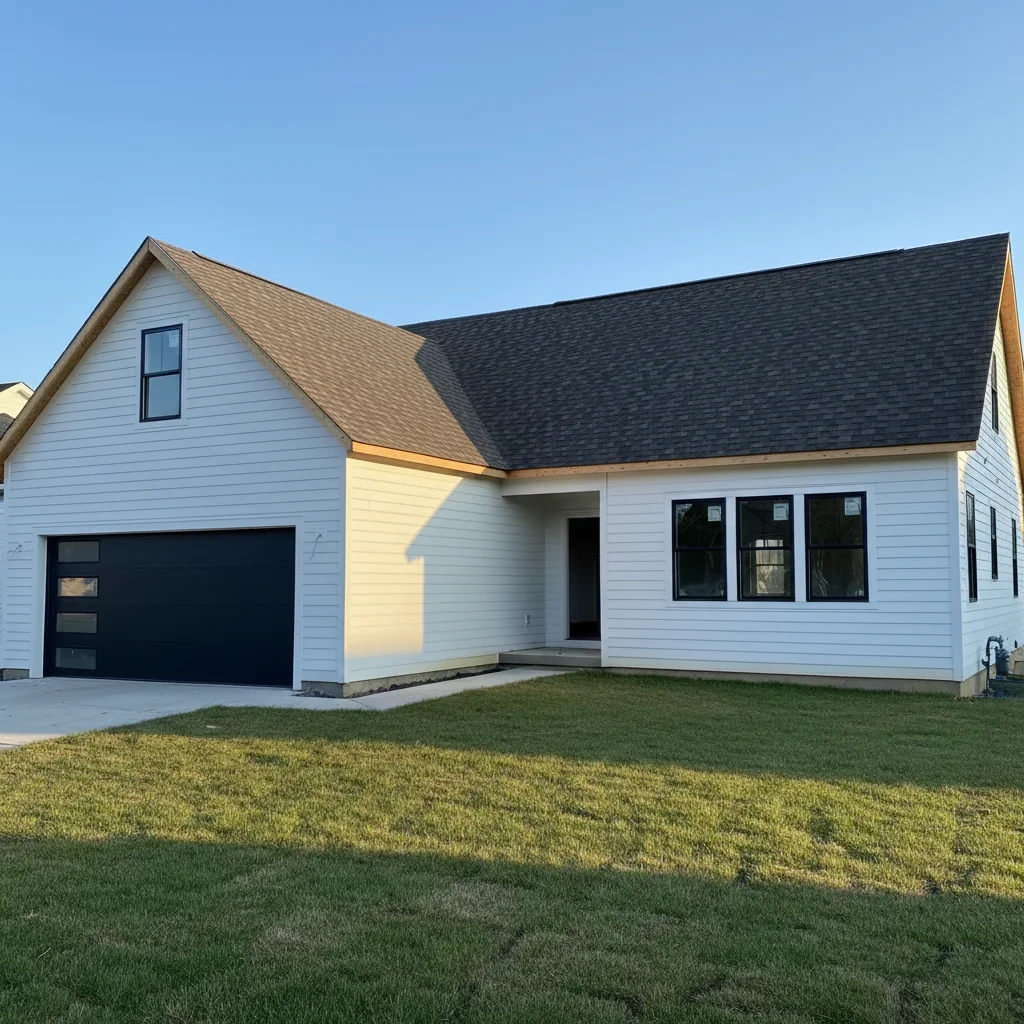
New construction shingle selection

A builder helped a client choose between three shingle colors for their custom home under construction, generating visualizations for the final selection meeting.

Prompt: add the impact-resistant architectural shingles from the reference photo to this new construction home — the house is complete except for roofing, show the finished look
Storm-damaged house with missing shingles and blue tarp on damaged roof sections
Main Photo
Reference image for AI Roof Shingle Visualizer
Reference
Same house with new weatherwood architectural shingles added showing the full replacement result
Result

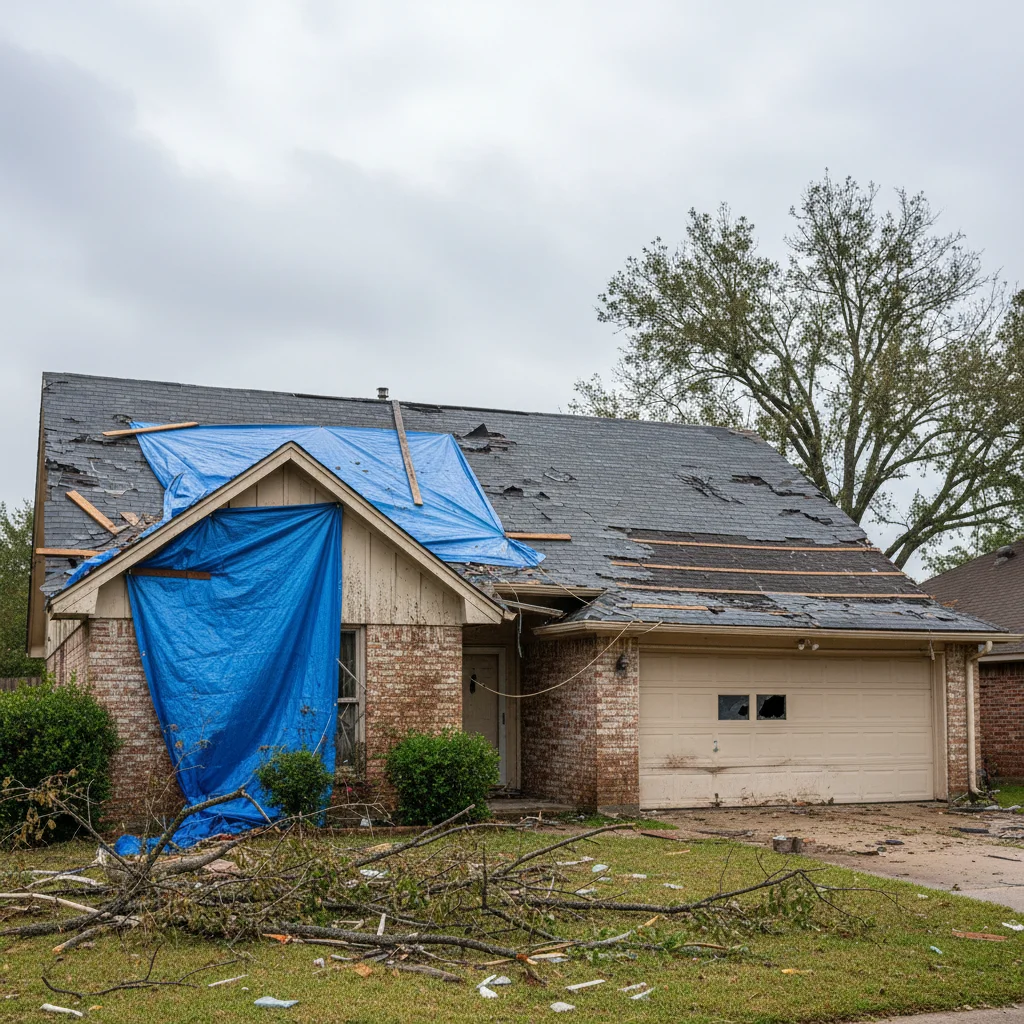
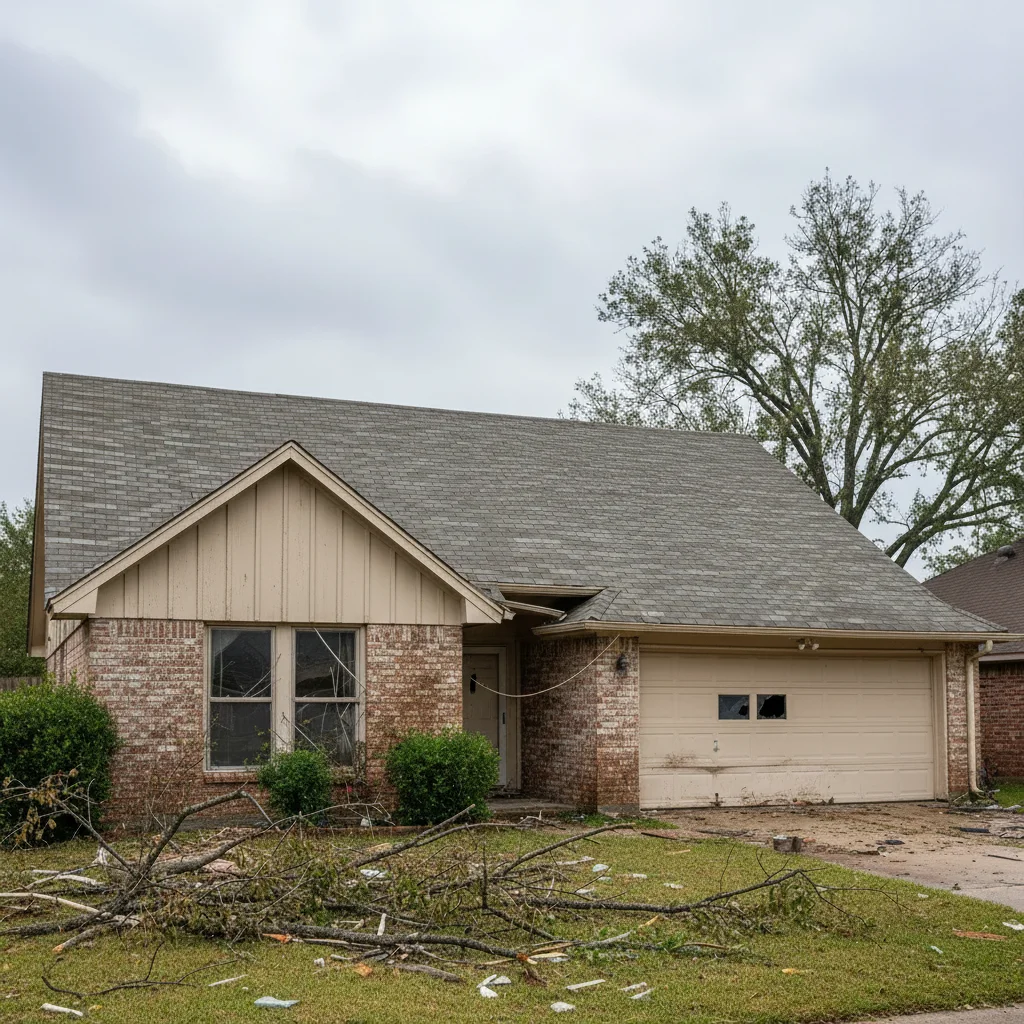
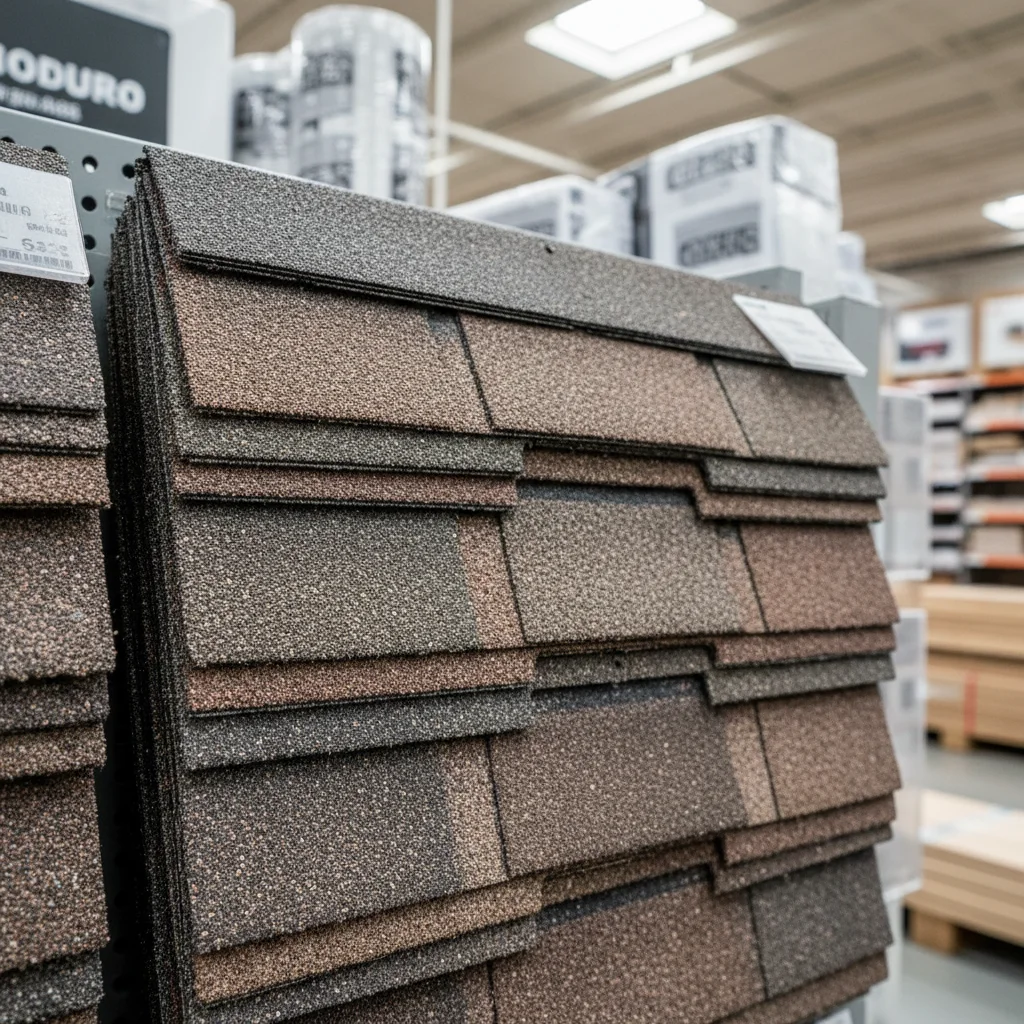
Insurance replacement color match

A homeowner needed to choose a replacement shingle that matched the neighborhood character after a storm damage claim, using photos downloaded from the insurance adjuster's approved shingle list.

Prompt: Please replace the entire damaged roof on the house with the weatherwood architectural shingles shown in the reference photo.

Detailed Guides by Scenario

📷

Roofing Sales & Contractor Tool

Help homeowners make confident shingle decisions during estimates — close more jobs by showing instead of telling.

Common Scenarios

  • Running 3-4 shingle color options on the homeowner's house photo during the estimate meeting
  • Building proposal packets with before-and-after visualizations for each shingle option
  • Following up undecided homeowners with visual proof of how their specific house looks with the proposed shingles

Best Practices

  • Photograph the house from the street before the meeting for a client-specific visualization
  • Prepare your 3 most popular shingle product photos in advance for quick back-to-back runs
  • Label exported images with manufacturer name and color code for easy ordering
Add these architectural shingles to the full roof — photorealistic for a homeowner proposal presentation
Show this shingle product on the house roof, all visible sections, bid-quality visualization
📷

Homeowner Shingle Selection

See your house with each shingle option before you commit to a $10,000+ project.

Common Scenarios

  • Testing the 2-3 shingle options your contractor quoted to see which looks best on your house
  • Checking whether a lighter or darker shingle color complements your siding and trim
  • Making a confident color decision without waiting for the crew to start

Best Practices

  • Use a current photo of your house taken in even daylight for the most accurate result
  • Download product images from manufacturer websites for the cleanest color references
  • Test the shingle color with your house in morning and afternoon sun if you have both photo angles
Add these shingles to my roof — keep the siding and trim exactly as-is so I can evaluate the color match
Replace my existing shingles with this new color from the reference, same roof pitch and coverage
📷

Builders & Developers

Help buyers choose roofing materials before the build reaches the roofing stage.

Common Scenarios

  • Presenting shingle options to buyers during pre-construction selection meetings
  • Generating visualizations for model home marketing showing different exterior packages
  • Helping buyers choose between standard and upgrade roofing tiers with visual proof

Best Practices

  • Use architectural renderings or near-complete construction photos as your base image
  • Prepare product images for each tier option — standard, mid-grade, premium — for a structured selection process
  • Include visualizations in model home selection guides to reduce decision friction
Add the premium impact-resistant shingle from this reference photo to the roof of this new construction home
Show this shingle color on the new build — photorealistic for the buyer selection package

If something looks off

Shingles look smooth like paint instead of textured

Why: The AI applied the shingle color without the dimensional texture. This happens when the reference photo is a solid color chip rather than a textured shingle photo.

Try: add the shingles with realistic dimensional texture — show individual shingle granules and the slight shadow line between each course

Tip: Use a product photo that shows shingle texture rather than a flat color chip. Manufacturer website product photos work better than color swatch cards.

Shingles don't cover the full visible roof

Why: The AI covered the main gable but missed dormers, lower roof sections, or side planes.

Try: add shingles to ALL visible roof areas — main roof, dormers, any lower sections, and any side angles visible in this photo

Tip: Be explicit: 'every visible roof surface' covers all planes the AI might otherwise skip.

New shingles are too dark or too light compared to the reference

Why: The house photo's lighting conditions (bright sun vs. overcast) shift how the shingle color renders.

Try: add the shingles matching the exact color from the reference photo, adjusting for the current house photo lighting

Tip: If color accuracy is critical (for HOA or insurance purposes), use a house photo taken under overcast light — direct sun creates strong shadows that affect color perception.

Shingle courses aren't straight or parallel

Why: The AI generated a random texture instead of following the horizontal course lines that define real shingle installation.

Try: add the shingles with straight horizontal course lines parallel to the ridge — each row offset by half a shingle width in standard staggered installation

Tip: Describing 'straight horizontal courses parallel to the ridge' aligns the AI's output with how shingles actually look when properly installed.

Quick answers

Do I need TWO photos — my house AND a shingle reference photo?

Yes. This tool works with two photos: (1) your house exterior photo showing the roof area, and (2) a reference photo of the shingles you want to visualize — a manufacturer's product image, a supply store sample photo, or a photo you took of actual shingles. Upload your house photo first, then click '+ Add reference photo' for the shingle image. The AI reads the shingle color, style, and texture from your reference to apply it accurately.

How do I add roof shingles to a house photo for free?

Upload your house photo and a reference photo of the shingles to EditThisPic. Type the placement: 'add these shingles to the full roof, all visible sections.' The AI applies them with realistic scale and pitch in 20-30 seconds. Free to use, no account required, no watermark.

Can I use this during a roofing sales consultation?

Yes — this is a core use case for roofing contractors. Before or during a homeowner meeting, photograph the house from the street, upload 3-4 shingle options from your product line, and generate visualizations on each. Homeowners who can see their actual house with the new shingles make decisions faster and feel more confident about the choice.

What shingle reference photos work best?

Manufacturer product photos from their website work best — they're optimized for accurate color and texture representation. Photos you take at a roofing supply store work well too, especially if taken flat and in good lighting. Avoid heavily angled or dark reference photos. If you have an actual shingle sample, photograph it flat on a white surface in natural light.

Can new construction builders use this for pre-build shingle selection?

Yes. Upload a photo of the house at any stage — even a rendering or near-complete construction photo with the roof deck exposed. Describe it as 'new construction, show the finished shingle appearance.' Builders use this to help clients make shingle selections before the roofing crew is scheduled.

Can I see how different shingle colors look on my specific house?

Yes. Run the tool with your first shingle reference, download the result, then run it again with a different shingle reference on the same house photo. Repeat for as many options as you want. The free weekly edit covers your first try; buy credits for back-to-back comparisons.

How much does EditThisPic cost?

You get 1 free edit per week — no account needed. After that, credit packs start at $1.99 for 3 edits. Monthly plans start at $4.99/mo for 15 edits with unused credits rolling over. All edits are full resolution with no watermark.

Ready to see your new roof?

Free to try. No signup required.

1 free edit included·Credit packs from $4.99