Free β€’ No signup Simulate Face contouring Β· Free

AI Contour Simulator

Preview sculpted cheekbones and a defined jawline on your face with AI in seconds.

Original photo before AI Contour Simulator
Before
β†’
Result after AI Contour Simulator with EditThisPic
After

Free AI Contour Simulator

Upload photo to simulate face contouring

Free β€’ Results in 30 seconds β€’ No signup

Release to upload

FreeNo signupNo watermark
Popular use cases:
  • contour simulator
  • virtual face contouring
  • test contour placement
  • contour for face shape
  • nose contour preview
  • cheekbone contouring
  • learn where to contour
  • contour and highlight tutorial

Cost
Free No signup required
Time
Instant results in 15-30 seconds
Works on
Any device - browser, phone, tablet, desktop
Powered by
AI-powered photo editing
Scenario Prompt Time
15-30s
15-30s
15-30s
15-30s
15-30s

How it works

  1. Upload your photo

    Choose a front-facing photo showing your full face clearly. Even lighting helps the AI understand your face shape and natural shadows. The AI will apply contouring based on your bone structure and the style you describe.

    Expect: Simple contouring: 30-40 seconds. Complex multi-area sculpting with highlight: 40-50 seconds and may need refinement.
  2. Describe the contouring you want

    Type the contouring style you want to try. Specify intensity (subtle, natural, dramatic), areas to contour (cheekbones, nose, jawline, forehead), and whether you want highlight too. The AI applies contour in the shadows and highlight on high points for a sculpted look.

    Tip: Be specific about which features to contour: 'contour cheekbones and slim nose' is clearer than just 'contour my face'. Mention your face shape if you want technique-specific placement.

    Copy one of these to get started:

    simulate Add subtle natural contouring to cheekbones with soft highlight on high points
    simulate Apply classic contouring: sculpt cheekbones, slim nose, and define jawline with blended application
    simulate Give me soft bronzy contour on cheekbones and temples for a natural sun-kissed dimension
    simulate Add dramatic contouring with deep shadows under cheekbones and bright highlight on cheekbone tops
    4 more prompts
    simulate Apply nose contouring to make it appear slimmer with highlight down the bridge
    simulate Give me contouring for round face: shadows on sides of forehead, under cheekbones, and along jawline
    simulate Add minimal natural contour with cream products look - soft and seamlessly blended
    simulate Apply full face sculpting: contour hairline, cheekbones, nose, jawline with strategic highlighting
  3. Review the result

    Check that the contouring enhances your features naturally. Look at placement, blending, and intensity. Make sure it doesn't look muddy or too heavy. If adjustments needed, describe changes like 'soften the contour' or 'add more highlight to cheekbones'.

  4. Download Your Sculpted Look

    Save your photo with contouring applied in high resolution. No watermark, perfect as a reference guide for applying your own contour makeup.

Try it free ↓

Free AI Contour Simulator

Upload photo to simulate face contouring

Free β€’ Results in 30 seconds β€’ No signup

Release to upload

Free β€’ No signup

"I use this for all my product photos now. Game changer." via Trustpilot

See it in action

Original photo before AI Contour Simulator
Before
->
Result after AI Contour Simulator with EditThisPic
After

Natural Everyday Contour

Add subtle natural contouring to cheekbones with soft champagne highlight on top of cheekbones

Prompt: Add subtle natural contouring to cheekbones with soft champagne highlight on top of cheekbones
Original photo before AI Contour Simulator
Before
->
Result after AI Contour Simulator with EditThisPic
After

Classic Sculpted Contour

Apply classic contouring to sculpt cheekbones, slim nose slightly, and define jawline with well-blended taupe contour

Prompt: Apply classic contouring to sculpt cheekbones, slim nose slightly, and define jawline with well-blended taupe contour

Detailed Guides by Scenario

πŸ“·

Design Visualization

Preview face contouring changes on your actual photo before committing β€” make confident design decisions backed by visuals.

Common Scenarios

  • Simulating face contouring on a room, outfit, or space to evaluate the look
  • Creating client-ready mockups that visualize face contouring in their specific context
  • Comparing multiple face contouring options side by side using the same source photo

Best Practices

  • Upload a clear, well-lit photo from the angle you'd naturally view the subject
  • Be specific about the face contouring β€” color, material, size, and placement all matter
  • Generate 2-3 variations to have meaningful options to compare
πŸ“·

Professional Proposals

Win client approval with realistic face contouring previews that show exactly what the finished result will look like.

Common Scenarios

  • Building a presentation deck with face contouring visualizations for a client pitch
  • Showing stakeholders face contouring options before ordering materials or starting work
  • Creating before-and-after comparisons of face contouring for a project proposal

Best Practices

  • Use the client's own photos for the most persuasive previews
  • Label each option clearly (Option A, B, C) for easy discussion
  • Note that face contouring previews are approximations β€” set expectations about final results
πŸ“·

Personal Decision-Making

Try before you buy β€” preview face contouring on your own photos to make smarter purchasing and lifestyle decisions.

Common Scenarios

  • Previewing face contouring before making an expensive purchase
  • Testing how face contouring looks in your actual space or on your actual person
  • Sharing face contouring previews with family or friends to get opinions before deciding

Best Practices

  • Upload a photo of the actual space/item/person β€” generic stock images won't help you decide
  • Try the most different options first (bold vs. subtle) to narrow down your face contouring preference
  • Save each preview so you can flip between them when comparing

If something looks off

AI changed the wrong area or something I didn't want changed

Why: The AI couldn't determine exactly which area you meant from description alone.

Try: Tap a marker on the specific area you want to change, then regenerate with the same prompt

Tip: Markers tell the AI 'I mean THIS one specifically.' Use them when description alone is ambiguous.

Contouring looks muddy, dirty, or too dark

Why: Contour shade may be too deep for your skin tone or not properly blended.

Try: Try 'lighten the contour shade' or 'soften and blend the contour more naturally' or specify 'taupe contour' for fair skin

Tip: Fair skin: use taupe or cool gray contour. Medium skin: warm brown. Deep skin: deeper brown or plum tones. Always specify 'blended'.

Contour placement doesn't suit my face shape

Why: Generic contouring placement doesn't account for individual face shapes.

Try: Specify your face shape: 'contouring for round face' or 'contour placement for long/oval/square face'

Tip: Round: contour sides. Square: soften jawline corners. Long: contour forehead/chin. Heart: focus on cheekbones only.

Highlight looks too stark or shimmery

Why: Highlight needs intensity and finish descriptors to look natural.

Try: Add 'subtle' or 'soft highlight' and specify finish: 'matte highlight' or 'subtle satin glow' instead of shimmer

Tip: For natural looks, use 'soft champagne highlight' or 'subtle luminosity'. For glam, 'bright highlight' or 'intense glow'.

Nose contouring made my nose look wider or unnatural

Why: Nose contouring requires precise placement along the sides, not on the tip or bridge.

Try: Try 'slim nose with contour on sides only and highlight down the center bridge' - be explicit about placement

Tip: Nose contour goes on SIDES to create shadow. Highlight goes DOWN THE BRIDGE. Never contour the tip or it looks wider.

Contouring and highlight don't blend together naturally

Why: Transition between contour, natural skin, and highlight needs blending instructions.

Try: Add 'seamlessly blended with smooth transitions between contour, skin, and highlight' to your prompt

Tip: Always mention 'blended' or 'seamless' for contour. The transition areas are as important as the placement itself.

Quick answers

Do I need to mark areas of my face before describing contouring?

No! Just describe which features you want to contour (cheekbones, nose, jawline, etc.) and the AI applies it to the correct areas. The AI understands facial anatomy and contour placement. Only use markers if you want very unconventional placement.

Can I try different contouring techniques on the same photo?

Yes! After seeing one result, describe a different intensity or technique and the AI replaces the previous contouring. Try subtle natural vs dramatic sculpting, or test different face-shape-specific techniques. Each generation replaces the previous application.

What contouring techniques can I simulate?

You can try any technique: classic contouring (cheeks, nose, jaw), draping, face-shape-specific placement (round, square, long, heart, oval), nose slimming, forehead narrowing, jawline definition, and more. Specify which areas and the AI applies technique-appropriate placement.

How do I know where to contour for my face shape?

Mention your face shape in your prompt and the AI applies appropriate placement. Round: sides of face and temples. Square: soften angular jaw. Long: horizontal on forehead/chin. Heart: cheekbones only. Oval: minimal, enhance cheekbones. You can also just describe areas you want to define.

Should I include highlight with my contour?

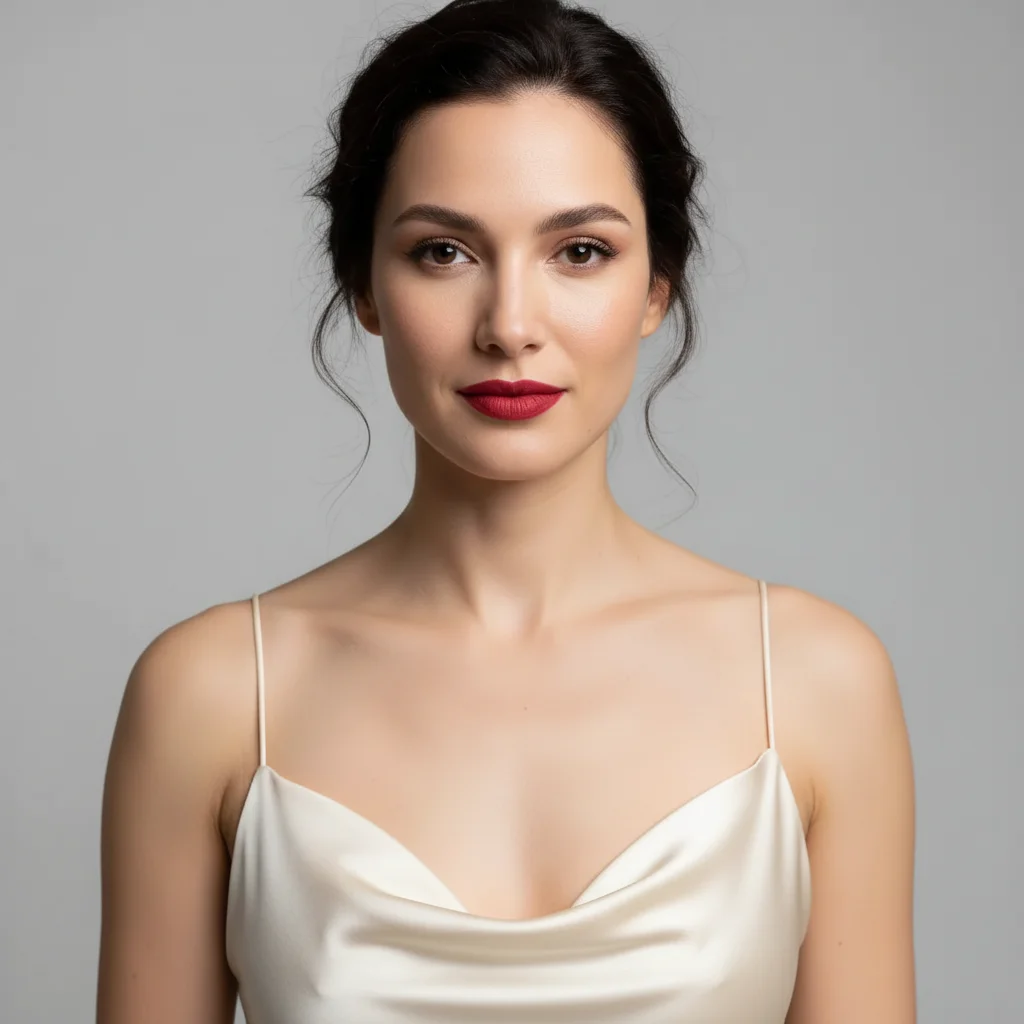
Highlight enhances contour by creating contrast and dimension. Mention both for best results: 'contour cheekbones with highlight on top' creates more sculpted look than contour alone. You can also try contour-only to see the difference, then add highlight in a second generation.

What's the difference between cream and powder contour?

You can specify finish: 'cream contour' creates a more seamless, skin-like finish. 'Powder contour' looks more matte and defined. Mention 'natural and blended like cream' for subtle looks or 'defined powder contour' for more structured sculpting. The AI simulates both finishes.

How do I create subtle vs dramatic contouring?

Use intensity words: 'subtle', 'soft', 'natural dimension' for everyday looks. Use 'dramatic', 'deep shadows', 'intense sculpting', 'bold' for editorial or glam looks. The same placement looks completely different at subtle vs dramatic intensity. Specify what you want.

Is EditThisPic's AI face contouring simulater really free?

Yes β€” you get 1 free edit per week, no account needed. For unlimited edits, plans start at $3.99/month.

Ready to edit your photos?

Free to try. No signup required.