Free • No signup Create Weight loss progress photos · Free

Create Consistent Weight Loss Progress Photos

Side-by-side progress photos with different lighting kill your credibility. Make them match.

Separate before and after photos with completely different lighting
Before
Side-by-side comparison with matched lighting showing real transformation
After

Create Consistent Weight Loss Progress Photos

Upload photo to create weight loss progress photos

Free • Results in 30 seconds • No signup

Release to upload

FreeNo signupNo watermark
Popular use cases:
  • Weight loss progress photos
  • Before after weight loss
  • Side-by-side transformation
  • Weight loss journey photos
  • Progress check-in photos
  • Body transformation photos
  • Diet progress photos

Cost
Free No signup required
Time
Instant results in 15-30 seconds
Works on
Any device - browser, phone, tablet, desktop
Powered by
AI-powered photo editing
Scenario Prompt Time
Basic side-by-side create side-by-side comparison with matched lighting 25s
Different lighting fixed combine both photos with consistent lighting appearance 30s
With date labels side-by-side with matched lighting, add date labels 30s

How it works

  1. Upload both progress photos

    Drop your before and after weight loss photos into EditThisPic. JPG, PNG, WebP up to 7MB each. Can be mirror selfies, gym photos, progress check-ins—any photos showing your weight loss journey.

    Expect: Simple side-by-side creation: 25-30 seconds. Complex lighting matching or background cleanup: may need one additional refinement.
  2. Describe how to combine them

    Type 'create side-by-side comparison with matched lighting' or 'combine before on left, after on right, match the lighting so they look consistent.' The AI aligns the photos, matches brightness and color, and creates the professional progress photo format.

    Tip: Specify 'before on left, after on right' if that matters to you—the standard convention helps viewers immediately understand the transformation direction.

    Copy one of these to get started:

    Creating basic side-by-side progress photo create side-by-side comparison with before on left and after on right, match lighting so both photos look consistent
    Before and after have very different lighting combine both photos side-by-side and match the lighting so it's clear the difference is weight loss not lighting changes
    Photos taken in different locations create side-by-side progress photo, adjust both photos to have consistent lighting and similar background appearance
    One photo is higher quality than the other combine both photos side-by-side, enhance the lower quality photo to match the better one, consistent lighting
    3 more prompts
    Need to add date labels to show timeline create side-by-side comparison with matched lighting, add date labels showing when each photo was taken
    Mirror selfies at different angles align both mirror selfies to same body position and height, match lighting, create side-by-side comparison
    Want to highlight specific body area changes create side-by-side comparison focused on waist area, crop both photos to emphasize the visible change, match lighting
  3. Check alignment and consistency

    Verify both photos are properly aligned—same body position, same height in frame. Check that lighting looks consistent so viewers see body changes, not lighting tricks. Zoom in to make sure faces and body proportions match in scale.

  4. Adjust matching if needed

    If lighting still looks different or one photo needs adjustment, describe the specific issue: 'brighten the before photo to match after' or 'both photos should have same warm tone.' For alignment issues, request 'align both photos so faces are at same height.'

    Tip: Add a date label to each photo ('Jan 2025' and 'Jan 2026') to show the timeline—makes transformations more impressive and credible.
Try it free

Create Consistent Weight Loss Progress Photos

Upload photo to create weight loss progress photos

Free • Results in 30 seconds • No signup

Release to upload

Free • No signup

"My 50-pound transformation looked fake because of different lighting. Fixed it in 30 seconds and now people actually believe my results." @WeightLossJourney2026

See it in action

Separate before and after photos with completely different lighting
Before
->
Side-by-side comparison with matched lighting showing real transformation
After

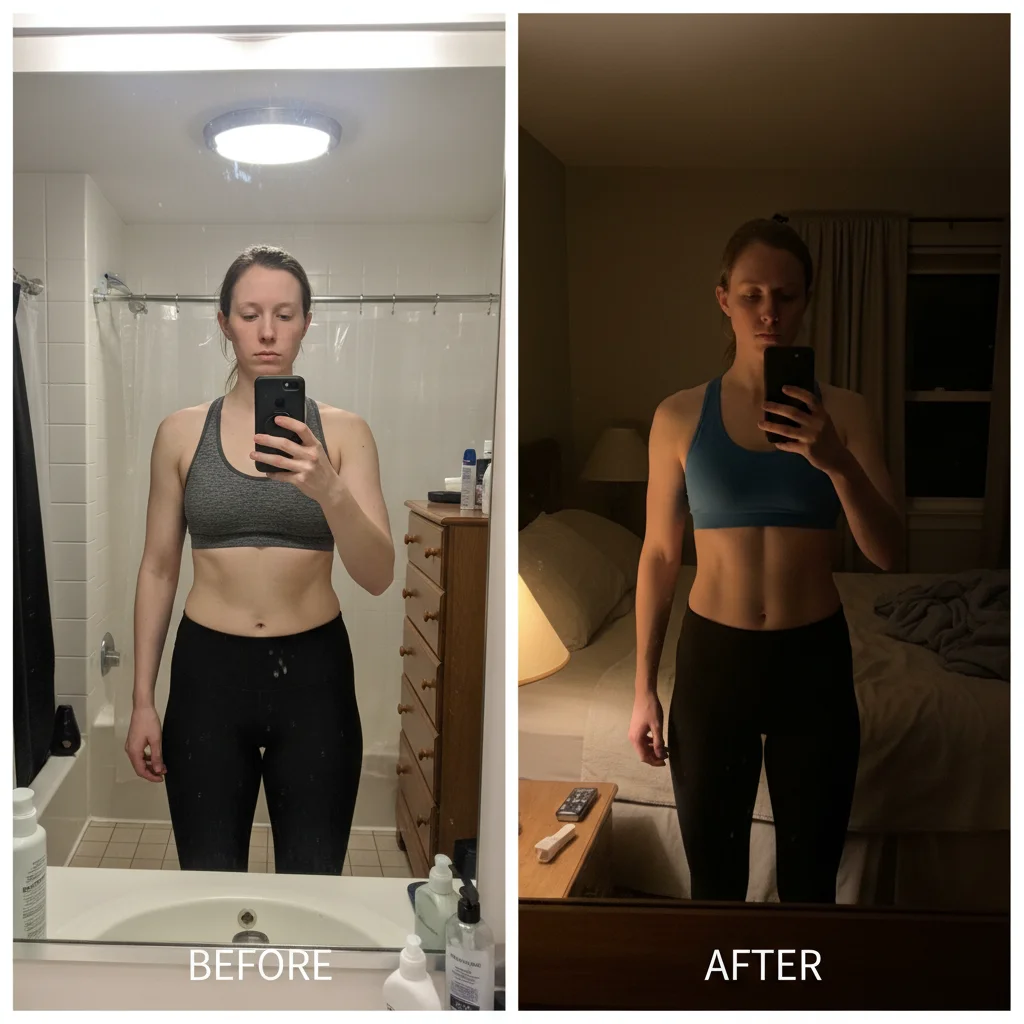
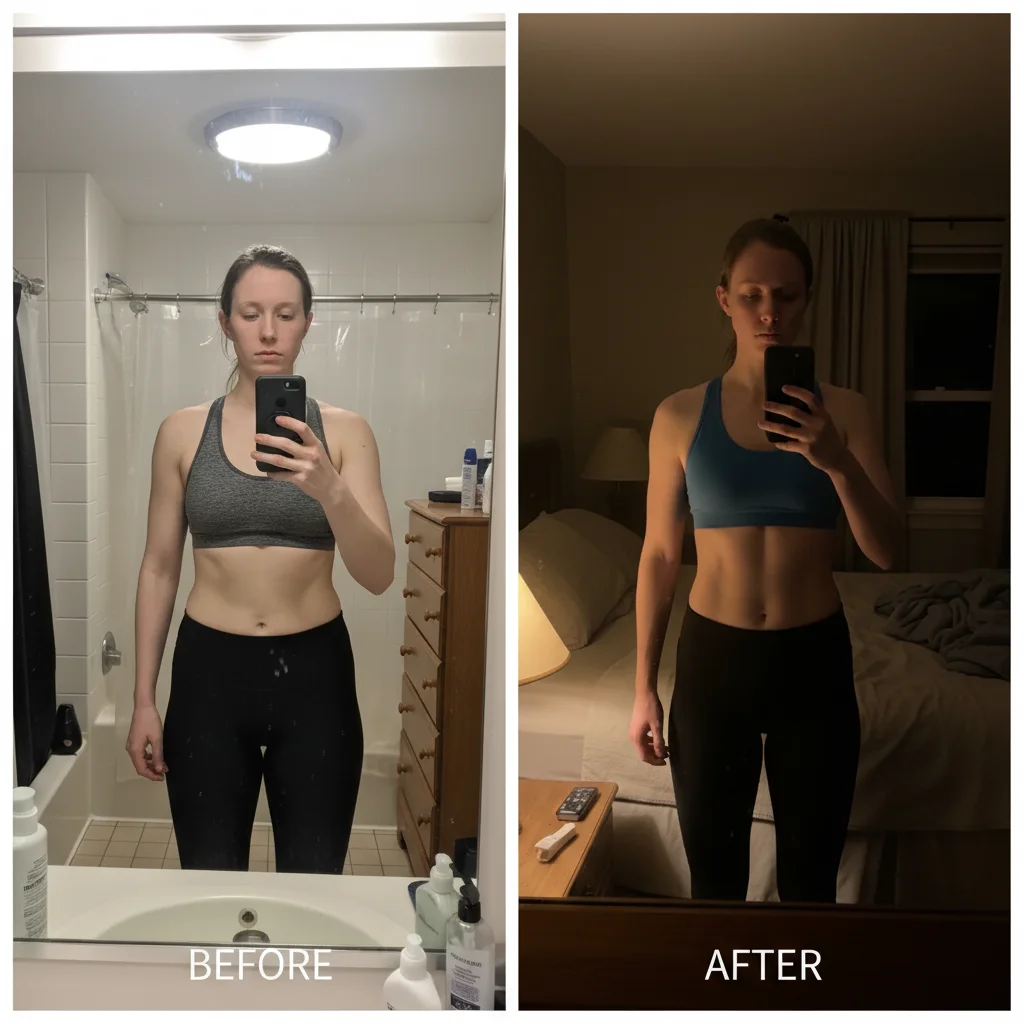
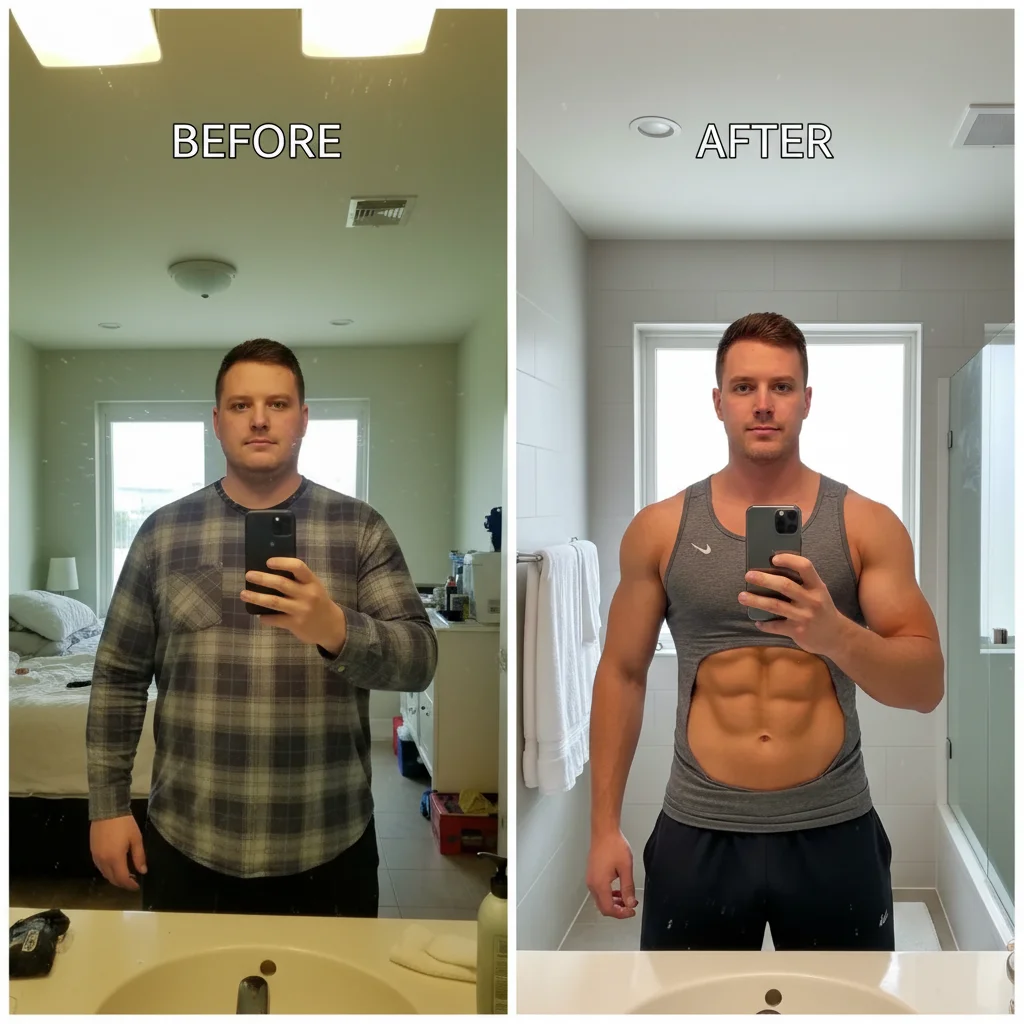
6-month weight loss with lighting consistency fixed

Before photo taken in bright bathroom light, after photo in dim bedroom. Matched lighting to prove 40-pound weight loss was real transformation, not photo tricks.

Prompt: create side-by-side comparison with before on left and after on right, match lighting so both photos look consistent
Progress photos from two different gym locations with mismatched backgrounds
Before
->
Aligned side-by-side with consistent lighting and professional appearance
After

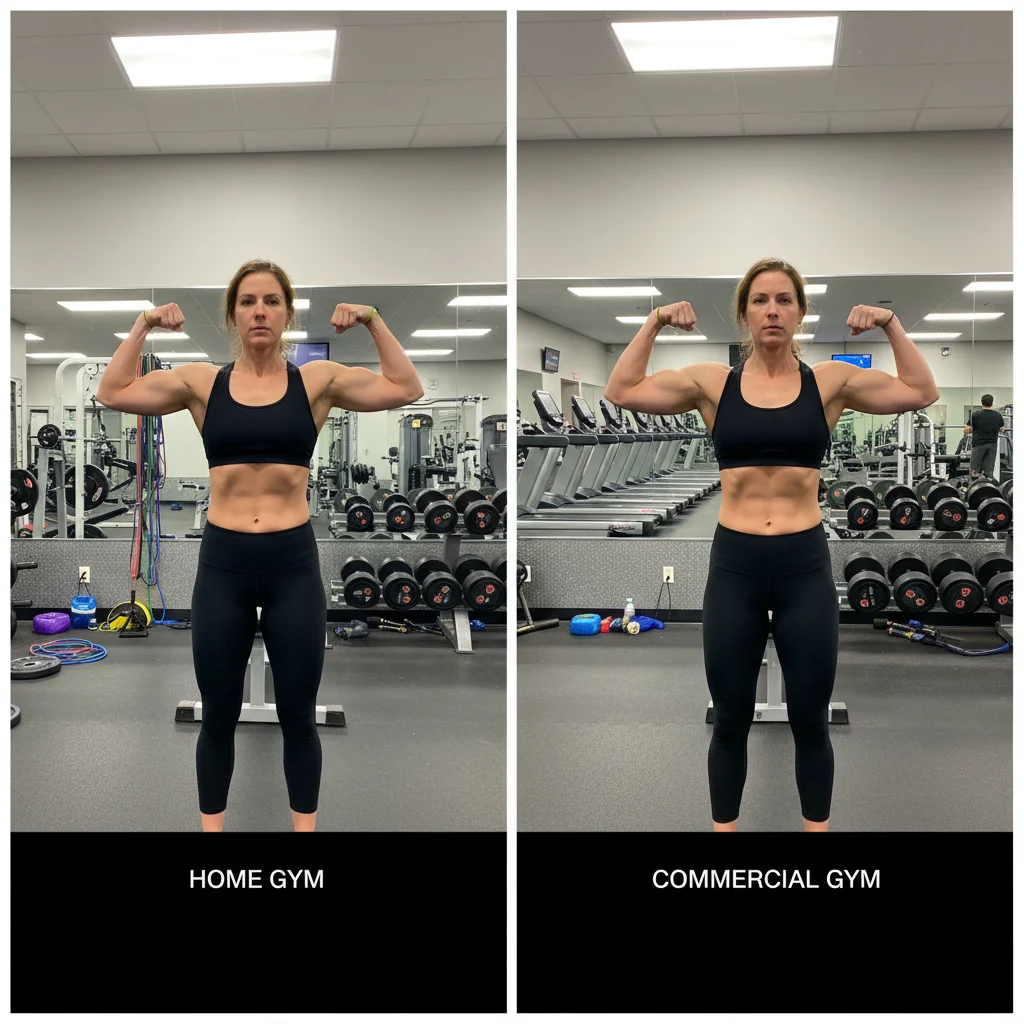
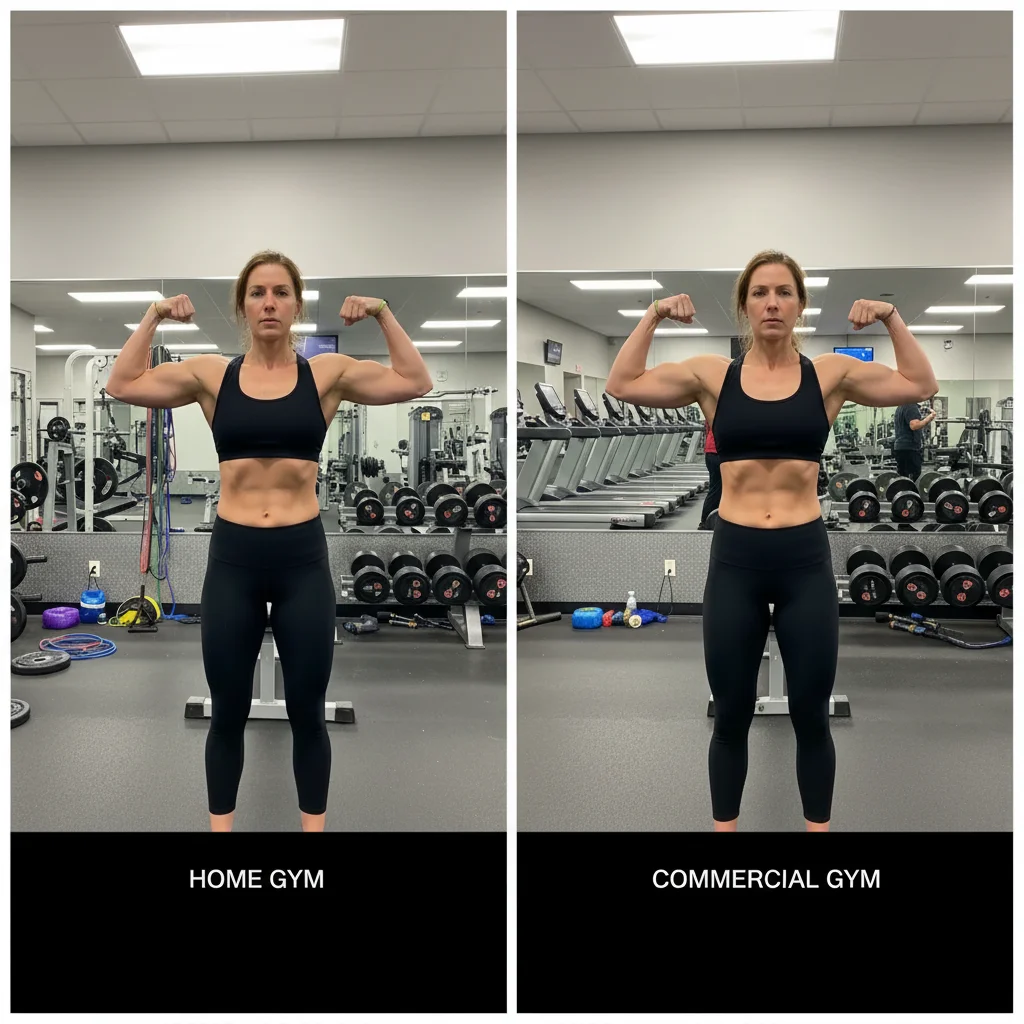
Gym progress photos from different locations aligned

Before at home gym with cluttered background, after at commercial gym with different equipment. Created clean comparison showing muscle gain and fat loss without location distraction.

Prompt: create side-by-side progress photo, adjust both photos to have consistent lighting and similar background appearance
Before and after with mismatched photo quality
Before
->
Matched quality side-by-side ready for social media sharing
After

Quality mismatch fixed for Instagram post

Old before photo is low resolution from 2024, new after photo is high quality from latest iPhone. Matched quality and lighting for Instagram-ready transformation post.

Prompt: combine both photos side-by-side, enhance the lower quality photo to match the better one, consistent lighting

Detailed Guides by Scenario

📷

Art & Decoration

Transform your photos into weight loss progress photos artwork for wall prints, framed art, and home decoration.

Common Scenarios

  • Converting a favorite photo into a weight loss progress photos print for your living room wall
  • Creating a series of weight loss progress photos portraits of family members as matching wall art
  • Turning landscape or travel photos into weight loss progress photos art for office decoration

Best Practices

  • Start with a high-resolution photo — printed art needs sharp detail even after the style transform
  • Request a specific aspect ratio if the print will go in a particular frame
  • Try 'bold weight loss progress photos' vs. 'subtle weight loss progress photos' to control how dramatic the transformation looks
📷

Social Media & Content

Create scroll-stopping social media content by converting photos to weight loss progress photos — perfect for profiles, stories, and viral posts.

Common Scenarios

  • Making a unique weight loss progress photos profile picture that stands out in feeds
  • Creating a weight loss progress photos version of a trending meme or photo challenge
  • Building a themed Instagram series where every post uses weight loss progress photos transformation

Best Practices

  • Pair the transformation with a catchy caption that references the art style
  • For Instagram stories, add text overlays after the weight loss progress photos conversion for maximum engagement
  • Process several photos in the same session to maintain a consistent style across posts
📷

Gifts & Personal Keepsakes

Turn meaningful photos into weight loss progress photos keepsakes — custom gifts, cards, and personalized items that people actually treasure.

Common Scenarios

  • Creating a weight loss progress photos portrait as a birthday or anniversary gift
  • Designing weight loss progress photos wedding invitations or save-the-dates from engagement photos
  • Making a weight loss progress photos memorial portrait for a loved one

Best Practices

  • Choose photos with clear faces and good lighting — the transformation preserves detail best from quality originals
  • For gifts, print on canvas or premium paper to complement the weight loss progress photos aesthetic
  • Request 'warm tones' or 'cool tones' to match the recipient's home decor

If something looks off

Side-by-side layout has one photo larger than the other

Why: Original photos have different aspect ratios or resolutions, causing size mismatch in side-by-side layout.

Try: create side-by-side with both photos exactly the same size and height, crop if needed to match dimensions

Tip: Specify 'same height' or 'equal size' to ensure balanced side-by-side appearance.

Lighting matched but transformation is now less visible

Why: Over-matching can reduce the contrast that makes body changes obvious—too much consistency hides progress.

Try: match lighting enough for consistency but preserve the visible body shape and muscle definition differences

Tip: Goal is consistent conditions, not identical photos—the body changes should still be dramatically visible.

Photos aligned but faces/bodies at different heights in frame

Why: Camera distance or body position changed between photos, creating vertical misalignment in comparison.

Try: align both photos so faces are at the same height and body positions match vertically

Tip: Vertical alignment is critical—viewers need to compare equivalent body areas at same eye level.

Background matching made the photos look fake or overly edited

Why: Aggressive background replacement can create artificial-looking results that hurt credibility.

Try: keep original backgrounds but match only the lighting and color tone, don't replace backgrounds completely

Tip: Different backgrounds are fine if lighting matches—authenticity is more important than perfection.

Added date labels are too small or hard to read

Why: Default text sizing may be too small for social media or mobile viewing.

Try: add large clear date labels in top corners of each photo, bold text that's readable on mobile

Tip: Date labels should be immediately visible—they add crucial context to the transformation timeline.

Color tone matching made skin tone look unnatural

Why: Matching overall color temperature affected skin tones which are sensitive to color shifts.

Try: match lighting and background color but preserve natural realistic skin tones in both photos

Tip: Always check skin tone after color matching—unnatural skin destroys transformation credibility.

Quick answers

Do I need to mark anything to create side-by-side progress photos?

No! Just describe what you want: 'create side-by-side comparison with matched lighting' or 'combine before and after with consistent appearance.' The AI understands progress photo requirements and handles alignment, matching, and layout automatically. Markers are only needed if you want to adjust specific areas after seeing the first result.

Why is consistent lighting so important for weight loss photos?

Inconsistent lighting makes people question if the transformation is real body changes or just photo tricks. Bright light makes you look thinner, dim light adds shadows that hide definition. When before and after have different lighting, viewers assume you're manipulating how you look, not showing actual progress. Matched lighting proves the difference is your body, not photography tricks.

Can this work with photos taken months or years apart?

Yes. The AI matches lighting, color, and quality regardless of when photos were taken. Different locations, cameras, and lighting conditions can all be normalized. The only requirement is that both photos show similar angles—front view, side view, etc. You can't match a front photo with a side photo, but any two comparable angles work.

Should I include date labels on my progress photos?

Yes. Date labels show the timeline and make transformations more impressive. '30 pounds in 6 months' is more motivating than undated photos. Add them by including 'add date labels showing start and end dates' in your prompt. Place them in top corners where they're visible but don't cover your body.

How do I make multiple progress check-in photos all match in style?

Use the exact same prompt for all progress photos: 'side-by-side with matched lighting and aligned body position.' This creates a consistent series where all photos have the same layout and appearance. Especially useful for monthly check-ins where you want to track gradual progress over time with visual consistency.

Is EditThisPic's AI weight loss progress photos creator really free?

Yes — you get 1 free edit per week, no account needed. For unlimited edits, plans start at $3.99/month.

Can I create weight loss progress photos on my phone?

Yes. EditThisPic works in any mobile browser — iPhone, Android, tablet. No app download needed.

What photo formats does the AI weight loss progress photos creator support?

JPG, PNG, WebP, and HEIC. Upload any common photo format and EditThisPic handles the rest.

Ready to create consistent weight loss progress photos?

Free to try. No signup required.