Free • No signup Brighten Room · Free

AI Room Brightener

Upload a dark room photo and describe how bright you want it. AI lifts exposure and enhances light in seconds.

Dark underexposed living room with heavy shadows and dim lighting
Before
Same living room brightened to look naturally well-lit and inviting
After

AI Room Brightener

Drop your photo here

or click to browse

Release to upload

Free • No signup

Popular use cases:
  • brighten dark room photo
  • interior photo exposure fix
  • dark listing photo brightener
  • underexposed room photo correction
  • real estate photo lighting fix
  • room photo brightening tool
  • dark interior photo fix
  • free room photo brightener

Cost
Free No signup required
Time
Instant results in 15-30 seconds
Works on
Any device - browser, phone, tablet, desktop
Powered by
AI-powered photo editing
Scenario Prompt Time
Underexposed listing photo brighten this room to look naturally well-lit and inviting without overexposing bright areas 15s
Dark basement significantly brighten this basement to look like a livable, well-lit finished space 20s
Airy staging look brighten to look airy and Scandinavian — crisp whites, soft shadows, lots of natural light 20s

How it works

  1. Upload your dark room photo

    Drop the underexposed photo into EditThisPic. Works with any interior room: living rooms, bedrooms, kitchens, basements. JPG, PNG, WebP up to 7MB.

    Expect: Simple exposure lift: 15-20 seconds. Heavily underexposed photos with strong shadows: may need one refinement to fully open up the dark areas.
  2. Describe how bright you want the result

    Type what you want: 'brighten this room to look naturally well-lit as if shot in midday natural light' or 'increase the exposure significantly — the room should look airy and spacious, not dark.' Describe the target brightness and mood. No marking needed — room brightening is a global adjustment the AI applies to the full image.

    Tip: Specifying the target mood — 'airy,' 'inviting,' 'bright but not overexposed' — gives the AI more to work with than just 'brighter.'

    Copy one of these to get started:

    Underexposed listing photo brighten this interior photo so the room looks naturally well-lit and inviting — increase exposure to open up the shadows while keeping the bright areas from blowing out
    Very dark room with deep shadows significantly increase the brightness of this dark room photo — open up all the shadowy areas so the full room is visible and looks spacious rather than dim
    Airy and light mood for staging brighten this room photo to look airy, bright, and Scandinavian — crisp whites, soft shadows, lots of perceived natural light without looking artificial
    Dark basement or windowless room brighten this basement photo to make it look livable and spacious — increase overall exposure and add perceived natural light even though there are no windows visible
    2 more prompts
    Phone photo from dim apartment fix the underexposure in this dim apartment photo taken on a phone — brighten the room to look like a well-lit professional real estate photo
    Night exterior reflected inside brighten this interior photo taken at night — the room looks darker than it is because there is no exterior light coming through the windows. Lift the exposure so the room feels bright and welcoming
  3. Review and download the brightened photo

    Check that shadows are open, details are visible throughout the room, and the brightness looks natural — not washed out or blown out. Use the before/after slider to compare. Download when satisfied.

  4. Refine specific dark areas with markers if needed

    If a corner or area under furniture is still dark after the overall brightening, tap a marker on that spot and add 'open up the shadows in the marked area.' Markers are optional for simple brightness fixes.

    Tip: Markers are most useful for rooms where one zone (a dark corner or windowless alcove) stays dark while the rest brightens well.
Try it free

AI Room Brightener

Drop your photo here

or click to browse

Release to upload

Free • No signup

"The basement photos were so dark buyers were skipping the listing. Brightened them in two minutes and showing requests tripled that week." @RealtorMarcus_DEN

See it in action

Dark underexposed living room with heavy shadows and dim lighting
Before
->
Same living room brightened to look naturally well-lit and inviting
After

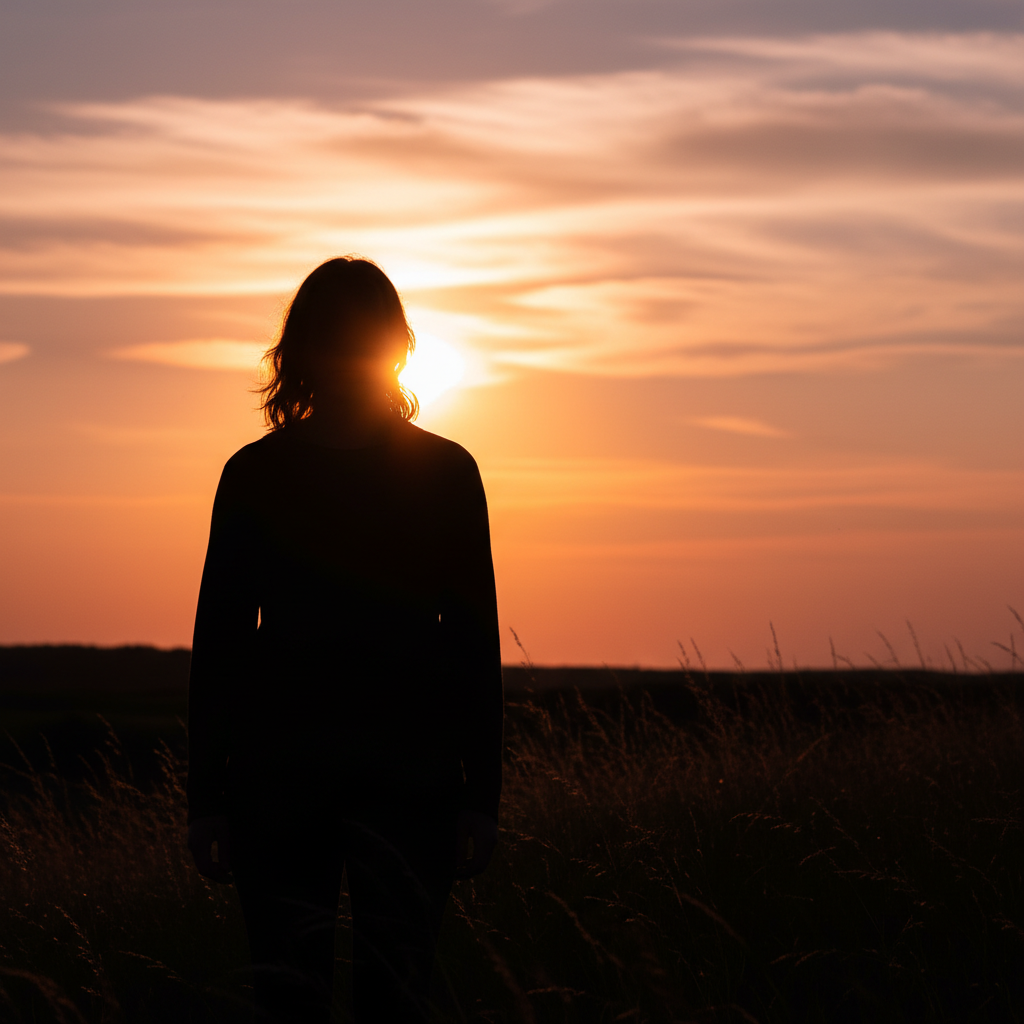
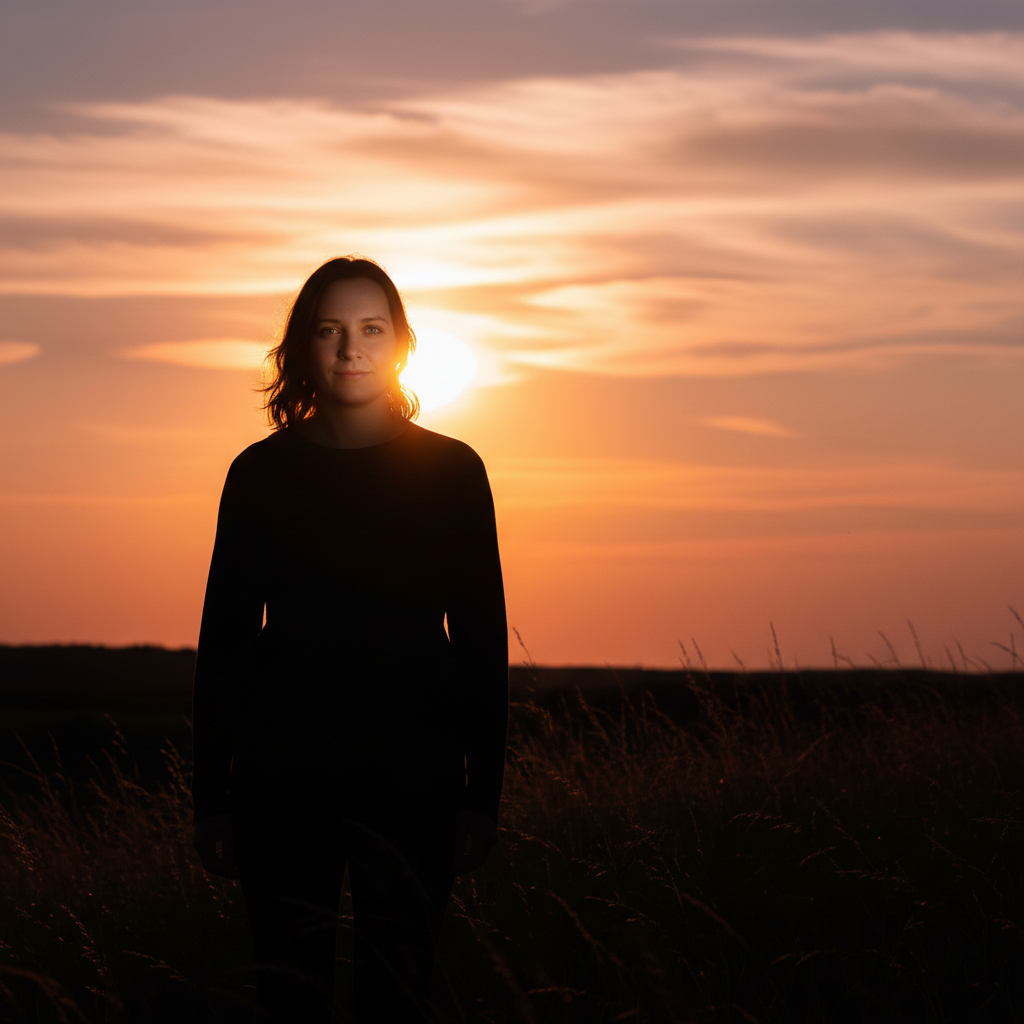
Dark living room brightened for listing

A heavily shadowed living room photo made bright and inviting for an MLS listing.

Prompt: brighten this living room photo so it looks naturally well-lit — open up the shadows and make the space feel airy and inviting without overexposing the bright areas
Dark basement room with low lighting and shadowy corners
Before
->
Same basement brightened to look like a well-lit livable finished space
After

Dark basement made livable

A dim basement listing photo transformed to show the space as bright and functional.

Prompt: brighten this basement photo significantly to make it look like a livable, well-lit finished space — open up all the dark areas and make the room feel larger and less dark

Detailed Guides by Scenario

📷

Real Estate Listing Photos

Fix dark, uninviting listing photos that cause buyers to skip your property — brighten rooms to look spacious and welcoming.

Common Scenarios

  • Brightening dark living room and bedroom photos before uploading to MLS
  • Fixing basement photos that look dim and uninviting to buyers
  • Lifting exposure on kitchen photos taken under poor artificial lighting

Best Practices

  • Target a brightness that looks 'naturally well-lit' rather than just technically brighter
  • Always disclose AI photo editing per local MLS guidelines
  • Brighten each room to a consistent brightness level for a cohesive listing gallery
📷

Rental and Airbnb Listings

Make dark rental photos look inviting so potential tenants and guests actually book your property.

Common Scenarios

  • Brightening dark apartment photos before uploading to Zillow or Apartments.com
  • Fixing dim Airbnb bedroom photos that get skipped by guests
  • Correcting underexposed photos in a windowless room or basement apartment

Best Practices

  • Describe the mood target: 'cozy and inviting' for short-term rentals, 'clean and professional' for long-term rentals
  • Brighten consistently — all photos in a listing should have similar brightness levels
  • For basements or dark units, add 'feel more spacious' to your prompt to help the AI expand the perceived volume
📷

DIY Home Sellers

Fix the dark phone photos you took yourself before listing your home — no editing skills required.

Common Scenarios

  • Brightening phone photos taken at night or under poor indoor lighting
  • Fixing the dark kitchen photo where the window blew out and the rest went dark
  • Making FSBO (For Sale By Owner) listing photos look professionally lit

Best Practices

  • Describe what the room actually looks like in person to anchor the AI: 'this room is bright in person but photos dark'
  • For window-backlit rooms, add 'balance the window light so the interior is visible' for best results
  • Compare your result to professional listing photos for the same room type to gauge target brightness

If something looks off

Room looks washed out or overexposed after brightening

Why: The AI overcorrected the brightness and blew out the highlight areas.

Try: brighten this room photo but protect the highlights — keep the bright areas from blowing out while still opening up the dark shadow areas

Tip: Add 'without overexposing' or 'protect highlights' to your prompt to prevent the AI from overcorrecting.

Brightening looks artificial or unnatural

Why: The AI increased overall luminance without matching the natural light falloff in the room.

Try: brighten this room to look like natural daylight is coming through the windows — soft, even, and realistic rather than artificially lit

Tip: Anchoring to 'natural daylight' rather than just 'brighter' produces more photorealistic results.

AI changed the wrong area or something I didn't want changed

Why: The AI interpreted the brightness instruction broadly and adjusted colors or contrast beyond the exposure lift.

Try: Tap a marker on only the dark areas, then regenerate: 'open up the shadows in the marked areas without changing the colors or contrast'

Tip: Markers with a narrow scope instruction limit the AI to brightening only the dark zones without altering the overall image look.

Dark corners are still dark after brightening

Why: The overall image brightened but deep shadow areas in corners weren't fully recovered.

Try: Tap markers on the dark corners, then add 'open up the shadows specifically in these marked dark corner areas to match the brightness of the rest of the room'

Tip: Markers are most useful for targeted shadow recovery in specific zones after a global brightness fix.

Quick answers

Do I need to mark or select the dark areas before brightening?

No. Just describe the result you want: 'brighten this room to look naturally well-lit.' The AI applies the brightness correction to the full image without any marking. Only use markers if one specific zone — like a dark corner — needs extra attention after the main brightening.

Will brightening a room photo look natural or artificial?

It looks natural when you describe the target clearly — 'naturally well-lit' or 'like midday daylight coming through windows.' The AI simulates realistic ambient light rather than just turning up a brightness slider, so results typically don't look processed.

Is there a free tool to brighten dark room photos without Photoshop?

Yes. EditThisPic is free with no account required. Upload your dark room photo, describe how bright you want it, and get a corrected result in 20 seconds. One free edit per week; credit packs from $1.99 for multiple rooms.

Can this fix very dark photos taken on a phone camera?

Yes. Phone cameras often underexpose dark interiors to prevent blown-out windows. Describe 'fix underexposed phone photo of this room to look like a professional real estate photo' and the AI handles the correction.

Ready to brighten your room photos?

Free to try. No signup required.

Try it free