Free • No signup Add Scar to face photo · Free

Add a Scar to a Face Photo

← Browse all add & replace tools

Last updated

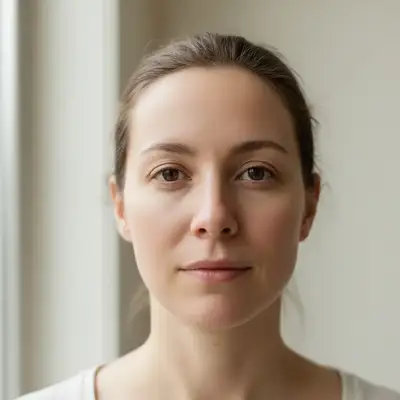
Upload a clear face photo, describe the scar you want, and the AI adds it realistically in seconds. Great for pranks, Halloween looks, or cosplay character photos.

Portrait of a man with clear smooth skin, slight angle, natural lighting Same portrait with a pale diagonal scar running from cheekbone to jaw

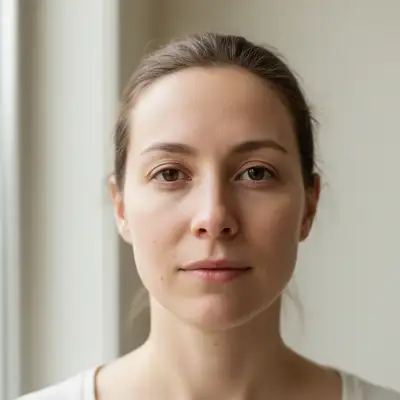
Upload photo to add scar to face photo

"Add a healed scar that runs from the corner of the upper lip up to the cheekbone, like an old knife wound. Pale pink, raised scar tissue, clearly years old. Make it look like it changed the shape of the lip slightly."

Release to upload

1 free edit·then from $4.99

Popular use cases:
  • fake scar photo
  • face scar prank photo
  • AI scar photo editor
  • realistic scar photo fake
  • villain scar photo
  • fake injury photo scar
  • Halloween scar photo
  • dramatic scar face photo

Cost
Free No signup required
Time
Instant results in 15-30 seconds
Works on
Any device - browser, phone, tablet, desktop
Powered by
AI-powered photo editing
Scenario Prompt Time
Villain slash scar Pale healed diagonal scar from left cheekbone to jaw corner, old, raised scar tissue 15s
Eyebrow scar Thin healed scar cutting vertically through the left eyebrow, pale, with a small hair gap 15s
Fresh stitches Fresh sutured cut on forehead, 2 inches, pink edges, visible stitch marks, days old 30s
Burn scar Healed burn scar on right cheek, 2 inches wide, smoother skin texture, discolored 30s

How it works

  1. Upload your photo

    Upload a clear, well-lit face photo. A straight-on or slight angle shot works best. Good lighting helps the AI blend the scar realistically into the skin texture. Avoid heavy filters or extreme lighting that would make the scar look obviously added.

    Expect: Upload takes under 5 seconds. The clearer the skin, the more convincing the scar.
  2. Describe the scar

    Type exactly what kind of scar you want and where it goes. Include the type (slash, burn, stitch marks), location (cheek, jaw, across the eye, lip), size, and how healed it looks. Old healed scars look pale and raised. Fresh scars are pink and raw.

    Tip: Old healed scars look the most dramatic in photos because they contrast against the skin tone. A pale raised scar across the cheek or from the lip to the jaw gives a strong villain aesthetic. For prank use, a clearly healed scar implies a backstory.

    Copy one of these to get started:

    Classic villain slash scar Add a dramatic healed slash scar running diagonally from the left cheekbone down to the corner of the jaw. The scar should be pale, slightly raised, and clearly old — no redness, just pale scar tissue against the skin.
    Lip-to-cheek scar Add a healed scar that runs from the corner of the upper lip up to the cheekbone, like an old knife wound. Pale pink, raised scar tissue, clearly years old. Make it look like it changed the shape of the lip slightly.
    Through-the-eyebrow scar Add a thin healed scar cutting vertically through the left eyebrow, about 1.5 inches long. The scar should interrupt the eyebrow hair, leaving a small gap, and be pale against the skin.
    Burn scar on the cheek Add a burn scar on the right cheek covering an area about 2 inches wide. The skin should look slightly discolored and smoother than normal skin — the texture of healed burn tissue. Not raw, just clearly different from the surrounding skin.
    3 more prompts
    Stitches scar — fresh Add a fresh-looking sutured cut on the forehead, about 2 inches long, with visible stitch marks on either side of a closed wound. Pink, swollen edges, clearly a medical closure from the last few days.
    Under-eye scar Add a small healed scar under the right eye, about an inch long, running horizontally. Pale and raised, clearly an old cut that healed without perfect smoothness.
    Full jaw scar Add a long healed scar running from the left ear down the entire jaw to the chin. Pale pink, raised, clearly an old injury that healed over years. The scar should follow the jawline naturally.
  3. Send it

    Download the edited photo and drop it on someone with no explanation, or go with "so I have something to tell you about last week." Works great on anyone who'd be alarmed by a permanent facial change. Also great as a profile photo update with zero context.

See it in action

Portrait of a man with clear smooth skin, slight angle, natural lighting
Before
->
Same portrait with a pale diagonal scar running from cheekbone to jaw
After

Villain diagonal cheek scar

Clear face photo with a dramatic pale diagonal scar from cheekbone to jaw added. Used as a profile photo update with zero context to see how long before friends asked.

Prompt: Add a dramatic healed slash scar running diagonally from the left cheekbone down to the corner of the jaw. Pale, slightly raised, clearly old scar tissue.
Straight-on selfie of a young woman with clear forehead, hair pulled back
Before
->
Same selfie with realistic fresh stitch marks on the forehead added
After

Fresh stitches forehead — the ER text

Photo with fresh stitch marks on the forehead added. Sent with "so something happened today, I'm okay" to family.

Prompt: Add a fresh-looking sutured cut on the forehead, about 2 inches long, with visible stitch marks. Pink, swollen edges, clearly a medical closure from the last few days.

If something looks off

The scar looks like a drawn line, not real scar tissue

Why: The AI may render a flat color line rather than the textured, raised quality of actual scar tissue.

Try: Make the scar look like real scar tissue — slightly raised above the skin surface, pale and smoother than the surrounding skin, with subtle texture variation along the edges.

Tip: Describing the scar as "raised" and "pale" explicitly gives the AI the dimensional and color cues it needs to render convincing scar tissue.

The scar doesn't follow the face's contours — looks floating

Why: The AI may place the scar flat without accounting for the 3D shape of the face.

Try: Place the scar so it follows the natural curves of the [cheek/jaw/forehead] — it should wrap around the contour of the face, not sit flat.

Tip: Photos with good side lighting (showing facial contours) help the AI understand the 3D shape and wrap the scar appropriately.

The scar is the wrong color — looks pink instead of pale

Why: The AI may render a fresh scar when you wanted an old healed one.

Try: Make the scar look fully healed and old — pale white or slightly lighter than the skin tone, with no redness or pinkness. The scar tissue should look years old.

Tip: Always specify the age: "old," "healed," "years old" produces pale scars. "Fresh," "recent," "days old" produces pink, raw-looking scars.

The scar is too subtle — barely visible

Why: The AI may understate the scar on lighter skin tones or low-contrast photos.

Try: Make the scar clearly visible and dramatic — bold, raised scar tissue with a strong contrast against the surrounding skin.

Tip: Adding "dramatic" or "clearly visible" to your prompt increases the scar's prominence.

The scar ends up in the wrong location

Why: Vague placement directions can result in the AI misinterpreting the target area.

Try: Place the scar specifically from [exact start point] to [exact end point] — for example, from the left cheekbone diagonally to the corner of the jaw.

Tip: Give two anchor points (start and end) for diagonal scars. For curved scars, describe the path it takes across the face.

Quick answers

Do I need to mark the area before describing where the scar goes?

No. Just describe the scar placement in your prompt — "from the left cheekbone to the jaw," "through the left eyebrow," "along the jawline" — and the AI places it there.

Is this free?

Yes. EditThisPic gives you 1 free edit per week with no account needed. For more edits, credits start at $1.99. No subscription required.

Will this look realistic enough to fool someone?

In a well-lit face photo, a healed scar is very convincing at phone screen size. Old healed scars — the pale, raised variety — tend to look the most believable because they have the texture and color of real scar tissue. Fresh stitches are also convincing for an "I ended up at urgent care" prank. Heavy makeup or filters in the original photo can reduce realism.

Can I add different types of scars — burn scars, stitch marks, slash wounds?

Yes. Describe the scar type specifically in your prompt. Burn scars are smoother and discolored. Slash wounds leave a raised, narrow line. Stitch marks leave a more textured, patterned mark on either side of a closed wound. The AI responds well to specific scar type descriptions.

Can I add a scar to someone else's photo?

Yes. Upload any clear face photo. This works for pranking friends by editing their photos, creating Halloween costume photos, or generating villain-look profile pictures for anyone.

What's the best kind of scar for a convincing prank?

Old healed scars are most convincing for a prank because they imply a long history — something the target "should have already noticed" but didn't. A fresh scar with stitches works better for the "something happened this week" prank. Diagonal cheek scars and jaw scars are the most immediately visible and dramatic.

Does EditThisPic store my photos?

Photos are processed to generate your edit and not stored beyond the session. No account means no personal data collected by default.

How is this different from apps like Fotor or BaldBooth?

Apps like Fotor use preset scar overlays you drag and drop onto a photo. EditThisPic takes a natural language description and renders the scar specifically into your photo, adjusting to the skin tone, face angle, and lighting. You can describe exactly the type of scar, its location, and how healed it looks.

How much does EditThisPic cost?

You get 1 free edit per week — no account needed. After that, credit packs start at $1.99 for 3 edits. Monthly plans start at $4.99/mo for 15 edits with unused credits rolling over. All edits are full resolution with no watermark.

Ready to add a scar to your photo?

Free to try. No signup required.

1 free edit included·Credit packs from $4.99