Free • No signup Apply Cross-process effect · Free

AI Cross-Process Filter

Just describe the cross-process look you want and AI applies it instantly.

Normal portrait with standard colors
Before
Portrait with cross-process effect showing cyan shadows and warm highlights
After

Apply Cross-Process Effect to Photo

Drop your photo here

or click to browse

Release to upload

Free • No signup

Advertisement
Popular use cases:
  • portrait photography
  • landscape photography
  • street photography
  • Instagram content
  • vintage aesthetics
  • film emulation
  • creative color grading
  • alternative process

Cost
Free No signup required
Time
Instant results in 15-30 seconds
Works on
Any device - browser, phone, tablet, desktop
Powered by
AI-powered photo editing
Scenario Prompt Time
Classic cyan and yellow apply cross-process effect with cyan shadows and warm yellow highlights, enhanced contrast 25s
Green-shifted portrait apply cross-process effect with enhanced greens and blue-shifted shadows, maintaining skin tones 25s
Magenta and teal modern create cross-process look with magenta highlights and teal midtones, high contrast 30s

How it works

  1. Upload your photo

    Drop your image into EditThisPic. JPG, PNG, WebP up to 7MB. Cross-process effects work best on well-exposed photos with good color range and visible shadows.

    Expect: Simple cross-process effects: 20-30 seconds. Complex color shifts with specific zone adjustments: may need 2-3 refinements.
  2. Describe what you want

    Type your instruction: 'apply cross-process effect with cyan shadows and warm highlights' or 'create cross-process look with enhanced greens and blue shift.' Be specific about which colors to shift and how much contrast to add. No marking needed—the AI understands color grading terms.

    Tip: Include specific color shifts like 'cyan in shadows' or 'magenta in highlights' for authentic cross-process looks

    Copy one of these to get started:

    Classic cyan and yellow cross-process apply cross-process effect with cyan shadows and warm yellow highlights, enhanced contrast and color separation
    Green-heavy cross-process for portraits apply cross-process effect with enhanced greens and blue-shifted shadows, maintaining skin tones
    Magenta and teal shift create cross-process look with magenta highlights and teal midtones, high contrast
    Subtle vintage cross-process apply subtle cross-process effect with slight cyan shift and warm skin tones, gentle contrast boost
    3 more prompts
    Aggressive color shift for landscapes apply strong cross-process effect with intense cyan shadows and orange highlights, maximum color separation and contrast
    Cross-process with lifted blacks create cross-process look with cyan shadows, lifted blacks for vintage feel, and warm highlights
    Blue and yellow cross-process apply cross-process effect with blue shift in shadows and yellows, enhanced saturation and punchy contrast
  3. Review the color shifts

    Check the cross-process effect at full size. Verify color shifts appear in the right areas—cyan/green in shadows, warm tones in highlights. Check that contrast is enhanced but not blown out.

  4. Refine with markers if needed

    If specific areas need different color treatment or the effect is too strong in certain zones, tap markers on those spots and regenerate with adjusted instructions. This is optional—most cross-process effects work without markers.

    Tip: Markers are for zone-specific refinement, not required. Try without them first.
Try it free

Apply Cross-Process Effect to Photo

Drop your photo here

or click to browse

Release to upload

Free • No signup

"Finally a cross-process filter that actually looks authentic. The color shifts are perfect and it captures that real film look." @filmshooter

See it in action

Normal portrait with standard colors
Before
->
Portrait with cross-process effect showing cyan shadows and warm highlights
After

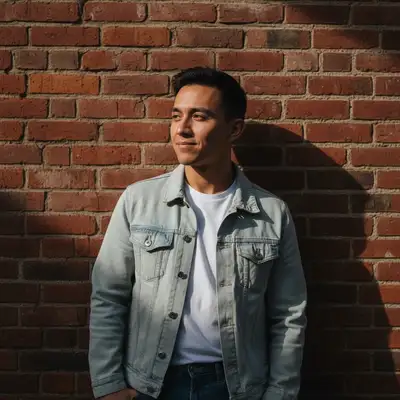
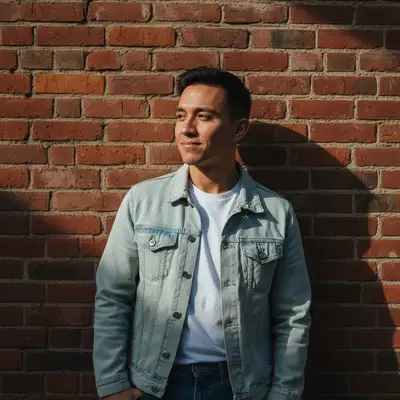
Portrait with cyan shadows and warm highlights

Applied classic cross-process look with cyan-shifted shadows and warm orange highlights while preserving natural skin tones.

Prompt: apply cross-process effect with cyan shadows and warm yellow highlights, enhanced contrast, maintaining skin tones
Normal landscape with standard colors
Before
->
Landscape with cross-process greens and blue shift
After

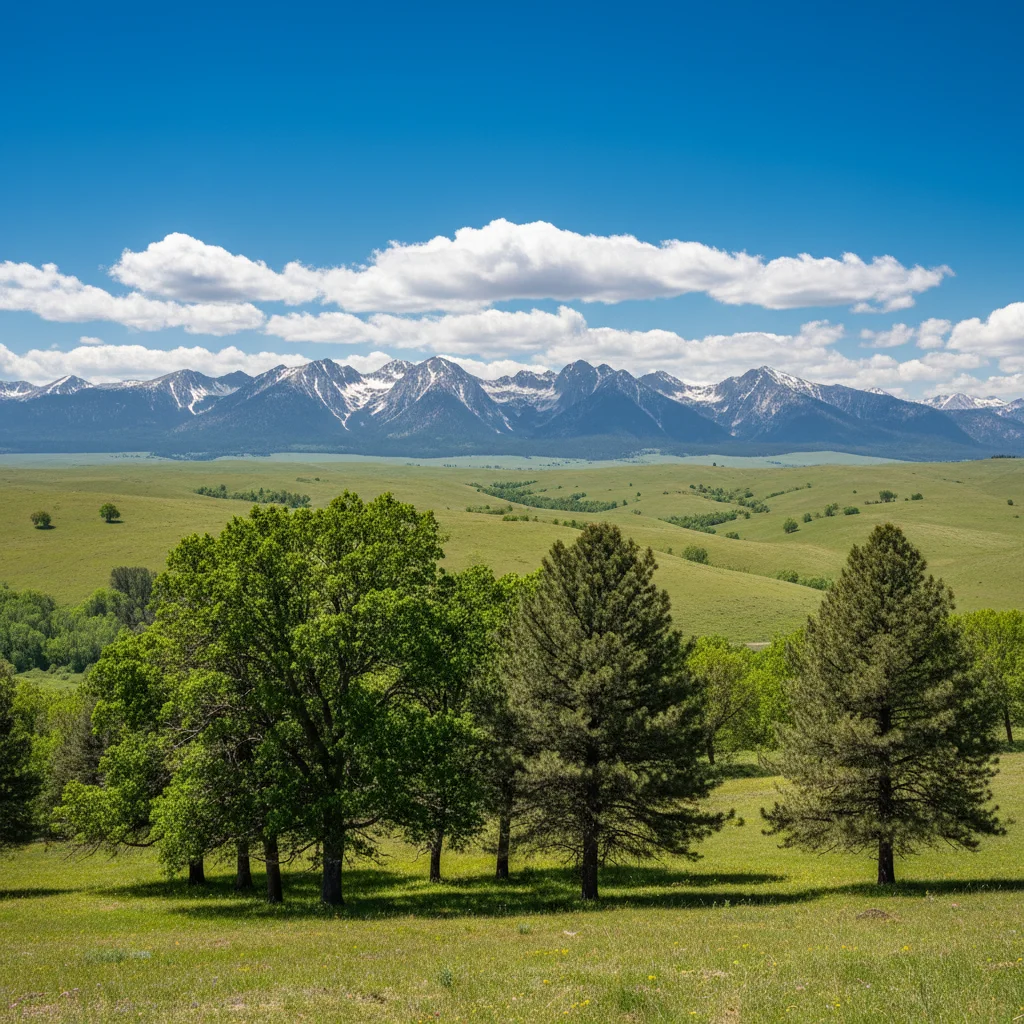
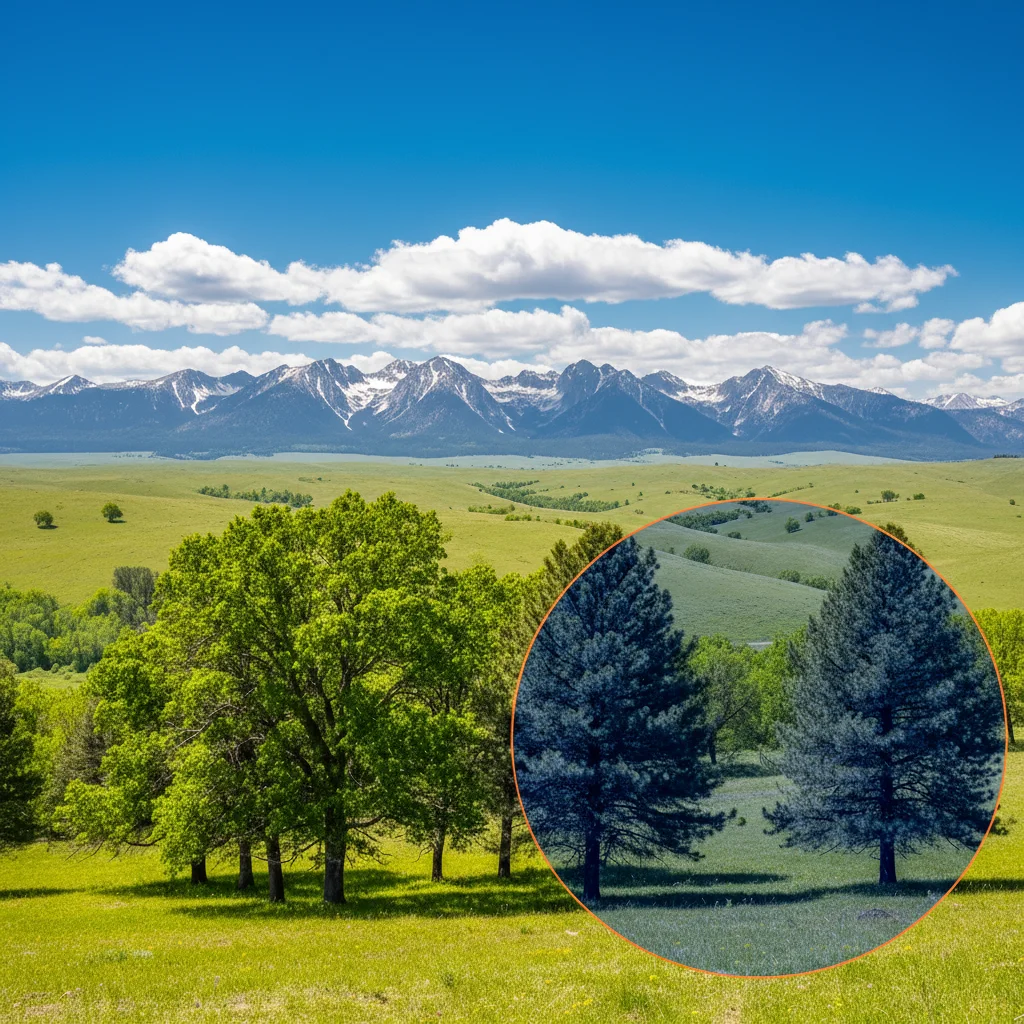
Landscape with enhanced greens and blue shift

Created distinctive cross-process landscape with intensified greens and cyan color shifts throughout.

Prompt: apply cross-process effect with enhanced greens and blue-shifted shadows, high contrast
Normal urban street photo
Before
->
Urban scene with magenta and teal cross-process effect
After

Urban street scene with magenta and teal

Applied modern cross-process effect with magenta highlights and teal midtones for dramatic urban look.

Prompt: create cross-process look with magenta highlights and teal midtones, high contrast
Advertisement

If something looks off

AI changed the wrong area or shifted colors globally instead of selectively

Why: The AI couldn't determine exactly which zones you meant from description alone. Cross-process effects are typically global, but sometimes you want selective application.

Try: Tap markers on specific areas where you want stronger or different color shifts, then regenerate with zone-specific instructions like 'apply cyan shift only to marked shadows'

Tip: Markers tell the AI 'I mean THIS zone specifically.' Use them when you want selective cross-processing.

Colors shifted too much and look unnatural

Why: Cross-process effects inherently create unnatural color shifts. The AI may have applied them too aggressively for your taste.

Try: Use 'subtle cross-process effect' or 'gentle color shift' to reduce intensity, or specify exact shift amount like 'slight cyan shift in shadows'

Tip: Start subtle and increase intensity if needed. It's easier to add more than reduce an overly strong effect.

Skin tones look wrong or too shifted

Why: Cross-process effects shift all colors, including skin. Without specific protection, faces can turn unnaturally cyan or green.

Try: Add 'maintaining natural skin tones' or 'preserving face colors' to your prompt to protect skin while shifting other colors

Tip: Always specify skin tone preservation for portraits, or use markers to exclude faces from color shifts.

Contrast is too high and details are lost

Why: Cross-process typically increases contrast. Combined with aggressive color shifts, this can blow out highlights or crush shadows.

Try: Use 'gentle contrast boost' instead of 'high contrast,' or add 'preserving shadow detail' to maintain dynamic range

Tip: Check histogram after applying. If highlights or shadows are clipped, regenerate with less aggressive contrast.

Effect looks muddy instead of punchy

Why: The color shifts may not have enough separation, or the original photo lacks dynamic range to showcase cross-processing.

Try: Try 'maximum color separation' and ensure your original has good exposure with visible shadows and highlights. Cross-process needs dynamic range to work.

Tip: Cross-process looks best on well-exposed photos with clear shadows and highlights, not flat lighting.

Result looks nothing like film cross-processing

Why: Authentic cross-process has specific characteristics: cyan shadows, warm highlights, lifted blacks, and color separation in specific zones.

Try: Use specific film terminology: 'apply cross-process effect with cyan shadows, warm highlights, lifted blacks, and enhanced color separation'

Tip: Reference specific film stocks if you know them: 'cross-process look like E6 in C41 with cyan shift'

Quick answers

Do I need to mark specific areas before applying the cross-process effect?

No! For most cross-process effects, just describe the color shifts you want: 'apply cross-process with cyan shadows and warm highlights.' The AI understands color grading terms and applies them globally. Only use markers when you need zone-specific adjustments—like protecting skin tones or applying different shifts to foreground vs background.

How do I create an authentic cross-process look with AI?

Real cross-processing happens when you develop slide film (E6) in print chemistry (C41), creating distinctive cyan shadows and warm highlights. To recreate this, specify 'cyan shadows,' 'warm yellow or orange highlights,' 'enhanced contrast,' and optionally 'lifted blacks' for that vintage feel. Be specific about color zones—cross-process is all about where colors shift, not just overall color changes.

Is there a free cross-process filter that works on any photo without Photoshop?

Yes! EditThisPic applies cross-process effects with AI using just text descriptions. No manual color curve adjustments, no Photoshop skills needed. It's free to try with no account required, and works on portraits, landscapes, street photography—any image with good dynamic range.

What's the difference between cross-process and vintage filters?

Cross-process creates specific color shifts (typically cyan shadows and warm highlights) due to mismatched film chemistry. Vintage filters may include grain, fading, or vignettes, but not necessarily the distinctive color crossover. Cross-process is more aggressive and color-focused, while vintage is broader and includes other degradation effects.

Can I apply different cross-process looks to different parts of the same photo?

Yes! Use markers to define zones, then describe the specific effect for that area: 'apply cyan shift to marked background' then generate, then mark the subject and 'apply warm tones to marked subject.' This creates selective cross-processing where different zones have different color treatments.

Ready to apply cross-process effects to your photos?

Free to try. No signup required.

Try it free