Free • No signup Enhance Lips · Free

AI Lip Enhancer

Describe the lip enhancement you want and AI transforms your lips instantly. No marking needed.

Woman with thin, narrow lips
Before
Same woman with naturally fuller, more defined lips
After

AI Lip Enhancer

Upload photo to enhance lips

Free • Results in 30 seconds • No signup

Release to upload

FreeNo signupNo watermark
Popular use cases:
  • lip enhancement
  • lip plumping photo
  • lip filler preview
  • fuller lips
  • lip shape correction
  • selfie lip enhancement
  • portrait lip definition
  • lip volume increase

Cost
Free No signup required
Time
Instant results in 15-30 seconds
Works on
Any device - browser, phone, tablet, desktop
Powered by
AI-powered photo editing
Scenario Prompt Time
Subtle fullness make the lips slightly fuller, keep natural 30s
Shape definition define lip edges and enhance cupid's bow 35s
Full lip enhancement plump both lips evenly for voluminous pout 40s

How it works

  1. Upload your photo

    Upload a clear, front-facing portrait. Good lighting on the face and visible facial features give the AI the best foundation for lips editing. JPG, PNG, WebP up to 7MB.

    Expect: Subtle lip enhancement: 30-35 seconds. Significant shape and volume change: 40-50 seconds and may need refinements.
  2. Describe the lip enhancement

    Type what you want: 'make the lips fuller and more defined' or 'plump the upper lip slightly and add more shape to the cupid's bow.' Be specific about which lip (upper, lower, both) and what kind of enhancement. No marking needed—the AI knows exactly where lips are.

    Tip: Use beauty terms like 'cupid's bow', 'vermillion border', or 'plumping' for precise results that match professional lip enhancement language.

    Copy one of these to get started:

    Natural lip fullness enhance the lips to be slightly fuller and more defined while keeping them natural-looking
    Upper lip plumping plump the upper lip to better match the lower lip volume, creating a more balanced look
    Defined lip shape define the lip edges and enhance the cupid's bow for a more sculpted, polished lip shape
    Plump both lips evenly plump both upper and lower lips evenly for a fuller, more voluminous pout while keeping symmetry
    3 more prompts
    Subtle filler look preview enhance the lips to simulate a subtle lip filler result - slightly more volume and smoother lip surface
    Add lip color with enhancement enhance the lips to be fuller and add a natural rosy pink tint to the lip color
    Smooth and rejuvenate lips smooth the lip surface, reduce fine lines around the lips, and add a subtle healthy plumpness
  3. Review the enhancement

    Check that lips look naturally fuller or more defined. Zoom in to verify the lip line is smooth, both sides are symmetrical, and the enhancement blends with surrounding skin. Ensure the result suits the overall face proportions.

  4. Refine with markers if needed

    If one lip or a specific area like the corners needs adjustment, tap a marker on that spot and regenerate. Most lip enhancements work perfectly on the first try without markers.

    Tip: Markers are for precision refinement only. Try without them first—you usually won't need them.
Try it free

AI Lip Enhancer

Upload photo to enhance lips

Free • Results in 30 seconds • No signup

Release to upload

Free • No signup

"I use this to preview lip filler results before my appointment. Upload a selfie, describe the fullness I want, and I can show my aesthetician exactly what I'm going for. So much better than reference photos." @LipPreview_Anna

See it in action

Woman with thin, narrow lips
Before
->
Same woman with naturally fuller, more defined lips
After

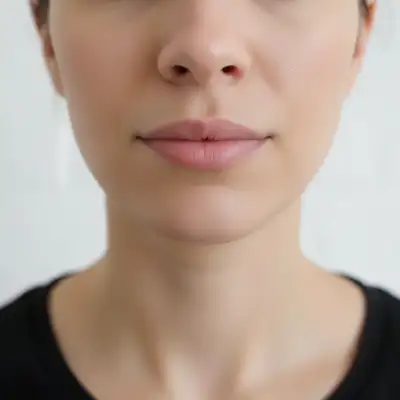
Natural lip fullness enhancement

Thin lips enhanced to look naturally fuller and more defined for a polished portrait.

Prompt: enhance the lips to be slightly fuller and more defined while keeping them natural-looking
Woman with thin upper lip and fuller lower lip
Before
->
Same woman with balanced, proportional lips
After

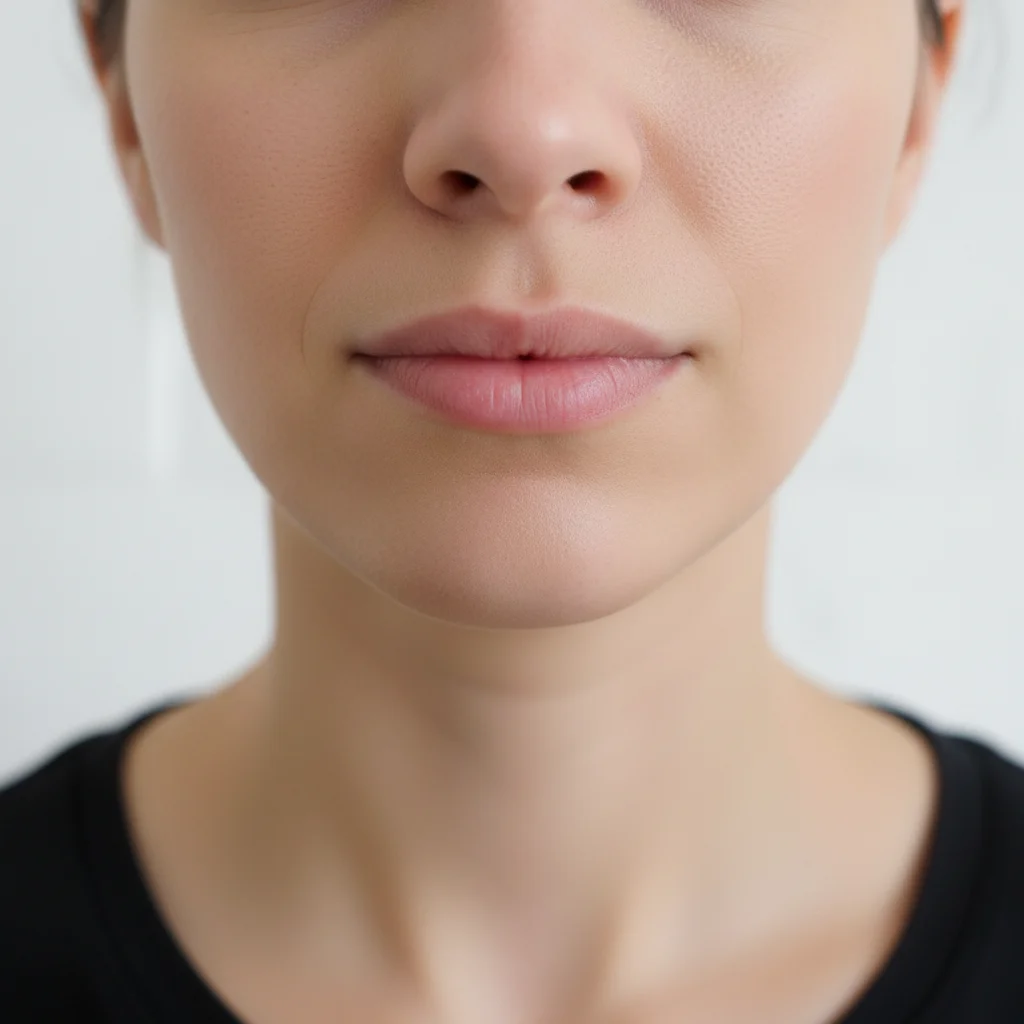
Upper lip balanced with lower

An asymmetric lip ratio corrected by plumping the upper lip to match the lower.

Prompt: plump the upper lip to better match the lower lip volume, creating a more balanced look

Detailed Guides by Scenario

📷

Photo Rescue & Restoration

Revive old, damaged, or poorly-shot photos with AI lips — bring new life to images you thought were unsalvageable.

Common Scenarios

  • Applying lips to old family photos that have degraded over time
  • Fixing a once-in-a-lifetime shot (wedding, graduation) that suffers from poor quality
  • Using lips on scanned prints to get crisp digital versions

Best Practices

  • Scan old photos at the highest DPI your scanner supports before uploading for best results
  • Describe the specific issue — 'this photo is too dark and blurry' gives better lips than a generic prompt
  • For severely damaged photos, work in stages: fix the biggest issue first, then refine
📷

Professional & Business Use

Ensure photos for websites, presentations, and marketing meet professional standards with lips.

Common Scenarios

  • Using lips on employee photos for a company website that need to look polished
  • Applying lips to event photos before sharing in a client presentation
  • Improving product images with lips for an online store or catalog

Best Practices

  • Process all images in a batch with the same enhancement settings for visual consistency
  • For web use, balance enhancement quality with file size — overly large images slow page loads
  • Always compare before and after to make sure lips looks natural, not over-processed
📷

Social Media & Personal Sharing

Make your personal photos look their best before sharing with friends, family, or followers using lips.

Common Scenarios

  • Quickly applying lips to vacation photos before posting on social media
  • Using lips on a selfie that has great composition but poor lighting
  • Batch-fixing a phone gallery of photos with lips before creating an album to share

Best Practices

  • Start with the photo you'd most like to share — fix that one first and use the same approach on the rest
  • For selfies, subtle enhancement always beats heavy processing — keep it natural
  • If the photo was shot in low light, mention it in the prompt so the AI tailors lips accordingly

If something looks off

AI changed the wrong area or something I didn't want changed

Why: The AI modified surrounding skin or chin area alongside the lips. This happens when the enhancement extends beyond the lip boundaries.

Try: Tap a marker on only the lips, then regenerate: enhance only the lips, do not change any skin around the mouth

Tip: Markers tell the AI 'I mean THIS area specifically.' Use them when description alone is ambiguous.

Lips look unnaturally inflated or duck-like

Why: The enhancement was too aggressive, pushing lips beyond proportions that look believable for the face.

Try: enhance the lips just slightly - subtle volume increase only, keep them proportional to the face

Tip: Adding 'proportional to the face' constrains the AI to enhancement levels that match overall facial structure.

Lip edges look blurred or undefined

Why: The plumping effect softened the lip line boundary, making the transition between lips and skin unclear.

Try: enhance the lips with clearly defined edges and a sharp lip line boundary, clean vermillion border

Tip: 'Sharp lip line' and 'vermillion border' tell the AI to keep crisp boundaries during enhancement.

Lips look asymmetrical after enhancement

Why: The AI applied different amounts of enhancement to the left and right sides, creating visible unevenness.

Try: enhance both sides of the lips equally and symmetrically, matching left and right perfectly

Tip: Specifying 'symmetrically' and 'matching left and right' directly addresses the balance issue.

Skin texture around lips looks altered

Why: The enhancement algorithm affected the surrounding skin, particularly the area above the upper lip and below the lower lip.

Try: enhance only the lip surface itself, preserve the exact original skin texture around the mouth completely

Tip: 'Only the lip surface' and 'preserve skin around mouth' create clear boundaries for the edit.

Quick answers

Do I need to mark the lips before describing the enhancement I want?

No! Just describe what you want: 'make the lips fuller' or 'plump the upper lip.' The AI knows exactly where lips are on a face. Only use markers if the enhancement accidentally affected surrounding skin and you need to constrain the edit to lips only.

How do I enhance lips in a photo without them looking fake?

Use 'slightly' or 'subtly' in your prompt: 'enhance the lips to be slightly fuller while keeping them natural.' Small enhancements that stay proportional to the face look the most convincing. Avoid asking for dramatic changes in one step—do two subtle enhancements instead if needed.

Is there a free AI lip enhancer that doesn't require login?

Yes, EditThisPic is free to try with no account needed. Upload your photo, describe the lip enhancement you want, and download the result. No watermarks on outputs. Works for subtle fullness to dramatic plumping without any signup.

What's the best free AI tool for enhancing lips in photos?

EditThisPic offers free AI lip enhancement with no signup required. Unlike apps that use slider controls, you describe the exact enhancement you want in natural language. It handles volume, shape, definition, and symmetry adjustments with realistic results in seconds.

Is EditThisPic's AI lips enhancer really free?

Yes — you get 1 free edit per week, no account needed. For unlimited edits, plans start at $3.99/month.

Can I enhance lips on my phone?

Yes. EditThisPic works in any mobile browser — iPhone, Android, tablet. No app download needed.

What photo formats does the AI lips enhancer support?

JPG, PNG, WebP, and HEIC. Upload any common photo format and EditThisPic handles the rest.

How long does it take to enhance lips?

Usually 15-30 seconds. Upload your photo, describe what you want, and the AI delivers the result.

Ready to enhance your lips in photos?

Free to try. No signup required.