Free • No signup Remove Bystander · Free

Remove Bystander From Photo

Describe who to add or remove. The AI handles the rest.

Photo with bystander in background
Before
Clean photo with bystander removed
After

Remove Bystander From Photo

Drop your photo here

or click to browse

Release to upload

Free • No signup

Popular use cases:
  • remove bystander
  • AI bystander editor
  • photo bystander tool
  • free bystander editing

Cost
Free No signup required
Time
Instant results in 15-30 seconds
Works on
Any device - browser, phone, tablet, desktop
Powered by
AI-powered photo editing

How it works

  1. Upload your photo

    Upload a photo where the unwanted element is clearly visible. The AI needs to see surrounding context to fill in naturally after bystander. JPG, PNG, WebP up to 7MB.

    Expect: Most edits complete in 20-45 seconds. Complex changes may need 1-2 refinements.
  2. Describe your edit

    Type what you want: 'remove the bystander standing in the background.' Be specific about details for best results. The AI understands natural language — no technical skills needed.

    Tip: Upload the person you want to add as a reference image for seamless insertion.

    Copy one of these to get started:

    Person lurking in background remove the random person standing in the background behind us
    People on the sides remove the bystanders on both sides of the frame, keep only the main subjects
    Someone sitting on bench behind remove the person sitting on the bench in the background
    Dog walker passing by remove the person walking their dog through the background
    4 more prompts
    Workers or staff in background remove the workers or staff visible in the background of this photo
    Clean removal with smooth fill remove bystander completely and fill the area with a clean, smooth background that matches surroundings
    Preserve surrounding detail remove bystander while preserving all surrounding details and textures exactly as they are
    Multiple instances at once remove all visible bystander from the entire photo, clean and seamless result
  3. Review the result

    Examine the area where the object was removed. The fill should match surrounding texture, color, and perspective. Check that no ghost outlines or smudged patches remain.

  4. Refine if needed

    If the removed area shows repetitive patterns or the fill doesn't match surrounding texture, tap markers on those spots and describe the issue. Try 'blend this patch with the surrounding area' for seamless results.

    Tip: Markers are optional. Try without them first — the AI usually gets it right.
Try it free

Remove Bystander From Photo

Drop your photo here

or click to browse

Release to upload

Free • No signup

"Wedding photos had random guests standing awkwardly in every background. All cleaned up now." @WeddingPlanner

See it in action

Photo with bystander in background
Before
->
Clean photo with bystander removed
After

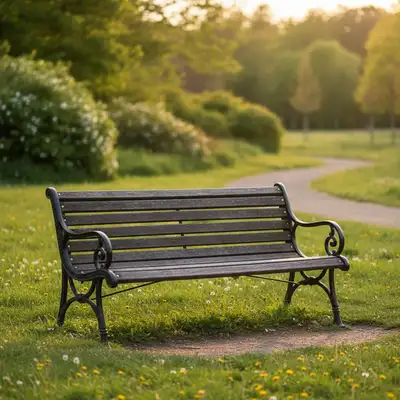
Background bystander removed

Clean background after removing random person standing behind subjects.
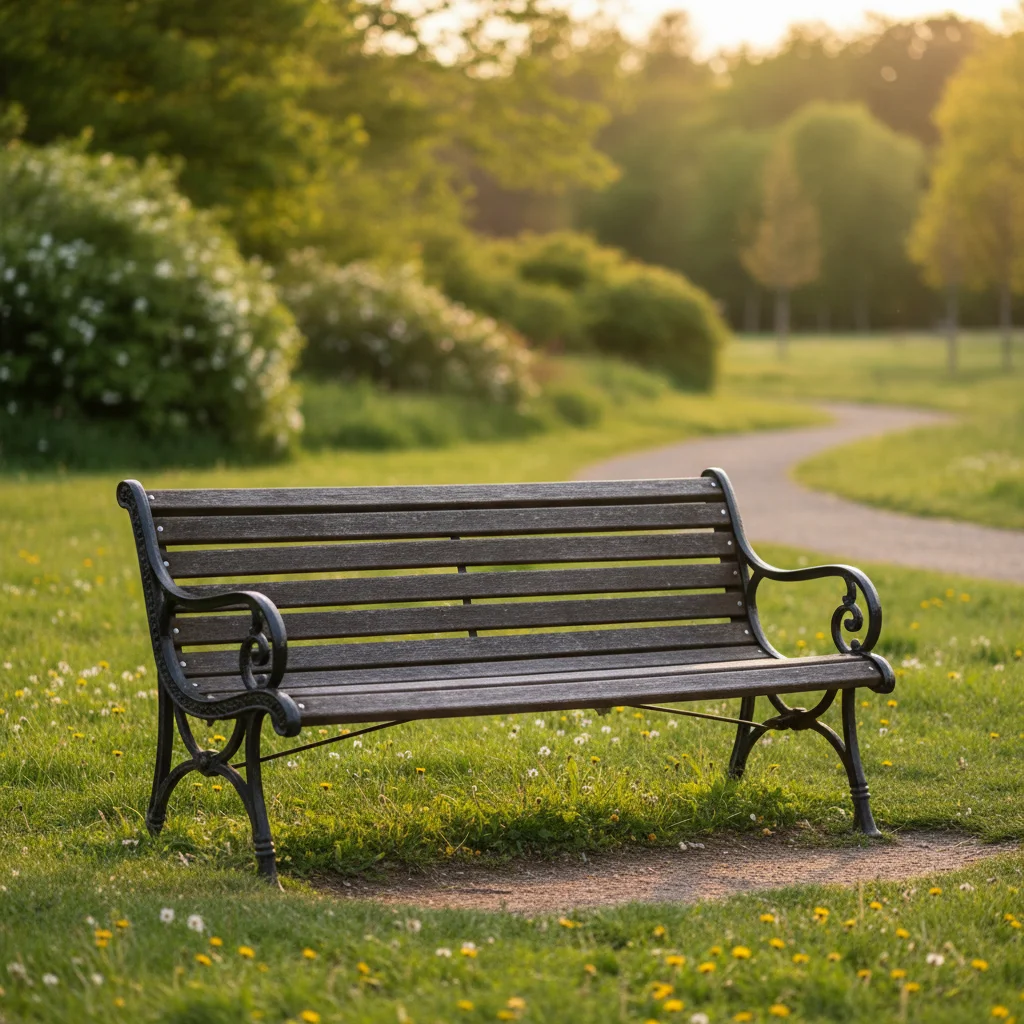
Prompt: remove the random person standing in the background
Photo with people on the sides
Before
->
Clean photo with only main subjects
After

Side people removed

Photo cleaned up with bystanders on both sides removed.

Prompt: remove the bystanders on both sides of the frame

Detailed Guides by Scenario

📷

Professional Photography

Remove unwanted bystander from professional photo shoots, client deliverables, and stock photography to achieve clean, polished results.

Common Scenarios

  • Client portrait sessions where the bystander appeared unexpectedly in frame
  • Stock photography that needs the bystander removed for broader commercial appeal
  • Product photography with distracting bystander in the background

Best Practices

  • Zoom in and place a marker directly on the bystander for the most accurate removal
  • Run a second pass if any faint outlines or shadows remain after the first edit
  • Describe the desired background fill — e.g., 'replace the bystander with clean wall' for predictable results
📷

Real Estate & Property Listings

Clean up property photos by removing bystander that distract buyers and lower perceived home value.

Common Scenarios

  • Listing photos where the bystander clutters the frame and makes rooms look smaller
  • Exterior shots with bystander that hurt curb appeal
  • Open house photos that need the bystander removed before uploading to MLS

Best Practices

  • Shoot the space first, then edit — AI removal works better than awkward staging workarounds
  • After removing the bystander, check that floor lines and wall edges still look straight
  • Process all listing photos in one session so lighting and style stay consistent
📷

Personal & Social Media

Fix personal photos by removing bystander before sharing on social media, printing, or gifting.

Common Scenarios

  • Vacation photos where the bystander appeared in an otherwise perfect shot
  • Family photos with bystander that distract from the people in the frame
  • Profile pictures and dating app photos that need the bystander cleaned out

Best Practices

  • Save the original photo first — edit a copy so you can always go back
  • For group photos, mark the bystander carefully to avoid affecting nearby people
  • If the first result isn't perfect, try rewording your prompt with more detail about the background

If something looks off

AI changed the wrong area

Why: The AI couldn't determine exactly which area you meant from the description alone.

Try: Tap a marker on the specific area you want to edit, then regenerate with the same prompt

Tip: Markers tell the AI exactly where to focus. Use them when description alone is ambiguous.

Result looks unnatural or blurry

Why: The AI may need more specific guidance about the look you want.

Try: remove the bystander standing in the background, ensure natural lighting and sharp details that match the rest of the photo

Tip: Adding 'natural' and 'realistic' to your prompt helps the AI prioritize believability.

Person's edges show halos or artifacts

Why: The boundary between the person and the background wasn't cleanly handled.

Try: Tap markers along the person's outline and regenerate: 'clean up the edges for a seamless blend'

Tip: Upload the person you want to add as a reference image for seamless insertion.

Added person's lighting doesn't match the scene

Why: The source photo of the person had different lighting than the target scene.

Try: Add 'match the lighting direction and color temperature of the scene' to your prompt

Tip: Use source photos with similar lighting conditions — both outdoor or both indoor — for best results.

Face swap looks uncanny or distorted

Why: The face angle or expression didn't align well between the two photos.

Try: Try with photos where both faces have a similar angle and expression for more natural results

Tip: Face swaps work best when both photos have a similar head angle and neutral or matching expressions.

Quick answers

Do I need to mark the bystanders?

No, describe their position and the AI removes them. Markers optional for precision.

Is this free?

Yes, 1 free edit per week. Plans from $3.99/mo for unlimited.

Does it work on mobile?

Yes, works in any mobile browser.

Can it remove multiple bystanders at once?

Yes, describe all the people you want removed and the AI handles them together.

What fills the space?

The AI fills with matching background — grass, pavement, wall, scenery — whatever was behind them.

What photo formats does the remove bystander from photo tool support?

JPG, PNG, WebP, and HEIC. Upload any common photo format and EditThisPic handles the rest.

How long does it take to remove bystander?

Usually 20-45 seconds. Upload your photo, describe what you want, and the AI delivers the result.

Do I need to download an app to remove bystander?

No app needed. EditThisPic runs entirely in your web browser on any device -- desktop, laptop, phone, or tablet.

Ready to edit your group photos?

Free to try. No signup required.

Try it free