Free • No signup Smooth Skin · Free

Smooth Skin from Photo

Type what you want. Skin smoothing that looks natural, not plastic.

Portrait with visible skin texture and minor imperfections
Before
Same portrait with naturally smoothed skin
After

Smooth Skin from Photo

Upload photo to smooth skin

Free • Results in 30 seconds • No signup

Release to upload

FreeNo signupNo watermark

1 free edit·then from $1.99

Popular use cases:
  • Portrait retouching
  • Fashion photography
  • Beauty photos
  • Modeling portfolios
  • Wedding photography
  • Professional headshots

Cost
Free No signup required
Time
Instant results in 15-30 seconds
Works on
Any device - browser, phone, tablet, desktop
Powered by
AI-powered photo editing
Scenario Prompt Time
Natural subtle smooth the skin while keeping natural texture and visible pores 15s
Full body soften skin texture on all visible skin including arms and shoulders 20s
Fashion polish even out skin tone and smooth texture, keep natural glow 20s

How it works

  1. Upload your photo

    Upload a clear, front-facing portrait. Good lighting on the face and visible facial features give the AI the best foundation for skin editing. JPG, PNG, WebP up to 7MB.

    Expect: Simple portraits: 15-20 seconds. Full body with multiple skin areas: may need 2 refinements.
  2. Describe your skin smoothing

    Type what you want: 'smooth the skin while keeping natural texture' or 'soften skin texture on arms and shoulders.' Be specific about which areas and how natural you want it. The AI understands—no selecting or brushing needed.

    Tip: Add 'keep pores visible' or 'maintain natural skin texture' to avoid the plastic look that ruins retouching.

    Copy one of these to get started:

    Portrait with natural results smooth the skin while keeping natural texture and visible pores, subtle retouching only
    Fashion photo with visible arms/shoulders soften skin texture on all visible skin including arms, shoulders, and back while maintaining natural appearance
    Beauty portrait needing more polish smooth the skin with medium intensity, reduce pore visibility while keeping some natural texture
    Full body shot for modeling portfolio even out skin tone and smooth skin texture across all exposed areas, keep natural skin glow
    2 more prompts
    Hands and arms close-up soften skin texture on hands and arms, reduce visible veins and age spots while keeping skin realistic
    High-fashion editorial look smooth skin to editorial beauty standard, soft porcelain finish but keep subtle skin texture visible
  3. Generate and review

    Tap generate and zoom to 100% to check the result. Look at skin texture—does it still look like real skin? Check that hair, eyes, and clothing weren't affected.

  4. Refine with markers if needed

    If some skin areas were missed or other areas were accidentally smoothed, tap markers on those spots and regenerate. Most skin smoothing works without markers.

    Tip: Markers help when you want different smoothing levels on different areas—like more on arms, less on face.
Try it free

Smooth Skin from Photo

Upload photo to smooth skin

Free • Results in 30 seconds • No signup

Release to upload

Free • No signup

See it in action

Portrait with visible skin texture and minor imperfections
Before
->
Same portrait with naturally smoothed skin
After

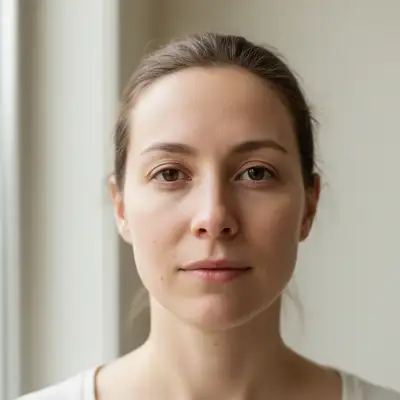
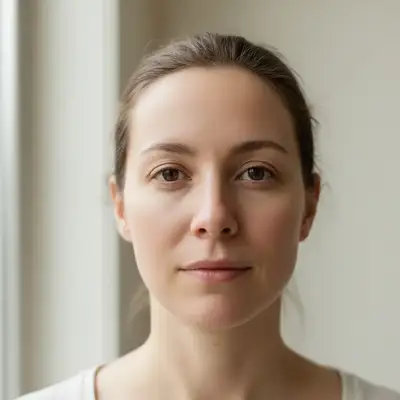
Natural portrait retouch

Portrait photo with visible skin texture on face and neck. One prompt smoothed everything while keeping it looking real.

Prompt: smooth the skin while keeping natural texture and visible pores, subtle retouching only
Fashion photo with visible skin texture on shoulders and arms
Before
->
Same photo with all visible skin smoothed naturally
After

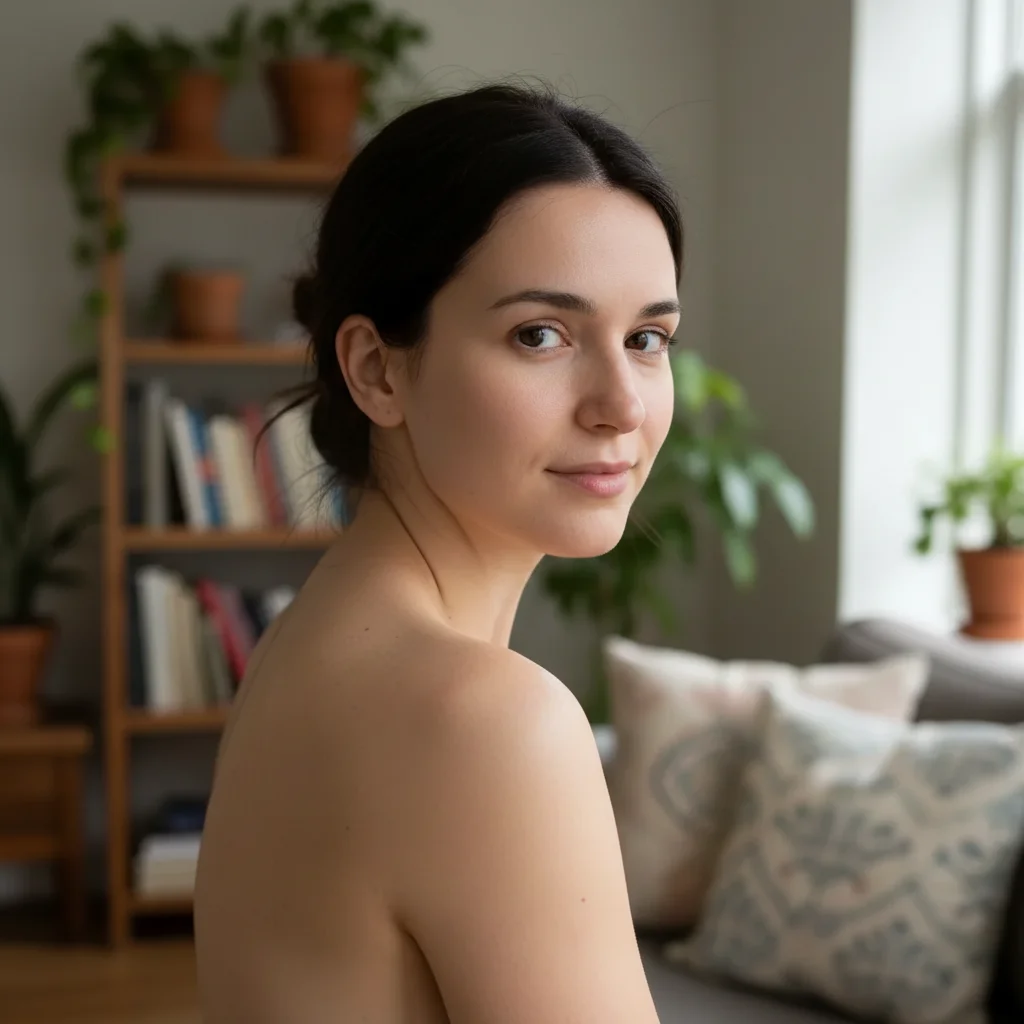
Fashion photo with exposed shoulders

Model shot with arms and shoulders visible. Smoothed all visible skin areas, not just the face.

Prompt: soften skin texture on all visible skin including arms, shoulders, and back while maintaining natural appearance

Detailed Guides by Scenario

📷

Portrait & Headshot Retouching

Natural skin smoothing for professional portraits, LinkedIn headshots, and corporate team photos.

Common Scenarios

  • Smoothing skin texture on a headshot for LinkedIn or corporate directory
  • Retouching a portrait for a professional bio or author photo
  • Polishing team photos for a company website while keeping everyone looking natural

Best Practices

  • Always include 'keep natural texture' or 'maintain visible pores' to avoid the plastic look
  • For headshots, focus on face and neck: 'smooth skin on face and neck, keep hair sharp'
  • Use 'subtle retouching only' for professional contexts where authenticity matters
📷

Fashion & Beauty Photography

Full-body skin smoothing for fashion shoots, modeling portfolios, and beauty content where arms, shoulders, and other exposed skin needs polishing.

Common Scenarios

  • Smoothing skin on arms, shoulders, and back for a fashion photo with a strapless outfit
  • Retouching a full-body modeling portfolio shot with even skin texture
  • Polishing beauty photography for editorial or advertising use

Best Practices

  • Specify 'all visible skin' to ensure arms and shoulders get treated, not just the face
  • For editorial beauty, use 'soft porcelain finish but keep subtle skin texture visible'
  • Include 'even out skin tone' to address color inconsistencies along with texture
📷

Selfies & Social Media

Quick skin smoothing for selfies before posting to Instagram, dating apps, or social profiles.

Common Scenarios

  • Smoothing a selfie before posting to Instagram or a dating profile
  • Quick skin retouching on a group photo before sharing on social media
  • Polishing a video call screenshot or casual portrait for a profile picture

Best Practices

  • Less is more — 'subtle smoothing' looks better than heavy retouching on social media
  • For selfies, add 'keep natural skin glow' to avoid flat, lifeless-looking skin
  • If lighting was uneven, add 'even out skin tone' to fix shadow-related texture issues

If something looks off

AI changed the wrong area or something I didn't want changed

Why: The AI couldn't determine exactly which skin areas you meant. This happens when description alone is ambiguous or when clothing is similar to skin tone.

Try: Tap a marker on the specific skin area you want smoothed, then regenerate with the same prompt

Tip: Markers tell the AI 'I mean THIS skin area specifically.' Use them when you want selective smoothing.

Skin looks plastic or artificial

Why: The smoothing was too aggressive, removing all natural texture. This happens when the prompt doesn't specify keeping texture.

Try: smooth the skin subtly while maintaining natural pores and skin texture, keep it realistic

Tip: Always include 'natural texture' or 'visible pores' in your prompt to avoid the wax figure look.

Only face was smoothed, not arms or shoulders

Why: The AI defaulted to face-only processing. Without explicit instruction, it assumed 'skin' meant face.

Try: soften skin texture on ALL visible skin including face, neck, arms, shoulders, and hands

Tip: Be explicit about body parts. 'All visible skin' is the key phrase for full-body smoothing.

Hair or eyebrows got blurred

Why: The smoothing accidentally affected areas near skin. Hair close to the face is sometimes caught in the processing.

Try: smooth skin only, preserve all hair detail, eyebrows, and eyelashes completely sharp

Tip: If hair still gets affected, tap markers on the hair areas you want protected and regenerate.

Quick answers

Do I need to select the skin areas first?

No—just describe what you want. 'Smooth the skin' or 'soften skin texture' works without any selection. The AI recognizes skin automatically. Only use markers if you need precision, like smoothing arms but not face, or if the AI missed an area.

How is this different from face smoothing tools?

Most tools only smooth the face. EditThisPic smooths any visible skin—arms, shoulders, hands, legs, back. Just specify which areas in your prompt: 'soften skin on arms and shoulders' or 'smooth all visible skin.' You control exactly what gets retouched.

How do I avoid the fake plastic look?

Add 'keep natural texture' or 'maintain visible pores' to your prompt. The plastic look happens when all skin texture is removed. Try 'smooth skin while keeping natural texture and subtle pores' for results that look retouched but still real.

Can I apply different smoothing to different areas?

Yes—use markers for selective control. Tap markers on areas that need more smoothing and describe what you want: 'apply stronger smoothing to marked areas.' Or run separate passes, smoothing face first with subtle settings, then arms with more intensity.

How do I smooth skin in a photo for free?

Upload your photo to EditThisPic and type 'smooth the skin while keeping natural texture.' The AI softens skin across your entire photo in 15-20 seconds. No Photoshop frequency separation or manual brushing required. Free to use with no account or watermark.

Is there a free skin smoother that works without signup?

Yes. EditThisPic smooths skin instantly in your browser with no account, no app download, and no watermark. You get 1 free edit per week. For unlimited edits, plans start at $3.99/month.

What is the best free AI tool for smoothing skin in photos?

EditThisPic smooths any visible skin — face, arms, shoulders, hands — not just faces like most beauty apps. Type what you want in plain English and the AI handles it. Free, no login required, no watermark. Unlike Facetune or Photoshop, no manual brushing or selection needed.

Can I smooth skin on my phone?

Yes. EditThisPic works in any mobile browser — iPhone, Android, tablet. No app download needed.

How much does EditThisPic cost?

You get 1 free edit per week — no account needed. After that, credit packs start at $1.99 for 3 edits. Monthly plans start at $4.99/mo for 15 edits with unused credits rolling over. All edits are full resolution with no watermark.

Ready to edit your photos?

Free to try. No signup required.

1 free edit included·Credit packs from $1.99