Free • No signup Create Double exposure · Free

AI Double Exposure Maker

Describe your vision and AI blends two images into stunning double exposure art.

Group of friends at a picnic
Photo 1
+
Woman to add to the group photo
Photo 2
Combined photo with the woman added to the group
Result

Create Double Exposure Effect

Upload photo to create double exposure

Free • Results in 30 seconds • No signup

Release to upload

FreeNo signupNo watermark
Popular use cases:
  • creative portraits
  • album art
  • artistic photography
  • poster design
  • profile pictures
  • social media art
  • magazine covers

Cost
Free No signup required
Time
Instant results in 15-30 seconds
Works on
Any device - browser, phone, tablet, desktop
Powered by
AI-powered photo editing
Scenario Prompt Time
Forest silhouette blend this portrait with forest scenery as double exposure effect, with trees visible through the silhouette and subtle transparency 30s
Cityscape profile create double exposure with cityscape inside the profile, buildings visible through the head with medium blend strength 35s
Ocean waves blend ocean waves and beach scenery through this portrait as double exposure, with waves visible across face and body 40s
Mountain landscape create double exposure with mountain landscape overlaid on portrait, peaks visible through upper body with strong contrast 40s

How it works

  1. Upload your base photo

    Drop your main image into EditThisPic. For classic double exposure, portraits with clear silhouettes work best. JPG, PNG, WebP up to 7MB.

    Expect: Simple double exposures with clear subjects: 30-45 seconds. Complex multi-layer artistic effects: may need 3-4 refinements for perfect blending.
  2. Describe the double exposure effect

    Type your instruction: 'blend with forest scenery as double exposure, trees visible through silhouette' or 'create double exposure with cityscape inside the profile.' Specify what should be blended, where it should appear, and how visible it should be. The AI understands concepts like 'through the silhouette,' 'inside the head,' or 'overlaid on the figure.'

    Tip: Mention the blend mode feel: 'subtle blend' vs 'strong overlay' vs 'ghostly transparent' helps the AI nail the opacity and blending style.

    Copy one of these to get started:

    Classic silhouette forest blend blend this portrait with forest scenery as double exposure effect, with trees visible through the silhouette and subtle transparency
    Cityscape inside profile create double exposure with cityscape inside the profile, buildings visible through the head with medium blend strength
    Ocean waves through portrait blend ocean waves and beach scenery through this portrait as double exposure, with waves visible across face and body
    Mountain landscape overlay create double exposure with mountain landscape overlaid on portrait, peaks visible through upper body with strong contrast
    4 more prompts
    Starry night sky blend blend starry night sky through this portrait as double exposure, stars and galaxy visible through silhouette with dark background
    Floral artistic overlay create artistic double exposure with colorful flowers and botanical elements blended through portrait with soft transparency
    Abstract geometric blend blend geometric shapes and abstract patterns through portrait as double exposure with bold contrast and artistic style
    Wildlife silhouette fusion create double exposure blending wildlife scene with animals through portrait silhouette with natural organic feel
  3. Upload reference image (optional)

    If you have a specific second image to blend (like a forest photo or cityscape), upload it as a reference. The AI will use it for the double exposure. If you don't upload one, describe what you want and the AI will generate or simulate the effect.

  4. Generate and review

    Click Generate and watch the AI create your double exposure. Check the blend quality—the effect should feel cohesive, not like two separate images pasted together. Look for natural transitions and appropriate opacity.

  5. Refine with markers if needed

    If certain areas need more or less blending, tap markers on those spots and regenerate. For example, mark the face if you want the blend stronger there, or mark the edges for smoother transitions.

    Tip: Markers help with fine-tuning blend intensity in specific areas. Try without them first to see the AI's interpretation.
Try it free

Create Double Exposure Effect

Upload photo to create double exposure

Free • Results in 30 seconds • No signup

Release to upload

Free • No signup

"Created a double exposure effect that would have taken me hours in Photoshop. Just described what I wanted and the AI nailed the blend perfectly." @creativestudio

See it in action

Group of friends at a picnic
Main Photo
Woman to add to the group photo
Reference
Combined photo with the woman added to the group
Result

Forest Silhouette Double Exposure

Classic double exposure with forest scenery blended through profile portrait, creating ethereal artistic effect.

Prompt: blend this portrait with forest scenery as double exposure effect, with trees visible through the silhouette and subtle transparency
Profile portrait ready for double exposure
Before
->
Portrait with cityscape buildings blended inside silhouette
After

Cityscape Double Exposure Portrait

Urban double exposure with city buildings visible inside the profile silhouette for modern artistic look.

Prompt: create double exposure with cityscape inside the profile, buildings visible through the head with medium blend strength

Detailed Guides by Scenario

📷

Art & Decoration

Transform your photos into double exposure artwork for wall prints, framed art, and home decoration.

Common Scenarios

  • Converting a favorite photo into a double exposure print for your living room wall
  • Creating a series of double exposure portraits of family members as matching wall art
  • Turning landscape or travel photos into double exposure art for office decoration

Best Practices

  • Start with a high-resolution photo — printed art needs sharp detail even after the style transform
  • Request a specific aspect ratio if the print will go in a particular frame
  • Try 'bold double exposure' vs. 'subtle double exposure' to control how dramatic the transformation looks
📷

Social Media & Content

Create scroll-stopping social media content by converting photos to double exposure — perfect for profiles, stories, and viral posts.

Common Scenarios

  • Making a unique double exposure profile picture that stands out in feeds
  • Creating a double exposure version of a trending meme or photo challenge
  • Building a themed Instagram series where every post uses double exposure transformation

Best Practices

  • Pair the transformation with a catchy caption that references the art style
  • For Instagram stories, add text overlays after the double exposure conversion for maximum engagement
  • Process several photos in the same session to maintain a consistent style across posts
📷

Gifts & Personal Keepsakes

Turn meaningful photos into double exposure keepsakes — custom gifts, cards, and personalized items that people actually treasure.

Common Scenarios

  • Creating a double exposure portrait as a birthday or anniversary gift
  • Designing double exposure wedding invitations or save-the-dates from engagement photos
  • Making a double exposure memorial portrait for a loved one

Best Practices

  • Choose photos with clear faces and good lighting — the transformation preserves detail best from quality originals
  • For gifts, print on canvas or premium paper to complement the double exposure aesthetic
  • Request 'warm tones' or 'cool tones' to match the recipient's home decor

If something looks off

The blend looks like two separate images pasted together, not a true double exposure

Why: True double exposure requires careful opacity and blending that respects the silhouette. The AI might have interpreted it as a simple overlay.

Try: create double exposure with [element] visible THROUGH the silhouette with transparent blend and natural transition

Tip: Use the word 'through' to emphasize it should blend into the silhouette, not sit on top of it. 'Transparent blend' helps too.

The second image is too strong or too weak

Why: Double exposure is all about balance. Without guidance on opacity, the AI picks a default that might not match your vision.

Try: blend [element] with [subtle/medium/strong] transparency and [light/medium/bold] opacity

Tip: Specify both transparency level and whether you want it subtle or dominant. 'Subtle transparency' vs 'bold overlay' creates very different results.

The blended image doesn't align with the silhouette properly

Why: Alignment and positioning matter in double exposure. Generic placement might not look intentional.

Try: create double exposure with [element] positioned inside the [head/upper body/full silhouette] with proper alignment

Tip: Be specific about where the blend should concentrate: 'inside the head,' 'across the chest area,' 'throughout the full body.'

The background interferes with the double exposure effect

Why: True double exposure works best when the background doesn't compete. Busy backgrounds muddy the effect.

Try: create double exposure effect with clean background removed and [element] blended through silhouette only

Tip: Consider removing or simplifying the background first, then applying double exposure for cleaner results.

Colors clash or don't harmonize between the two images

Why: Double exposure benefits from color harmony. Mismatched color temperatures or palettes look disconnected.

Try: create double exposure with [element] blended in [warm/cool/monochrome] tones to match the portrait

Tip: Mention color harmony: 'in matching warm tones' or 'with complementary color palette' helps the AI balance the blend.

AI changed the wrong area or blended in unexpected places

Why: The AI couldn't determine exactly which area you meant from description alone. This happens with ambiguous requests.

Try: Tap markers on the silhouette area where you want the blend to appear, then regenerate with the same prompt

Tip: Markers tell the AI 'blend HERE specifically.' Use them to define the exact blend zone when description alone is ambiguous.

Quick answers

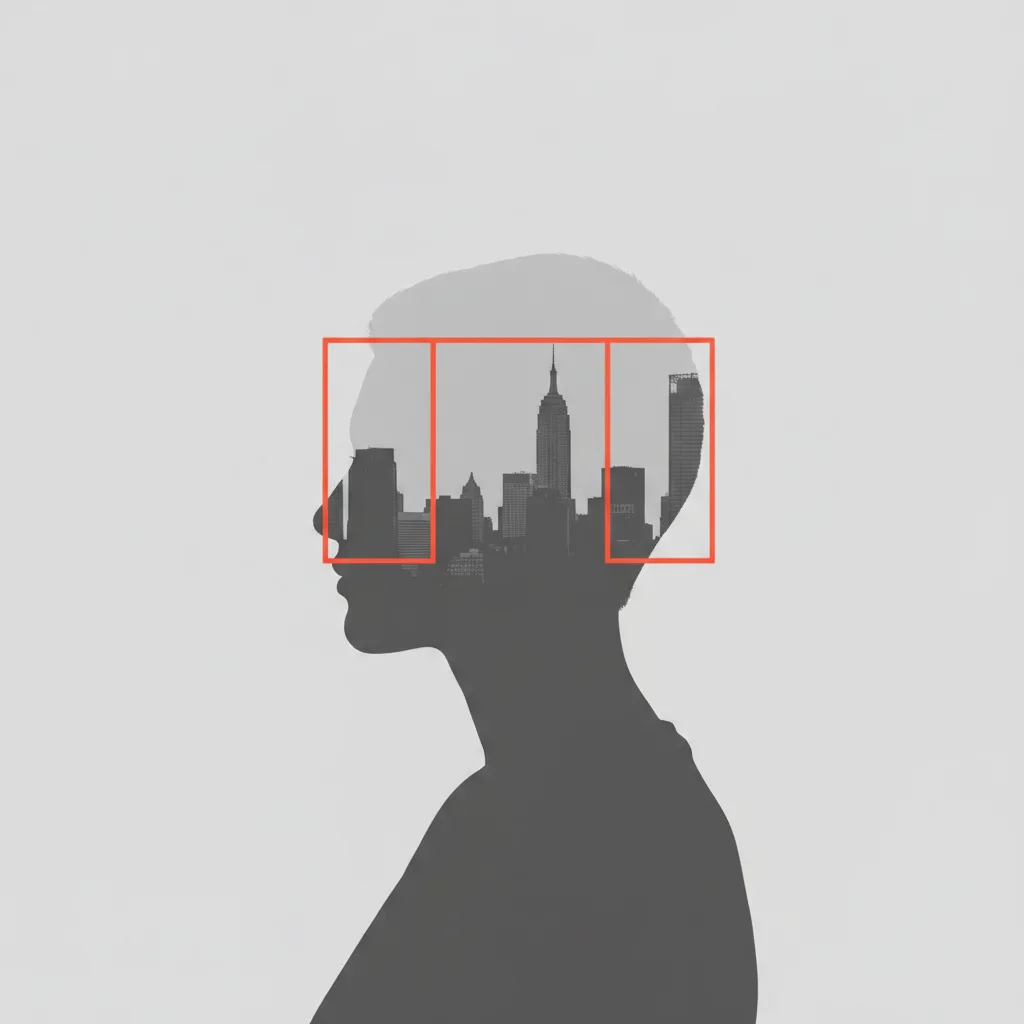
Do I need to mark the areas before creating a double exposure?

No! Just describe what you want: 'blend forest scenery through the silhouette' or 'create double exposure with cityscape inside the profile.' The AI understands these concepts. Only use markers when you need precision—like specifying exactly which part of the silhouette should have stronger or weaker blending after your first attempt.

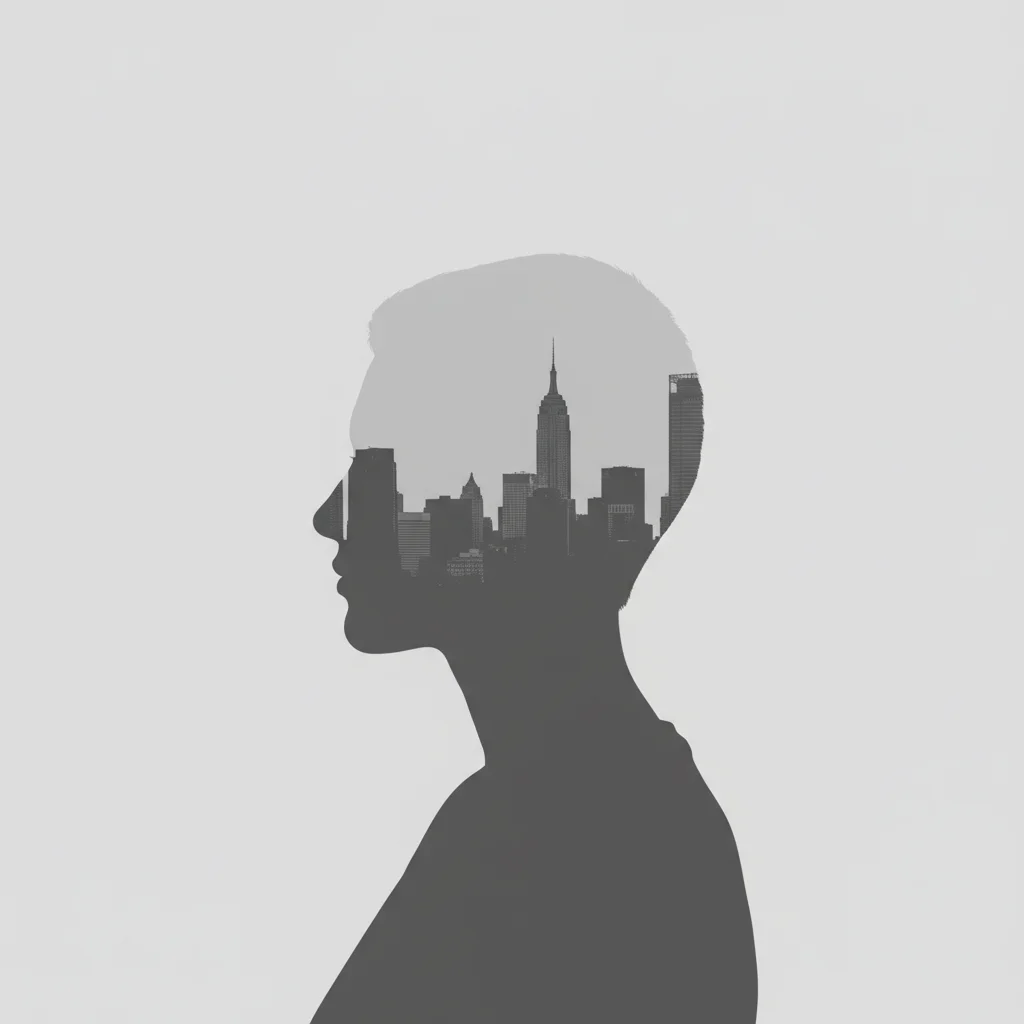
How do I create a realistic double exposure effect that doesn't look fake?

Use language that emphasizes transparency and natural blending: 'visible THROUGH the silhouette,' 'subtle transparency,' 'natural transition.' True double exposures have the second image showing through the first, not sitting on top. Mention the blend strength (subtle, medium, strong) and ensure you're working with a portrait that has a clean silhouette against a simple background.

What's the best free tool for creating double exposure effects?

EditThisPic's AI Double Exposure Maker creates professional layered compositions without Photoshop's complex masking and blend modes. Unlike manual methods that require precise selection and opacity adjustments, our AI understands natural language descriptions and creates cohesive blends automatically. Perfect for artists, photographers, and creatives who want double exposure effects without the technical learning curve.

Do I need two photos to create a double exposure?

You have two options: upload a reference image for the AI to blend with your portrait, or describe what you want and let the AI generate or simulate the blend. For example, saying 'blend with forest scenery' without uploading a forest photo will have the AI create the effect. Uploading a specific forest image gives you more control.

What types of portraits work best for double exposure?

Profile shots and portraits with clean silhouettes work best. Simple backgrounds (white, solid colors, or minimal scenes) make it easier for the AI to create clean blends. Portraits with busy backgrounds or unclear edges may need background removal first. Side-view profiles are classic for double exposure, but front-facing portraits work too—just be specific about where the blend should appear.

Is EditThisPic's AI double exposure creator really free?

Yes — you get 1 free edit per week, no account needed. For unlimited edits, plans start at $3.99/month.

Can I create double exposure on my phone?

Yes. EditThisPic works in any mobile browser — iPhone, Android, tablet. No app download needed.

What photo formats does the AI double exposure creator support?

JPG, PNG, WebP, and HEIC. Upload any common photo format and EditThisPic handles the rest.

Ready to create double exposure art?

Free to try. No signup required.