Free β€’ No signup Add Dramatic lighting Β· Free

AI Dramatic Lighting Adder

Add Rembrandt, rim light, or film noir lighting effects to any photo instantly.

Original photo before AI Dramatic Lighting Adder
Before
β†’
Result after AI Dramatic Lighting Adder with EditThisPic
After

Free AI Dramatic Lighting Adder

Upload photo to add dramatic lighting

Free β€’ Results in 30 seconds β€’ No signup

Release to upload

FreeNo signupNo watermark

Cost
Free No signup required
Time
Instant results in 15-30 seconds
Works on
Any device - browser, phone, tablet, desktop
Powered by
AI-powered photo editing

How it works

  1. Upload Your Photo

    Choose the image that needs dramatic lighting enhancement. Works best with portraits, products, and subjects with clear form.

    Expect: Simple add: 20-30 seconds. Complex add: 30-45 seconds and may need refinements.
  2. Describe the Dramatic Effect

    Tell the AI what type of dramatic lighting you want - rim lights, side lighting, Rembrandt shadows, cinematic contrast. Specify light direction, intensity, and mood.

    Copy one of these to get started:

    add Add dramatic rim lighting from behind and to the right, creating a bright golden edge light that outlines the subject against the darker background
    add Add cinematic side lighting from the left creating strong contrast with deep shadows on the right side of the face for a film noir mood
    add Add dramatic Rembrandt lighting with a triangle of light under the right eye, creating classic portrait studio lighting with depth and dimension
    add Add moody low-key lighting with subtle highlights on the subject and deep shadows filling most of the frame for dramatic atmosphere
    3 more prompts
    add Add dramatic backlight creating a halo effect around the subject with visible light rays streaming from behind for an ethereal look
    add Add theatrical spotlight effect from above with circular light pool illuminating the subject while surrounding areas fade into dramatic darkness
    add Add cinematic three-point lighting with key light from left, fill from right, and rim light from behind creating professional studio drama with balanced shadows
  3. Review the Lighting Effect

    Check that the added dramatic lighting looks natural and enhances your subject. Verify shadow placement, highlight intensity, and overall mood match your vision.

  4. Download Your Enhanced Photo

    Save your dramatically lit image in high resolution with no watermark. The enhanced lighting creates professional, cinematic atmosphere.

Try it free ↓

Free AI Dramatic Lighting Adder

Upload photo to add dramatic lighting

Free β€’ Results in 30 seconds β€’ No signup

Release to upload

Free β€’ No signup

"Worked perfectly on my first try. Way easier than Photoshop." via Trustpilot

See it in action

Original photo before AI Dramatic Lighting Adder
Before
->
Result after AI Dramatic Lighting Adder with EditThisPic
After

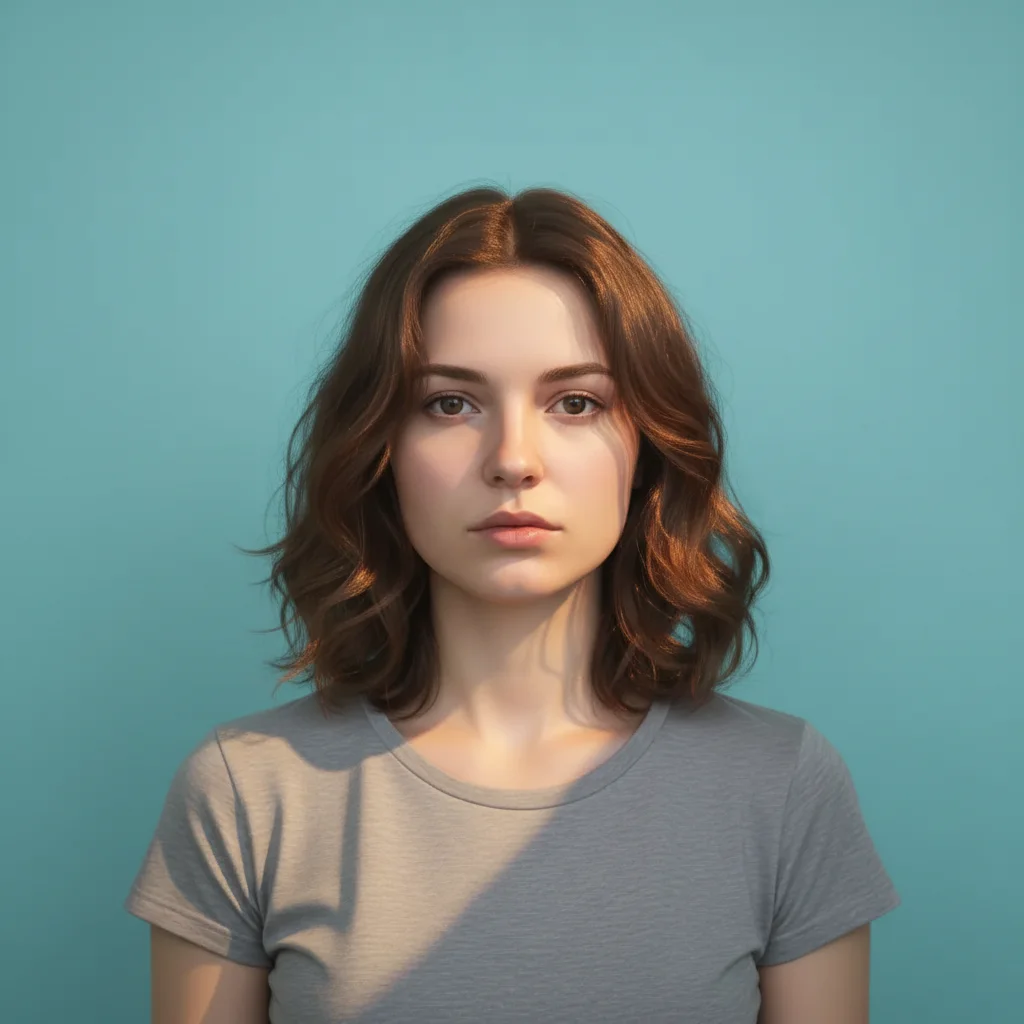
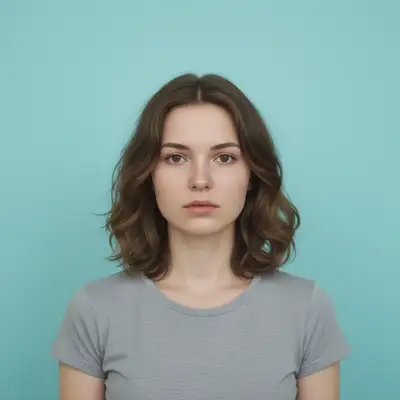
Portrait Rim Lighting

Add dramatic warm orange rim lighting from behind and slightly to the right, creating a glowing edge around the subject's hair and shoulders that separates them from the cyan background

Prompt: Add dramatic warm orange rim lighting from behind and slightly to the right, creating a glowing edge around the subject's hair and shoulders that separates them from the cyan background
Original photo before AI Dramatic Lighting Adder
Before
->
Result after AI Dramatic Lighting Adder with EditThisPic
After

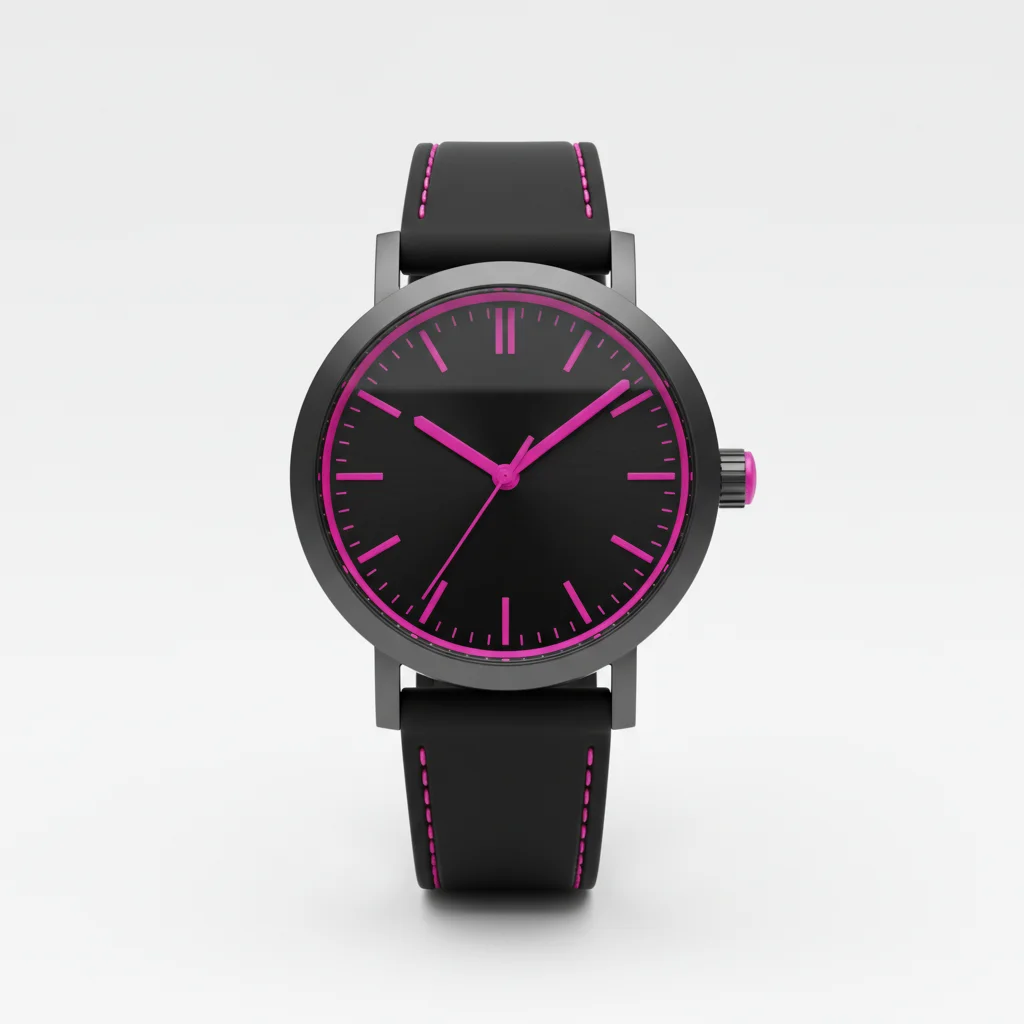
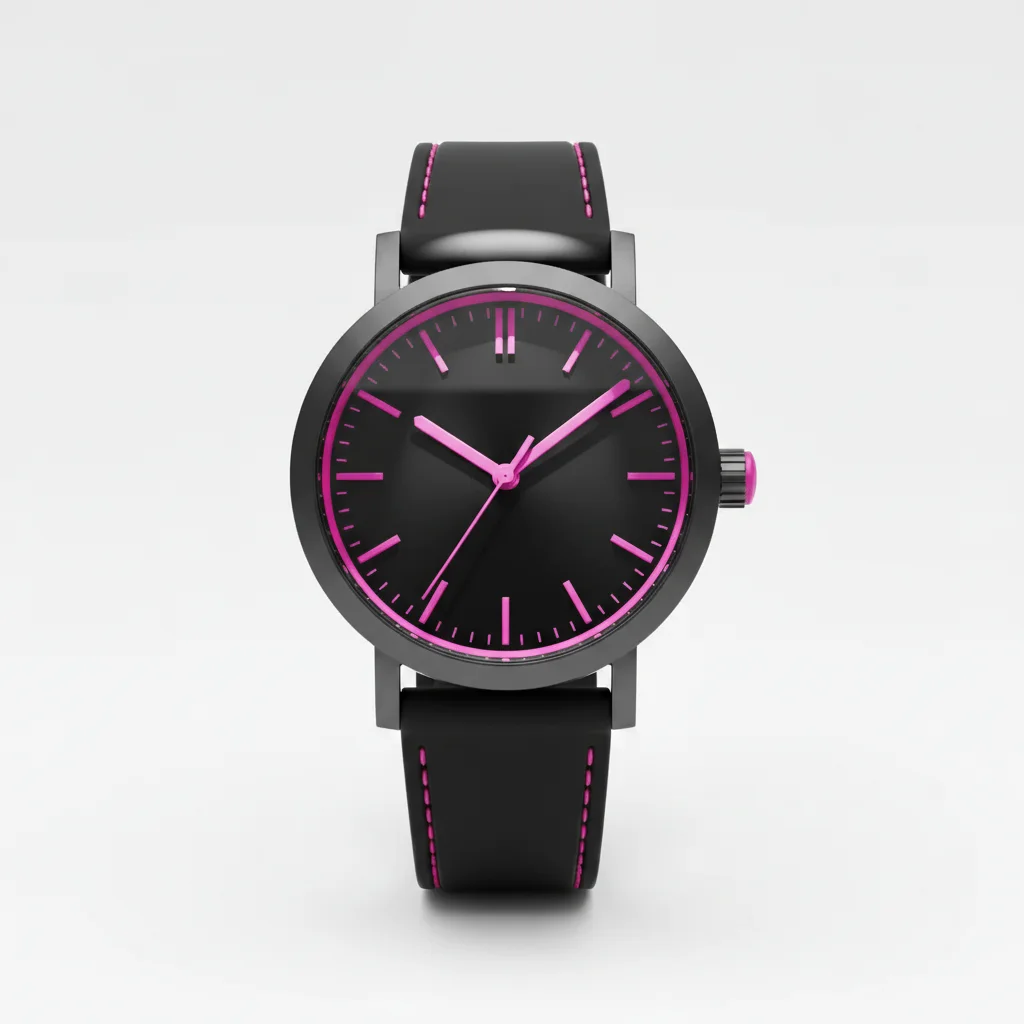
Product Cinematic Lighting

Add dramatic side lighting from the left with strong highlights on the watch case and deep shadows on the right side, creating metallic gleam and emphasizing the magenta accents

Prompt: Add dramatic side lighting from the left with strong highlights on the watch case and deep shadows on the right side, creating metallic gleam and emphasizing the magenta accents

Detailed Guides by Scenario

πŸ“·

Home & Interior Design

Preview how dramatic lighting would look in a room or space before committing to a purchase or renovation.

Common Scenarios

  • Visualizing dramatic lighting in a living room, bedroom, or office before buying
  • Creating client mockups that show dramatic lighting in their actual space
  • Comparing different placements of dramatic lighting in renovation plans

Best Practices

  • Upload a well-lit, straight-on photo of the room for the most realistic result
  • Specify the size and position β€” e.g., 'add a large dramatic lighting on the left wall'
  • Match the room's lighting in your prompt: 'warm lighting' for evening shots, 'natural daylight' for window-lit rooms
πŸ“·

Creative & Social Content

Use dramatic lighting to create eye-catching content for social media, digital art, or personal projects.

Common Scenarios

  • Adding dramatic lighting to photos for unique social media posts that stand out in feeds
  • Creating fantasy or composite images that incorporate dramatic lighting for art projects
  • Making holiday or themed content by placing dramatic lighting in seasonal photos

Best Practices

  • Be specific about the style β€” 'realistic dramatic lighting' vs. 'illustrated dramatic lighting' gives very different results
  • Use reference images when you want the AI to match a particular look
  • For social content, try unusual placements that create a surreal or humorous effect
πŸ“·

Professional & Marketing Use

Incorporate dramatic lighting into marketing materials, presentations, and product catalogs without expensive photo shoots.

Common Scenarios

  • Adding dramatic lighting to product mockups and marketing banners
  • Creating presentation slides that show dramatic lighting in context
  • Building a catalog of variations that feature dramatic lighting in different settings

Best Practices

  • Use high-resolution source images β€” marketing materials demand sharp details
  • Keep brand guidelines in mind: specify colors and style that match when adding dramatic lighting
  • Generate multiple versions and A/B test which placement performs best in ads

If something looks off

AI changed the wrong area or something I didn't want changed

Why: The AI couldn't determine exactly which area you meant from description alone.

Try: Tap a marker on the specific area you want to change, then regenerate with the same prompt

Tip: Markers tell the AI 'I mean THIS one specifically.' Use them when description alone is ambiguous.

Lighting looks artificial or overdone
Try: Request 'subtle dramatic lighting' or 'natural-looking cinematic effect'. Specify that shadows should be soft-edged and highlights should blend naturally.

Tip: Include 'keep natural texture and detail' in your prompt to avoid over-processing.

Wrong areas are lit or shadowed
Try: Be specific about light direction using clear terms (from left, from above, behind subject). Describe which areas should be highlighted and which should be in shadow.

Tip: Place markers directly on the area you want changed to guide the AI precisely.

Lighting doesn't create enough drama
Try: Request stronger contrast, deeper shadows, or more intense highlights. Use terms like 'bold', 'strong', or 'high contrast' to increase dramatic effect.

Tip: Describe the lighting direction in your prompt, like 'soft light from the left side.'

Added lighting clashes with existing lighting
Try: Mention the current lighting in your photo and ask for the dramatic effect to enhance rather than replace it. Request that new lighting 'complements existing illumination'.

Tip: Describe the lighting direction in your prompt, like 'soft light from the left side.'

Shadows are too harsh or too soft
Try: Specify shadow quality: 'soft-edged shadows for gentle drama' or 'hard shadows for graphic impact'. Describe the shadow transition you want.

Tip: Mention shadow direction explicitly, like 'shadow falling to the right,' for realistic results.

Overall mood is wrong
Try: Use mood descriptors: 'moody and mysterious', 'heroic and powerful', 'elegant and refined'. Reference film styles if helpful (film noir, action movie, fashion editorial).

Tip: Try adjusting your prompt wording if the first result isn't perfect β€” small changes make a big difference.

Quick answers

Do I need to mark where the lighting should be added?

No marking needed. Just describe the lighting style and direction (rim light from behind, side lighting from left, spotlight from above). The AI understands lighting terminology and applies effects naturally to your subject.

What types of dramatic lighting can I add?

Common styles include rim lighting (edge highlights), Rembrandt lighting (triangular face highlight), side lighting (strong directional contrast), backlighting (halo effects), spotlight effects, low-key lighting (mostly shadows), and cinematic three-point setups.

Will dramatic lighting work on any photo?

Works best on photos with clear subjects and visible form. Portraits, products, and defined objects respond well. Very flat or abstract images may have limited dramatic potential since lighting emphasizes dimensionality.

Can I add multiple lighting effects at once?

Yes, you can combine effects like 'add rim light from behind and side light from left' for complex setups. Professional three-point lighting (key, fill, rim) can be requested in a single prompt.

How do I control the intensity of dramatic lighting?

Use descriptive terms in your prompt: 'subtle dramatic lighting' for gentle effects, 'strong dramatic lighting' for bold impact, or 'extreme high-contrast lighting' for maximum drama. Specify how intense highlights and shadows should be.

Is EditThisPic's AI dramatic lighting adder really free?

Yes β€” you get 1 free edit per week, no account needed. For unlimited edits, plans start at $3.99/month.

What photo formats does the AI dramatic lighting adder support?

JPG, PNG, WebP, and HEIC. Upload any common photo format and EditThisPic handles the rest.

How long does it take to add dramatic lighting?

Usually 15-30 seconds. Upload your photo, describe what you want, and the AI delivers the result.

Ready to edit your photo?

Free to try. No signup required.