Free • No signup Open Editor

AI Food Photo Editor

Make food look as appetizing in photos as it does on the plate. Fix warm restaurant lighting, boost dish colors, clean menu backgrounds, and create professional imagery for menus, DoorDash, Instagram, and Google Business — in under a minute.

FreeNo signupNo watermark

Drop your photo here

"fix the warm orange lighting and make the food colors look natural and appetizing — the plate should look white"

Release to upload

Free • No signup

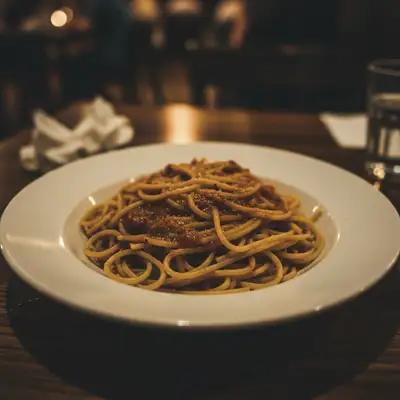
Before photo
Before
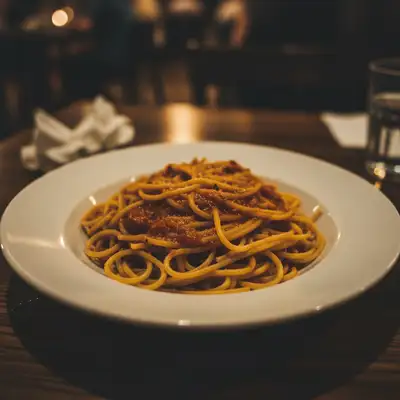
After AI edit
After
Quick Answer

EditThisPic is a free AI food photo editor for restaurants, food bloggers, and delivery apps. Upload your dish photo, describe the edit in plain English, and get a professional result in under 60 seconds. Fix restaurant lighting, enhance food colors, clean menu backgrounds, and format photos for DoorDash, Instagram, and Google Business. No signup required.

Unlike Lightroom, Photoshop, or generic filter apps that require manual slider adjustments and Photoshop skills, EditThisPic lets you describe what you want in plain English — 'fix the orange lighting and make the dish look appetizing' — and delivers a professional food photo result in under a minute. No presets, no technical knowledge, no subscription required to try.

How AI Food Photo Editing Works

Food photography has a narrow window between 'looks delicious' and 'looks flat.' The most common culprit is restaurant lighting — tungsten and warm LED fixtures cast an orange glow that shifts white plates yellow and makes food look dull in photos even when it looked vibrant in person. AI food photo editing goes beyond simple brightness and contrast sliders. When you describe what you want — 'fix the orange cast and make the colors pop' — the AI understands the scene: the plate, the food, the surface, and the background. It corrects white balance based on the actual subject (the dish), not an average of the whole frame. It boosts color saturation selectively — reds in a sauce become richer, greens in herbs become more vivid — without pushing into artificial territory that makes food look plastic. For delivery apps, the AI can center-crop, square-format, and brighten simultaneously — optimizing the photo for DoorDash thumbnails where dishes need to pop at 150x150 pixels. For Instagram and food blog use, it sharpens grill marks, crust textures, steam wisps, and sauce glossiness — the visual details that make viewers hungry. The goal is always the same: make the photo look as good as the food actually did.

The Five Most Common Food Photo Problems

1. Orange color cast from restaurant lighting — Tungsten and warm LEDs make white plates look yellow and food colors inaccurate. Prompt: 'correct the white balance so the plate looks white and food colors are natural and accurate.' This single fix transforms most restaurant photos. 2. Dark or underexposed dish — Dim restaurant ambience is atmospheric for dining but kills detail in photos. Prompt: 'brighten the food so all details are visible while keeping a warm restaurant atmosphere.' Add 'avoid blowing out the highlights' to preserve texture in light-colored dishes. 3. Cluttered background and table — Other dishes, glassware, napkins, and table clutter compete for attention. Prompt: 'remove the background clutter and keep only the plate and immediate table surface.' A clean backdrop keeps the viewer's eye on the food. 4. Flat color and dull texture — Phone cameras compress dynamic range. Prompt: 'enhance the food colors to look vibrant and appetizing — make the sauce glossy, the herbs bright green, the crust golden.' Name specific elements for precise results. 5. Wrong format for the platform — Instagram wants 4:5 portrait. Delivery apps want 1:1 square. Google Business wants landscape. Prompt: 'crop to a square centered on the dish with a small margin of the table visible.'

Food Photo Specs by Platform

DoorDash and Uber Eats — Square 1:1, minimum 1200×1200px. Thumbnails display at 150–250px, so the dish must be recognizable at small sizes. High contrast, centered dish, simple background. Prompt: 'brighten, crop to square centered on the dish, and increase contrast so it stands out in a delivery app feed.' Instagram Food — 1080×1080 (square) or 1080×1350 (portrait 4:5). Portrait format uses more screen space in the feed. Close-up detail shots and overhead flat lays perform best. Prompt: 'enhance for Instagram — sharpen food details, boost colors slightly, and make the overall image bright and appealing.' Google Business Profile — Minimum 720px, ideally 1500px+ on the longer side. Google uses these for local search and Maps. Upload 10+ food photos plus interior shots. Prompt: 'enhance for Google Business — natural color correction, good brightness, appetizing food colors.' Printed Menu — 300 DPI minimum. Consistent lighting and background color across all items. Shoot the entire menu in one session for visual consistency. Slightly higher contrast and saturation than screen photos — printing dulls colors. Food Blog and Recipe Sites — Standard web: 1200×800 landscape or 800×1200 portrait. Show process shots and the finished dish. Prompt: 'enhance the colors, sharpen the details, and make the food the clear focal point.'

Shooting Tips That Make Editing Easier

Natural light beats any flash. Position the dish near a large window. Side or back light creates depth and shows food texture. Never use direct flash on food — it creates flat, greasy-looking results. Shoot immediately after plating. Food has a 30–90 second window of peak visual appeal. Steam rises, sauces glisten, ice stays solid. Have your camera framed before the plate arrives. Two angles work for almost everything. 45-degree angle (diner's perspective) for tall food: burgers, drinks, stacked items. Overhead flat lay for flat food: pizza, bowls, platters, spreads. Clean the plate edge before shooting. Wipe sauce drips from the rim. A smudged rim reads as carelessness even when the food itself is excellent. Shoot in good light, fix the rest in editing. AI editing excels at color correction, background cleanup, and sharpening — but it needs a well-exposed, in-focus original to work from. Good light and focus are the two things AI can't fully recover.

Lighting & Color Correction

Restaurant & Menu Photos

Food Styling & Enhancement

Background & Cleanup

Delivery & Ordering Platforms

Food Details & Garnishes

Use case guides

Restaurant Menu Photography

Create consistent, professional-quality menu photos across your entire menu. Fix the orange cast from restaurant lighting, enhance dish colors, clean backgrounds, and format for both printed menus and digital listings — all without hiring a photographer.

Common scenarios

  • A restaurant owner shooting new menu items on a phone under warm kitchen lighting and getting orange-tinted photos
  • A café building a Google Business photo library with 30+ dishes that all need consistent color correction and cropping
  • A chef updating seasonal menu photos mid-season with minimal time and no photography equipment

Best practices

  • Shoot all menu items in the same location and lighting for visual consistency — AI correction is easier and more uniform when the starting point is consistent
  • Fix white balance first before any other edit — correcting the orange cast reveals the true food colors and reduces the need for additional color work
  • For printed menus, add 'high detail for print' to your prompt — this prioritizes texture sharpening over color boosting
  • Maintain the same crop and aspect ratio across all menu photos — consistency across items reads as professional quality

Sample prompts

Correct the white balance so the plate looks white, enhance the dish colors naturally, and sharpen the food textures for a professional menu photoFix the restaurant lighting, clean up the background to remove any clutter, and make the dish colors accurate and appetizing

DoorDash and Delivery App Listings

Delivery app food photos are tiny thumbnails in competitive feeds. Dishes that stand out get clicked. Optimize your DoorDash, Uber Eats, and Grubhub photos for maximum visibility — square format, centered dish, bright and high-contrast.

Common scenarios

  • A restaurant updating DoorDash listings with phone photos that are too dark, off-color, or landscape-oriented
  • A ghost kitchen building an entire photo library for a delivery-only brand with no professional photography budget
  • An operator noticing low click-through rates on delivery apps and wanting to update food photos to improve conversion

Best practices

  • Always crop to square (1:1) — delivery apps thumbnail in square format and landscape photos lose significant food area when cropped
  • Brighten more than you think necessary — app thumbnails display at very small sizes where dark photos become unrecognizable blobs
  • Center the hero element of the dish — delivery thumbnails are too small to show complex compositions, one dominant element per photo
  • Check the thumbnail at actual size before uploading — zoom out on your phone to see it at 150–200px to verify it reads correctly

Sample prompts

Crop to a square centered on the dish, brighten significantly so all details are visible, boost the colors for high contrast in a delivery app thumbnailFormat this food photo for DoorDash — square crop, bright and colorful, dish centered and filling 80% of the frame

Food Blogger and Instagram Content

Food blog and Instagram content needs to stop the scroll. Close-up textures, vibrant colors, and clean compositions create the visual appeal that drives engagement, saves, and shares.

Common scenarios

  • A food blogger shooting recipe hero shots for a cooking blog and needing consistent professional-quality images without a Lightroom subscription
  • An Instagram food account wanting to improve the visual quality and consistency of phone-shot food photos
  • A home cook building a food social media presence and needing to level up photo quality without photography training

Best practices

  • Shoot at the most flattering angle first — 45-degree diner's angle for tall food, overhead flat lay for bowls and platters — then enhance from a good source
  • Add bokeh requests to your prompt — 'slight depth-of-field blur on the background' turns flat phone photos into professional-looking shots
  • Name specific elements in your prompt for accurate color enhancement: 'make the sauce glossy, the herbs bright green, the crust golden' vs. 'enhance colors'
  • Portrait format (1080×1350) occupies more Instagram feed space than square — use portrait for hero shots when possible

Sample prompts

Enhance for Instagram — sharpen the food textures, boost the colors naturally, add slight bokeh to the background, make the dish the clear focal pointMake this food photo Instagram-ready — vibrant appetizing colors, crisp details on the dish, clean background, bright and eye-catching overall

Cookbook Photography

Cookbook and recipe photography prioritizes accuracy and clarity over appetite-driven enhancement. Food should look exactly as it will look when readers cook it — natural, precise colors, sharp details throughout, no over-saturation.

Common scenarios

  • A cookbook author or food stylist needing consistent high-quality dish photos across 80+ recipes without a full retouching workflow
  • A recipe blogger creating a self-published cookbook and needing photos that print accurately at 300 DPI
  • A culinary school or cooking class business building a recipe library with professional photo standards

Best practices

  • Prioritize accurate color over appealing color — tell the AI 'accurate natural colors' not 'vibrant appetizing colors' for cookbook use
  • Request 'sharp detail throughout the dish' rather than selective sharpening — readers need to see the dish structure, not just the glamour angle
  • For print export, specify '300 DPI equivalent quality' in your prompt — this pushes the AI toward maximum detail preservation
  • Maintain neutral backgrounds — white, light gray, or natural wood — for visual consistency across recipe chapters

Sample prompts

Enhance for cookbook photography — accurate natural food colors, sharp detail throughout the entire dish, clean neutral background, no over-saturationCorrect the white balance, sharpen all dish textures for print quality, and maintain accurate food colors — this is for a printed cookbook
Example prompts to get started

fix the warm orange lighting and make the food colors look natural and appetizing — the plate should look white
crop to a square centered on the dish, brighten so all details are visible, and boost the colors so it stands out in a delivery app feed
enhance this food photo for Instagram — sharpen the food textures, boost the colors naturally, and make the overall image bright and eye-catching
enhance this menu photo — correct the white balance, make the dish colors vibrant and accurate, clean up the background, and sharpen the food details
enhance for a food blog — sharpen the textures, make the colors pop, add slight depth-of-field blur to the background, and make the dish the clear focal point
enhance this dish photo for cookbook use — accurate, natural colors, sharp textures throughout the dish, clean neutral background, high detail without over-saturation

Food Photo Editing FAQ

What is the best free food photo editor?

EditThisPic is a free AI food photo editor that works in your browser — no app download, no signup required. Upload your dish photo, describe the edit in plain English ('fix the orange lighting and make colors pop'), and get a professional result in under 60 seconds. Free to try with one free edit per week.

How do I fix orange-tinted restaurant photos?

Restaurant lighting — tungsten bulbs and warm LEDs — creates orange color casts that make food look unnatural. Prompt: 'correct the white balance so the plate looks white and the food colors are natural.' This single edit transforms most restaurant food photos. It's the most common and highest-impact food photo fix.

Can AI make food look more appetizing in photos?

Yes — within what's already there. AI can fix lighting, boost colors to their accurate saturation, sharpen textures like grill marks and sauce gloss, and clean backgrounds that distract from the dish. The result is food that looks as good in photos as it did on the plate. It enhances reality rather than fabricating it.

What size should food photos be for DoorDash?

Square format (1:1), minimum 1200×1200 pixels. DoorDash crops and thumbnails images aggressively — the dish must be recognizable at 150–250px display size. Center the dish in the frame, use bright high-contrast lighting, and keep the background simple. Prompt: 'crop to square centered on the dish and brighten for a delivery app thumbnail.'

How do I edit food photos for Instagram?

Instagram food performs best at 1080×1080 (square) or 1080×1350 (portrait 4:5 — uses more feed space). Boost saturation moderately — food should look vibrant, not artificially colored. Sharpen textures. Keep backgrounds clean. Prompt: 'enhance for Instagram — natural color boost, sharp food details, bright and eye-catching.'

How do I edit restaurant menu photos?

Start with white balance correction to eliminate the orange cast from restaurant lighting. Then boost food colors naturally — greens brighter, reds richer, browns deeper. Clean any background distractions. Finally sharpen the dish textures. For printed menus, export at 300 DPI. Maintain consistent style across all menu items.

Can I use AI to edit food photos on my phone?

Yes. EditThisPic works in any mobile browser — iPhone, Android, or tablet. Upload directly from your camera roll. Phone food photos work well: shoot near a window in natural light, avoid flash, center the dish, and let AI handle color correction, background cleanup, and sharpening.

How do I optimize food photos for Google Business Profile?

Google Business photos appear in Maps and local search results. Upload minimum 720px, ideally 1500px+. Fix white balance for accurate food colors — natural and appetizing, not over-saturated. Add 10+ food photos plus interior shots. Update seasonally when the menu changes. Google favors recent photos with high engagement.

Is AI food photo editing free?

EditThisPic offers one free edit per week — no account required. A restaurant could edit 10–15 menu photos in a single session using the free tier. For full menu updates across dozens of dishes, credit packs start at $4.99 for 10 edits. No subscription required.

What's the difference between a food photo editor and a general photo editor?

General photo editors (Lightroom, Photoshop) require manual adjustments to every slider. AI food photo editing lets you describe what you want in plain English: 'fix the lighting and make the food look appetizing.' The AI understands food contexts — it knows a dish should be the focal point, that sauce should be glossy, that herbs should be vivid green. No Lightroom presets or technical skills needed.

How do I make food photos look professional without a professional camera?

Phone cameras are capable of professional-quality food photos with the right conditions. Shoot near a window in soft natural light. Avoid flash. Center the dish. Shoot in your camera's highest quality setting. Then edit: fix white balance, boost food colors naturally, clean the background, sharpen textures. AI editing bridges most of the gap between phone and professional camera output.

Should flash be used for food photos?

No. Camera flash creates flat, harsh light that makes food look greasy and unappetizing. Natural window light (side or back light) creates depth and shows food textures. If shooting in a dark restaurant, underexpose slightly and brighten in editing — that produces better results than using flash.

Ready to start editing?

Open Editor