Free โ€ข No signup Fix Balding ยท Free

Fix Balding in Photo with AI

Fill in thinning areas and bald spots - just describe where you want hair

Man with M-shaped receding hairline and temple thinning
Before
โ†’
Same man with restored natural hairline
After

Fix Balding in Photo

Drop your photo here

or click to browse

Release to upload

Free โ€ข No signup

Advertisement
Popular use cases:
  • fix balding in photos
  • hair restoration preview
  • cover bald spots
  • fix receding hairline
  • add hair to thinning areas
  • male pattern baldness fix
  • hair loss photo editing

Cost
Free No signup required
Time
Instant results in 15-30 seconds
Works on
Any device - browser, phone, tablet, desktop
Powered by
AI-powered photo editing
Scenario Prompt Time
Receding Hairline Fill in the receding hairline, adding hair to restore a natural hairline 20s
Crown Bald Spot Fill in the bald spot at the crown with hair matching the surrounding area 15s
Top Thinning Add hair to the thinning area on top of the head, making it thicker and fuller 18s
Temple Recession Restore hair to the receded temples, filling in the corners 15s
Full Restoration Restore all thinning and bald areas to full hair coverage throughout 25s

How it works

  1. Upload your photo

    Choose a photo that clearly shows the thinning or bald areas. Front or angled photos work best. The AI needs to see the scalp area and surrounding hair to match texture and color naturally.

    Expect: Simple fixes (small thinning area): 10-15 seconds. Complex fixes (large bald areas or full hairline reconstruction): 20-25 seconds.
  2. Describe what you want fixed

    Type exactly what areas need hair. Be specific: "fill in the bald spot at the crown", "add hair to the receding hairline", "cover the thinning area on top", or "restore hair to the temples". The AI understands anatomy terms and will add hair that matches your existing color and texture - no need to mark areas first.

    Tip: Reference specific areas (crown, hairline, temples, vertex) for precise results. You can also specify density: "fill in with thick hair" vs "add subtle coverage to thin area" for different levels of restoration.

    Copy one of these to get started:

    Receding hairline (most common) Fill in the receding hairline, adding hair to restore a natural hairline
    Crown thinning/bald spot Fill in the bald spot at the crown with hair matching the surrounding area
    Overall thinning on top Add hair to the thinning area on top of the head, making it thicker and fuller
    Temple recession Restore hair to the receded temples, filling in the corners
    3 more prompts
    Vertex thinning Fill in the vertex area at the back-top of the head with full coverage
    Subtle density increase Add subtle hair coverage to the thinning areas, not completely full but denser
    Full restoration preview Restore all thinning and bald areas to full hair coverage throughout
  3. Review the result

    Check that the new hair matches your existing hair color, texture, and natural growth pattern. The hairline should look realistic - not too perfect or straight. Thinning areas should blend seamlessly with surrounding hair.

  4. Refine with markers if needed

    If the AI added hair to the wrong area or missed a spot, tap a marker on the exact location that needs hair, then regenerate. This is optional - most balding fixes work with description alone.

    Tip: Markers are helpful for very specific small areas like temple corners or uneven thinning patterns. They let you say 'add hair exactly HERE' when description alone isn't precise enough.
Try it free โ†“

Fix Balding in Photo

Drop your photo here

or click to browse

Release to upload

Free โ€ข No signup

"Used this to see what I'd look like with hair restoration before committing to treatment. Incredibly helpful for setting realistic expectations." @DavidConsideringOptions

See it in action

Man with M-shaped receding hairline and temple thinning
Before
->
Same man with restored natural hairline
After

Receding Hairline Restoration

Classic M-shaped hairline recession filled in. The restored hairline follows a natural curve, not a straight line across.

Prompt: Fill in the receding hairline, adding hair to restore a natural hairline
Man with visible circular bald spot at crown area
Before
->
Same man with crown area fully covered with natural hair
After

Crown Bald Spot Coverage

Visible bald spot at the crown filled in with hair matching the surrounding texture and color. Common area for male pattern baldness.

Prompt: Fill in the bald spot at the crown with hair matching the surrounding area
Person with diffuse thinning on top of head, scalp visible
Before
->
Same person with fuller, denser hair coverage on top
After

Overall Thinning Density Boost

Diffuse thinning across the top made denser. Less dramatic than filling bald spots - adds coverage to sparse areas.

Prompt: Add hair to the thinning area on top of the head, making it thicker and fuller
Advertisement

If something looks off

AI changed the wrong area or something I didn't want changed

Why: The AI couldn't determine exactly which area you meant from description alone.

Try: Tap a marker on the specific area you want to change, then regenerate with the same prompt

Tip: Markers tell the AI 'I mean THIS one specifically.' Use them when description alone is ambiguous.

The new hair doesn't match my existing hair color

Why: Complex lighting or highlights/lowlights can make it hard for the AI to determine the 'correct' base color.

Try: Specify color in your prompt: 'Fill in the bald spot with dark brown hair' or 'Add hair matching the dark areas, not the highlights'

Tip: If your hair has multiple tones, tell the AI which tone to match - usually the darker base color works best.

The hairline looks too perfect or straight

Why: The AI created an unnaturally even hairline, which doesn't look realistic.

Try: Add 'natural and slightly uneven' to your prompt: 'Fill in the hairline with natural, slightly uneven coverage'

Tip: Real hairlines have subtle irregularity. Words like 'natural', 'realistic', or 'slightly imperfect' help create believable results.

The texture of new hair doesn't match existing hair

Why: The AI might have used a different texture reference, especially if your hair has complex texture or styling.

Try: Describe texture explicitly: 'Fill in with straight hair like the rest' or 'Add curly hair matching the existing texture'

Tip: If texture mismatch persists, try a photo where your hair texture is more uniform and clearly visible.

Too much hair was added - looks unrealistic for my age

Why: The AI may have created very full, youthful hair when you wanted more age-appropriate coverage.

Try: Request moderate coverage: 'Fill in the thinning area with moderate density, age-appropriate hairline'

Tip: Specifying 'age-appropriate' or 'mature hairline' can prevent overly thick, teenager-level hair density.

The new hair section has different lighting or shine

Why: The AI generated hair that doesn't match the lighting conditions of your original photo.

Try: Mention lighting consistency: 'Fill in the bald spot, matching the lighting and shine of existing hair'

Tip: This is more common with strong directional lighting. More evenly-lit photos usually produce more consistent results.

Quick answers

Do I need to mark the bald areas before describing what I want?

No! Just describe which areas need hair ("fill in the crown" or "restore the hairline") and the AI detects and fills those areas automatically. Only use markers if the AI added hair to the wrong spot - for example, if you wanted the crown filled but it filled the temples instead.

How do I fix balding in photos for free?

Upload your photo to EditThisPic, type what needs fixing ("fill in bald spot at crown", "restore receding hairline", "add hair to thinning areas"), and the AI adds natural-looking hair instantly. Free to use with no signup required and no watermark on your downloads.

Will the added hair match my natural hair color and texture?

Yes, the AI analyzes your existing hair and generates new hair that matches color, texture, and natural growth patterns. For best results, use photos where your hair is clearly visible so the AI has good reference material.

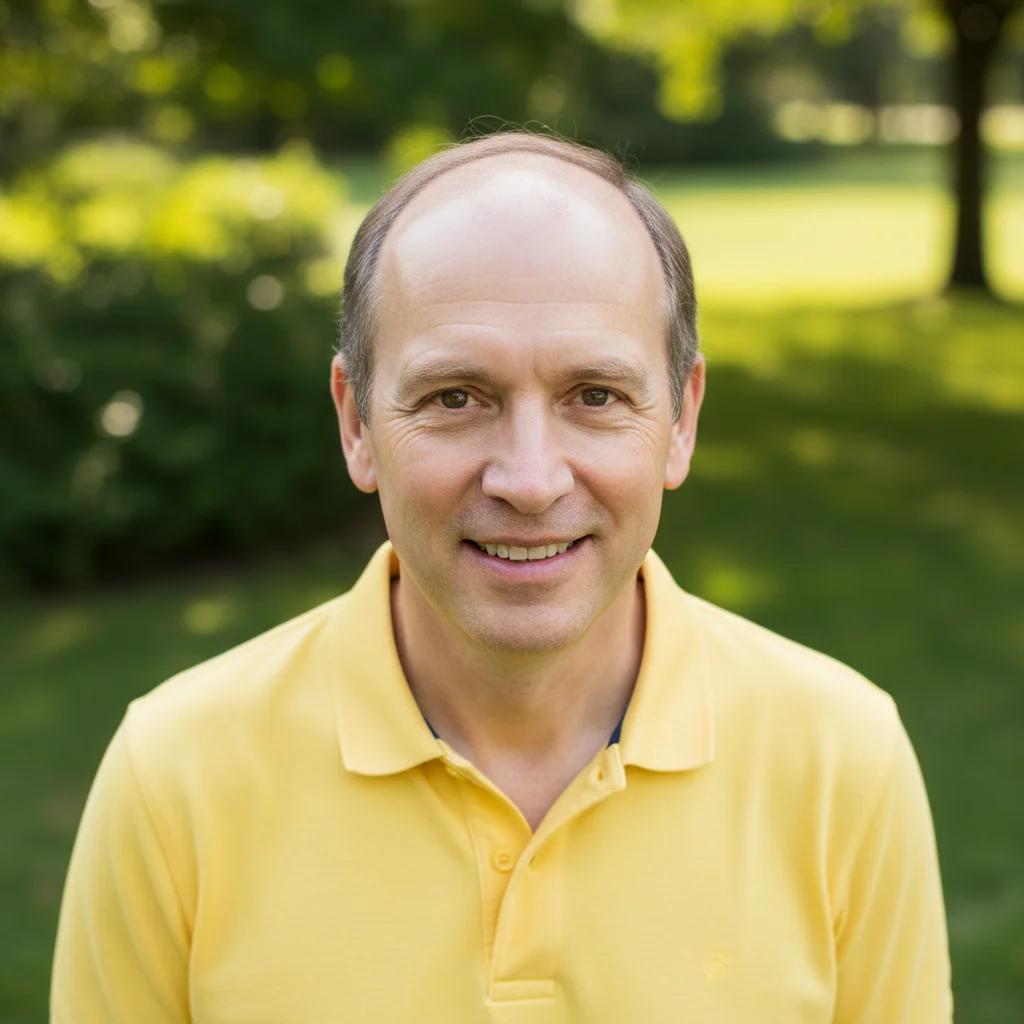
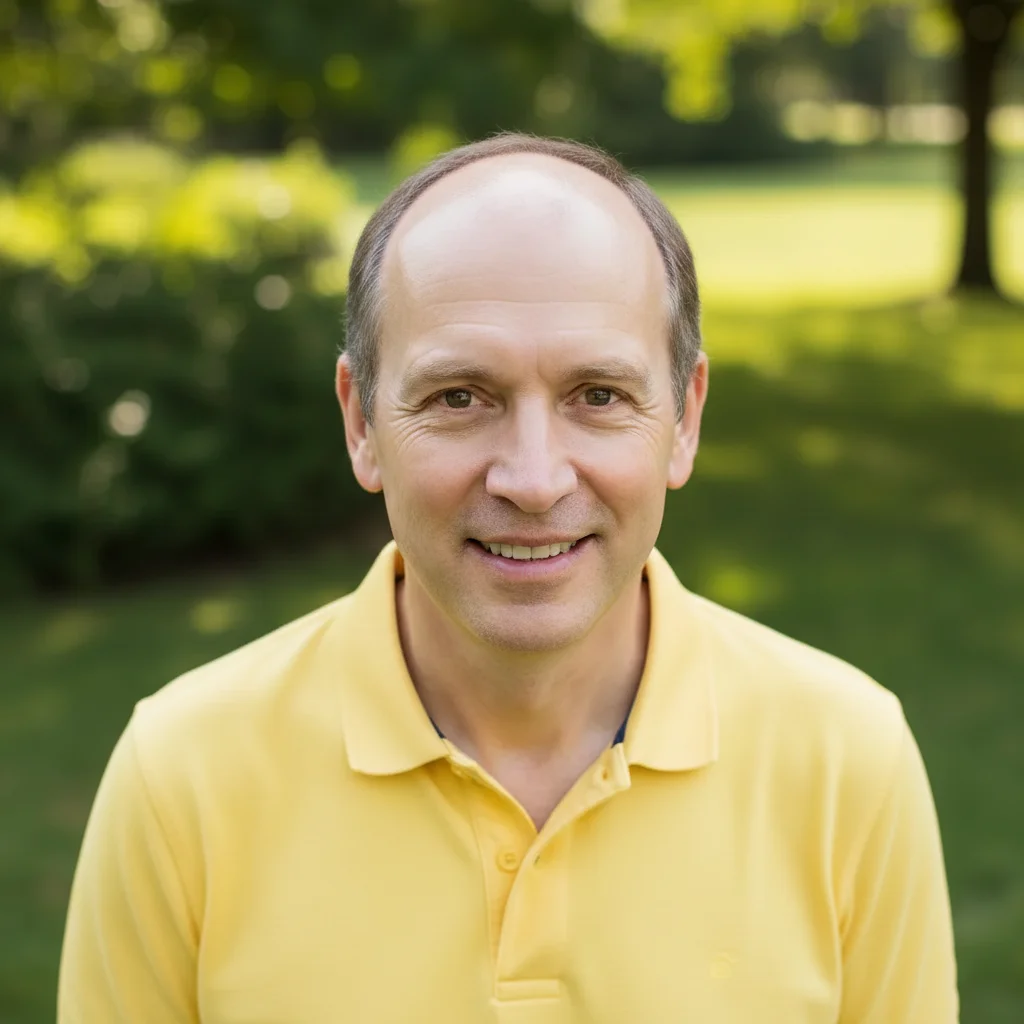
Can I preview what hair restoration treatment results might look like?

Absolutely! This is a popular use case. Upload your current photo and describe the level of restoration you're considering ("fill in receding hairline" or "restore full coverage to crown"). It's helpful for setting realistic expectations before treatments like transplants or medications.

Can I fix just one specific area without changing the rest?

Yes! Be specific in your description ("fill in only the crown, leave hairline as-is") or use markers to target the exact spot. The AI will only add hair where you specify, leaving other areas untouched.

Ready to fix balding in your photos?

Free to try. No signup required.

Try it free โ†’