Free • No signup Slim Face · Free

AI Face Slimmer

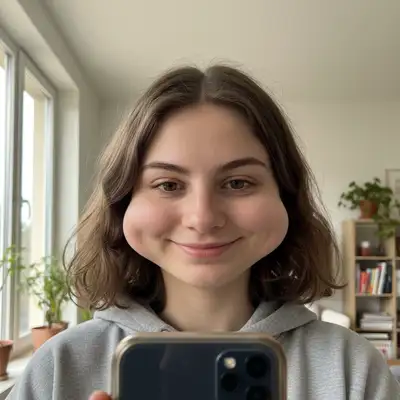
Describe the slimming you want and AI reshapes your face naturally. No marking needed.

Woman with round, wide face shape
Before
Same woman with subtly slimmed, more contoured face
After

AI Face Slimmer

Upload photo to slim face

Free • Results in 30 seconds • No signup

Release to upload

FreeNo signupNo watermark
Popular use cases:
  • face slimming
  • face contouring photo
  • slim face in selfie
  • jawline definition
  • cheek reduction
  • face reshaping
  • double chin removal
  • portrait face editing

Cost
Free No signup required
Time
Instant results in 15-30 seconds
Works on
Any device - browser, phone, tablet, desktop
Powered by
AI-powered photo editing
Scenario Prompt Time
Subtle slimming slim the face slightly, keep it natural 30s
Jawline focus define the jawline for a sharper look 35s
Full face contouring slim cheeks, define jaw, reduce double chin 45s

How it works

  1. Upload your photo

    Upload a clear, front-facing portrait. Good lighting on the face and visible facial features give the AI the best foundation for face editing. JPG, PNG, WebP up to 7MB.

    Expect: Subtle face slimming: 30-40 seconds. Significant reshaping with jawline work: 40-55 seconds and may need refinements.
  2. Describe the slimming you want

    Type what you want: 'slim the face slightly' or 'reduce the width of the face and add more jawline definition.' Be specific about areas—cheeks, jawline, chin, or overall width. No marking needed—the AI understands facial structure and proportions.

    Tip: Use 'slightly' for the most natural results. The best face slimming is when nobody can tell it was edited—small changes make the biggest difference.

    Copy one of these to get started:

    Quick natural face slim slim the face slightly for a more defined, contoured look — keep it natural so nobody can tell it was edited
    Camera adds 10 pounds fix slim my face to undo the widening that the camera lens added — make it look like how I appear in the mirror
    Define the jawline slim the lower face and sharpen the jawline for a more structured, angular appearance
    Reduce double chin slim the face and reduce the double chin appearance, create a clean jawline-to-neck transition
    4 more prompts
    Slim cheeks only reduce the width of the cheeks for a more sculpted, high-cheekbone look while keeping everything else the same
    V-shape face contour contour the face to a V-shape with slimmer cheeks tapering to a defined pointed chin
    Slim for group photo slim my face slightly in this group photo — I want to look like I do in person, not how the camera made me look
    Dating profile face slim slim my face subtly for a dating profile — keep it authentic but show my best angle
  3. Review the result

    Check that the slimming looks natural and proportional. Zoom in to verify that ears, hair, and background haven't been distorted. Compare with the original to ensure the change is subtle enough to be believable.

  4. Refine with markers if needed

    If one side needs more slimming or the jawline needs further definition, tap a marker on that area and regenerate. Most face slimming works well on the first try without markers.

    Tip: Markers are for precision refinement only. Try without them first—you usually won't need them.
Try it free

AI Face Slimmer

Upload photo to slim face

Free • Results in 30 seconds • No signup

Release to upload

Free • No signup

See it in action

Woman with round, wide face shape
Before
->
Same woman with subtly slimmed, more contoured face
After

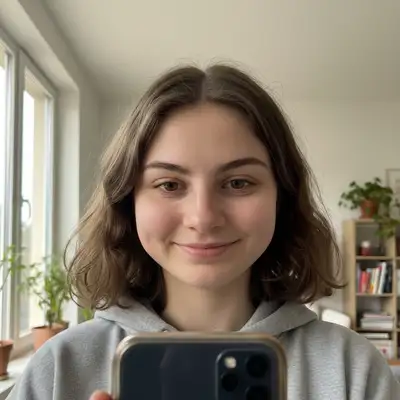
Round face subtly contoured

A naturally round face slimmed for a more defined, contoured appearance in a headshot.

Prompt: slim the face slightly for a more defined and contoured look while keeping it natural and proportional
Man with soft jawline and fuller lower face
Before
->
Same man with defined jawline and slimmer face
After

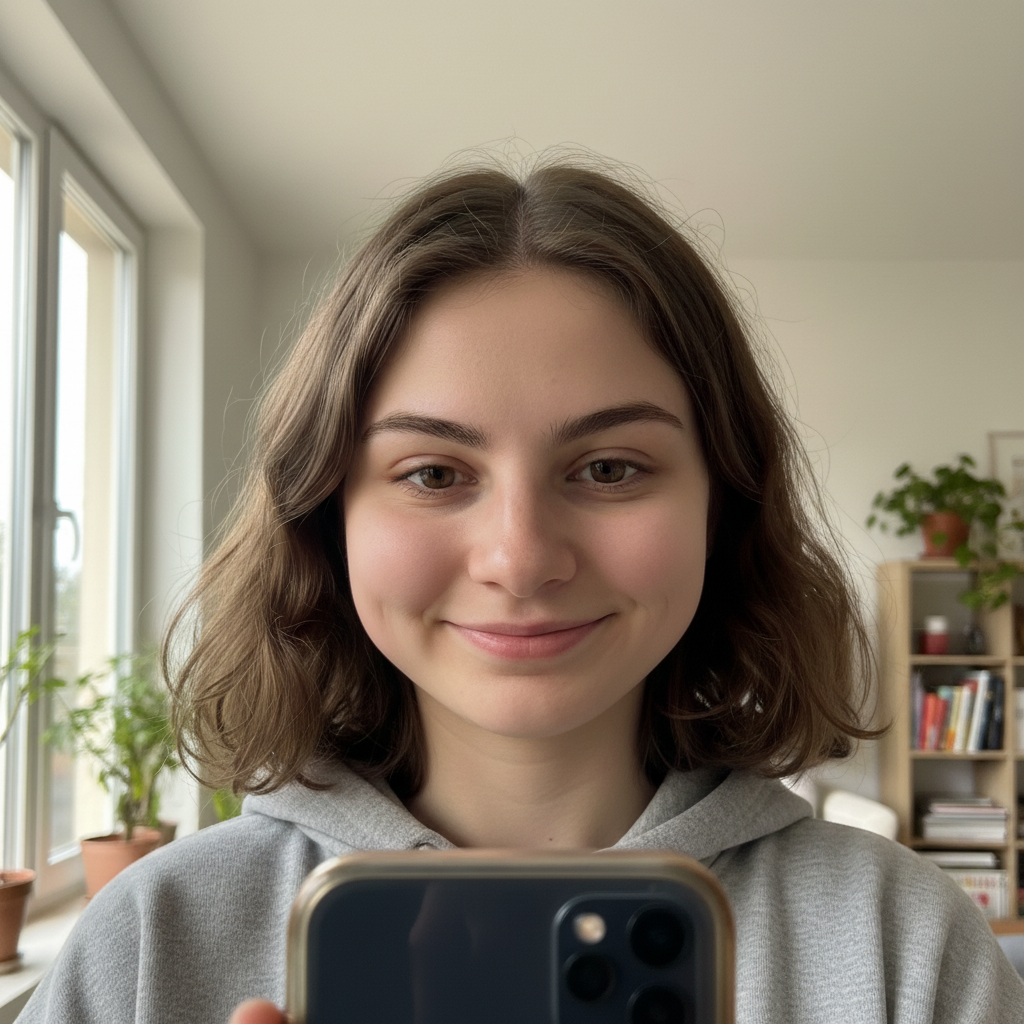
Jawline defined for professional photo

A soft jawline enhanced with definition for a more structured professional appearance.

Prompt: slim the lower face and define the jawline for a sharper, more angular appearance

Detailed Guides by Scenario

📷

Portrait Retouching

Natural-looking face retouching for portraits — enhance without making the subject look artificial.

Common Scenarios

  • Applying face adjustments to a headshot or portrait for professional use
  • Subtle face retouching on a family photo before printing
  • Touch-up face edits for event photos (wedding, graduation, reunion)

Best Practices

  • Less is more — subtle retouching always looks better than heavy-handed changes
  • Compare before and after at 100% zoom to check that skin texture still looks real
  • Mention 'natural-looking' in your face prompt to avoid the over-processed look
📷

Professional & Commercial

High-end face retouching for commercial use — beauty, fashion, and product photography standards.

Common Scenarios

  • Applying face retouching to model photos for a fashion brand
  • High-end face work on beauty shots for advertising campaigns
  • Commercial-grade face editing on executive portraits for annual reports

Best Practices

  • For commercial work, specify the industry standard: 'beauty retouching' vs. 'editorial retouching' for face
  • Keep lighting and shadows intact — only address skin, features, or the specific retouching target
  • For advertising, ensure retouching complies with local advertising standards and regulations
📷

Personal Enhancement

Quick face retouching for personal photos — look your best in photos you'll share, print, or frame.

Common Scenarios

  • Quick face fixes on a selfie before posting to social media
  • Applying face retouching to a photo for a dating profile or personal website
  • Touching up face in a favorite photo that has one annoying flaw

Best Practices

  • Fix the one thing that bothers you most — don't try to change everything at once
  • Ask for 'slight' or 'subtle' face changes to keep the photo looking authentically like you
  • The goal is to look like you on your best day, not like a different person

If something looks off

AI changed the wrong area or something I didn't want changed

Why: The AI slimmed features you wanted to keep, like ears, hair, or background objects near the face edge.

Try: Tap markers on only the face area you want slimmed, then regenerate: slim only the face, keep hair, ears, and background exactly the same

Tip: Markers tell the AI 'I mean THIS area specifically.' Use them when description alone is ambiguous.

Face looks distorted or warped after slimming

Why: The change was too dramatic for the original proportions, creating visible stretching or compression artifacts.

Try: slim the face very subtly - just a slight reduction in width, keep all proportions natural and undistorted

Tip: Smaller adjustments avoid warping. If you need more slimming, do two subtle edits rather than one dramatic one.

Background is warped near the face edges

Why: The slimming algorithm pushed surrounding pixels, causing visible distortion in the background adjacent to the face.

Try: slim the face while keeping the background completely undistorted and natural, no warping around the edges

Tip: 'Background undistorted' tells the AI to handle edge transitions cleanly without affecting surroundings.

Face slimming is uneven—one side looks different

Why: Different lighting or angles caused the AI to apply more slimming to one side than the other.

Try: slim both sides of the face equally and symmetrically, match the slimming amount on left and right

Tip: Specifying 'symmetrically' addresses the uneven application that happens with angled lighting.

Hair or ears look distorted after face slimming

Why: The slimming extended beyond the face boundary and pulled nearby hair or ears inward.

Try: slim only the face shape itself, preserve the exact original position and shape of hair and ears

Tip: 'Preserve exact original hair and ears' creates strict boundaries for where slimming is applied.

Quick answers

Do I need to mark the face before describing the slimming I want?

No! Just describe what you want: 'slim the face slightly' or 'define the jawline.' The AI understands facial structure and applies slimming proportionally. Only use markers if the slimming accidentally affected hair or background areas and you need to constrain the edit.

How do I slim a face in a photo without it looking edited?

Keep changes small by using 'slightly' or 'subtly' in your prompt. The most convincing face slimming removes just enough width to look like a more flattering angle rather than an obvious edit. If you need more change, do two rounds of subtle slimming rather than one dramatic one.

Is there a free AI face slimmer that doesn't require login?

Yes, EditThisPic is free to try with no account needed. Upload your photo, describe the face slimming you want, and download the result. No watermarks on outputs. Works for subtle contouring to significant reshaping without any signup.

What's the best free tool for slimming a face in photos?

EditThisPic offers free AI face slimming with no signup required. Unlike apps where you drag sliders or control points, just describe what you want. It handles cheek reduction, jawline definition, and overall face contouring with natural results in seconds.

Is EditThisPic's AI face slimmer really free?

Yes — you get 1 free edit per week, no account needed. For unlimited edits, plans start at $3.99/month.

Can I slim face on my phone?

Yes. EditThisPic works in any mobile browser — iPhone, Android, tablet. No app download needed.

What photo formats does the AI face slimmer support?

JPG, PNG, WebP, and HEIC. Upload any common photo format and EditThisPic handles the rest.

How long does it take to slim face?

Usually 15-30 seconds. Upload your photo, describe what you want, and the AI delivers the result.

Ready to slim your face in seconds?

Free to try. No signup required.