AI Skin Treatment Tracker
← Browse all beauty toolsLast updated
Upload skin photos and let AI normalize lighting for accurate treatment comparison.
Upload photo to track skin treatment progress
"adjust the white balance to neutral daylight, keep skin detail and all imperfections visible"
Release to upload
How it works
See it in action


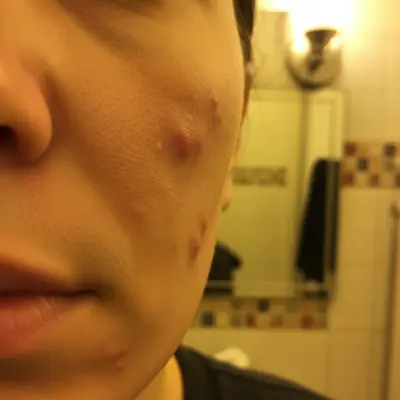
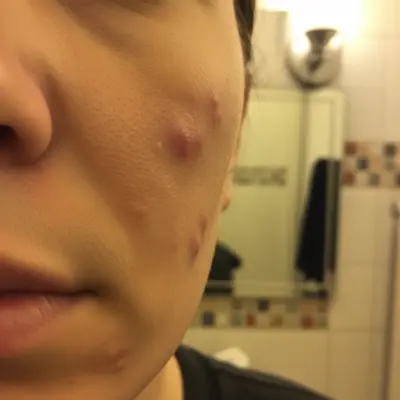
Acne treatment tracking
Normalizing a close-up face photo to track acne treatment progress under consistent clinical lighting.
Prompt:
normalize to bright clinical lighting, preserve all acne, blemishes, and skin texture exactly


Rosacea documentation
Correcting a photo's color cast to accurately document rosacea redness for dermatologist review.
Prompt:
remove warm color cast, show true skin redness under neutral daylight conditions, preserve all texture


Eczema progress photo
Standardizing lighting on a hand photo to track eczema treatment over multiple weeks.
Prompt:
normalize lighting to bright even daylight, keep all dry patches and skin texture visible
Quick answers
Popular use cases
Ready to track your skin treatment?
Free to try. No signup required.