Pricing Restore Discolored photo · Free

Restore a Discolored Photo

← Browse all restore tools

Last updated

Correct the magenta, orange, or cyan shift that dye fade leaves on a colour print, so the people look like themselves again.
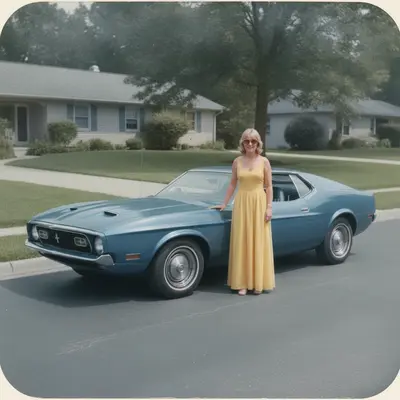
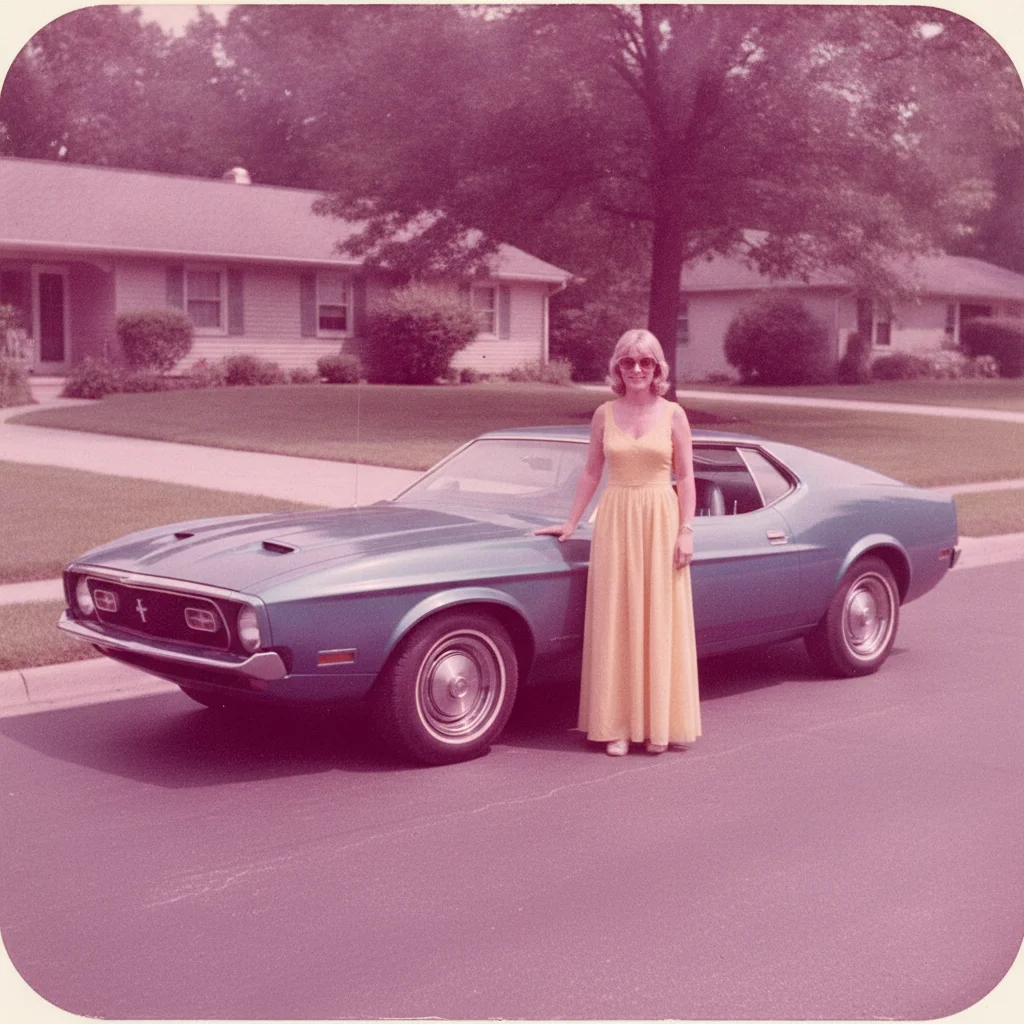
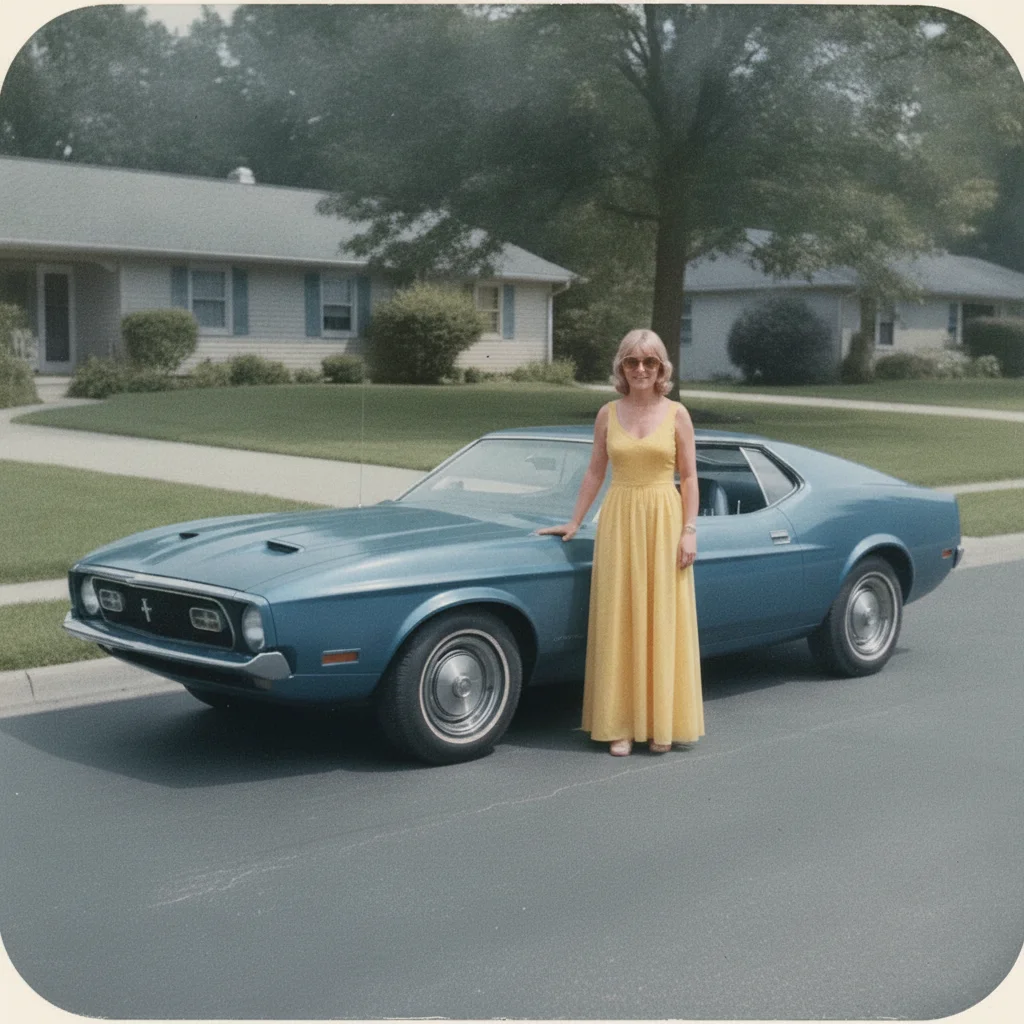
1970s print of a woman in a yellow dress beside a blue car, the whole image shifted magenta-pink The same print with the magenta cast removed, natural skin, a true yellow dress, and a dark blue car

Upload photo to restore discolored photo

"restore this discolored photo — remove the strong orange colour shift, bring skin tones back to natural and whites back to white, and change nothing else"

Free to try · no sign-up · photos are never shared

Release to upload

<30stypical edit
1 freeedit weekly
Photo on your phone? Scan to open this editor there — free edit works on your phone too.

1 free edit every week·paid packs after

How it works

  1. Upload a scan or a phone photo of the print

    Scan the photo, or shoot it flat in window light — JPG, PNG, or WebP up to 7MB. Avoid warm indoor bulbs and coloured walls: they add a second cast on top of the one you are trying to fix, and the AI cannot tell the two apart.

    Expect: A uniform magenta, orange, or cyan shift corrects well in one pass because the AI can anchor on things it knows should be neutral — skin, teeth, a white shirt. A print where one dye layer has gone entirely comes back plausible rather than exact: the AI rebuilds the missing colour from what remains, so a dress you remember as teal may land close, not perfect.
  2. Name the cast, not the subject

    Type what is wrong with the colour: 'restore this discolored photo — remove the magenta colour cast and bring skin tones and whites back to neutral, keeping everything else as it is.' Say which colour the print has drifted toward; 'magenta', 'orange', and 'cyan' each steer the correction differently, and 'fix the colours' steers it nowhere.

    Tip: Mention one thing whose real colour you know — 'the car was dark blue', 'her dress was yellow' — and the correction has an anchor for the whole print.

    Copy one of these to get started:

    Magenta shift (most 70s and 80s prints) restore this discolored photo — remove the magenta colour cast and bring skin tones and whites back to neutral, keeping everything else exactly as it is
    Orange or red-orange shift restore this discolored photo — remove the strong orange colour shift, bring skin tones back to natural and whites back to white, and change nothing else
    Cyan or blue-green shift restore this discolored photo — neutralise the cyan-blue colour cast so skin looks natural and whites are clean, and keep the rest of the print as it is
    Cast with a known anchor colour restore this discolored photo by removing the magenta cast — the woman's dress was bright yellow and the car was dark blue — and bring skin tones and whites back to neutral
    3 more prompts
    Discolored portrait, skin first restore this discolored portrait — correct the colour cast so the skin tones look natural and healthy, leave the person's features, hair, and expression exactly as they are
    Uneven fade, one band worse restore this discolored photo — remove the overall magenta cast, and even out the band along the top edge that has faded more orange than the rest
    Cast only, keep the age correct the colour cast in this discolored photo so skin and whites are neutral, but keep the grain, softness, and slightly faded look of the original print
  3. Check the skin, the whites, and the greys

    Skin is the best judge: it should look like skin, not pink or tan-orange. Then look at anything white or grey — a shirt, a wall, the print border — and confirm it reads neutral. If skin is right but the sky has gone odd, ask for a second pass on that area only.

  4. Use a marker for a patch that shifted differently

    Prints that sat half-under a frame mat or an album sleeve fade unevenly, leaving a band that is more orange than the rest. Tap a marker on that band and say 'match this area to the rest of the print.' Markers are optional and only for the spot the whole-print correction did not even out.

See it in action

1970s print of a woman in a yellow dress beside a blue car, the whole image shifted magenta-pink
Before
->
The same print with the magenta cast removed, natural skin, a true yellow dress, and a dark blue car
After

Restore a Discolored Photo — 1970s Driveway

A 1970s colour print with a heavy magenta cast, corrected so skin, the yellow dress, and the blue car read true.

Prompt: restore this discolored photo — remove the magenta colour cast so skin tones and whites read neutral, keeping the woman's bright yellow dress and the dark blue car as their true colours, and change nothing else
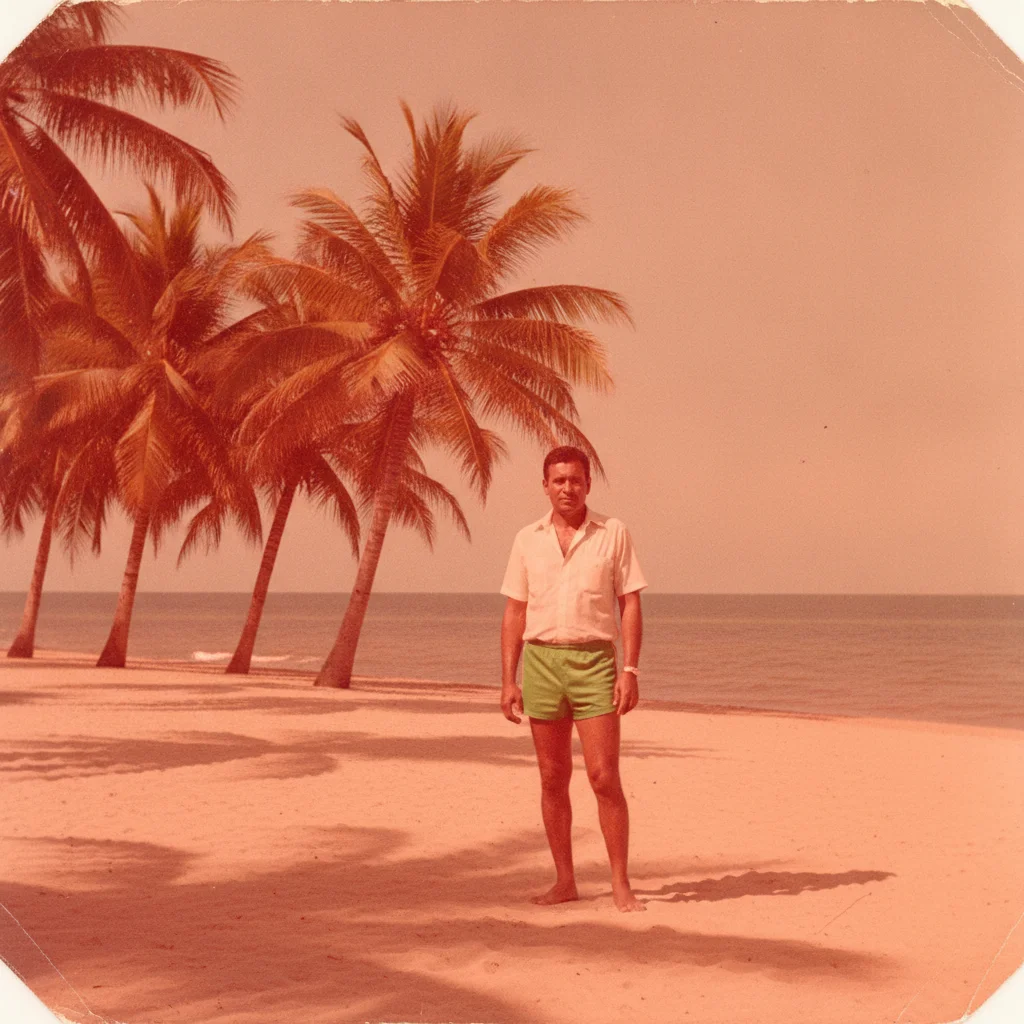
1980s beach print of a man in a white shirt, the whole image drifted orange with a tan sky
Before
->
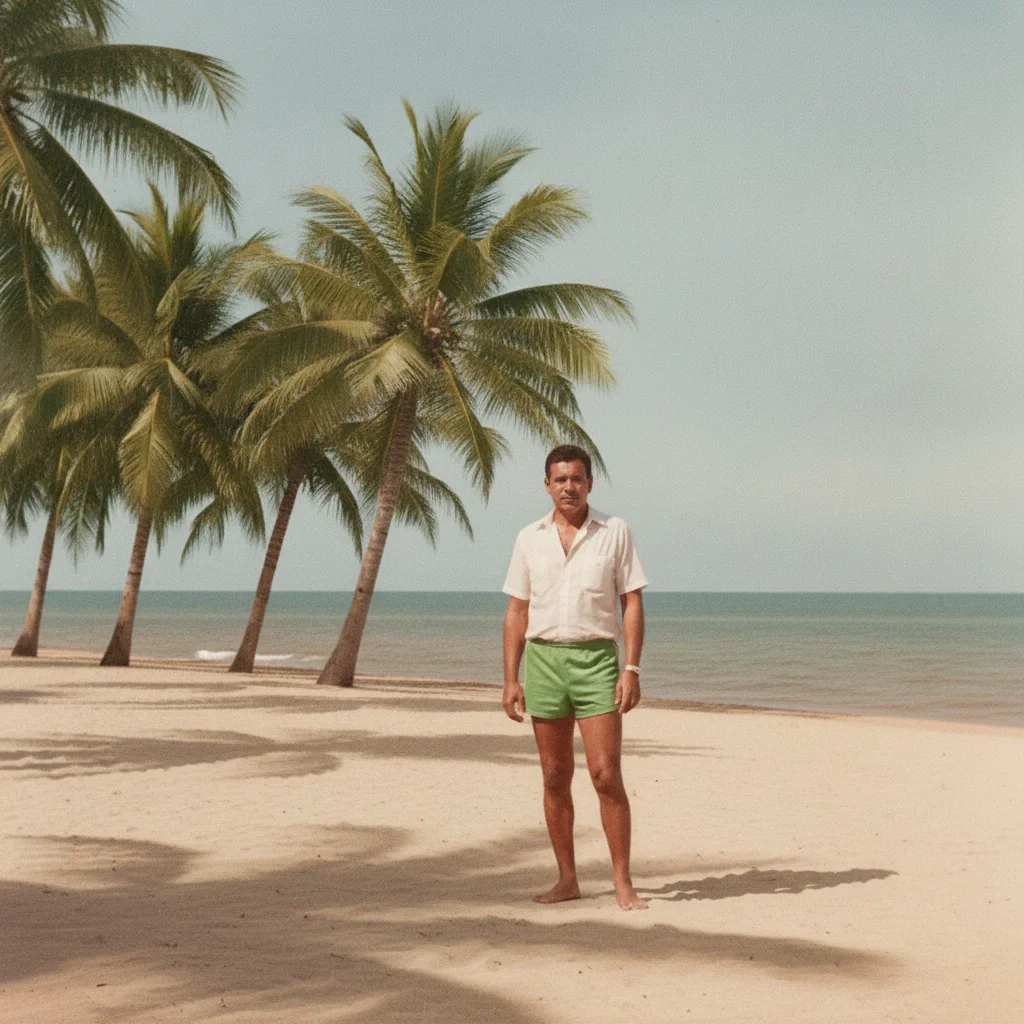
The same print with the orange cast corrected, natural skin, a white shirt, and a blue sky
After

Restore a Discolored Photo — 1980s Beach Portrait

A 1980s print drifted orange from cyan dye loss, brought back to natural skin and a clean white shirt.

Prompt: restore this discolored photo — remove the strong orange colour shift, bring the man's skin tones back to natural and his white shirt back to white, keep the green of the palm trees true, and leave everything else exactly as it is

Quick answers

How do I restore a discolored photo?

Upload the print and describe the cast: 'restore this discolored photo — remove the magenta colour cast and bring skin tones and whites back to neutral, keeping everything else as it is.' The AI reads what should be neutral — skin, teeth, white cloth — and pulls the whole print back to it. Name the colour the print has drifted toward, and name any object whose true colour you remember, for the best anchor.

Do I need to mark the discolored areas first?

No. Describe the cast in plain language and the AI corrects the whole print at once — a colour shift almost always covers everything. Tap markers are optional and only useful for a single band or corner that faded differently from the rest.

Is restoring a discolored photo free?

Yes. EditThisPic gives you one Fast edit per week, no signup or credit card required. Credit packs and a subscription are available if you have a box of prints to work through.

Why did my old photo turn magenta or orange?

Colour prints are built from three dye layers — cyan, magenta, and yellow — and they do not fade at the same rate. When cyan goes first the print drifts orange or red; when yellow goes it drifts magenta and purple. Light, heat, and cheap album pages speed it up, which is why a print from a sunny hallway shifts faster than one in a drawer.

Is this the same as fixing a yellowed or faded photo?

Not quite. Yellowing is the paper itself going brown; fading is a loss of contrast and density. Discoloration is a colour cast — the whole print has swung toward one hue. This tool corrects the cast. If the print is also faded or yellowed, ask for those in their own pass afterwards.

Will the correction change the people or the scene?

No. Faces, clothing, and the scene stay as photographed — only the colour balance changes. The AI does not smooth skin, alter expressions, or add anything to the frame. If it drifts, adding 'change nothing except the colour cast' brings it back.

What photo formats can I upload?

JPG, PNG, and WebP up to 7MB. The restored photo downloads in the same format you uploaded.

How much does EditThisPic cost?

You get 1 free edit per week — no account needed. After that, one-time credit packs start at $4.99 for 10 edits, valid 12 months, no subscription. Power users who edit daily can pick Studio Membership, a monthly workspace at $49.99/mo for 300 edits. Purchased downloads are clean with no watermark.

Ready to bring the true colours back to your discolored photo?

Free to try. No signup required.

1 free edit included·paid credit packs after