Pricing Restore Creased photo · Free

Restore a Creased Photo

← Browse all restore tools

Last updated

Erase fold lines, wallet creases, and the cracked emulsion along them so the print reads flat again.
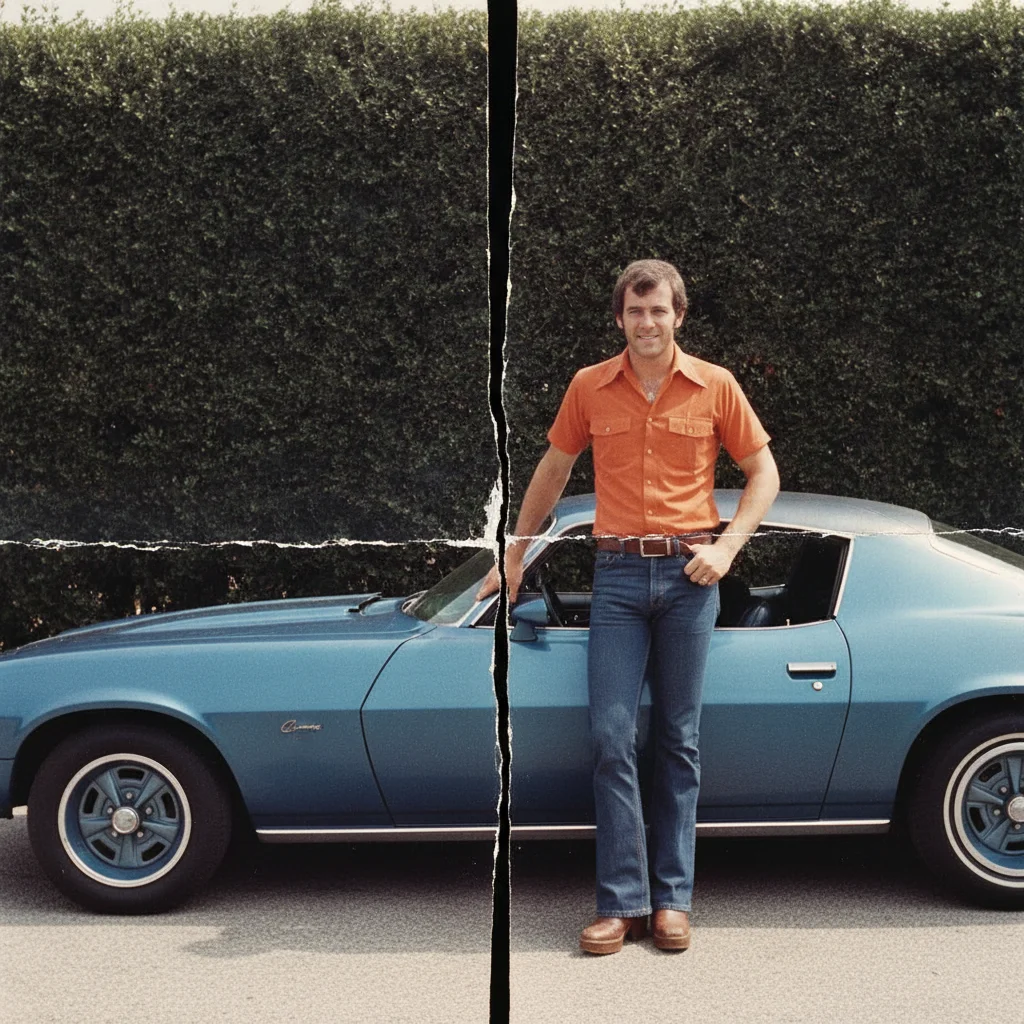
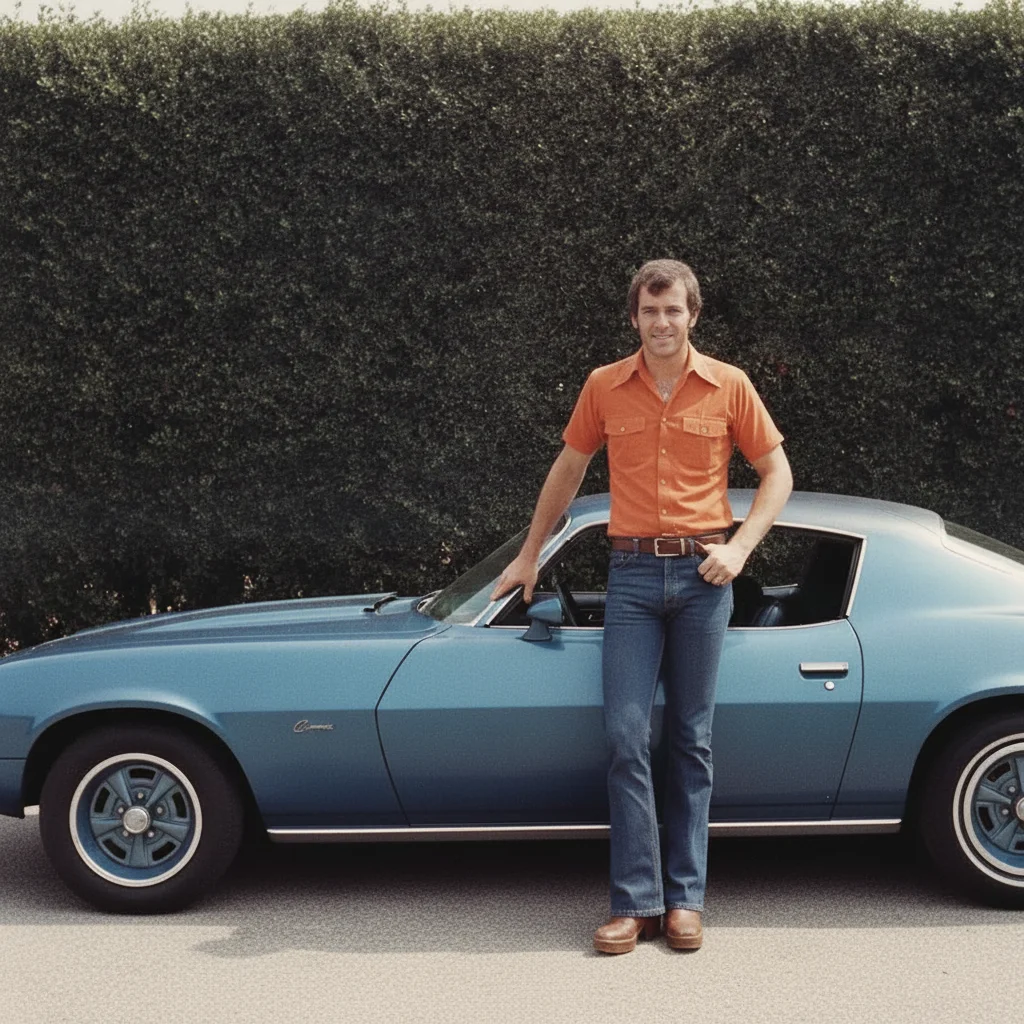
Photograph with a deep cracked white fold line down the centre of the print The same photograph with the fold line removed and the image rebuilt underneath

Upload photo to restore creased photo

"remove the wallet fold creases from this photo, including the cracked white lines, and restore smooth natural detail across the print"

Free to try · no sign-up · photos are never shared

Release to upload

<30stypical edit
1 freeedit weekly
Photo on your phone? Scan to open this editor there — free edit works on your phone too.

1 free edit every week·paid packs after

How it works

  1. Flatten and scan the print

    Press the photo flat before you capture it — a heavy book overnight helps — then scan it, or photograph it in even daylight with no glare. JPG, PNG, or WebP up to 7MB. Side lighting exaggerates a crease shadow, so light it evenly.

    Expect: A crease that has creased but not cracked the emulsion disappears cleanly. Where the fold has cracked through and lifted the surface, the image underneath is rebuilt from context, so review it closely.
  2. Describe where the creases run

    Type what you want removed and where: 'remove the vertical fold line running down the centre of this photo and the smaller creases across the bottom corner, rebuilding the image underneath.' Naming the direction and location beats asking to 'fix the damage'.

    Tip: If a crease crosses a face, say so explicitly — that tells the AI to treat the line as a repair on a face, not as a background blemish.

    Copy one of these to get started:

    Single fold down the middle remove the fold line running down the centre of this photo and rebuild the image underneath so the crease is invisible
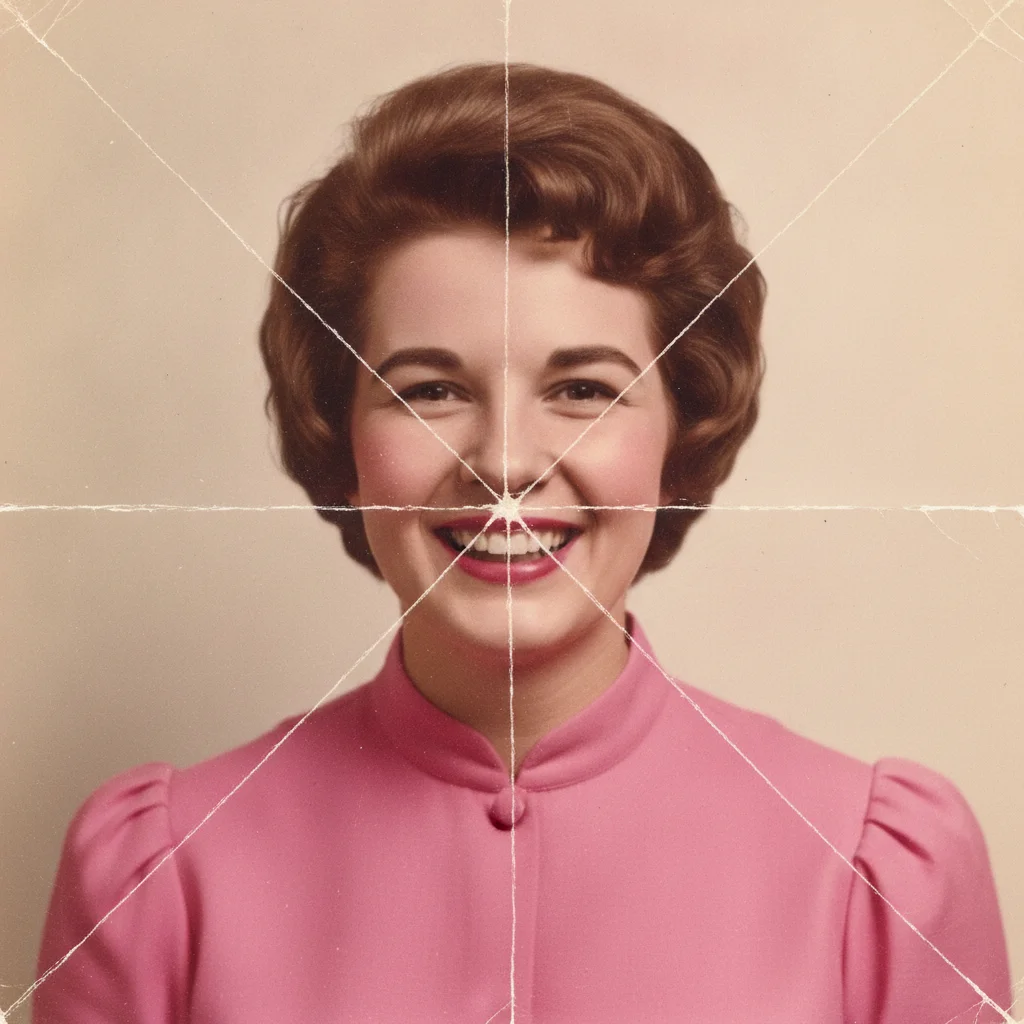
    Wallet folds remove the wallet fold creases from this photo, including the cracked white lines, and restore smooth natural detail across the print
    Crease across a face remove the crease line running across the face in this photo and rebuild the features naturally to match the rest of the portrait
    Fine surface creases smooth out the fine crease lines and surface wrinkles across this old photo without softening the rest of the image
    3 more prompts
    Cracked emulsion along the fold repair the cracked emulsion along the fold line in this photo where the surface has flaked away, and rebuild the missing detail to match both sides
    Creases in one corner remove the creases and bent corner marks from the bottom right of this photo and leave the rest of the image unchanged
    Full crease removal pass remove every fold line and crease mark from this old photo and rebuild the image underneath, keeping the original film grain and print texture
  3. Review along the crease line

    Zoom in and follow the whole length of the old fold. Look for a faint ghost line, a change in texture, or detail that does not line up on either side — those are the places a crease repair gives itself away.

  4. Refine with a marker if needed

    If a short stretch of the crease survived, tap a marker on it and describe what should be there. Markers are optional and used for precision touch-ups, not for the main crease removal.

See it in action

Photograph with a deep cracked white fold line down the centre of the print
Before
->
The same photograph with the fold line removed and the image rebuilt underneath
After

Restore a Creased Photo — Centre Fold

A 1970s snapshot folded down the middle, with the cracked white line rebuilt away.

Prompt: remove the fold line running down the centre of this photo and rebuild the image underneath so the crease is invisible

Portrait photograph with a grid of deep wallet creases cracked across the face
Before
->
The portrait restored with the wallet creases removed and the face rebuilt naturally
After

Restore a Creased Photo — Wallet Folds

A portrait carried in a wallet for years, with its grid of creases cleared from the face.

Prompt: remove the wallet fold creases and crease marks from this photo, including the lines across the face, and restore smooth natural detail

Quick answers

How do you fix a photo that has been folded and creased?

Upload the print and describe the folds: 'remove the fold line down the centre of this photo and rebuild the image underneath.' The AI erases the crease, repairs the cracked emulsion along it, and reconstructs the detail the fold destroyed using the image on either side. Pressing the photo flat before you scan it gives the repair a cleaner starting point.

Do I need to mark or trace the creases first?

No. Describe them in plain language — 'a deep vertical fold down the middle and smaller creases in the corner' — and the AI locates them. Tap markers are only for cleaning up a stretch that survived the first pass.

Is removing creases from a photo free?

Yes. EditThisPic gives you one Fast edit per week, no signup or credit card required. Credit packs and a subscription are available if you have a stack of photos to work through.

Can it fix a crease that cracked right through the photo?

Yes, though that is the harder case. Where the emulsion has cracked and flaked, the image under the line is genuinely gone, so the AI rebuilds it plausibly from the detail on both sides. The narrower the crack, the more convincing the result.

What about a crease running across someone's face?

It can be repaired, and it is the case worth reviewing most closely. The features under the fold are reconstructed rather than recovered, so the result is a close, natural likeness rather than a guaranteed exact match.

Should I flatten the photo before scanning it?

Yes, if you can. A night under a heavy book reduces the shadow the crease casts, which means less for the AI to work around. Light the print evenly too — side lighting deepens crease shadows and makes them look worse than they are.

What photo formats can I upload?

JPG, PNG, and WebP up to 7MB. The restored photo downloads in the same format you uploaded.

How much does EditThisPic cost?

You get 1 free edit per week — no account needed. After that, one-time credit packs start at $4.99 for 10 edits, valid 12 months, no subscription. Power users who edit daily can pick Studio Membership, a monthly workspace at $49.99/mo for 300 edits. Purchased downloads are clean with no watermark.

Ready to get the creases out of your photo?

Free to try. No signup required.

1 free edit included·paid credit packs after