Free • No signup Create Before-after portfolio photos · Free

Create before-after photos for your portfolio

Before-after photos sell your services, but mismatched lighting and angles kill credibility. Fix them in 30 seconds.

After renovation bathroom with warm yellow evening lighting
Before
Same bathroom with bright neutral morning lighting to match before
After

Create Before-After Portfolio Photos

Upload photo to create before-after portfolio photos

Free • Results in 30 seconds • No signup

Release to upload

FreeNo signupNo watermark
Popular use cases:
  • Before-after portfolio photos
  • Contractor before-after photos
  • Personal trainer transformation photos
  • Beautician before-after
  • Portfolio transformations
  • Match before-after lighting
  • Fair comparison photos

Cost
Free No signup required
Time
Instant results in 15-30 seconds
Works on
Any device - browser, phone, tablet, desktop
Powered by
AI-powered photo editing
Scenario Prompt Time
Match time of day match lighting to look like same time of day 20s
Match angle adjust perspective to match same angle as before 25s
Match indoor lighting match indoor lighting to consistent brightness 20s
Remove color cast remove color cast, match neutral colors to before 15s

How it works

  1. Upload your mismatched photo

    Drop the photo that doesn't match—usually the 'after' photo taken at different time, angle, or lighting than the 'before.' Common for renovation projects, fitness transformations, beauty treatments, or organizing jobs.

    Expect: Lighting/color matching: 20-30 seconds. Angle adjustments: may need refinement.
  2. Describe what needs to match

    Type 'match the lighting and color to look like same time of day as before photo' or 'adjust angle to match the before shot for fair comparison.' Be specific about what's different. The AI understands portfolio context—'make both photos look taken same day' or 'match the natural window light from before.'

    Tip: Upload both photos together if possible, or describe the before photo's lighting: 'bright morning light' or 'evening warm tones.'

    Copy one of these to get started:

    After photo taken different time of day than before match the lighting and color temperature to look like same time of day as the before photo
    After photo from different angle than before adjust perspective to match the same angle and viewpoint as the before photo for fair comparison
    Indoor lighting different between before and after match the indoor lighting to consistent brightness, make both photos look taken with same lights
    Color cast making after look worse remove the yellow/blue color cast, match neutral colors to the before photo
    3 more prompts
    Weather different between outdoor before and after match the sunny/cloudy conditions to show same weather as before for fair comparison
    Camera quality different between photos enhance the lower-quality photo to match resolution and sharpness of the better photo
    Background clutter distracting from transformation blur or clean up background to focus attention on the actual transformation area
  3. Review for fair comparison

    Check that lighting matches between before and after. Verify angles show the same perspective. Ensure colors are consistent so the transformation is the only difference. Fair comparisons build trust with potential clients.

  4. Refine if needed

    If lighting needs fine-tuning or angles need adjustment, describe the specific change and regenerate. Most portfolio comparisons work on the first try.

    Tip: Save your before photo specs (time of day, camera settings) so future afters can match from the start.
Try it free

Create Before-After Portfolio Photos

Upload photo to create before-after portfolio photos

Free • Results in 30 seconds • No signup

Release to upload

Free • No signup

"My bathroom remodel photos were different times of day—before looked bright, after looked dingy. Matched the lighting in 20 seconds. Now they look like a legit transformation." @ContractorMike

See it in action

After renovation bathroom with warm yellow evening lighting
Before
->
Same bathroom with bright neutral morning lighting to match before
After

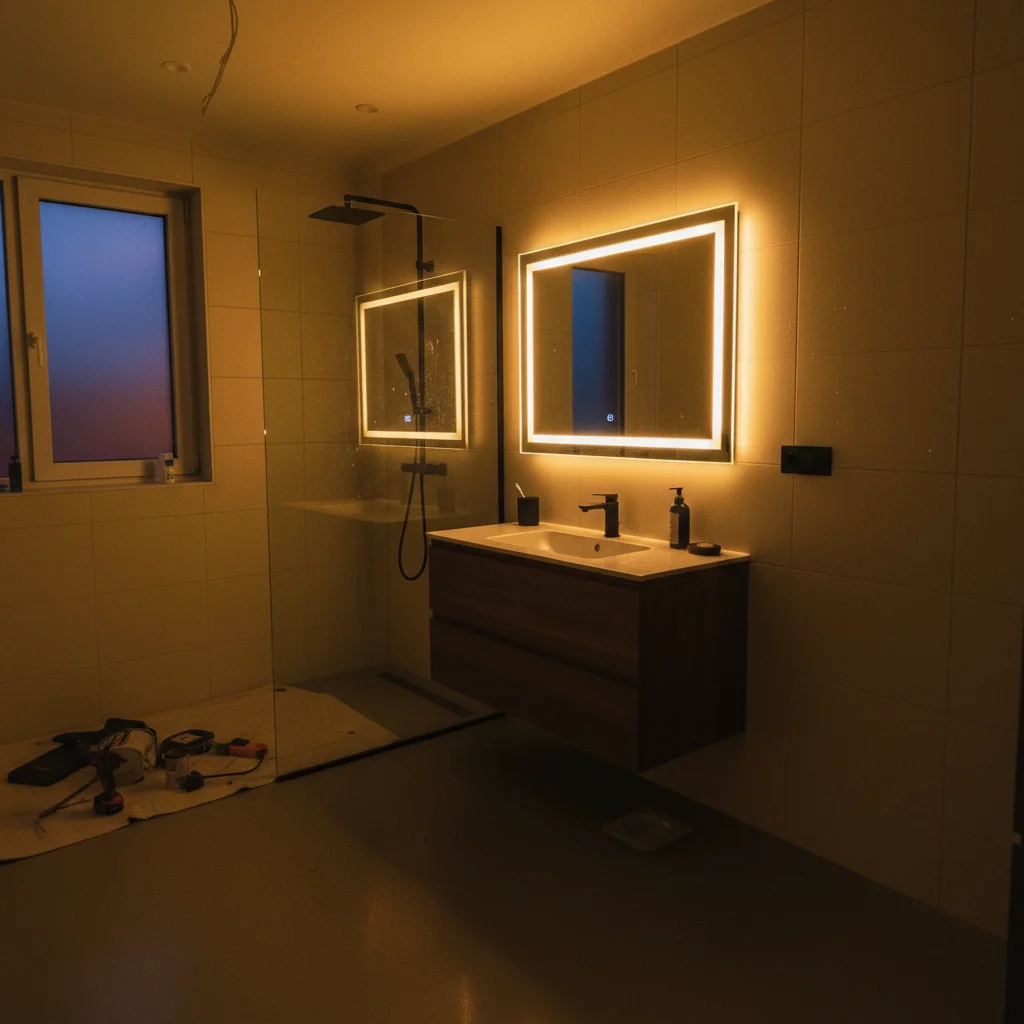
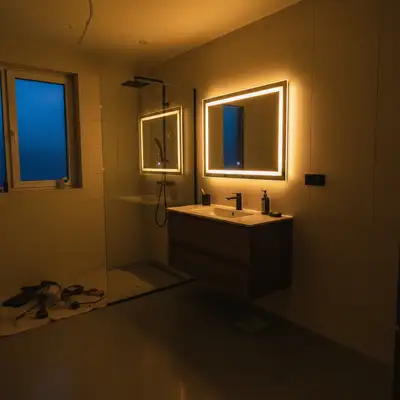
Bathroom remodel with mismatched lighting

Contractor took before photo in bright morning light, after photo at dusk with overhead lights. After looked dingy compared to bright before, hiding the transformation. Matched lighting to show true improvement.

Prompt: match the lighting and color temperature to look like same time of day as the before photo
Fitness after photo from unflattering low angle
Before
->
Same person from straight-on angle to match before photo
After

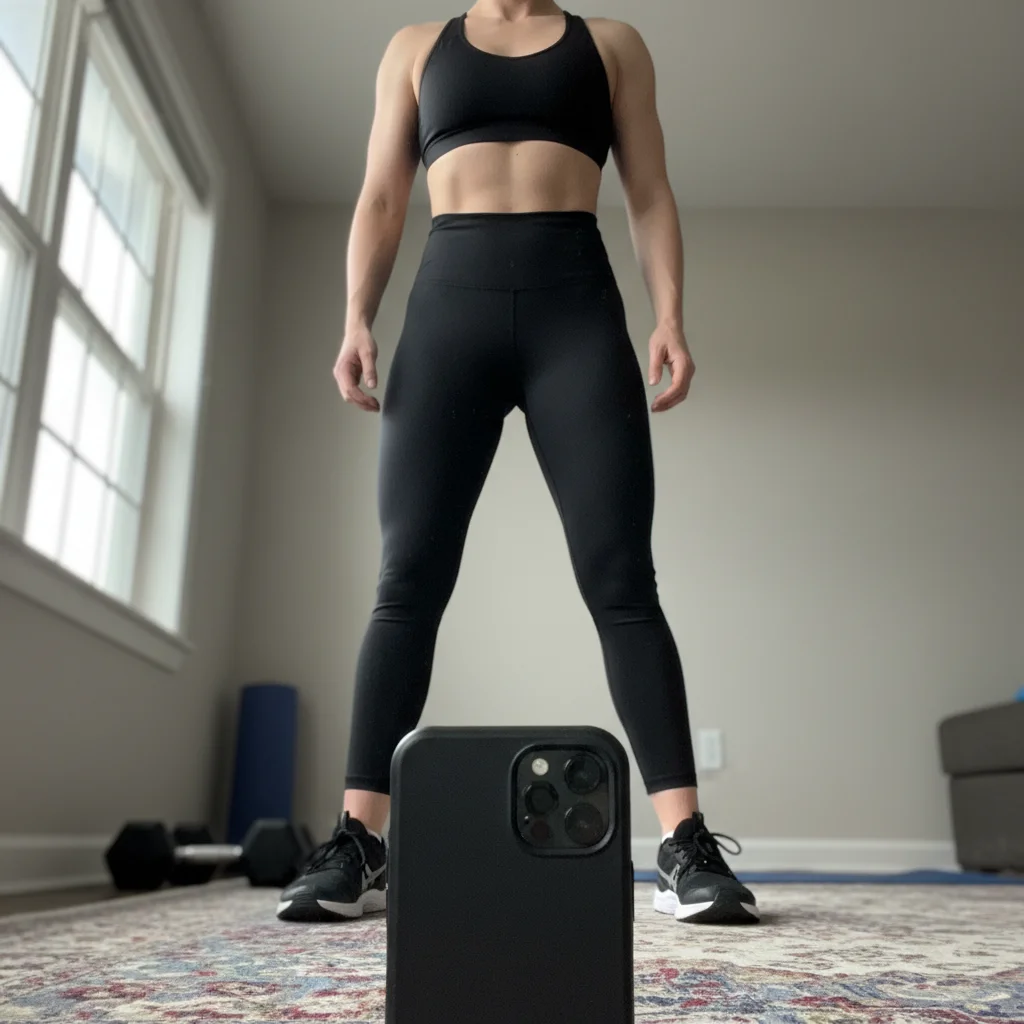
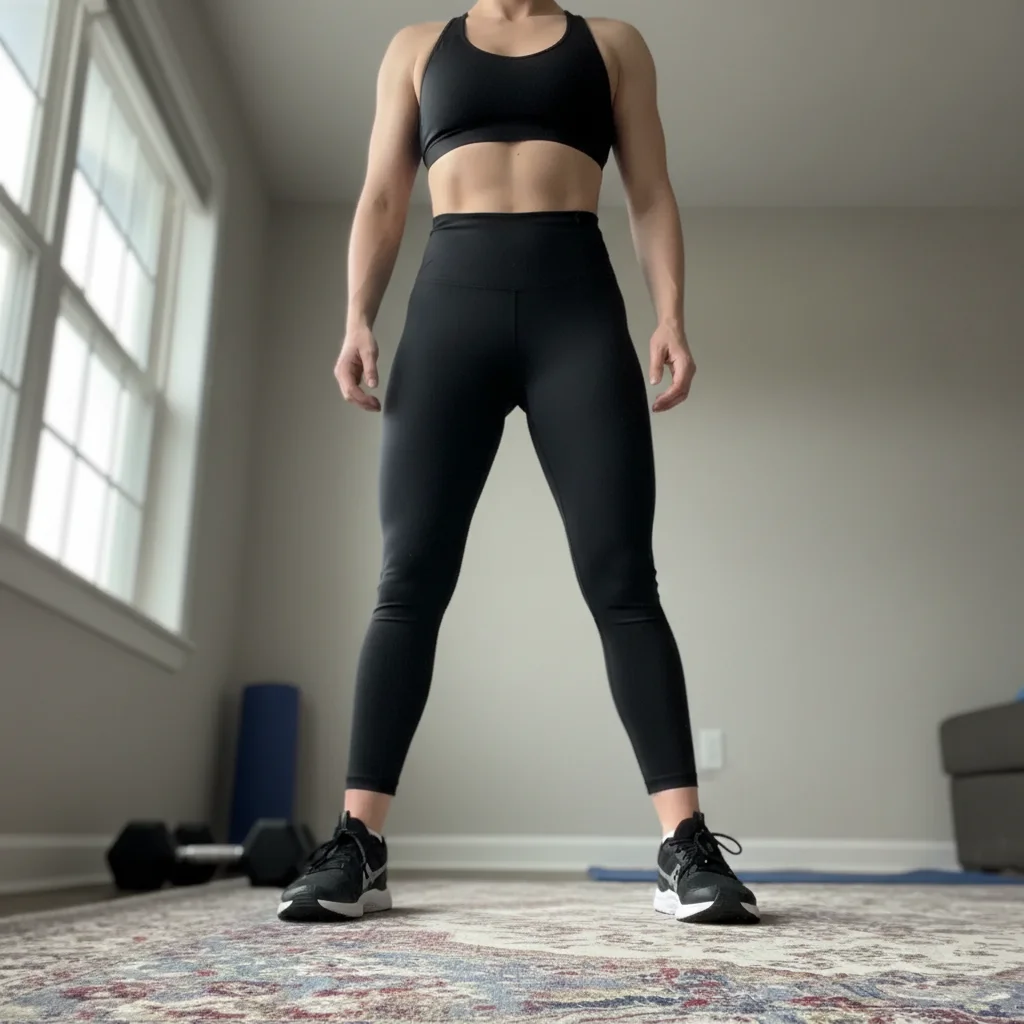
Fitness transformation with angle mismatch

Personal trainer's client before photo was straight-on mirror selfie, after was angled phone photo from below making client look wider. Fixed angle to show real transformation fairly.

Prompt: adjust perspective to match the same angle and viewpoint as the before photo for fair comparison

Detailed Guides by Scenario

📷

Art & Decoration

Transform your photos into before-after portfolio photos artwork for wall prints, framed art, and home decoration.

Common Scenarios

  • Converting a favorite photo into a before-after portfolio photos print for your living room wall
  • Creating a series of before-after portfolio photos portraits of family members as matching wall art
  • Turning landscape or travel photos into before-after portfolio photos art for office decoration

Best Practices

  • Start with a high-resolution photo — printed art needs sharp detail even after the style transform
  • Request a specific aspect ratio if the print will go in a particular frame
  • Try 'bold before-after portfolio photos' vs. 'subtle before-after portfolio photos' to control how dramatic the transformation looks
📷

Social Media & Content

Create scroll-stopping social media content by converting photos to before-after portfolio photos — perfect for profiles, stories, and viral posts.

Common Scenarios

  • Making a unique before-after portfolio photos profile picture that stands out in feeds
  • Creating a before-after portfolio photos version of a trending meme or photo challenge
  • Building a themed Instagram series where every post uses before-after portfolio photos transformation

Best Practices

  • Pair the transformation with a catchy caption that references the art style
  • For Instagram stories, add text overlays after the before-after portfolio photos conversion for maximum engagement
  • Process several photos in the same session to maintain a consistent style across posts
📷

Gifts & Personal Keepsakes

Turn meaningful photos into before-after portfolio photos keepsakes — custom gifts, cards, and personalized items that people actually treasure.

Common Scenarios

  • Creating a before-after portfolio photos portrait as a birthday or anniversary gift
  • Designing before-after portfolio photos wedding invitations or save-the-dates from engagement photos
  • Making a before-after portfolio photos memorial portrait for a loved one

Best Practices

  • Choose photos with clear faces and good lighting — the transformation preserves detail best from quality originals
  • For gifts, print on canvas or premium paper to complement the before-after portfolio photos aesthetic
  • Request 'warm tones' or 'cool tones' to match the recipient's home decor

If something looks off

Matched lighting looks too perfect or fake

Why: Heavy color correction can sometimes over-correct and look artificially processed.

Try: match lighting naturally, keep realistic imperfections and texture

Tip: Add 'keep it looking real' to prevent the over-processed Instagram filter appearance.

Angle adjustment distorted the image

Why: Large perspective changes can introduce distortion if the original angle was very different.

Try: subtle perspective adjustment, maintain natural proportions

Tip: For very different angles, it's better to retake the photo than try to fix with heavy perspective warping.

After photo now looks worse than before

Why: If the after was actually taken in better conditions, matching to worse before conditions hides your work.

Try: enhance the before photo instead to match the after's better lighting

Tip: Match to the better photo, not the worse one—both should show the work at its best.

Colors don't quite match between photos

Why: Different cameras or auto-adjustments can create subtle color differences that are hard to perfectly match.

Try: Tap markers on specific areas that need color matching, then: match this area's color exactly to the before

Tip: Focus on matching skin tones, walls, or other consistent elements rather than everything at once.

AI changed the wrong part of the photo

Why: Vague descriptions like 'match the lighting' when there are multiple light sources can be ambiguous.

Try: Tap a marker on the specific area to adjust, then describe: match only this area's lighting

Tip: Markers tell the AI 'I mean THIS specific light source or area.' Use them for complex lighting scenes.

Quick answers

Do I need to mark areas before describing what to match?

No! Just describe what needs matching: 'match the lighting to before photo' or 'adjust angle to match.' The AI understands portfolio photo context. Only use markers if you need to specify a particular area or light source when there are multiple in the scene.

Why do before-after photos need to match?

Fair comparisons build trust. If before is bright and after is dark (or vice versa), potential clients think you're manipulating the comparison. Matched lighting, angles, and conditions prove your work stands on its own merit. Mismatched comparisons look deceptive and reduce conversions. Professional portfolios show honest transformations with consistent photography.

Can I use these matched photos in my portfolio?

Yes. You're creating fair comparisons, not falsifying results. Matching lighting and angles removes photography variables so clients see your actual work. This is standard practice in professional portfolios. Don't alter the actual transformation (adding results that didn't happen), just standardize the photography conditions.

What should I match between before and after photos?

Match: (1) Time of day and lighting conditions, (2) Camera angle and distance, (3) Color temperature and white balance, (4) Resolution and image quality. The only difference should be your work. Everything else—photography conditions—should be identical for a fair comparison that highlights your transformation.

Should I match to the before or enhance the before to match the after?

Match to whichever photo has better conditions, usually the after. If your after photo has great lighting but before was dark, enhance the before to match the after's lighting. Both photos should present the space/person at their best photographic quality—the transformation is the only variable.

Is EditThisPic's AI before-after portfolio photos creator really free?

Yes — you get 1 free edit per week, no account needed. For unlimited edits, plans start at $3.99/month.

Can I create before-after portfolio photos on my phone?

Yes. EditThisPic works in any mobile browser — iPhone, Android, tablet. No app download needed.

What photo formats does the AI before-after portfolio photos creator support?

JPG, PNG, WebP, and HEIC. Upload any common photo format and EditThisPic handles the rest.

Ready to create professional before-after photos?

Free to try. No signup required.